Polymer clay feels like play‑dough for adults, but the results can look like museum pieces. If you’ve ever tried a quick bead and ended up with a crumbly mess, you know the frustration. This guide walks you through every stage of a polymer clay sculpture tutorial online, so you can go from a raw block to a polished figure without guesswork. We’ll cover tools, conditioning, design, armature, detail work, baking, and sealing. By the end you’ll have a repeatable workflow you can use for animals, characters, or abstract art. This tutorial is also featured on CreativiU’s online learning platform, where creators share tips and resources.
Step 1: Gather Materials and Tools
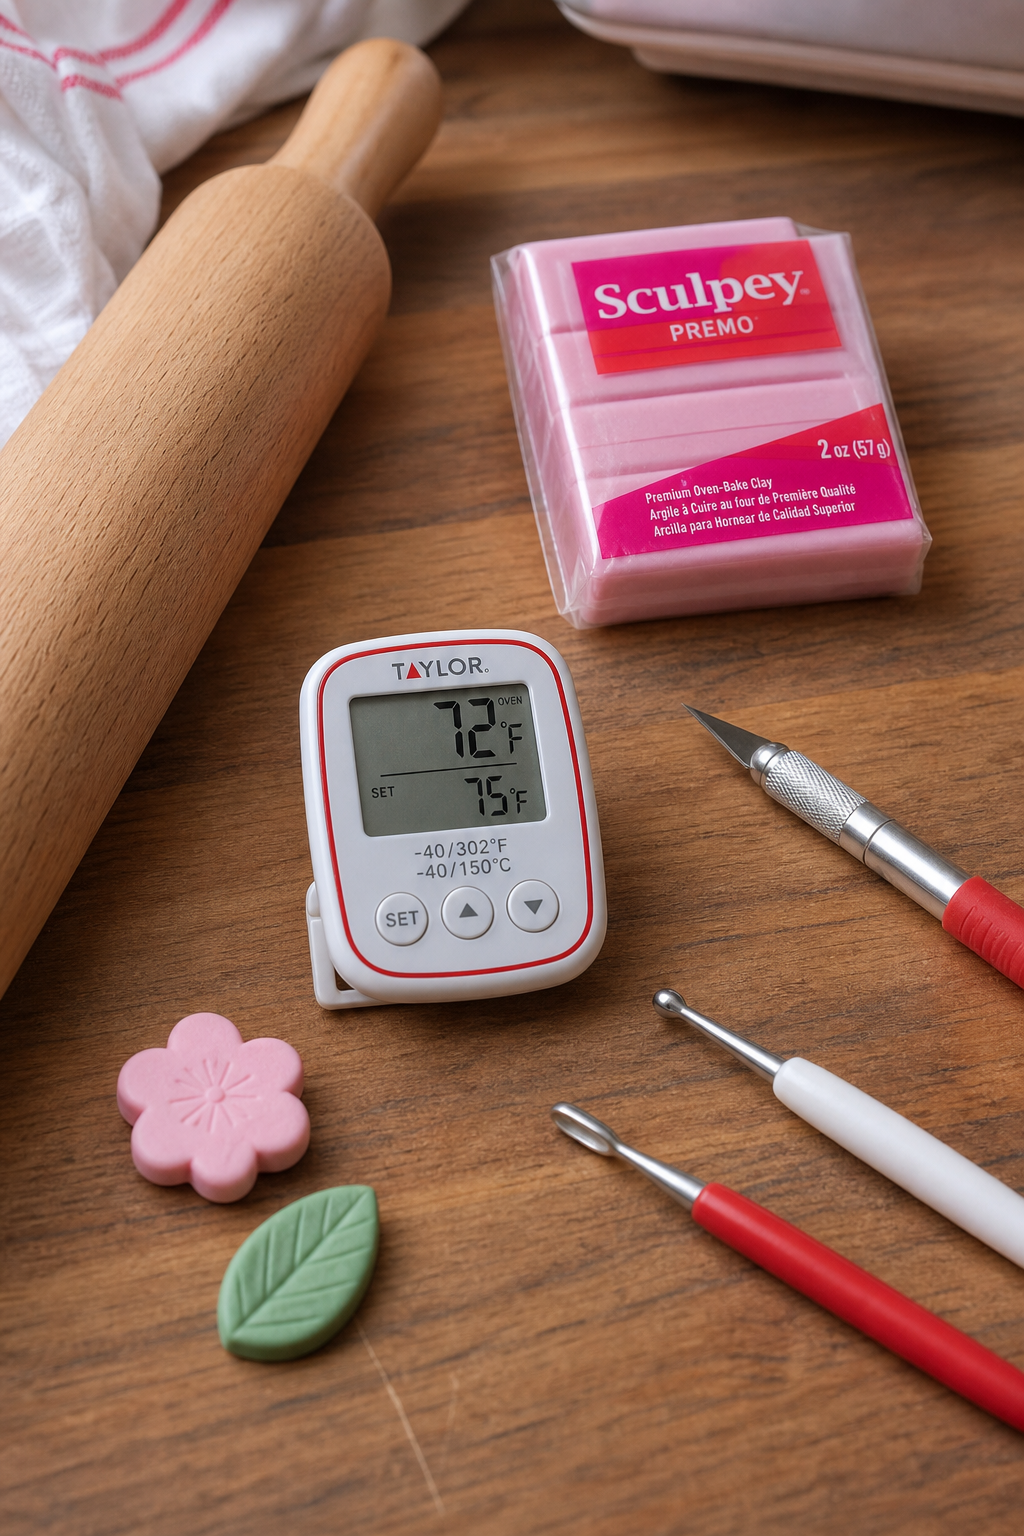
The first hurdle is not the technique but the kit you set up on your desk. You don’t need a full workshop; a few smart choices keep cost low and performance high. Start with a reputable polymer clay brand known for holding detail well and curing reliably. Avoid inexpensive blocks that tend to crack after baking.
Next, collect a small rolling pin or an acrylic roller. If you have a pasta machine, that’s the fastest way to condition large amounts, but a simple hand‑rolled slab works fine for beginners. A set of basic sculpting tools, a needle‑point stylus, a craft knife, and a smooth‑edge spatula, covers most cuts and textures. For finer detail, an old toothbrush or a piece of aluminum foil can add surprising patterns.
Don’t forget a dedicated oven thermometer. Many home ovens run hotter or cooler than the dial says, and a few degrees can mean the difference between a solid piece and a brittle one.
Store any unused clay in zip‑lock bags that you’ve tested for reactivity, a quick week‑long test with a small clay piece will tell you if the plastic leaches. Keep the bags flat and airtight to preserve softness.
When you’re ready to start, check out this Beginner polymer clay tutorial for a quick video walk‑through that shows the exact tools we just listed in action.
Step 2: Condition the Polymer Clay
Conditioning is the process of making the clay soft, pliable, and free of air bubbles. Freshly opened blocks can feel crumbly, like cold butter. The goal is a smooth, buttery texture that rolls without cracking.
One easy method is the hand‑knead approach: break a small piece from the block, roll it between your palms, fold it, and repeat until the surface feels even. If you have a pasta machine, run the clay through the rollers several times, folding it back on itself between passes. This aligns the polymer particles and removes trapped air.
If you’re conditioning a larger batch, warm the clay slightly first. Place the block in a microwave‑safe bag and sit it on a warm rice pack for a few minutes , not hot enough to melt, just enough to make the clay supple.
While you work, avoid porous surfaces like untreated wood or plain paper. These can soak up the plasticizers in the clay, making it dry out faster. A silicone mat or a piece of parchment works best.
When the clay passes the “finger test” , it springs back gently after a light press , you know it’s ready. For extra smoothness, dust the work surface with a tiny amount of cornstarch; it prevents sticking without affecting the cure.
According to Wikipedia, conditioning improves the polymer chain alignment, which leads to a stronger final piece after baking.
Step 3: Design Your Sculpture Layout
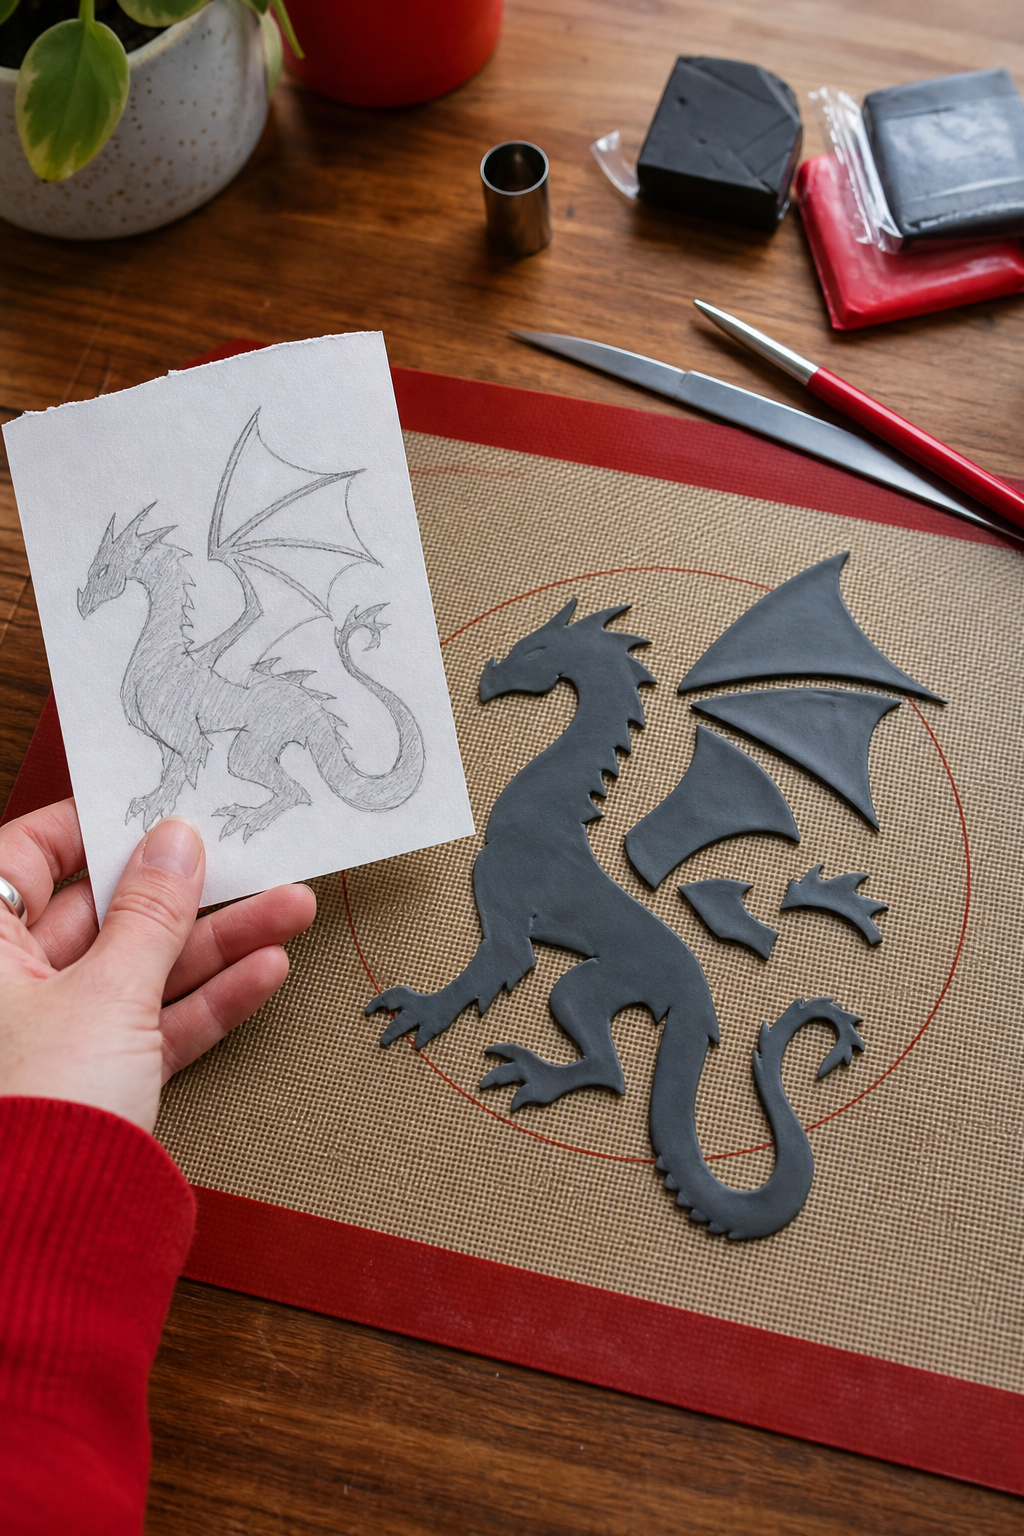
Before you start shaping, sketch a quick layout on paper. This isn’t about artistic perfection; it’s about planning the volume, balance, and where armature will be needed. Think of the final piece as a puzzle , each part must fit together without forcing.
Start with a simple silhouette: draw the main shape, then break it into basic geometric forms , cylinders for limbs, spheres for heads, and cones for horns. This helps you estimate how much clay each section will need.
If you plan a pose that defies gravity, note where extra support will go. For example, a dragon’s wing might need a thin wire armature hidden inside the clay to keep it upright.
Once the sketch is done, transfer the outline onto a sheet of conditioned clay. Use a craft knife to cut out the major shapes, then set them aside. You now have a physical mock‑up that you can rearrange before committing to the final sculpture.
“A clear layout saves hours of rework , treat it like a blueprint for your clay project.”
When you’re happy with the layout, you can start adding detail layers on top of the base forms.
Step 4: Build the Base Structure
The base, or armature, is the skeleton that holds up your sculpture. It prevents sagging and reduces the amount of clay needed, which keeps the piece lighter and less prone to cracking during bake.
There are two common approaches: foil armature and wire armature. Foil is great for smooth, flowing bodies; wire works best for points that need precise angles, like claws or horns.
To build a foil armature, tear a strip about two inches wide and start forming the main torso. Wrap the foil around your hand to create an oval for the head, then taper it for the neck. Add extra foil strips for limbs, leaving a little extra length for adjustment.
For wire, cut pieces a bit longer than the final length, then make a small loop at one end with pliers. This loop will anchor the wire to the foil or directly to a clay core. Bend the wire at natural joint points , think of the elbow as a 90‑degree angle.
Secure the armature to the base by embedding the ends in a small blob of clay. The clay will act as a glue once baked, especially if you score the contact points with a needle before pressing them together.
If you need extra stability, spray a light coat of liquid clay on the armature before covering it. This tacky layer helps the clay adhere better.
CreativiU’s advanced sculpting techniques course shows video demos of both foil and wire armatures, making the process easy to follow.
Step 5: Sculpt Details and Textures
Now the fun part begins , adding the features that turn a block of clay into a character. Start with the largest details first, then move to finer elements.
For a dragon, roll thin coils for scales. Press a small stamp or a piece of lace onto the coil before attaching it to the body; the imprint will become a scale pattern. Use a needle‑point stylus to carve scales into the surface if you prefer a hand‑carved look.
When shaping eyes or small ornaments, a toothpick works well to push in tiny beads. For smoother surfaces, smooth with a fingertip dipped in a little bit of liquid clay , this fills micro‑gaps and gives a glossy finish after bake.
To create texture, dip a toothbrush into a dab of clay and brush it lightly across a raised area. The bristles leave a subtle fur‑like pattern, perfect for animal fur or reptile skin.
Keep the thickness of any added detail under 3/8 inch; thicker spots will need longer bake times and can warp.
More on texture techniques can be found on a dedicated crafting resource, which offers a deep look at using household items as texture tools.
Step 6: Bake the Sculpture Properly
Baking is where polymer clay turns from pliable dough to hard plastic. The temperature and time must match the specific clay you’re using. Some clays cure at 275 °F (135 °C), while others require 230 °F (110 °C). Setting the oven too hot will scorch the clay; too low and it stays soft.
First, preheat your oven for at least ten minutes. Use an oven thermometer to verify the temperature; many ovens overshoot by 20‑30 °F.
Place the sculpture on a ceramic tile or a parchment‑lined metal tray. The tile acts as an insulator, keeping heat even and protecting the bottom from discoloration.
Follow the rule of thumb: bake for 30 minutes per ¼ inch of thickness. If your piece is ¾ inch thick, aim for 90 minutes. Add an extra 15 minutes if you’re mixing different clays, baking at the highest required temperature.
After the timer ends, turn the oven off but leave the door slightly ajar for five minutes. This gradual cooling helps prevent cracking caused by thermal shock.
According to reliable source, underbaking is the most common cause of weak pieces, while overbaking rarely harms the clay if temperature stays within limits.
When the bake is done, let the sculpture cool on the rack for at least ten minutes before handling. This gives the polymer chains time to lock in place.
Step 7: Finishing Touches and Sealing
After cooling, the sculpture may show rough edges or tiny fingerprints. Start with a gentle sand‑paper pass (400‑800 grit) to smooth the surface. Wet the paper slightly to avoid creating dust.
For a professional shine, buff the sanded piece with a soft polishing cloth. This brings out a subtle sheen without adding any product.
Sealing is the final barrier that protects color and prevents cracking. Choose a sealer based on the intended use: a clear acrylic spray works for display pieces, while a brush‑on polymer glaze is better for jewelry that will see wear.
Apply the sealer in thin coats, allowing each layer to dry fully before adding the next. Two coats usually suffice; a third coat can add extra depth if the piece will be handled often.
For a matte finish, a thin layer of polymer clay wax spreads easily with a soft cloth and gives the piece a soft, tactile feel.
CreativiU’s DIY polymer clay jewelry tutorial includes a step‑by‑step guide on sealing with both acrylic spray and wax, plus troubleshooting tips for common issues like bubbling.
FAQ
What temperature should I set my oven to for polymer clay?
Polymer clay cures best at 275 °F (135 °C). Use an oven thermometer to confirm the oven reaches this temperature before loading the piece. If you’re mixing polymer clay with another brand, bake at the higher temperature needed for any component.
Can I use my kitchen oven for polymer clay?
Yes, a regular kitchen oven works as long as you monitor the temperature closely. Avoid using the convection setting, as the fan can cause uneven heating. Place a ceramic tile on the rack to spread heat evenly and protect the bottom of the sculpture.
How do I prevent my sculpture from cracking during bake?
Cracking often comes from underbaking, rapid temperature changes, or uneven thickness. Bake for the full time based on thickness, let the oven preheat fully, and cool the piece gradually by leaving the door ajar for a few minutes after the timer ends.
Is it okay to add metal beads or gems before baking?
You can embed small metal findings, but they should be placed in shallow indentations to avoid stress points. For larger gems, bake the clay first, then set the gems with a clear epoxy after cooling.
What is the best way to smooth seams where two clay pieces meet?
Score both surfaces lightly with a needle, apply a dab of liquid clay, then press the pieces together and blend the joint with a fingertip or a smooth tool. Let the seam dry before baking to ensure a smooth finish.
How can I make my finished sculpture more durable?
Beyond proper baking, add a protective seal such as a clear acrylic spray or polymer glaze. This adds a hard skin that resists scratches and UV fading. For jewelry, a thin coat of polymer wax can also improve wear resistance.
Do I need a dedicated polymer‑clay oven?
A dedicated oven isn’t required, but many artists use a small toaster oven for consistency. If you share a kitchen oven, always double‑check the temperature with a thermometer and bake on a tile to keep the heat steady.
Where can I find more advanced tutorials?
CreativiU offers a range of courses that dive deeper into complex techniques like multi‑brand blending, advanced armature engineering, and professional finishing. Their library updates regularly, giving you fresh material to keep your skills sharp.
Conclusion
Building a polymer clay sculpture online doesn’t have to be a guess‑work experiment. By gathering the right tools, conditioning the clay properly, planning a solid layout, constructing a reliable armature, adding thoughtful details, baking at the exact temperature, and sealing with a suitable finish, you’ll produce pieces that look polished and last long.
Remember to check your oven temperature, respect thickness‑based bake times, and always finish with a protective seal. With these steps you can move from simple beads to full‑scale figures, all from the comfort of your home studio.
If you’d like to explore more projects, check out CreativiU’s advanced sculpting techniques course for deeper dives into texture, armature, and professional finishing.
Leave a Reply