You’ve seen the colorful glass plates and suncatchers, and you want to make them yourself. An online glass fusing workshop for beginners is the best way to start without a studio. With a platform like CreativiU, you get structured lessons, community support, and all the basics to fire up your kiln with confidence.
Step 1: Learn the Basics of Glass Fusing
Glass fusing is the process of heating glass in a kiln until it softens and bonds together. The key concept is COE (coefficient of expansion), which tells you how much glass expands when heated. Use glass with the same COE (typically 90 or 96) to avoid cracking. According to Wikipedia’s entry on fused glass, the technique dates back thousands of years but modern kilns make it accessible at home.
Before you buy a kiln, learn about firing schedules, the rate you heat and cool the glass. A typical schedule includes a slow ramp, a soak at the target temperature, and a controlled cool-down. Many online workshops, like those on CreativiU, break down schedules in easy-to-follow videos. You’ll also learn about kiln shelf preparation, glass cutting basics, and how to clean glass properly.
Step 2: Gather Your Tools and Materials
You don’t need a fully stocked studio to start. Here are the essentials for an online glass fusing workshop for beginners. Soul Ceramics’ guide to glass fusing supplies lists the must-haves:
You can find starter kits at art glass suppliers. The Art Glass Supplies blog on COE96 projects recommends starting with compatible glass to avoid stress fractures. Buy a small kiln, like a HotShot or Paragon, and a basic set of tools. CreativiU’s online classes page links to recommended supplies for each course.
Step 3: Set Up a Safe Workspace
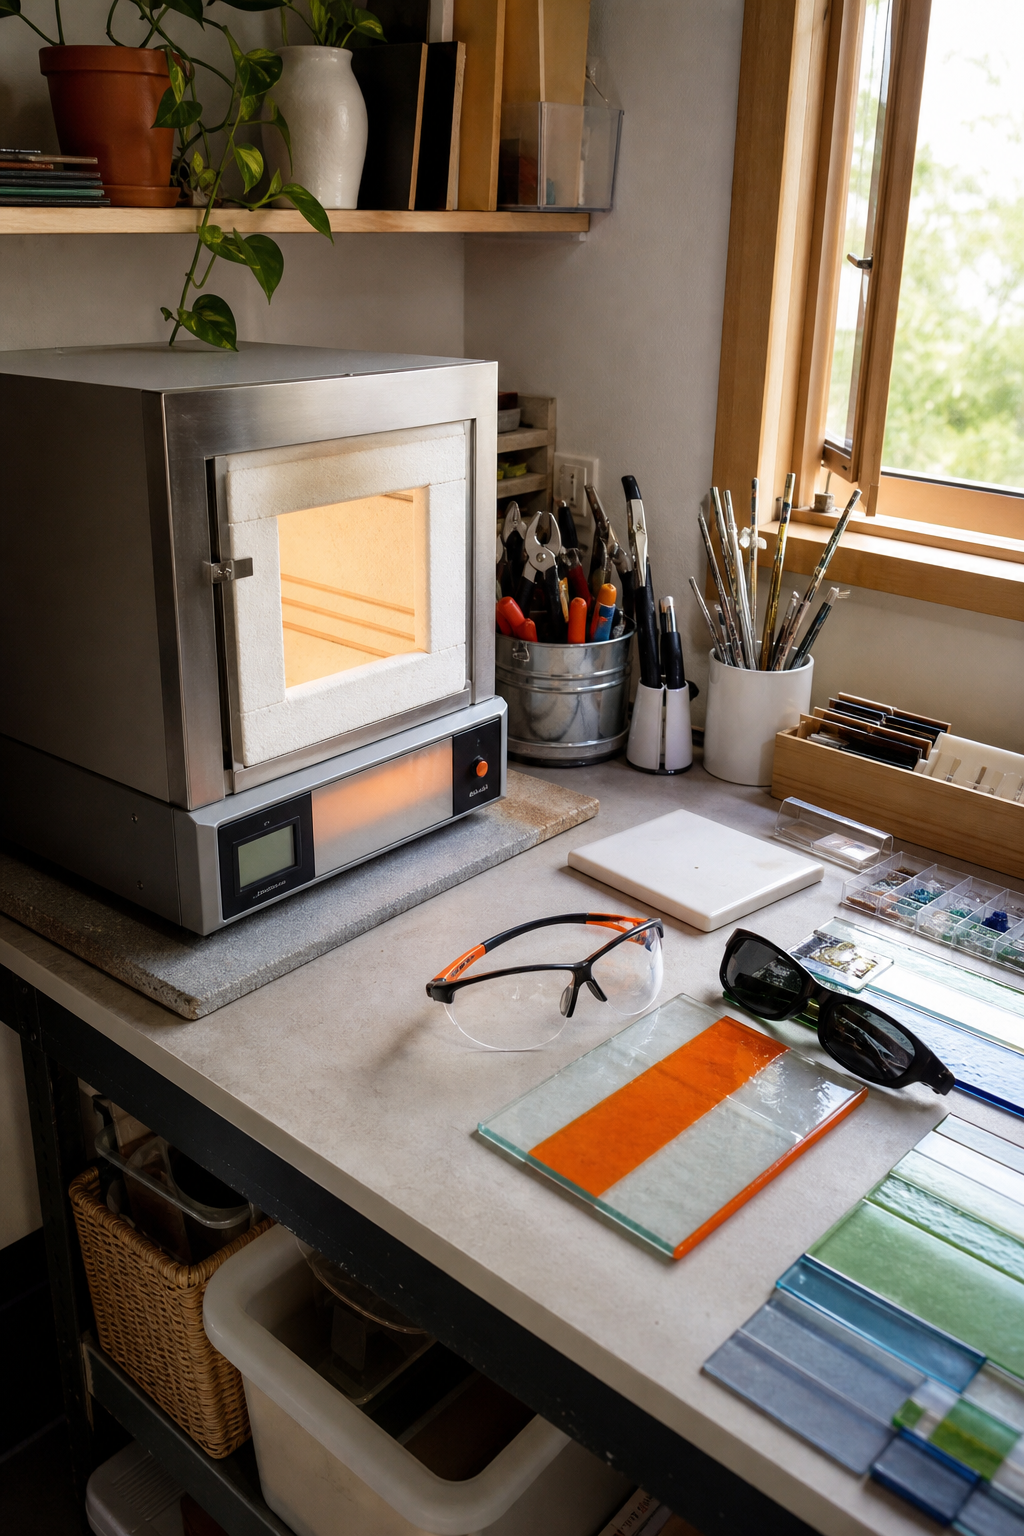
Working with glass and a hot kiln requires caution. The Glasshoppa Safety Top Ten covers the basics: wear safety glasses when cutting, keep a fire extinguisher near the kiln, and never leave a firing kiln unattended. Ventilation is important, open a window or use a fan to remove fumes from kiln wash and glass dust.
Set up your worktable away from foot traffic. Cover it with a fire-resistant mat or a piece of cement board. Keep a metal trash can for glass scraps. Label your firing schedules and post them near the kiln. A good online workshop, like those from CreativiU, includes a safety checklist. Never skip the annealing phase, it’s the slow cool that keeps your piece from cracking.
Step 4: Learn Basic Glass Fusing Techniques
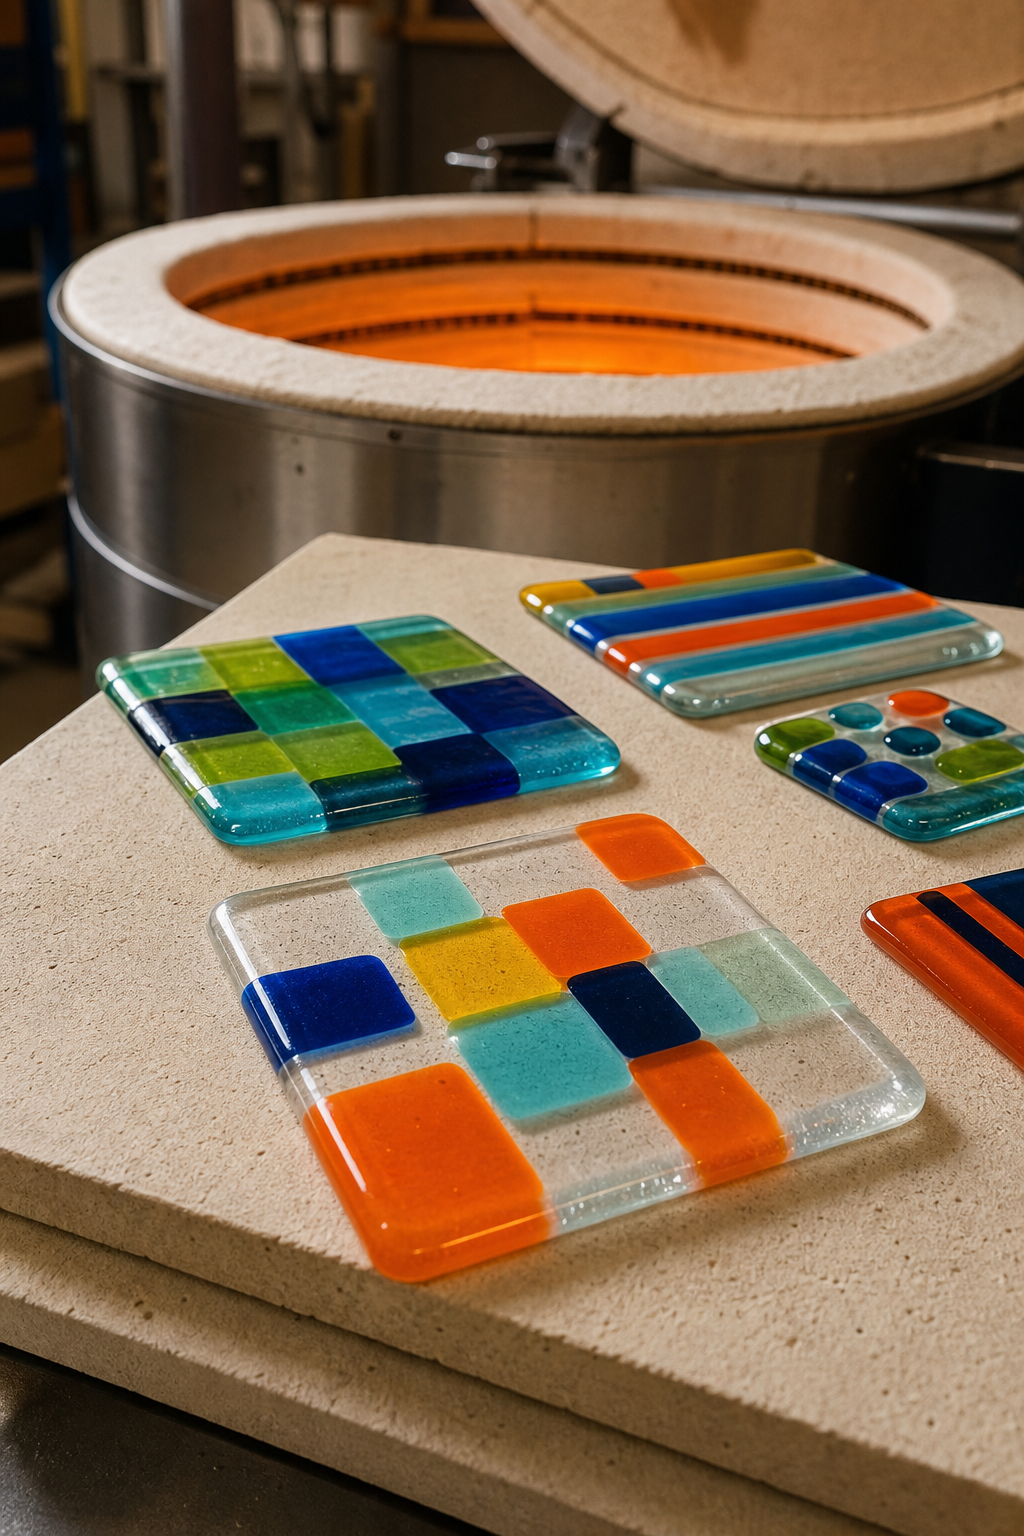
Now it’s time to understand the three main fusing techniques: tack fuse, full fuse, and slump. Tack fuse heats glass to around 1350°F (732°C), just enough to stick layers together while keeping their shapes distinct. Full fuse reaches about 1450°F (788°C), melting glass into a single smooth piece. Slumping is a second firing at lower temperatures (1200-1300°F) to shape the fused glass over a mold.
Your online glass fusing workshop for beginners should cover these with video demos. CreativiU’s courses break each technique into short modules so you can rewatch tricky parts. Practice with small squares before attempting a project. Keep a notebook of firing schedules, what worked and what didn’t. Soon you’ll be able to combine techniques, like tack fusing a design onto a full-fused base, then slumping it into a bowl.
For more on related crafts, check out Stained Glass Classes Online: A Usable Guide on CreativiU’s blog. It covers cutting and soldering skills that complement fusing.
Step 5: Create Your First Simple Project
Start with a coaster or a small suncatcher. The Kiln Frog blog on beginner fused glass ideas suggests a square coaster made from two layers of glass. Cut a 4×4 inch base from clear glass, then cut a slightly smaller square from colored glass for the top. Clean both pieces, stack them, and fire to a full fuse. After firing, the edges will be smooth, and you can add dichroic glass accents for sparkle.
Follow these steps: 1) Score and break your glass using a cutter and running pliers. 2) Clean each piece with a damp cloth, oil and dust cause bubbles. 3) Place the base on a kiln shelf coated with shelf wash, then center the top piece. 4) Fire to a full fuse using a schedule that includes a bubble squeeze (a slow ramp to 1250°F with a 10-minute soak). 5) Let the kiln cool naturally to room temperature before opening.
If you want to advance further, CreativiU’s Advanced Glass Fusing Workshop teaches multi-layered landscapes and kiln carving.
Step 6: Post-Processing and Finishing
Once your piece is cool, inspect it for sharp edges. Use a diamond hand pad or a wet grinder to smooth any rough spots. Rinse off the dust and dry it. For a glossy finish, you can fire again with a thin layer of clear glass (cap) or apply a glass polish like Cerium Oxide.
If you plan to hang your suncatcher, drill a hole before the final firing, or glue a bail with epoxy. For coasters, you can adhere felt pads to the bottom to protect surfaces. Many beginners skip this step, but finishing transforms a rough project into a gift-worthy piece.
Consider documenting your process, photos help you track improvements. Share your results in the CreativiU community for feedback. And when you’re ready to sell, platforms like Lighthouse can help validate demand for your glass art.
Frequently Asked Questions
How much does an online glass fusing workshop for beginners cost?
Prices vary widely, from free YouTube tutorials to paid courses around $50-$200. CreativiU offers subscription-based access to many workshops, often with monthly or yearly plans. The cost includes video lessons, downloadable resources, and community support.
Do I need a kiln to take an online glass fusing workshop?
Yes, you’ll need a kiln to complete projects. However, many workshops let you learn the theory first. Some community studios offer kiln access. If you’re not ready to buy, look for a local maker space that rents kiln time.
How long does it take to learn glass fusing?
You can make your first simple piece after a few hours of lessons. Learning schedules and techniques takes practice, but most beginners feel confident after 3-5 projects. An online workshop gives you unlimited replay, so you learn at your own pace.
What is the best glass for beginners?
Stick to COE90 or COE96 glass from the same manufacturer. Bullseye (COE90) and Spectrum (COE96) are popular. Don’t mix COE numbers, it causes cracking. Many online workshops include a starter pack recommendation.
Can I use a microwave kiln for glass fusing?
Yes, microwave kilns are an affordable option for small projects like pendants and coasters. They heat quickly but have limited temperature control. They’re good for beginners who want to test the hobby before buying a full-sized kiln.
How do I join an online glass fusing workshop?
Most platforms let you enroll by creating an account. CreativiU offers instant access to its library of workshops. You can also find live sessions that allow real-time Q&A. Check the platform’s booking system, like Steamsonline, to register.
Conclusion
An online glass fusing workshop for beginners gives you the knowledge to start safely and make beautiful pieces from day one. Sign up for CreativiU’s beginner workshop to get structured lessons, a supportive community, and project ideas that build your skills step by step. Gather your tools, set up your space, and fire your first piece this weekend.
For color inspiration, you might enjoy exploring Auras by Osiris’ guide to healing crystals, the colors and patterns can spark ideas for your glass designs.
Leave a Reply