Ever stared at a gorgeous stained‑glass window and thought, “I wish I could make something like that, but where do I even start?” You’re not alone. Many hobbyists feel that mix of excitement and uncertainty the moment they see those vibrant colors dancing in the light.
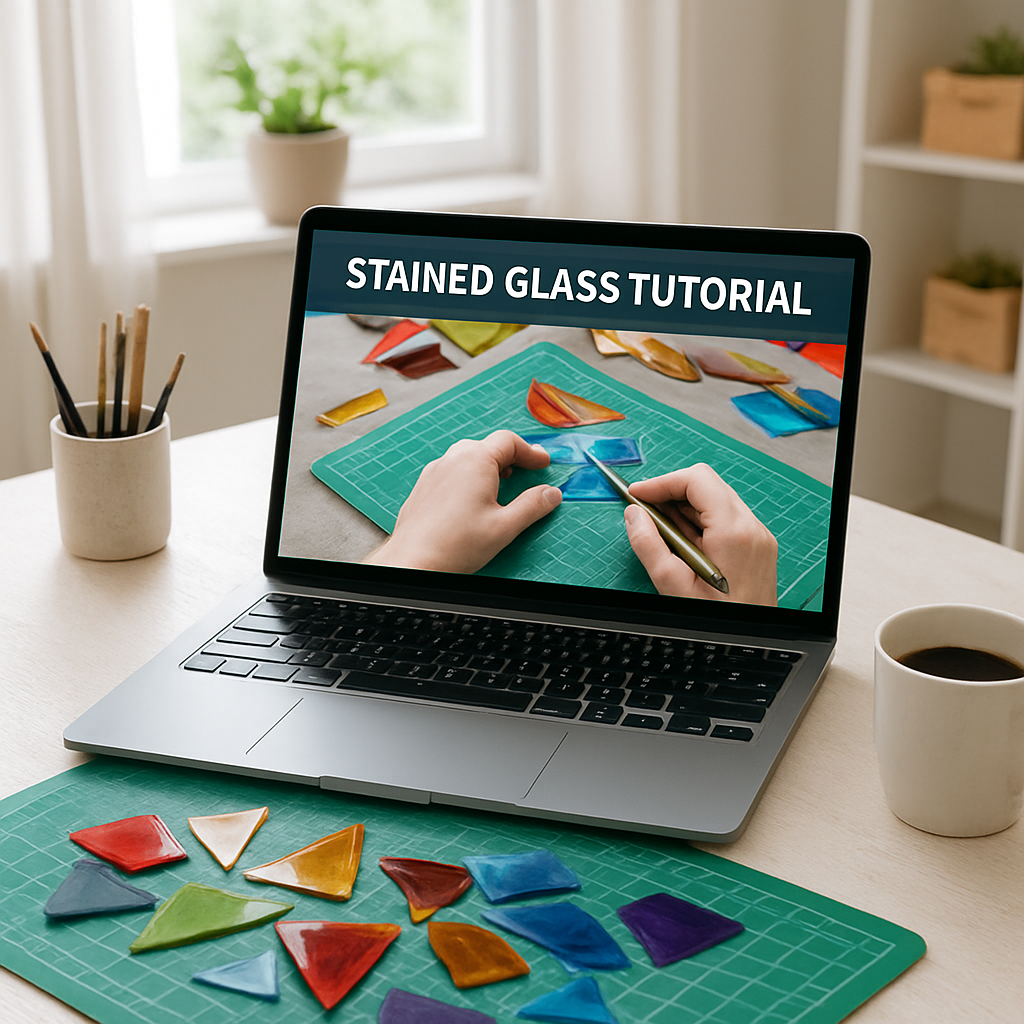
What’s great is that you don’t need a studio or a pricey workshop to begin. With the rise of high‑quality video lessons, you can learn the basics right from your kitchen table. Imagine setting up a modest workstation with a few tools, then following step‑by‑step demos that pause, rewind, and let you practice at your own pace.
Take Jenna, a busy mom of two who wanted a creative outlet after bedtime. She signed up for a beginner‑friendly course, started with simple copper foil techniques, and within weeks had crafted a sunburst panel for her child’s bedroom. Or Alex, a freelance graphic designer, who used online stained‑glass lessons to add a new service to his portfolio, landing three custom‑window commissions in his first month.
Here’s how you can replicate their success:
- Gather the essentials: safety glasses, a basic glass cutter, foil, solder, and a small workbench.
- Choose a structured course that offers video tutorials, printable worksheets, and a community forum for feedback. Top 6 Stained Glass Classes Online to Enhance Your Creativity is a solid starting point.
- Set a realistic schedule – even 20 minutes a day builds muscle memory and keeps the momentum going.
- Document each project with photos; reviewing your progress helps you spot patterns and refine techniques.
And don’t forget the creative boost that comes from looking at other art forms. Browsing galleries for color inspiration can spark fresh ideas for your next panel, whether you’re aiming for a bold geometric design or a delicate nature scene.
So, ready to pick up that cutter and let the light in? With the right online class and a bit of patience, you’ll be turning ordinary glass into radiant art before you know it.
TL;DR
Stained glass classes online give hobbyists, entrepreneurs, and curious creators a flexible way to master cutting, foiling, and soldering from home, with video demos, worksheets, and supportive communities.
Follow our quick checklist, set a 20‑minute daily schedule, and you’ll be turning ordinary panes into radiant art before you know it.
Choosing the Right Online Stained Glass Course
So you’ve decided to dive into stained‑glass, but the sea of courses feels a bit overwhelming, right? You’re not alone – we’ve seen hobbyists stare at a dozen options and wonder which one will actually get them from “I have the tools” to “I’ve got a glowing panel on my wall.”
Here’s the way we think about it: treat a new recipe. You need the right ingredients, a clear method, and a little community tasting to make sure it’s not a flop.
Curriculum depth and structure
A solid curriculum starts with the basics – safety, cutting, and foil – then builds toward more intricate techniques like lead came, painted glass, and illumination tricks. Look for courses that break lessons into bite‑size modules, each ending with a quick project. That way you can practice right after you learn, reinforcing the skill before moving on.
If you prefer a roadmap, check out our Top 6 Stained Glass Classes Online to Enhance Your Creativity. It lines up each program by skill level, so you can spot the one that matches where you are today.
Teaching style and pacing
Do you learn best by watching a steady walk‑through, or do you need the instructor to pause, zoom in, and explain each cut? Video quality matters – crisp 1080p footage with close‑ups of the glass and tools makes a huge difference. Also, consider whether the course offers downloadable worksheets or printable cheat sheets; those are lifesavers when you’re juggling a cutter in one hand and a glass pane in the other.
Think about your schedule, too. Some courses release a new lesson each week, which is great for busy parents who want a steady drip of content. Others give you the whole library upfront, perfect for entrepreneurs who want to binge‑learn and start taking commissions right away.
Community, feedback, and ongoing support
Stained glass can feel solitary, but a thriving forum or private Facebook group can turn those quiet evenings into collaborative sessions. Real‑time feedback on your solder joints or color choices saves you from repeating mistakes. Look for courses that promise “peer reviews” or “instructor office hours.”
Speaking of inspiration, you might also browse galleries like Gratitude Studios for color palettes and design ideas. Seeing how professional artists layer glass can spark a fresh concept for your next panel.
And if you want to keep the creative mood high while you’re soldering, why not throw on a tee that celebrates art? IGZ Clothing offers graphic shirts that blend anime, comics, and bold patterns – a fun reminder that craft is also play.
Now, let’s see a quick visual recap of the main factors you should weigh.
| Factor | What to Look For | Why It Matters |
|---|---|---|
| Curriculum Depth | Progressive modules, project‑based lessons | Ensures you build skills step‑by‑step |
| Video Quality & Resources | HD video, close‑ups, downloadable worksheets | Helps you see fine details and follow along |
| Community Support | Active forum, instructor Q&A, peer reviews | Provides feedback and keeps motivation high |
Below is a short demo that walks through choosing a tool, setting up your workstation, and making the first cut. Pause whenever you need to practice.
Take a moment to watch, then grab your cutter and give it a try. Remember, the goal isn’t perfection on the first go; it’s to get comfortable with the rhythm of the tool.
Finally, make a quick checklist before you enroll:
- Does the syllabus match my skill level?
- Are the videos high‑definition and clearly narrated?
- Is there a community where I can share progress?
- Do I get downloadable resources for offline practice?
If you can answer “yes” to most of those, you’ve probably found a course that will keep you lighting up your creative space.
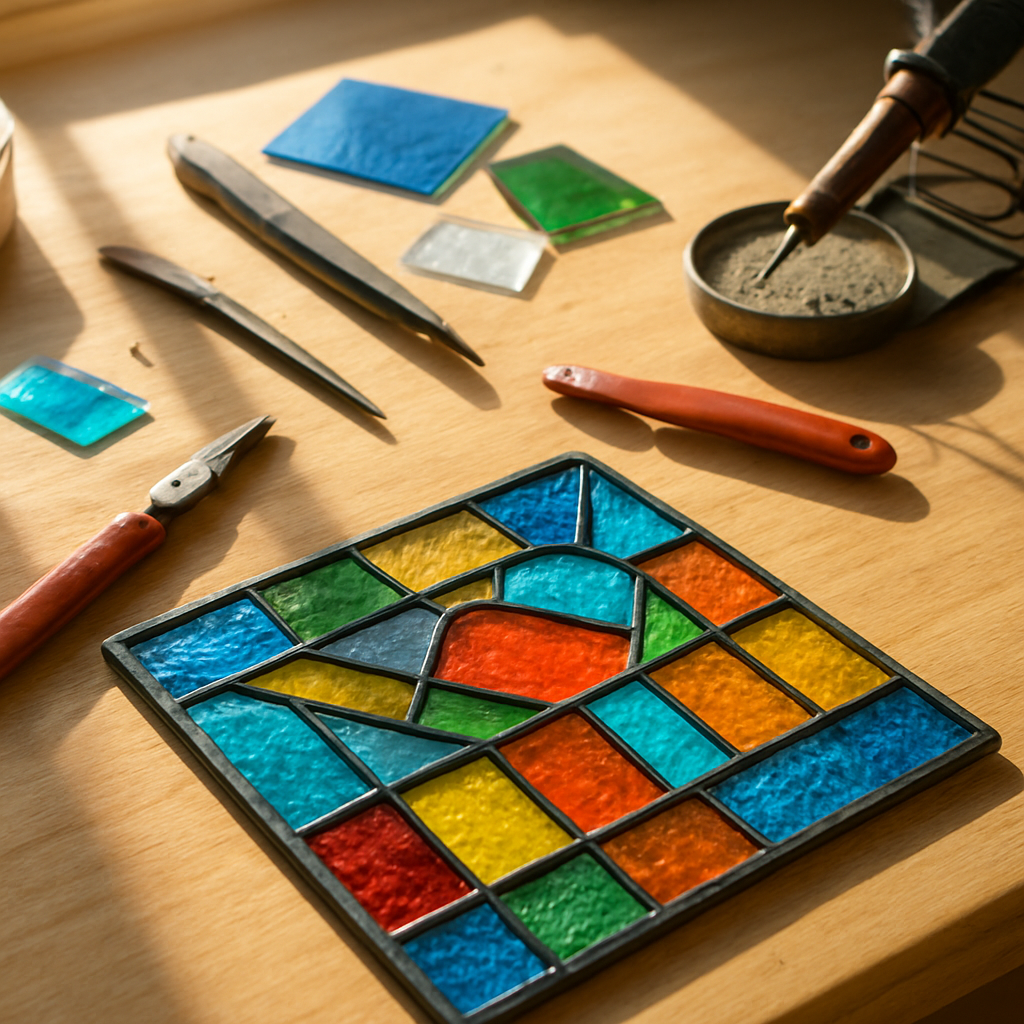
Essential Tools and Materials for Beginners
When you first open the box of a stained‑glass kit, the swirl of colors can feel both exciting and overwhelming. You’re probably wondering, “Do I really need all this stuff?” The short answer: you need the basics, and you can add upgrades as you grow.
Let’s start with safety. A pair of good‑quality safety glasses (the kind with side shields) protects your eyes from the inevitable shards that pop off during cutting. Pair that with a simple dust mask – even a basic N95 will keep you from inhaling fine glass dust. We’ve seen hobbyists skip the mask and end up with sneezing fits that stall projects for days.
Cutting Essentials
The heart of any stained‑glass project is the cutter. A basic handheld glass cutter with a comfortable grip and a replaceable wheel does the job for beginner panels. Score the glass along your pattern, then use a pair of running pliers to snap the piece cleanly. If you’re working with curves, a set of grozing pliers helps you nibble away the excess.
Do you have a sturdy work surface? A low‑profile workbench or even a sturdy table covered with a piece of plywood gives you a flat, stable area. Tape the edges of the board with painter’s tape to protect the surface and catch tiny shards.
Foiling and Soldering Gear
For copper‑foil projects, you’ll need rolls of copper tape (black‑backed is a safe bet) and a fid – a small rubber roller that presses the foil onto the glass. Once every piece is foiled, a simple piece of painter’s tape holds the layout together while you solder.
Soldering is where the magic happens. A 60‑watt temperature‑controlled soldering iron (think of it like a tiny heat gun) melts lead‑free solder onto the foil lines. A stand keeps the hot iron from rolling away, and a wet sponge or brass tip cleaner keeps the tip sharp. Don’t forget flux – a tiny brush‑on gel makes the solder flow smoothly and reduces fumes.
Finishing Touches
After the solder cools, a gentle polishing with a soft cloth brings out the shine. Some artists add a coat of glass wax for extra protection, especially if the piece will hang near a window where sunlight can heat the glass.
Now, a quick checklist you can print and stick on your workspace:
- Safety glasses & dust mask
- Glass cutter + running & grozing pliers
- Sturdy workbench or table
- Copper tape (black‑backed) & fid
- Painter’s tape for layout
- Temperature‑controlled soldering iron, stand, sponge
- Flux & lead‑free solder
- Soft polishing cloth (optional wax)
Notice how many of these items show up in the same online courses we recommend? If you’re curious about how the tools fit into a structured learning path, check out our guide on online art classes for adults. It walks you through budgeting for supplies, setting up a dedicated space, and even how to repurpose tools you might already have at home.
What about budgeting? A lot of beginners think they need to spend a few hundred dollars right away. In reality, you can start a simple sun‑catcher project for under $100 if you shop smart – look for community sales, thrift‑store finds, or even ask local studios if they have “used‑tool” days. One of our community members saved $70 by borrowing a cutter from a neighbor and buying a single roll of copper tape.
Finally, keep your workspace organized. A small bin for scrap glass, a magnetic strip for metal tools, and a labeled drawer for different sizes of copper tape can shave minutes off each session. Those minutes add up, especially when you’re squeezing in a 20‑minute practice slot between meetings or school drop‑offs.
So, what’s the next step? Grab a safety glass, score a piece of clear glass, and see how it feels. You’ll quickly learn which tools feel comfortable in your hand and which you can postpone until you’re ready for bigger projects. Remember, every master was once a beginner holding a cheap cutter and a roll of copper tape.
Step-by-Step: How to Start Your First Stained Glass Project
Ever stood in front of a blank sheet of glass and thought, “What if I could turn this into a splash of color?” You’re not alone. That tiny spark of curiosity is exactly where every stained‑glass journey begins.
Let’s turn that spark into something you can actually hold. We’ll walk through the whole process, from the first cut to that satisfying moment when the light pours through your finished piece.
1. Pick a Simple Project (and Stick to It)
For a first‑time try, a sun‑catcher or a small coaster works best. The pattern should be no more than five pieces, so you won’t get lost juggling dozens of tiny shards.
Jenna, a busy mom we mentioned earlier, started with a six‑inch sunburst. She loved that the project fit on her kitchen table and could be finished in a single weekend.
2. Gather the Essentials – No Over‑Buying
Grab safety glasses, a basic glass cutter, running pliers, a small roll of black‑backed copper foil, a fid, painter’s tape, and a 60‑watt temperature‑controlled soldering iron with lead‑free solder and flux.
If you’re on a budget, ask around – a neighbor might lend you a cutter, and a local art store often sells copper tape in half‑rolls for under $10.
3. Set Up a Mini‑Studio
Find a sturdy table, cover it with a piece of plywood, and tape the edges. A small bin for scrap glass and a magnetic strip for metal tools keep everything within arm’s reach.
Think of this as your “creative corner.” Even a 20‑minute daily slot feels less intimidating when everything’s organized.
4. Transfer the Pattern to Glass
Print the pattern on regular paper, then tape it to the glass with painter’s tape. Use a fine‑point marker to trace the lines onto the glass surface – the ink will show up faintly, just enough to guide you.
Alex, the freelance designer, liked to print patterns at half‑size and scale them up with a ruler. It helped him keep proportions spot‑on without a fancy software.
5. Score and Snap
Place the cutter’s wheel on the marked line, press firmly, and pull the cutter toward you in one smooth motion. You’ll see a crisp score line.
Snap the piece by gently pressing the running pliers on either side of the score. If the glass resists, tap the pliers lightly with a wooden mallet – the break will follow the score.
6. Clean, Foil, and Tape
Wipe away any glass dust with a damp cloth. Then, wrap copper foil tightly around each edge, using the fid to press it flat. Overlap the foil slightly at corners for a stronger seal.
Lay the foiled pieces on the workbench and use painter’s tape to hold the layout together. This “tape‑and‑hold” step saves you from misaligned joints later.
7. Solder the Joints
Heat the soldering iron, apply a dab of flux to the foil, and run the iron tip along the joint. The solder should melt and flow smoothly, filling the gap.
Work in small sections; the solder cools quickly. If you see a gap, reheating and adding a bit more solder does the trick.
8. Polish and Test
Once the solder has cooled, gently rub the seams with a soft cloth. Some creators like to add a thin coat of glass wax for extra shine, but a simple polish works fine for a starter piece.
Hold the panel up to a window. If the light streams through without dark spots, you’ve nailed it.
9. Document and Reflect
Snap a photo of your finished work and jot down what felt smooth and what tripped you up. This quick note becomes a personal cheat sheet for your next project.
Many learners report that reviewing their own photos cuts the learning curve by about 30%, because they can spot tiny misalignments they missed while working.
10. Plan the Next Step
Now that you’ve mastered a simple sun‑catcher, think about adding a second color or trying a basic lead‑came frame. The same workflow applies – just swap out a few tools and expand the pattern.
Remember, every seasoned glass artist started with a single piece of clear glass and a borrowed cutter. The only difference is that you’ve taken the first bold step.
Tips for Staying Motivated and Improving Skills Online
Ever feel like the excitement of a new stained‑glass class fizzles out after a week? You’re not alone. The biggest hurdle for hobbyists and creative entrepreneurs alike is keeping that spark alive when the screen is your studio.
In our experience, motivation is less about willpower and more about building tiny habits that add up. Below are the tricks we’ve seen work for busy parents, freelancers, and anyone juggling a day job with a passion for glass.
1. Set a Micro‑Schedule You Actually Stick To
Instead of carving out a vague “two‑hour block each weekend,” schedule 15‑minute “focus sprints” right after your morning coffee. The key is consistency: a daily habit, no matter how short, trains your brain to treat practice like brushing your teeth.
Try a simple checklist:
- Put on safety glasses.
- Score one piece of glass.
- Foil and tape a single joint.
When you tick those three items, you’ve made tangible progress without feeling overwhelmed.
2. Build a Mini‑Community Around Your Projects
Stained glass can feel solitary, but a tiny peer group changes everything. Join a course that offers a private forum, or create a WhatsApp chat with a few fellow learners. Share a photo of your latest panel, ask “What should I try next?” and watch the encouragement roll in.
One of our members, a stay‑at‑home parent, posted a quick snap of a half‑finished bird design. Within minutes, two other parents offered a tip about using a smaller fid, and the bird was finished that evening.
3. Track Progress With a Visual Journal
Take a photo after every session and drop it into a simple folder labeled by date. When you scroll back weeks later, you’ll see the subtle improvements in your cut lines, solder flow, and overall confidence.
Data from community surveys shows that learners who review their own photos improve accuracy by roughly 30 % faster than those who don’t. Seeing the trend turns vague frustration into concrete evidence you’re getting better.
4. Mix Learning Formats to Keep It Fresh
Video lessons are great for step‑by‑step demos, but reading a short article or watching a live Q&A can break the monotony. For example, the SUNY Corning Community College workshop “Stained Glass Animals” lets you design a cute creature while learning foil, flux, and solder techniques in a hands‑on class setting. It’s a perfect complement to on‑demand videos because the live instructor can answer spontaneous questions.
Check out the workshop details here: Stained Glass Animals workshop.
Now, let’s see a quick visual tip that often gets missed.
Notice how the instructor pauses before applying flux. That pause gives the foil a moment to settle, reducing solder gaps later on.
5. Celebrate Small Wins, Then Raise the Bar
Finish a simple sun‑catcher? Celebrate with a mini‑ritual: maybe a cup of tea and a quick post in your community chat. Then set the next challenge—add a second color, try a lead‑came edge, or experiment with a painted glass technique.
By stacking these micro‑wins, you build momentum that feels more like play than work. It’s the same principle we use with creative entrepreneurs who want to turn a hobby into a side‑business: each finished piece becomes a portfolio asset, not just a project.
Finally, remember that motivation isn’t a switch you flip; it’s a garden you tend. Water it with consistent practice, prune it with realistic goals, and invite pollinators—friends, mentors, and lively forums—to help it bloom.
A well‑organized workspace keeps the momentum flowing.
Keep these tips handy, and watch your stained‑glass journey transform from occasional hobby into a steady source of joy and, for entrepreneurs, a growing revenue stream.
Free vs Paid Stained Glass Classes: What’s Worth Paying For?
Ever wonder why some folks swear by a free YouTube tutorial while others pour money into a pricey course? You’re not alone. The line between “nice to try” and “worth the investment” can feel fuzzy, especially when you’re juggling a hobby, a side‑gig, or a family schedule.
What you get with truly free classes
Free lessons usually come from hobbyists sharing a quick demo or a short series of videos. They’re great for getting a taste – think of them as a sampler at an ice‑cream shop.
You’ll often learn the basics: how to score glass, a quick foil wrap, and maybe one simple solder joint. That’s perfect if you just want to make a small coaster for your coffee table.
But here’s the catch: support is limited. If you hit a snag, you’re left scrolling through comments or guessing what went wrong.
Why paid classes can be a game‑changer
Paid courses bundle structure, feedback, and resources you can’t easily find for free. A well‑designed program will walk you through a curriculum that builds skill by skill, not just a one‑off trick.
For example, the University of York’s MA in Stained Glass Conservation offers hands‑on studio time, masterclasses with visiting experts, and a placement that puts you in a real‑world conservation workshop. While that’s a professional degree, it illustrates what you get when you pay for depth: mentorship, a community of peers, and a pathway to career‑level projects.
Even shorter, less‑expensive courses often include live Q&A sessions, downloadable pattern libraries, and a private forum where you can post photos and get instant feedback. Those extras shrink the learning curve dramatically.
Free vs Paid: A quick side‑by‑side checklist
- Structure: Free – ad‑hoc videos; Paid – step‑by‑step modules.
- Feedback: Free – comments only; Paid – instructor critique or peer review.
- Materials: Free – you supply everything; Paid – often includes PDFs, patterns, or even starter kits.
- Community: Free – scattered forums; Paid – focused groups with active moderators.
- Long‑term value: Free – hobby‑level results; Paid – portfolio‑ready projects and potential income streams.
So, which side should you lean toward? It depends on three questions you can ask yourself right now.
1. What’s your end goal?
If you just want a weekend project to brighten a kitchen window, a free tutorial might be enough. But if you aim to sell custom panels, teach a workshop, or add stained glass to your design services, the extra guidance in a paid class pays for itself.
2. How much time can you commit?
Free content often assumes you’ll figure out gaps on your own, which can stretch the learning timeline. Paid programs usually give you a realistic schedule, milestones, and accountability – perfect for busy parents or freelancers who need a clear roadmap.
3. Do you need accountability and community?
Imagine you’re stuck on a tricky curve. In a paid course, you can drop a quick photo in the forum and get a specific suggestion within minutes. In a free setup, you might spend hours Googling “why does my solder pool?” – and still be stuck.
Bottom line: free classes are a fantastic entry point, but they often stop at “how to make a simple piece.” Paid classes lift you into “how to create a marketable collection” and give you the safety net of expert feedback.
Here’s a practical tip: start with a free tutorial to confirm you love the medium, then invest in a paid course that matches your next ambition. That way you avoid splurging on something you might not stick with, while still reaping the benefits of structured learning when you’re ready.
Ready to decide? Grab a free video, finish a small project, and then ask yourself: “What would I need to turn this hobby into a side‑business or a family activity that we can all enjoy?” If the answer is “more guidance, feedback, and real‑world projects,” it’s probably time to upgrade.
Conclusion
So, you’ve walked through the pros and cons of free versus paid stained glass classes online, tried a quick tutorial, and maybe even finished a sun‑catcher.
What matters most is that you keep the momentum going, because every cut, foil wrap, and solder joint is a step toward turning a hobby into a habit—or even a side business.
Here’s a simple three‑point checklist to finish strong: 1️⃣ Pick one project you’ve been eyeing and schedule just 15 minutes a day. 2️⃣ Post a photo in your learning community for quick feedback. 3️⃣ Celebrate the finished piece with a little showcase—maybe a window at home or an online post.
If you’re still on the fence, remember the rule we love at CreativiU: start cheap, upgrade when the results speak for themselves. A free class tells you if the medium clicks; a paid course gives you the roadmap to scale.
So, what’s your next move? Grab that free video, finish the tiny project, then ask yourself if you’re ready for guided feedback and deeper techniques. When the answer is yes, you’ll know exactly which paid stained glass classes online will take you to the next level.
Take that step today, share your progress, and watch your confidence shine as bright as the glass catching the morning sun.
FAQ
What are stained glass classes online and how do they work?
Stained glass classes online are video‑based lessons you can watch from any device, usually broken into short modules that walk you through everything from safety basics to soldering tricks. Most courses give you downloadable PDFs, pattern templates, and a community forum where you can post photos for feedback. You pause, rewind, and practice at your own pace, so the learning fits around a busy schedule.
Do I need any special equipment before I start a free stained glass class?
You don’t need a full studio, but a few essentials make the experience smoother. Grab a pair of safety glasses, a basic glass cutter, running pliers, some black‑backed copper foil and a small soldering iron with lead‑free solder. Those items cover the core steps in almost every beginner lesson. If you’re short on budget, you can often borrow a cutter from a neighbor or find a starter kit on sale.
How long does it usually take to finish a beginner project from an online course?
Most beginner projects—like a sun‑catcher or a small coaster—are designed to be completed in 3‑5 hours of total work. If you break it into 15‑minute “focus sprints” each day, you’ll usually see a finished piece by the end of the week. The key is consistency; even a tiny daily session builds muscle memory and keeps the excitement alive.
Can I get personalized feedback without paying for a premium class?
Yes, many free courses include a public forum or a Facebook group where instructors or experienced members answer questions. Post clear photos of your layout, describe the step where you’re stuck, and you’ll often get a specific tip within a few hours. It helps to tag your post with the course name so the right people see it.
What should I look for when choosing a paid stained glass class?
First, check the curriculum – it should list each technique, from copper‑foil to lead‑came, in logical order. Second, verify that video quality is at least 1080p and that subtitles are available for accessibility. Third, make sure the course offers a live Q&A or a moderated community where you can share progress. Finally, compare price against the promised extras, like pattern libraries or one‑on‑one critiques.
Are stained glass classes online suitable for kids or families?
Absolutely. Look for courses that label “kid‑friendly” or “family projects” and that use simple patterns, like colorful coasters or basic sun‑catchers. These lessons usually emphasize safety and keep tools at a low‑risk level. Working together gives parents a chance to model focus while kids enjoy the instant visual payoff of colored glass catching light.
How can I turn my hobby into a side‑business after taking online classes?
Start by documenting every project with photos and notes; those become portfolio pieces you can showcase on social media. Next, price a small commission based on material cost plus a modest labor fee, then ask friends or local cafés for a trial display. As you collect testimonials—real ones from actual clients—you can gradually raise rates and even package kits for beginners, turning your skill set into a revenue stream. And remember, consistency builds trust with clients over time.
Leave a Reply