Ever stared at a blank sheet of paper and felt that mix of excitement and dread? That’s the exact spot where every gouache beginner begins, and it’s totally normal to wonder how to turn those nervous splashes into confident strokes.
The good news is you don’t need a fancy studio or a mountain of supplies—just a handful of paints, a couple of good synthetic brushes, and a piece of heavyweight paper that can handle water without warping. When you set up a tidy workspace with everything within arm’s reach, the whole process feels less like a chore and more like a relaxed coffee‑break chat with a creative friend.
First, test your colors on a scrap corner. Mix a tiny amount of each tube with a drop of water until the paint looks like thin honey. This quick test tells you whether the paint is too thick—add a splash more water—or too runny—add a dab more pigment. Keeping the consistency consistent across all your tubes saves you from surprise muddy patches later on.
Next, lay down a light sketch with a graphite pencil. Keep the lines faint—just enough to guide your brush. When you start painting, work from the background forward, applying the thinnest washes first. Let each layer dry to a matte finish before adding the next; this prevents the colors from muddying each other, a common hiccup for beginners.
A simple technique that makes a huge difference is to reserve a tiny amount of opaque white gouache for highlights. Dab it lightly on the brightest spots while the underlying layer is still slightly tacky. The white will sit on top instead of mixing, giving your painting that crisp pop you’ve been chasing.
If you ever wonder how to take those fresh strokes and turn them into printable art or custom stickers, you can simply scan or photograph your finished piece and send it to a reliable print service. A quick search for JiffyPrintOnline shows they specialize in high‑quality art reproductions, perfect for showcasing your gouache work on cards, labels, or even limited‑edition merch.
Finally, if you’d like a structured path that walks you through every step—from setting up your palette to mastering opacity and layering—check out our A Step-by-Step Online Gouache Painting Techniques Course. The lessons break down each skill into bite‑size videos, give you feedback from experienced instructors, and connect you with a supportive community of fellow hobbyists and budding entrepreneurs.
TL;DR
If you’re new to gouache, start by testing paint consistency, using thin washes, and letting each layer dry before adding the next to keep colors vibrant and prevent muddying.
Then add a dab of opaque white for highlights while the paint’s still tacky, scan your work for digital prints, and consider a step‑by‑step online gouache course to boost confidence and speed up progress.
Materials & Supplies
Alright, let’s get the toolbox sorted before you even touch a brush. The magic of gouache isn’t in the paint alone – it’s in the combo of pigments, paper, and tools that let you work fluidly without the stress of warping or muddying colours.
First up, the paint. Grab a basic gouache set that includes the three primaries (red, yellow, blue) plus white and black. This gives you every hue you’ll need while keeping the palette simple enough to test consistency quickly. If you can, opt for student‑grade tubes that still offer decent pigment load – they’re budget‑friendly and work beautifully for beginners.
Next, brushes. Synthetic round brushes in sizes 4, 6 and 8 are the sweet spot: they hold water well, snap back into shape, and let you switch from fine detail to broader washes without swapping tools. A flat brush around ½‑inch is handy for laying down even background layers. Remember to rinse them frequently; gouache can dry fast and gum up the bristles.
Paper matters more than you might think. Look for heavyweight (300 gsm or more) cold‑pressed watercolor paper or a mixed‑media pad. The extra thickness stops the paper from buckling when you add multiple layers, and the slightly textured surface gives the paint a nice tooth for both smooth washes and crisp edges.
Water is your secret weapon. Keep two containers nearby: one for rinsing brushes and another with fresh clean water for diluting paint. This two‑bucket method helps you keep colours pure – you won’t accidentally mix a lingering hue into a fresh mix.
While you’re setting up, think about how you’ll store leftovers. Gouache dries fast but can be re‑activated with a splash of water, so seal any extra paint in a tightly‑lidded palette or zip‑lock bag. That way you won’t waste pigment and you’ll have “on‑hand” colours for the next session.
For those who like to see their work beyond the sketchbook, printing your finished pieces can turn a hobby into a side‑hustle. A quick scan or high‑resolution photo can be sent to JiffyPrintOnline for custom stickers, postcards, or even limited‑edition art prints. It’s a painless way to share your gouache creations with friends or start a small shop without a big upfront investment.
When you sit down to paint, consider timing your practice. Using a Pomodoro timer helps you stay focused and prevents marathon sessions that lead to fatigue. A 25‑minute work block followed by a five‑minute break keeps your hand steady and your eye fresh. Check out FocusKeeper’s guide to Pomodoro timing for a simple setup you can apply to any creative practice.
Here’s a quick checklist you can print and tape to your studio wall:
- Gouache set (primary colours + white & black)
- Synthetic round brushes (sizes 4, 6, 8) + flat brush
- 140‑300 lb cold‑pressed paper or mixed‑media pad
- Two water containers (rinse & dilute)
- Palette or zip‑lock bag for leftovers
- Paper towels & rag for blotting
- Workspace with good natural or daylight lamp
Once you’ve got everything laid out, you’ll notice the difference instantly – the workflow feels smoother, the colours stay vibrant, and you’re not constantly pausing to hunt for a missing tool.
Ready for a deeper dive? Our A Step‑By‑Step Online Gouache Painting Techniques Course walks you through each supply choice, shows why they matter, and gives you hands‑on demos that turn this list into real‑world results.
Below is a short video that demonstrates how to test paint consistency and set up your palette – it’s the exact routine we recommend for a hassle‑free start.
After the video, grab your supplies, set a timer, and start experimenting. The more you practice, the quicker you’ll develop that confident, buttery gouache feel that makes every stroke enjoyable.
Preparing Your Workspace
Now that you’ve got your paints, brushes and paper ready, the next game‑changer is the space where you actually lay down those first gouache strokes.
A cluttered desk is a silent creativity thief – you’ll spend more time hunting for a spare brush than enjoying the paint itself.
Here’s how to carve out a tidy, inspiring workstation that keeps you in the flow from the moment you open the lid.
Choose a flat, stable surface
A sturdy table or desk gives your paper a solid foundation. If the surface wiggles, even a light wash can turn into a surprise ripple, and that’s rarely the effect you’re after.
We recommend a surface that’s at least 24 inches wide so you can spread your palette, water jars and sketch pad without constantly reaching over the edge.
Do you have a window that bathes your studio in natural daylight?
Natural light reveals the true intensity of gouache pigments. If a sunny spot isn’t an option, swap in a daylight lamp with a 5000‑kelvin bulb – the colour temperature mimics overcast daylight and reduces harsh shadows.
Keep the light source to the side or slightly behind you; front‑on lighting flattens the image and makes it harder to judge values.
Organise your tools within arm’s reach
Arrange everything you’ll need for a 30‑minute session in a semi‑circle around your painting area. Paint tubes go on the left, water jars on the right, and your palette sits dead centre. This layout cuts the “where’s‑that‑brush?” brain‑cycle in half.
A small tray or a repurposed baking sheet works wonders as a catch‑all for paper towels, spare brushes and that rubber spatula you love to use for scraping excess paint.
What about the dreaded ‘stay‑wet’ palette?
Line a shallow tray with a couple of sheets of kitchen paper, dampen them, then cover with parchment and cling film. The paper stays moist, the paint stays buttery, and you can pick up where you left off without re‑mixing.
If you’re short on space, a portable art cart with wheels lets you roll the whole setup to a sunny nook and back without disassembling.
Control moisture and keep the air friendly
Gouache loves a little humidity but hates a dry, crack‑inducing breeze. A simple tabletop humidifier set to low can keep the air from sucking the water out of your washes.
Alternatively, place a shallow bowl of water nearby – the evaporating surface adds a gentle mist that keeps the paint from skinning too quickly.
Ever wonder why your colours look dull after a few minutes?
That’s often the paint re‑activating from a dry spot on the paper. By keeping the workspace slightly humid and the paper flat, you let each layer dry to a true matte before the next comes in.
Quick checklist before you start
- Flat table or desk (at least 24 inches wide)
- Good natural light or 5000 K daylight lamp
- Paint tubes, palette, water jars, spray bottle within arm’s reach
- Stay‑wet tray with kitchen paper, parchment & cling film
- Paper towels, rubber spatula, zip‑lock bag for leftovers
- Optional humidifier or bowl of water nearby
Take a minute to glance over this list and tick each box. When everything is where it should be, you’ll notice how quickly the first wash glides across the paper.
If you’d like a deeper dive on setting up a versatile studio, our online acrylic painting classes for beginners include a full workspace walkthrough that works just as well for gouache.
That extra perspective can help creative entrepreneurs design a space that’s both functional and Instagram‑ready, boosting confidence when you share your progress with the community.
With a tidy, well‑lit, and moisture‑balanced workstation, the biggest obstacle disappears – you’re simply ready to let the gouache flow and enjoy the process.
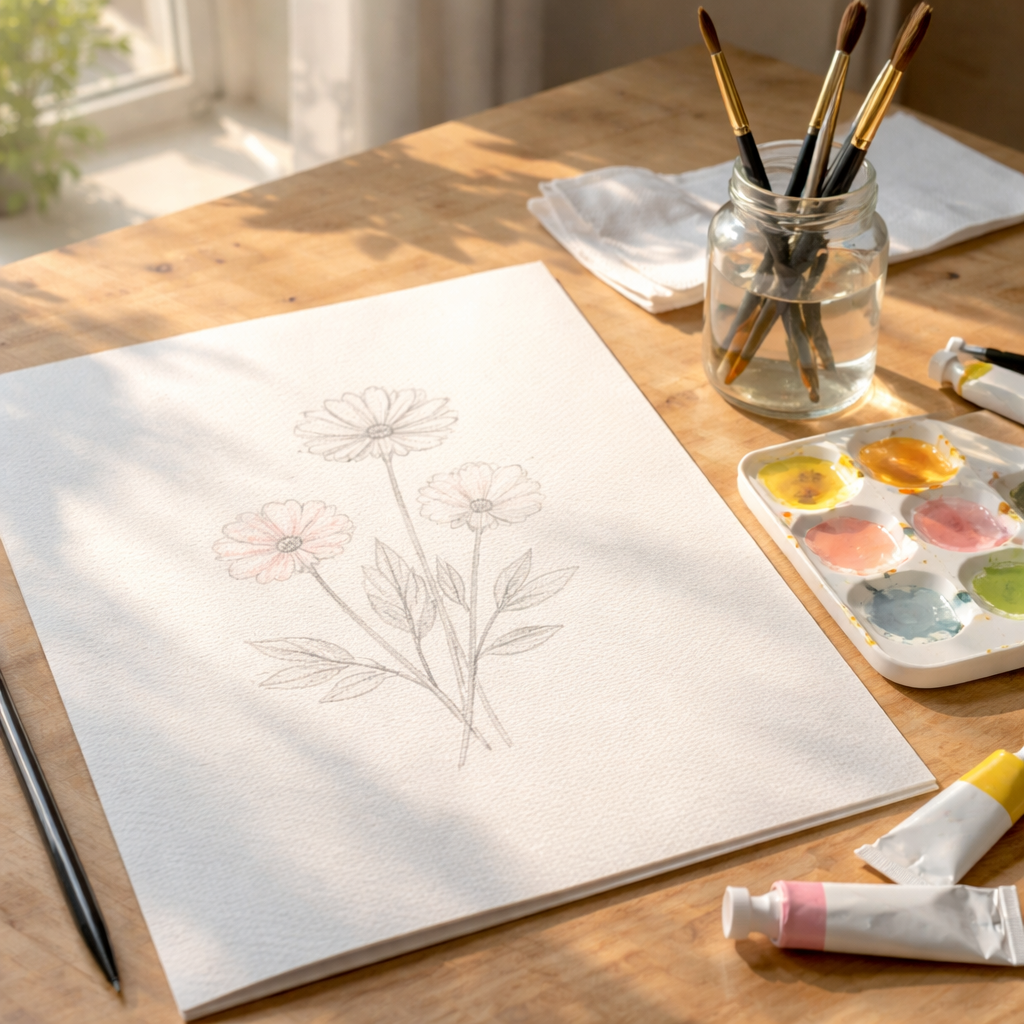
Step 1: Sketching Your Design
Before any colour ever meets paper, you need a roadmap. Think of a sketch as the GPS for your gouache journey – it tells your brush where to go and saves you from wandering into a muddy cul‑de‑sac. Grab a soft‑lead graphite pencil (something that erases cleanly) and, for the next five minutes, block out the biggest shapes. No details yet, just the silhouette of a flower, a simple vase, or the outline of a favourite childhood toy. This quick gesture gets the brain humming and the hand loose.
Why does this matter for beginners? Because gouache is wonderfully forgiving – you can paint over mistakes – but every extra layer you add builds opacity. If your initial lines are wobbly, you’ll end up re‑working large sections, which can dull the vibrancy you’re after. A tidy sketch keeps the paint‑to‑paper ratio balanced, letting each wash stay crisp.
Actionable sketch routine
1. Set a timer for three minutes. Sketch the primary forms in light, broken strokes.
2. Label your focal points. A tiny “X” where the brightest highlight will sit, a “+” where a shadow deepens.
3. Step back. Look at the silhouette from a distance – does it read clearly? If not, adjust the proportions now, not after the paint dries.
Once you’ve got a confident outline, it’s time to think about value. Light‑to‑dark planning is a secret weapon for gouache because the medium dries matte, and you can layer lighter washes over darker ones, but not the reverse. Grab a piece of scrap paper and test a thin wash of your lightest colour. Does it stay translucent? If it looks chalky, add a drop of water; if it washes away, you’ve got too much water. This tiny experiment saves you from a whole canvas of “muddy” later.
Real‑world example: One of our CreativiU community members, a freelance illustrator, always starts with a 30‑second “gesture sketch” of a character’s pose. She then adds a quick value map – dark areas get a light grey wash, highlights stay the paper colour. When she finally reaches for gouache, the colours sit on a pre‑established value field, and the result feels like a polished illustration rather than a trial‑and‑error mess.
Choosing the right tools for the sketch
Use a #2 graphite pencil for most projects; it’s dark enough to see but easy to erase. If you’re working with kids, a colour‑lead pencil in a soft hue can double as a playful colour guide. Keep a clean eraser handy – a kneaded eraser works wonders for lifting stray lines without tearing the paper.
Tip: If you’re feeling adventurous, try a faint wash of diluted gouache (just a hint of water) over the sketch. This “wet‑under‑drawing” lets you see how the paper reacts to moisture and gives you a sense of how the final layers will behave.
Now, let’s bring the sketch into the gouache world. Place your paper on a flat, well‑lit surface. Position your palette within arm’s reach, and keep a small cup of clean water nearby. When you’re ready, load a medium‑size round brush with a thin wash of colour and follow the lightest lines first. Work from background to foreground – this is the classic “back‑to‑front” approach that prevents accidental colour bruising.
Pro tip from our experience: after you finish the first wash, let it dry just until it feels tacky (about 5‑7 minutes on a 140 lb paper). Then go back in with a slightly thicker mix for the mid‑tones. The tacky surface acts like a subtle “glue,” keeping the next layer anchored without muddying the previous one.
Need a deeper dive into sketch‑to‑paint workflow? Check out How to Choose and Get the Most from Online Acrylic Painting Classes for Beginners for a comparable step‑by‑step breakdown that works just as well with gouache.
Finally, give yourself a quick confidence boost: photograph your sketch, flip it over, and imagine the colours you’ll use. This tiny mental rehearsal tricks your brain into visualising the finished piece, which research shows improves accuracy and reduces paint waste.
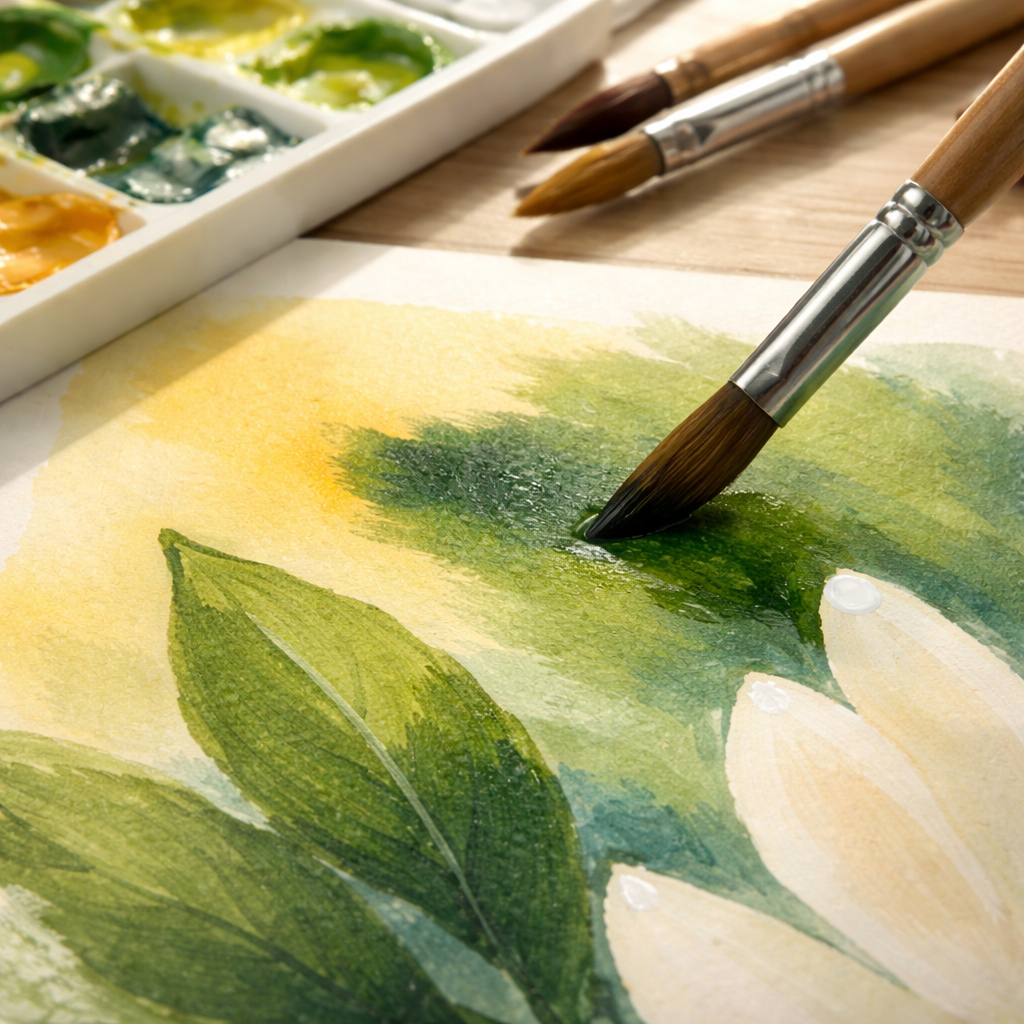
Step 2: Applying Base Layers
Alright, you’ve got your sketch ready and your paints mixed. Now it’s time to lay down those first washes – the base layers that set the colour mood for everything that follows.
Think of the base layer as the under‑painting in a photograph: it’s not the final image, but it tells the camera (your eyes) what to expect. For beginners, the trick is to keep it thin, even, and slightly tacky before it dries completely.
Why thin washes matter
If you dump a bucket of paint onto the paper, you’ll end up with a soggy mess that pulls pigment into the fibres and makes later layers look muddy. A thin wash – roughly the consistency of watered‑down milk – sits on the surface, letting you preserve the vibrancy of each colour you add later.
In our experience, using a round #6 brush loaded with just a whisper of paint gives you that delicate veil. Load the brush, tap off excess, and glide across the paper in long, confident strokes.
Step‑by‑step base‑layer routine
1. Choose your first colour. Usually a light hue that matches the overall sky or background tone. Dilute it until it feels like honey‑thin water.
2. Test on a scrap corner. Look at how it spreads and how quickly it dries to a matte finish. Adjust water if it beads or runs too fast.
3. Paint the area. Work in sections, moving from one edge to the next. Let each swipe overlap slightly – this prevents harsh lines.
4. Check the tack. After 5‑7 minutes (on 140 lb paper), run a fingertip lightly over the wash. It should feel just a bit sticky, not wet. That tackiness is your “glue” for the next layer.
5. Repeat with a second wash. Pick a slightly richer colour for mid‑tones. Because the first layer is tacky, the second one adheres without bleeding into the first.
Does it feel a bit intimidating? Remember, you’re not trying to perfect every brushstroke. The goal is a smooth, even tone that you can build on.
Common pitfalls and how to dodge them
• Over‑watering. Too much water makes the paper swell, causing the wash to pool. Keep a spray bottle handy and mist only when the paper looks too dry.
• Rushing the dry‑time. If you add a second layer while the first is still wet, the colours merge and you lose the crispness you worked for. Set a timer – 10 minutes is a safe window for most homes.
• Using the wrong brush. A flat brush can lay down a uniform wash, but a round brush gives you more control over edges. Switch depending on the shape you’re filling.
Quick checklist before you move on
| Task | Tool/Material | Tip |
|---|---|---|
| Mix thin wash | Round #6 brush + water | Consistency like thin honey |
| Test tackiness | Finger or soft cloth | 5‑7 minutes on 140 lb paper |
| Apply second layer | Mid‑tone colour, same brush | Work while first layer is tacky |
Once your base layers are dry to a matte finish, you’ll notice how the colours you add later stay vibrant instead of turning into a muddy brown.
If you’re looking for a structured guide that walks you through each of these steps with video demos, check out our step‑by‑step gouache painting techniques course. It breaks down base‑layer application, timing, and brush selection in bite‑size lessons that fit into a coffee‑break.
So, what’s the next move? Grab your brush, trust the tacky surface, and let those thin washes become the foundation for a painting you’ll be proud of.
Step 3: Adding Details & Blending
Now that your base washes have settled into a matte, tacky skin, it’s time to start the fun part – adding the details that make a painting feel alive. This is where you turn a flat colour field into a story you can almost hear whisper.
Why the tacky surface matters
When the first layer is just a little sticky, the next brushstroke adheres like a gentle glue. That little “bite” lets you lay a darker hue on top without it bleeding into the lighter undercoat. If you skip that sweet spot, the colours will merge and you’ll end up with a muddy patch you’ll hate.
So, before you dip your brush again, run a fingertip over a hidden corner of the paper. If it feels a touch tacky – not wet, not dry – you’re good to go.
Choosing the right brush for details
We’ve talked about flat vs round brushes for washes. For details, a small round #2 or a fine liner works best. The tip should hold just enough paint to lay a crisp line, but not so much that it sags.
Tip: load the brush, then flick it against the side of the palette. This removes excess water and gives you a tighter line – a trick we’ve seen work wonders for hobbyists who want clean edges without a lot of cleanup.
Layering with colour temperature
Think of colour temperature like a warm‑to‑cool gradient that guides the eye. Warm colours (reds, oranges, yellows) push forward; cool colours (blues, greens, violets) recede. When you add details, start with the warmest lights on the parts you want to pop, then pull back with cooler shadows.
For example, if you’re painting a simple flower, lay a thin warm‑yellow wash for the petal tips, then blend a cool‑green shadow just behind the centre. The contrast will give the bloom a three‑dimensional feel without extra strokes.
Blending tricks without muddying
One of the biggest beginner fears is that blending will turn everything into a brown soup. Here’s a gentle method: after you’ve placed a darker detail, immediately soften the edge with a clean, damp brush (just a hint of water). Lightly sweep over the line – you’ll see the colour melt into the layer beneath while keeping the hue distinct.
If you want a smoother transition, try the “dry‑on‑wet” technique. Keep the underlying layer tacky, then use a dry brush loaded with a tiny amount of colour. Drag it across the edge; the dry bristles catch just enough pigment to create a feathered blend.
Adding texture with dry‑brushing
Dry‑brushing is a secret weapon for texture – think bark, fur, or the subtle grain of a stone. Grab a flat brush, dip it into paint, then scrub most of the colour off on a paper towel. Lightly sweep the brush over the raised areas of your paper. The result is a broken, almost sketch‑like texture that adds depth without heavy layering.
Because gouache re‑activates with water, you can come back later and soften any dry‑brush marks if they feel too harsh – just mist the area lightly and blend with a clean, damp brush.
Highlighting with opaque white
Remember the opaque white we saved earlier? It’s your best friend for crisp highlights. While the layer you’re working on is still tacky, dab a tiny dot of pure white on the brightest spot – a leaf tip, a glass sparkle, or the edge of a highlight on a fruit. The white will sit on top, not mix, giving you that punch of light that makes a painting pop.
Don’t be shy about using it. A single, well‑placed white can turn a flat colour into a miniature light source.
Quick checklist before you step back
- Confirm the base layer is tacky, not wet.
- Pick a fine round brush for crisp lines.
- Use warm colours for highlights, cool colours for shadows.
- Blend with a damp brush or dry‑on‑wet technique.
- Add texture with dry‑brushing where appropriate.
- Finish with a tiny opaque white highlight.
Once you’ve walked through those steps, take a step back and look at your work from a few feet away. Does the image read clearly? Are the details guiding the eye where you want them?
If you’re craving more guided practice, our step‑by‑step gouache painting techniques course walks you through each blending method with video demos and community feedback, so you can experiment confidently.
And remember, the goal isn’t perfection on the first try – it’s building a habit of observation, layer control, and playful experimentation. Keep your brush moving, trust the tacky surface, and let those details bring your gouache piece to life.
Tips for Beginners
Okay, you’ve got your sketch and the first wash is drying to that perfect, slightly tacky skin. Now comes the part that trips up most newcomers: turning those happy little strokes into a finished gouache piece without turning everything into a muddy brown mess.
First, keep an eye on your water‑to‑paint ratio. If the mix looks like milk, you’re in the sweet spot – thin enough to glide, but still opaque when it lands. A quick test on a scrap corner of paper will tell you if it spreads too fast (add a drop of paint) or beads (add a drop of water). This tiny habit saves you from re‑working large areas later.
Second, work on a tacky surface, not a completely dry one. When the first layer feels just a bit sticky to the fingertip, you can lay the next colour on top and it’ll adhere without bleeding. If you’re not sure, set a timer for 5‑7 minutes after each wash; that window works for most 140 lb papers.
Third, simplify your palette. Stick to the three primaries, white and black, and mix the rest. Fewer tubes mean fewer chances to accidentally introduce a muddy hue. When you need a specific shade, mix a tiny amount, test it, then label the cup – a habit we see even seasoned illustrators swear by.
Fourth, use the right brush for the job. A round #6 works wonders for thin washes and gentle blending, while a tiny #2 or liner gives you crisp lines for details. Load the brush, tap off excess on the palette edge, then flick it against the side of the cup. That quick flick removes surplus water and gives you tighter control – a trick we love because it cuts down on accidental smudges.
Fifth, embrace dry‑brushing for texture. After a layer has dried, dip a flat brush lightly in paint, blot most of it on a paper towel, and sweep across raised areas. The result is a broken, sketch‑like texture that suggests bark, fur, or stone without adding heavy pigment. Because gouache re‑activates, you can always go back with a damp brush to soften anything that feels too harsh.
Sixth, keep your workspace tidy and your tools within arm’s reach. A cluttered desk steals minutes you could spend painting, and those minutes add up to frustration. Arrange paints on the left, water jars on the right, and the palette in the middle – a semi‑circle that cuts the “where’s‑that‑brush?” loop in half.
Seventh, protect your highlights with opaque white while the underlying layer is still tacky. Dab a tiny dot on the brightest spot – a leaf tip, a glass sparkle, a petal edge – and the white will sit on top, not blend away. It’s the quickest way to add that punch of light that makes a flat colour pop.
Eighth, give yourself a quick visual checkpoint every few strokes. Step back about three feet, squint, and ask yourself: does the eye flow where I want it? If something feels off, lift the brush, let the area dry, then correct with a thin glaze. A glaze is just a very diluted wash, and because the base is tacky, it adheres without muddying.
Finally, make practice a habit, not a marathon. Set a timer for 15 minutes each day, pick a single technique – maybe the dry‑brush texture or the white highlight – and repeat until it feels automatic. Consistency beats occasional long sessions any day.
If you want a structured path that walks you through each of these habits with video demos and community feedback, check out our comprehensive gouache painting course. It breaks down everything from mixing ratios to layering tricks, so you can move from “I’m stuck” to “I’m flowing” faster.
Conclusion
We’ve walked through the whole journey of how to paint with gouache for beginners, from setting up a tidy workspace to mastering the tacky window and adding confident details.
So, what does that mean for you right now? It means you already have a simple checklist you can stick to: grab heavyweight paper, mix a thin wash, wait for that sweet tacky feel, then layer up with thicker mixes.
If you’re a hobbyist, try turning a quick sketch into a printable card and share it on CreativiU’s marketplace. Creative entrepreneurs can package that same piece as a digital product and start earning while you keep practicing.
Parents, involve the kids in the timer‑based routine – a single highlight or a dab of color is enough to keep them engaged and proud of the result.
Remember, gouache is forgiving. A mistake is just an opportunity to re‑wet and reshape. Keep a spray bottle handy, set a kitchen timer, and let each layer dry before the next.
What’s the next step? Pick a subject you love, set your timer, and let those first thin washes flow. When you finish, snap a photo, note what worked, and jump back in tomorrow.
Ready to level up? Dive into a structured online course on CreativiU – the community support and step‑by‑step videos will keep your momentum going.
FAQ
What basic supplies do I need to start how to paint with gouache for beginners?
At the very least you’ll want a pack of student‑grade gouache (primary colours plus white and black work fine), a heavyweight 140 lb cold‑pressed paper, a couple of synthetic round brushes (sizes 6 and 8 are versatile), two jars of clean water, and a palette or disposable plate. A spray bottle helps you reactivate the tacky surface, and a kitchen timer keeps the drying windows honest. All of these items are cheap enough to grab on a weekend trip to the craft store.
How do I know when the paper is in the “tacky window” and ready for details?
After you lay down a thin wash, wait about 5–7 minutes on 140 lb paper, then lightly touch the surface with the tip of your finger. If it feels a gentle resistance – like a post‑it that’s just barely stuck – you’re in the sweet spot. That tackiness lets highlights and fine lines sit on top without sinking or smearing. Set a kitchen timer each time you finish a wash; when it dings, do the fingertip test.
Why should I start with thin washes instead of dumping thick paint?
Thin washes dry quickly, stay transparent, and give you a clear view of the colour underneath. If you start heavy, the paper swells, colours blend into a muddy mess, and you lose control over opacity. By building up layers – thin first, then slightly thicker mid‑tones – you maintain vibrancy and avoid the dreaded “muddy green” that many beginners experience. Plus, thin layers let you re‑wet the paper for smooth blending later.
Can I fix a mistake once the gouache has dried?
Absolutely. One of gouache’s biggest perks is its opacity. If a colour looks off, wait for the layer to dry completely, then paint over it with a fresh mix. You can also lift a mistake with a damp cotton swab before the next layer dries. For stubborn spots, lightly mist the area, let it become tacky again, and re‑apply the correct hue. This forgiving nature keeps the learning curve friendly.
How often should I clean my brushes while painting?
Every time you switch colours, rinse the brush in clean water, swirl, and gently pat it on a paper towel. Gouache dries fast, so a brush left in pigment will harden and lose its shape. If you’re working on a larger piece, keep a second brush handy for “wet‑on‑wet” blending while the first stays clean. A quick rinse between washes prevents unwanted colour contamination and keeps your strokes crisp.
What are some quick ways to involve kids in a gouache session?
Kids love the tactile feel of gouache, so keep the activity short and focused. Give them a single colour to experiment with a thin wash, then set a timer for 10 minutes. After the wash dries, let them add one white highlight or a simple dot of a second colour. The limited steps keep them engaged, and the quick drying time means you can stack a few mini‑projects in one sitting without frustration.
How can CreativiU help me keep the momentum after I finish a beginner painting?
CreativiU offers on‑demand courses that break down each stage of gouache – from workspace setup to layering techniques – into bite‑size lessons you can fit into a busy schedule. The community forums let you share photos, get feedback, and see how other hobbyists and entrepreneurs turn their practice pieces into printable products. By joining a structured course, you get a clear roadmap and peer support to keep painting regularly.
Leave a Reply