You’ve probably seen the soft glow of soy candles on someone’s desk, a little jar glowing in the corner of a living room, and thought, “That’s pretty cozy.” It’s a familiar sight, right?
Ever wondered why soy is a favorite among DIYers? It’s not just about the mellow scent; it’s about the feel, the burn, the way it sticks to the walls of your mind.
What if you could take that cozy glow, mix in your favorite aromas, and create something that feels as personal as a handwritten note? That’s the promise we’re making here: you’ll learn how to make soy candles with essential oils in a way that feels more like an art project than a recipe.
We’re not about quick hacks or fluff. We’re about the little details that make a difference: the right blend of soy wax, the right proportion of essential oils, the safe way to heat and pour. Think about the moment you first lit a candle and felt that warm, fragrant embrace—can you replicate that? That’s the goal.
So, let’s start with a quick mental checklist: you need soy wax, a double boiler, a thermometer, essential oils, wicks, and a container that feels right. No fancy equipment, just the basics that a home crafts enthusiast can find in any kitchen or hobby store. If you’re a parent looking for a calming activity for the kids or a creative entrepreneur wanting to add a signature scent to a product line, this guide is built for you.
What’s next? First, we’ll break down the science of melting and mixing. Then we’ll dive into how to choose oils that complement each other. We’ll walk through the pouring process so the finish is smooth, not streaky. Finally, we’ll show you how to test the burn and tweak the formula for the best scent throw. Ready to bring that aromatic glow into your own space? Let’s dive in.
TL;DR
Grab soy wax, a double‑boiler, a thermometer, essential oils, a wick, and a jar, then melt the wax to 185°F, cool to 135°F, add oils, pour, set, and test a small batch, tweaking scents for the perfect hand‑made candle.
With these simple steps, you’ll create a fragrant, clean‑burning soy candle that feels personal and professional—perfect for personal use, gifting, or starting a small candle line.
Step 1: Gather Supplies and Tools
Before you dive into melting soy, think about the vibe you want your candle to bring. Is it a cozy winter night or a breezy summer morning? The right tools set the stage, so let’s make sure you have everything handy.
First up, soy wax. Look for a grade that melts cleanly—often labeled “candle wax” or “soy wax flakes.” A little goes a long way, but buying a small block lets you experiment without waste.
Next, a double‑boiler or a two‑pot setup. A pot of simmering water in a larger pot keeps the wax from scorching. If you’re in a hurry, a microwave‑safe container with a heat‑resistant lid does the trick, just stir every 30 seconds.
You’ll need a reliable thermometer. A digital probe that reads to the nearest degree is perfect. It’s the difference between a wax that’s too hot and a candle never catches a proper scent throw.
Wicks are the unsung heroes. Choose a cotton wick size that matches your jar’s diameter. If you’re unsure, start with a #2 or #3 and adjust based on how the candle burns. A wick too thick can scorch the edges; too thin and your candle won’t stay lit.
Containers matter, too. Glass jars give a classic look, but metal tins or even recycled teacups can be fun. Make sure whatever you pick can handle the heat—most glass is fine, but if you’re using a tin, double‑check that it’s heat‑safe.
Essential oils bring the scent. Pick oils that complement each other—lavender with lemon, cedarwood with vanilla—for a warm, earthy feel. Stick to 1–5% oil by weight. Too much can make the flame flicker; too little leaves the candle almost scentless.
Finally, a stirring stick, a scale, and some safety gear: oven mitts, eye protection, and a well‑ventilated space. A scale ensures you’re using the right amount of oil, and a sturdy stick keeps the mix from splashing.
With everything laid out, you’re ready for the next step: learning how to melt and mix soy for the perfect fragrance. Here’s a deeper dive into soy wax melting techniques.
Before we get into the heat, check out this quick visual guide to the equipment layout:
Now, picture your workspace: a neat, organized station that feels like a studio. This helps prevent mistakes and lets you focus on the scent journey.
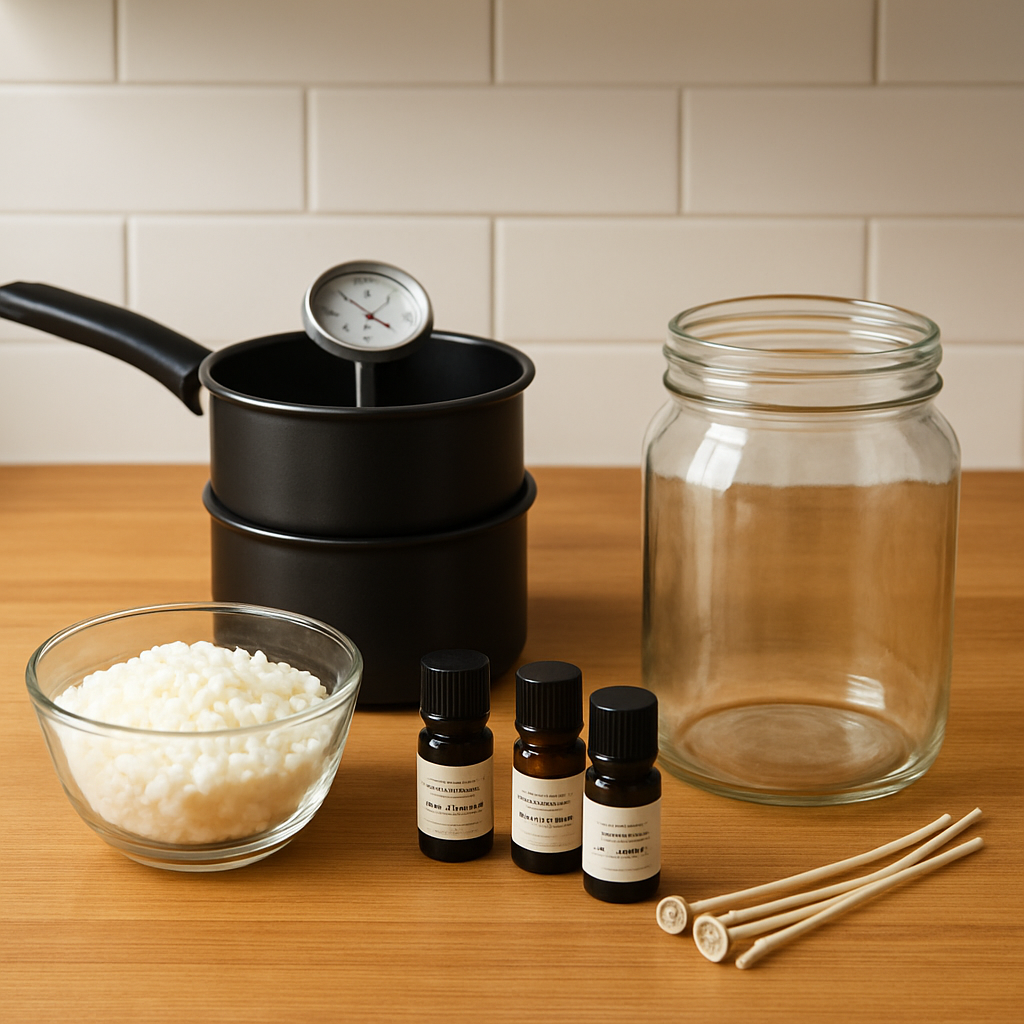 [/IMAGE]
If you’re thinking about packaging your finished candles, JiffyPrintOnline offers customizable stickers and labels that can add a professional touch. And if you’re planning to sell or keep track of your craft, ESC Hub provides an all‑in‑one tool to manage inventory, sales, and finances.
Now that your gear is ready, let’s move on to the science of melting—because the right temperature is what brings the scent to life.
Step 2: Melt Soy Wax Safely
Now that you’ve got your gear lined up, it’s time to turn that cold, solid wax into a smooth, pour‑ready liquid. Think of the process like making a sauce—heat it gently, watch the temperature, and stir until everything’s melted together.
Use a Double Boiler
The safest way to heat soy is a double boiler. If you don’t have one, a sturdy saucepan over a smaller pot works fine. The key is indirect heat so the wax never hits a direct flame, which can cause hot spots and uneven melting.
Start with low to medium heat and give the wax a few minutes to soften. Stir every 30 seconds; soy wax can take 10‑15 minutes to fully melt depending on your batch size.
Monitor the Temperature
Accuracy matters. A digital thermometer that reads to the nearest degree gives you real confidence. Aim for 185°F (85°C)—that’s the sweet spot before you add fragrance or essential oils. If you’re working with a 1‑lb batch, you’ll see the temperature rise steadily as the wax thins.
Why 185°F? At that range the wax is fluid enough to mix, but not so hot that you’ll scorch the oils. It also keeps the scent molecules intact for a stronger throw. This temperature control also keeps the wax from scorching, which can leave a bitter taste behind.
Add Fragrance at the Right Time
When the wax reaches 185°F, take the pot off the heat and let it sit for a minute. Drop in your pre‑measured essential oil—about 6–10% of the wax weight. Stir gently for two minutes; that slow motion helps the oil distribute evenly.
Keep in mind that essential oils have lower flashpoints than fragrance oils. If you’re using a pure essential oil, let the wax cool to about 160°F before adding it to avoid losing the aroma.
Keep the Warmth Without Overheating
After adding fragrance, you’ll need to lower the temperature to a pouring range of 120–140°F. This cools the wax just enough to pour smoothly without shocking the wax, which could create bubbles or a rough surface.
Use a small cooling towel or a heat‑resistant spatula to help dissipate heat if your stove runs hot. A quick tap of a cold plate can also help bring the wax down faster.
Test the Wax
Before pouring, test a tiny amount in a small jar. If it sets cleanly and the scent feels right, you’re good to go. If you notice any discoloration or a greasy film, it might be time to reheat slightly.
Remember, every batch can behave a bit differently, so keeping a log of temperatures and times helps you tweak future batches.
Tip: Keep a Log
Jot down the wax weight, heat duration, temperatures, and fragrance load. That simple habit saves time when you’re scaling up or experimenting with new scents.
By mastering the timing and temperature, you’ll avoid common pitfalls like uneven pour, scent loss, or uneven burn. That’s why this step is as much about science as it is about art.
For a deeper dive into why timing matters, check out this detailed guide on timing and temperature in soy candle making.
Step 3: Add Essential Oils and Fragrance
Now that the wax is happily tumbling at 185°F, the real fun begins—adding the scents that turn a plain jar into a mood‑setting statement. Think of it like seasoning a pot: a little goes a long way, and timing is everything.
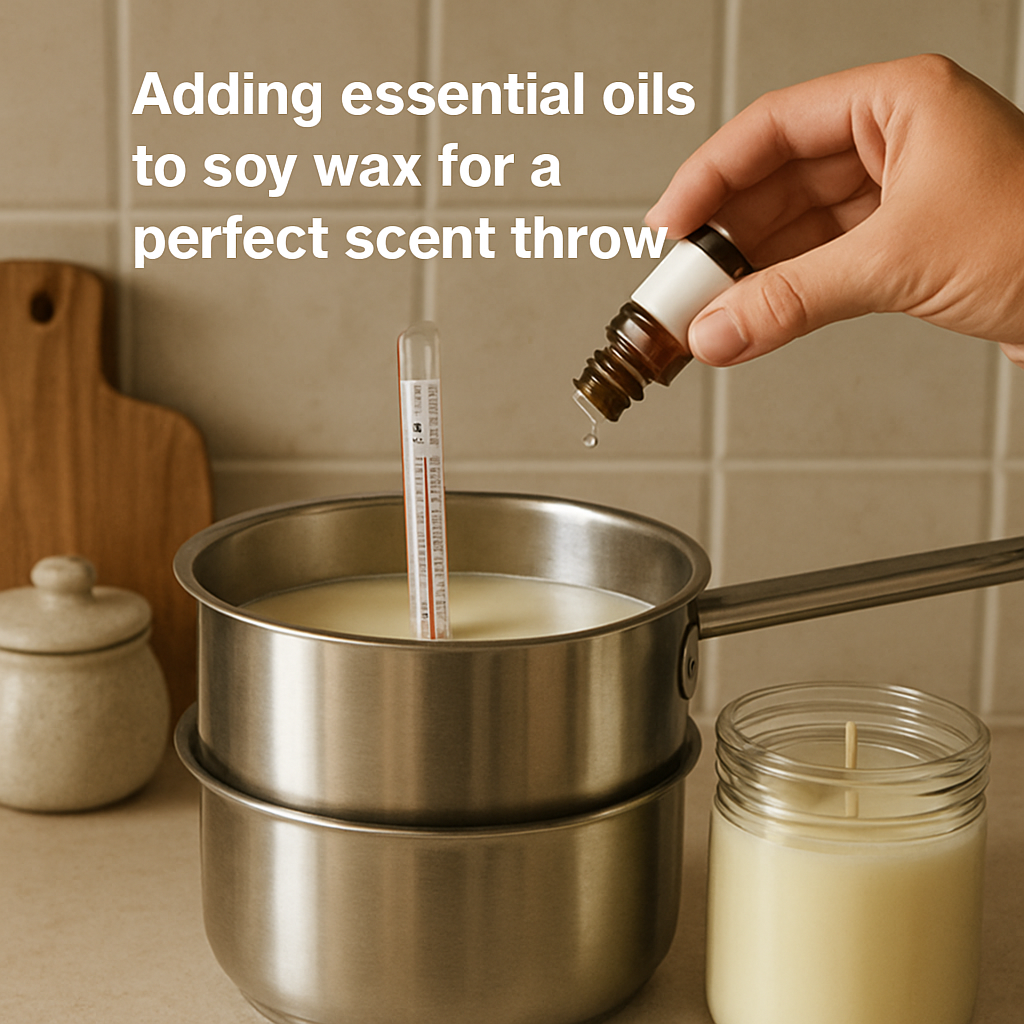
First, pull out the essential oils you’ve pre‑measured. In our workshops we’ve found that 6 % of the wax weight is the sweet spot for most pure oils—so for a 1‑lb batch, that’s roughly 6 oz of your favorite blend.
Tip: Use a glass dropper or pipette so you don’t spill. Drop the oil into the pot, then stir in a slow, circular motion for two full minutes. This gives the molecules time to mingle with the wax without burning off.
Wondering about the best oils? If you love calm, try lavender or chamomile; for a fresh, citrus kick, go lemon or grapefruit. Mix two or three oils in a 2:1 ratio—this keeps the scent balanced and avoids any single note overpowering the others.
Now, let’s talk temperature. Pure essential oils have lower flash points than fragrance oils, so it’s wise to let the wax cool to about 160°F before adding them. If you’re using a fragrance‑oil blend, 185°F is fine, but always check the manufacturer’s recommended temp.
What if you’re worried about scent loss? The trick is to let the wax rest for a minute after adding the oil, then stir again for another minute. The rest allows the heat to dissipate a bit, preventing the volatile compounds from evaporating.
For hobbyists, a small bottle of a “scent‑throw” test (just a few drops in a paper cup) can show you whether your blend is strong enough. If it’s faint, you can bump the load to 7–8 %—just remember to keep an eye on safety.
Once you’re happy with the aroma, it’s pouring time. Lower the temperature to the 120–140°F range. If your stove runs hot, slide a cold towel over the pot’s surface; this gentle cooling prevents splatter and keeps the wax silky.
As the wax pours, keep the wick centered by gently nudging it with a stick or a wick‑sizer. When the pour slows, give the jar a gentle shake—this helps release any air bubbles that might otherwise show up as unsightly lines.
After the wax has set, trim the wick to about a quarter‑inch. This small step prevents a high flame and a long burn time that can scorch the edges.
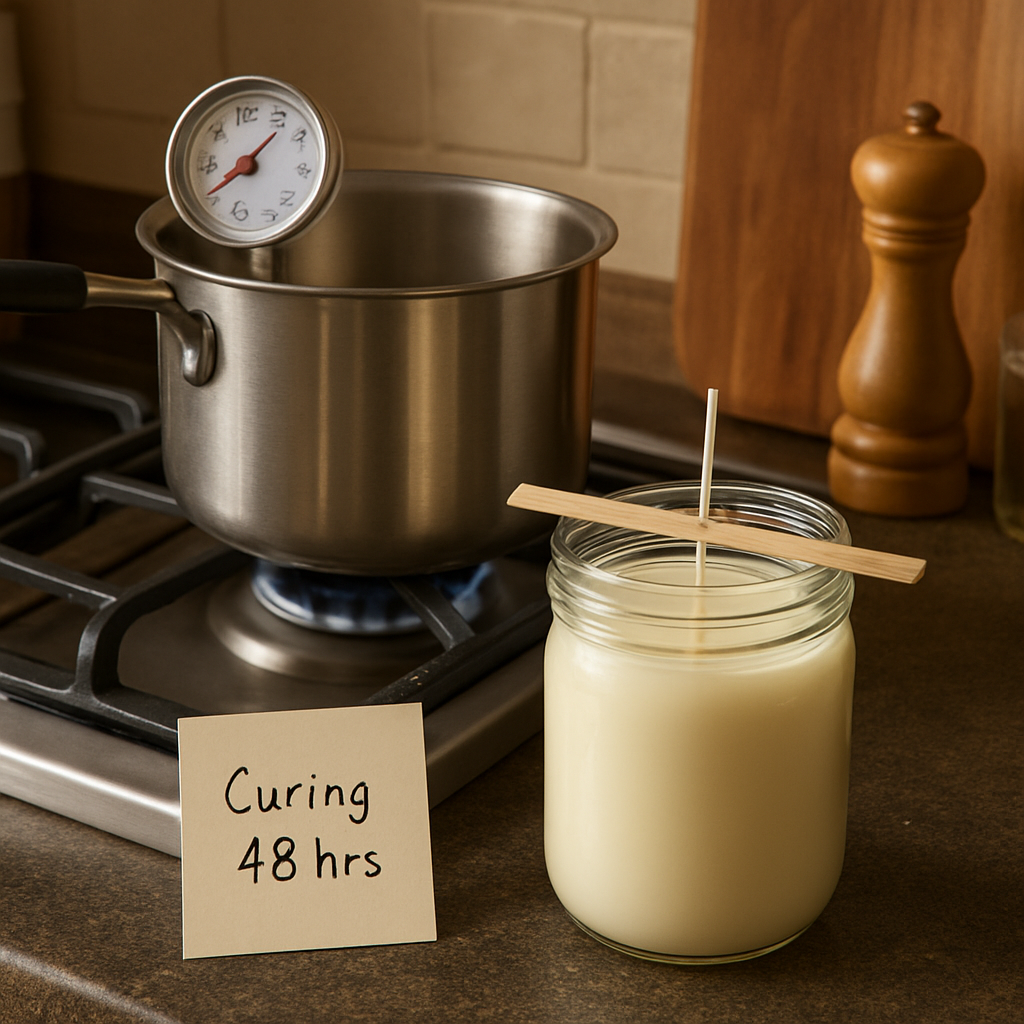
Now, here’s the part that makes your candle truly shine—curing. Let the candle sit, undisturbed, for 48 hours before the first light. During this period, the wax hardens, the scent diffuses, and the colors deepen.
And if you’re thinking about turning this into a product line, keep a detailed log: batch number, oil ratios, pour temp, and burn time. That data turns a hobby into a professional recipe.
For a deeper dive into selecting the perfect oil blend, check out our beginner‑friendly candle‑making guide, which walks you through blending basics and safety tips.
Also, if you’re planning to sell your creations online, a handy tool for budgeting a website is available here: Website Design Cost Calculator. It helps you map out expenses before you start building.
Step 4: Prepare Molds and Containers (Comparison Table)
Now that your wax is ready to pour, the next big decision is: what’s the home for your candle?
It’s not just about picking a pretty jar—think about how the container will hold heat, how it looks on a shelf, and whether it’s reusable.
What’s out there?
You’ve probably seen the classic mason jar, the sleek tin, and the ever‑flexible silicone mold. Each has its own vibe and quirks.
Let’s break them down.
| Container Type | Pros | Cons |
|---|---|---|
| Mason Jar | Affordable, sturdy, great for a DIY look. | Can crack if poured too hot; not always airtight. |
| Tin Candle | Heat‑resistant, great for travel, keeps scent tight. | Requires a wick holder, can be expensive. |
| Silicone Mold | Easy release, reusable, fun shapes. | Not a finished container—need a secondary jar. |
Before you pick, ask yourself a few quick questions: what’s the candle’s purpose—personal use, gifting, or resale? What size do you need? Do you want a reusable vessel or a one‑time mold?
Mason jars are the go‑to for home‑made gifts. Their thick glass handles the heat fine, and the clear glass lets you see the wax swirl. If you’re worried about cracks, pre‑heat the jar in the oven for a minute and let it cool—this reduces sudden temperature changes.
Tin candles shine when you’re after a sleek, travel‑ready vibe. Because the metal conducts heat, you need to place a wick holder or a small metal cup in the center to keep the wick from leaning. Tins also hold fragrance well, so you can bump the oil load a bit higher without burning.
Silicone molds are your creative playground. They let you craft shapes—stars, hearts, even tiny animals. The trick is to line the mold with parchment paper or a silicone release spray so the candle comes out clean. Remember, silicone isn’t a finished container; you’ll still pour the wax into a jar or glass once it sets.
If you’re selling online, think about packaging. Tin candles pair nicely with a branded cardboard box, while mason jars can be shipped with a simple kraft paper sleeve. Silicone shapes can be wrapped in clear plastic for a professional look.
No matter the choice, keep the wick centered. A quick way is to use a wick bar—just a pencil or chopstick with a metal tip. Slide it under the center and let the wick sit straight. This tiny step prevents uneven burn and keeps the candle looking tidy.
Temperature control is still king. Even a perfect jar will burn badly if poured too hot. Use a digital thermometer and keep the wax at 135°F. If you’re pouring directly into a silicone mold, you can pour a little cooler—around 125°F—to help the mold hold its shape.
Don’t forget to test the pour. Drop a small amount of wax onto a piece of parchment paper; if it spreads smoothly without streaks, you’re good. If it looks rough, give it a quick stir or let it cool a bit longer.
Now you’re ready to bring your design to life. Whether you’re a parent making a calming room scent or a budding entrepreneur crafting a signature line, the right container turns a simple candle into a polished product.
Want to dive deeper into the art of scent blending? Check out this guide from The Everyday Farmhouse for a treasure trove of essential oil pairings.
If you need a quick visual recap, this video shows how to choose and test containers for optimal burn.
Now grab your favorite container, pour that smooth, scented wax, and let the magic happen. Your next candle will look as good on the shelf as it smells in the room.
Step 5: Pour, Set, and Cure the Candles
Alright, the wax is ready to meet its new home. Before you lift that ladle, pause for a quick breath. You’re almost there—just the final splash and a few days of patience to get that perfect scent throw.
First things first: keep the temperature steady at about 135°F (57°C). If you’re working with a silicone mold, you can push a notch lower, to around 125°F, so the wax doesn’t cling too hard and the shape stays crisp.
Center the wick, then pour
Grab a wick bar or a chopstick with a metal tip. Slide it under the wick, push it straight, and make sure the wick stays centered as the wax begins to flow. A tilted wick means a tunnel‑burn later on. Some folks drop a small paper towel in the bottom of the jar first to catch any drips—nice trick for a clean edge.
When you start pouring, do it slowly and in a single stream. A steady pour reduces bubbles. If you notice a little stream, pause for a second, let the wax settle, then continue. This technique is especially handy when you’re aiming for a flawless surface on a clear mason jar.
First set—cooling down the first few inches
As soon as the wax reaches the rim, give the jar a gentle tap on the counter. It helps release any trapped air and makes the wax surface smooth. Don’t rush to the next step; let the wax cool until it’s no longer tacky but still soft to the touch—about 10 to 15 minutes after the pour starts.
During that cooling window, keep an eye out for visible cracks or warping. If you see a crack, you can often smooth it out by gently pressing the wax back together with a clean utensil. Remember, this is a small adjustment; you’ll still get a solid candle once it’s fully set.
Trim the wick, set the fragrance, and let it rest
When the candle has cooled to room temperature—usually 2 to 3 hours depending on the size—remove the wick bar. Trim the wick to about a quarter‑inch. This short tip reduces the risk of a large, unburnt ember that can scorch the edges.
Now the magic part: curing. Place the candles in a dry, dark area with stable temperatures. Avoid direct sunlight and vents, as they can cause uneven drying. The best cure time is 48 to 72 hours. That’s when the fragrance molecules fully bind with the wax, giving you a richer, longer scent throw.
Some hobbyists keep a small journal or a digital log in the CreativiU community to note when each candle cures. It’s a simple habit that turns a craft hobby into a data‑driven hobby, especially handy if you’re planning to sell or gift your creations.
If you’re curious how professional kits handle curing, check out CandleScience’s guide on soy candle making for industry standards.
Once your candle has cured, it’s ready to light. Light it for the first time in a draft‑free room to see how the scent and flame behave. If you notice any oddities—like a quick burnout or a weak fragrance—try adjusting the oil load next batch. Small tweaks can make a big difference.
Remember, patience is the secret sauce. A rushed cure can leave your candle smelling flat, just like a coffee left too long on the counter. Treat the wait as part of the ritual—just like you’d let tea steep before sipping.
And if you ever feel stuck or want to dive deeper into techniques and tips, the Candle Making for Beginners at Home: A Simple Step‑by‑Step Guide on CreativiU breaks down every nuance, from choosing the right wax to perfecting your pour.
Step 6: Finishing Touches and Decorating
Now that your soy candle’s glow is set, the real fun starts: adding that finishing flair. Think of it as the final paint stroke on a canvas—small touches that turn a good candle into a statement piece. You’re not just lighting a flame; you’re lighting a mood. Ready to make it personal?
First, give your jar a clean look. A light wipe with a cotton ball removes dust, letting the wax sit steady. You’ll notice the surface gleam instantly, almost like a polished marble. That clean base makes any added décor pop.
Next, think about color. A simple dab of food coloring or a drop of liquid wax dye can transform the vibe. Small color shifts make big emotional leaps. For a deeper dive, see this guide.
If you’re into the DIY aesthetic, add a decorative rim. A thin line of metallic tape, a ribbon, or a small dried flower can become the candle’s signature. Position it where the flame will catch the light—this subtle glow gives the piece an extra layer of charm.
Labels are your branding canvas. Even a simple handwritten tag adds authenticity. Use a stamp, a wax seal, or a printed label that matches the scent profile. When someone pulls that jar out of a shelf, the label tells the story before the candle even lights.
Now, add a touch of natural décor. A sprig of lavender, a slice of citrus peel, or a small pinecone doubles as a scent enhancer and visual treat. Stick them gently into the wax, letting the essential oils seep out. The burst of nature makes the candle feel alive, like a living art piece.
If you love a bit of sparkle, sprinkle a few glitter flakes on top. Stir them into the wax before the first set, so they’re locked in. The sparkle catches light and adds a playful edge to the glow.
Even a subtle fragrance can fill a room if the candle’s wax and wick are balanced. Test the burn by lighting a small sample; if the scent wafts nicely, you’re golden. If it’s faint, trim the wick or add a touch more oil next time. Remember, a calm burn means a scent release.
Your candles are now a genuine, beautiful piece of your bright heart today.
Finally, take a breath and admire your work. The scent, color, and label show the care you poured into each jar. Light it and feel the reminder of your creative journey.
FAQ
Q: What supplies do I need to start making soy candles with essential oils?
A: First, grab a 100% soy wax block—those come in a range of colors and are easy to melt. A double‑boiler or a pot‑and‑pan setup, a digital thermometer that reads to the nearest degree, and a set of cotton or cedar‑wood wicks that match your jar size are the basics. Don’t forget a scale for measuring the oil, a heat‑resistant container for pouring, a wick centering tool, and a small clean‑up cloth. If you’re new, start with a 1‑lb batch to keep the math simple.
Q: How do I choose the right essential oils for my candle?
A: Picking oils feels like curating a playlist for your space. Decide the mood—relaxing, uplifting, or earthy—and then pair complementary scents. Lavender, chamomile, and sandalwood are great for calm; lemon, peppermint, or citrus blends energize. Mix two or three oils in a 2:1 ratio so one note doesn’t overpower the others. Always test a small sample: drop a few drops in a paper cup, light it, and check the scent balance.
Q: What fragrance load is safe and effective?
A: A safe fragrance load keeps the candle clean and the scent strong. For pure essential oils, aim for 6–8% of your wax weight. If using a fragrance oil blend, 10–12% is usually fine. Measure with a digital scale; a 1‑lb batch (454 g) needs about 27–36 g of oil. Too much oil can cause a strong flame and excess soot; too little makes the scent flat.
Q: How do I center the wick properly?
A: Centering the wick is a small step that saves a big problem later. Slip a wick‑centering stick through the bottom of the jar, then slide the wick on top and pull it straight. Press the stick a few inches deep and tap the jar gently to set the wick. If it’s off‑center, it’ll tunnel. Keep the wick about a quarter inch from the rim after the first set.
Q: What’s the ideal pour temperature for soy wax?
A: The ideal pour temperature is between 135–140 °F (57–60 °C). This range lets the wax flow smoothly without scorching the oils. If you pour too hot, you risk bubbles and a rough surface; too cool, and the wax can cling to the jar walls. Use the thermometer to stop the wax just before it starts to thicken, then pour in a steady stream.
Q: How long should I let the candle cure?
A: Curing gives the scent time to bond fully with the wax. After the candle has set and the wick trimmed, let it sit in a dry, draft‑free spot for 48–72 hours. This allows the fragrance molecules to disperse evenly, resulting in a richer scent throw. If you’re short on time, 48 hours usually suffices, but for the best performance aim for a full 72‑hour cure.
Q: What if my jar cracks during the melt?
A: Cracked jars often result from rapid temperature changes or over‑heating. To fix a minor crack, wipe the area, apply a tiny drop of soy wax melted to 135 °F, and smooth it with a butter knife. Let it harden for a few minutes. For larger cracks, replace the jar—it’s safer and gives you a fresh start.
Conclusion
When you finish that first jar, you’re already halfway to a brand‑new habit. The steps we walked through—measuring, melting, scenting, and curing—feel like a recipe, but the real magic comes from the moments you spend experimenting.
Do you notice how a simple tweak, like lowering the pour to 135°F, can change the finish from a little gritty to silky smooth? That’s the power of precision, and it’s something our community loves to test in their own studios.
What’s next? Treat the finished candle like a prototype. Light it in a quiet corner, note the scent throw, and jot any ideas for the next batch. A quick log—weight, fragrance load, pour temp—turns each candle into data you can reuse. That’s why we built our courses around “learning by doing.”
And remember, the beauty of soy wax isn’t just in the aroma; it’s in the sustainable story you share. A small jar of lavender‑infused soy can become a conversation starter at a family gathering or a thoughtful gift for a friend.
So grab your next set of oils, hit the stove, and keep iterating. Each candle is a chance to refine your craft, connect with other creators, and build a portfolio that feels as real as the scent that fills the room. Happy pouring!
Leave a Reply