Picture this: you’re curled up on the couch, the scent of fresh wax drifting through the room, and you’ve just poured your very first homemade candle.
Ever wonder why that tiny flicker feels so rewarding? It’s because candle making for beginners at home turns a simple hobby into a personal scent studio, right in your kitchen.
And the best part? You don’t need a fancy workshop or a mountain of tools. A few basic supplies—some wax, a wick, a pot, and maybe a favorite essential oil—are enough to get you glowing.
But let’s be honest, the idea of melting wax can sound a little intimidating. I felt that same flutter of nerves the first time I lifted a pot of paraffin over the stove, wondering if I’d end up a wax‑covered mess.
Here’s what I mean: the process is surprisingly forgiving. You’ll learn to control temperature, pick colors that match your mood, and watch the wax solidify into a candle that looks—and smells—just the way you imagined.
Think about it this way: each candle you make is a tiny experiment, a blend of art and science you can tweak each time. Want a stronger fragrance? Add a few more drops of oil. Prefer a longer burn? Choose a larger container.
And if you’re the type who loves a good story, imagine gifting a hand‑poured candle to a friend, explaining how you chose the scent because it reminded you of a summer road trip.
So, what should you do next? Grab a pot, melt some wax, and let the scent guide you. The first pour might be a bit uneven, but that’s part of the charm—no two candles are exactly alike.
By the end of this guide, you’ll have a clear roadmap, from picking the right wax to troubleshooting common hiccups, all while feeling confident enough to experiment on your own.
Ready to light up your creative side? Let’s dive in and turn that curiosity into a cozy, glowing reality.
TL;DR
Candle making for beginners at home lets you turn simple supplies into fragrant, hand‑poured candles that reflect your personality, all while learning easy temperature control, scent blending, and creative color tricks.
Follow our step‑by‑step guide, experiment with scents, and soon you’ll enjoy cozy glow evenings, personalized gifts, and the confidence to keep crafting brighter moments in your own kitchen.
Step 1: Gather Materials and Tools
Before you even think about melting wax, you’ve got to know what’s sitting on your kitchen counter. It sounds simple, but the right toolbox can mean the difference between a candle that burns cleanly for weeks and one that sputters out after a few minutes.
Wax: the heart of the candle
If you’re just starting out, soy wax is the go‑to choice for container candles. It gives an even burn, holds fragrance beautifully, and—bonus—creates almost no soot. That clean‑burn reputation isn’t just hype; the experts at General Wax Candle Making point out that soy wax offers the longest burn time and the cleanest performance for beginners. Plus, it’s plant‑based, so you’re not adding extra toxins to your home.
That said, don’t feel locked into soy forever. Beeswax, paraffin, and coconut blends each have quirks. Beeswax burns longest but costs more; paraffin is cheap and great for color‑intense taper candles; coconut wax blends mimic soy’s clean burn while staying vegan. For your first batch, stick with a small 1‑pound soy block—you’ll get a feel for melting points without breaking the bank.
Wicks: the unsung heroes
Choosing the right wick is like picking the perfect coffee grind: too thin and your flame flickers out, too thick and you get a smoky mess. For most 8‑oz glass jars, a cotton‑core wick labeled “size #4” works like a charm. If you’re using a scented oil blend, bump up to a #6 to keep the melt pool steady.
Pro tip: always test a wick in a scrap piece of wax before committing to your final jar. It’s a tiny step that saves you from a whole lot of disappointment later.
Containers and safety gear
Glass jars (think old jam jars or specialty candle jars) are the easiest for beginners. They distribute heat evenly and let you see the wax level as it cools. Avoid thin plastic containers—they can warp or even melt.
Don’t forget a heat‑proof pouring pitcher, a digital thermometer (aim for 185‑195 °F for soy), and a pair of silicone gloves. A simple wooden spoon or spatula works for stirring, but a silicone one won’t melt if you accidentally leave it in hot wax.
Fragrance and color
Essential‑oil blends or fragrance oils add personality. A rule of thumb: 1 ounce of oil per pound of wax gives a noticeable scent without overpowering. If you love a citrus‑mint combo, try ½ ounce orange essential oil + ½ ounce peppermint for a fresh summer vibe.
For color, liquid dye is mess‑free, while chip dyes give deeper hues. Add color when the wax hits around 170 °F; that’s when the wax is fluid enough to blend but still cool enough to lock the pigment.
Check‑list for a smooth start
- Soy wax (1‑lb block)
- Cotton‑core wick, size #4 (or #6 for heavily scented)
- Glass jar (8‑oz)
- Digital thermometer
- Heat‑proof pouring pitcher
- Silicone spatula
- Fragrance oil or essential oils
- Liquid or chip dye
- Silicone gloves
Print this list, stick it on your fridge, and cross off each item as you gather it. The act of checking off feels oddly satisfying—like you’re already halfway to a finished candle.
Real‑world example: Jenna’s weekend project
Jenna, a busy mom of two, decided to make a “home‑office boost” candle for her work‑from‑home desk. She grabbed a 1‑lb soy block, a #4 cotton wick, a 10‑oz amber glass jar, and a blend of rosemary and lemon essential oils. After melting the wax to 190 °F, she added ¾ ounce of fragrance and a few drops of amber dye. She poured, let it set for three hours, and now has a candle that not only smells amazing but also burns evenly for over 30 hours. Her secret? A quick wick‑test in a spare spoonful of wax to confirm the flame stayed steady.
Seeing Jenna’s success, you might think “I can’t mess this up.” And that’s the point—candle making for beginners at home is forgiving as long as you’ve got the right tools in front of you.
Now that you know what to gather, the next step is all about preparation: measuring, melting, and mastering temperature control. Ready?

Step 2: Choose the Right Wax and Fragrance
Now that you’ve got your tools in hand, the fun really begins – picking the wax that will be the heart of your candle and the scent that will turn it into a memory.
Wax types: what feels right for you?
Think of wax like the canvas for a painter. Soy wax is the go‑to for most beginners because it melts at a low temperature, holds fragrance well, and burns cleanly. If you love a buttery glow and don’t mind a slightly higher cost, beeswax gives a natural honey scent and the longest burn time. Paraffin is cheap and perfect when you want vibrant colors in taper candles, but it can produce a bit more soot. Coconut‑wax blends sit somewhere between soy and paraffin – they’re vegan, have a smooth finish, and create a decent melt pool.
Here’s a quick way to decide: ask yourself what you value most. If you’re after a “green” vibe and easy fragrance load, reach for soy. If you want that luxe, long‑lasting burn and don’t mind the price, beeswax wins. For bright, colorful experiments, paraffin or a coconut blend can be fun.
Does this feel overwhelming? Don’t worry – you can start with a single 1‑lb soy block and later branch out. The key is to note the melting point: soy usually melts around 120‑130 °F, while paraffin sits near 150 °F. Knowing that number helps you set the right temperature later.
Fragrance basics: more than just “nice smell”
Fragrance oils and essential oils behave differently in wax. Essential oils are natural extracts; they’re great for fresh, therapeutic scents like lavender or citrus, but they can be volatile at high temperatures. Fragrance oils are specially formulated for candles, so they stay stable even when the wax is hot.
Rule of thumb for beginners: aim for about 1 ounce of fragrance per pound of wax. That gives a noticeable scent without drowning the flame. If you love a stronger punch, you can push to 1.5 ounces, but test a small batch first – too much oil can cause a “sweaty” surface or uneven burn.
Mixing scents is where creativity shines. Try a “top‑note” (bright) like orange, a “middle‑note” (heart) such as rosemary, and a “base‑note” (deep) like vanilla. A classic blend is citrus‑mint: ½ ounce orange essential oil plus ½ ounce peppermint fragrance oil. It wakes up the senses and works well in a home‑office candle.
Matching wax and scent
Some waxes hold certain fragrance families better. Soy loves floral and fruity oils, while paraffin excels with woody and spicy blends. Beeswax already has a subtle honey scent, so pair it with light, complementary notes – think lavender or soft vanilla.
Temperature matters, too. Add fragrance when the wax has cooled to about 170‑180 °F. Too hot and the scent will evaporate; too cool and it won’t bind properly, leading to a weak aroma.
Test, tweak, repeat
Before you pour into your final jar, do a “smell test.” Melt a tablespoon of wax, stir in your measured fragrance, and let it sit for a minute. Take a quick sniff – does it feel right? If it’s faint, add a few more drops; if it’s overpowering, dilute with a bit more plain wax.
Another handy trick is the “cold‑pour test.” After you’ve poured a small batch, let it set completely, then light it for a minute. Watch the flame: a steady, clean burn means you’ve nailed the wax‑wick‑fragrance combo. If you see sputtering or a strong “sooty” smell, adjust the fragrance load or try a slightly larger wick.
Quick checklist before you melt
- Choose wax type that matches your scent goal (soy, beeswax, paraffin, coconut blend).
- Note the wax’s melting point; set your thermometer accordingly.
- Pick fragrance – essential oil for natural aroma, fragrance oil for stability.
- Calculate fragrance load (≈1 oz per lb of wax).
- Plan to add scent at 170‑180 °F for best binding.
- Do a mini smell test with a spoonful of wax.
- Record your ratios so you can repeat the winning formula.
That’s it – the part that feels like picking paint colors for a room, but with the added bonus of a scent that’ll greet you every time you walk in. Once you’ve settled on wax and fragrance, you’re ready to move on to measuring, melting, and mastering temperature control. Let’s keep the momentum going and turn those choices into a candle that looks as good as it smells.
Step 3: Prepare Your Workspace and Safety Measures
Alright, you’ve picked your wax and fragrance, now it’s time to set the stage. A tidy, well‑ventilated work area isn’t just nice to look at—it’s the difference between a smooth pour and a smoky disaster.
Clear a safe zone
First, clear a flat surface that can handle heat. A kitchen counter covered with a silicone baking mat works wonders because the mat won’t melt and it catches any stray drips. If you’re using a stove‑top double boiler, make sure the pot sits snugly and doesn’t wobble.
Do you have kids or pets wandering nearby? Keep them out of the “candle‑making in progress” sign on the door can save you from an unexpected splash.
Ventilation & fire safety
Wax fumes aren’t toxic in small bursts, but they can irritate your nose and eyes if they linger. A fresh breeze also helps the fragrance settle correctly once you pour.
Keep a fire extinguisher rated for Class B (flammable liquids) within arm’s reach. It’s not dramatic—just a smart habit. If a flame escapes the wick, you’ll have the right tool to smother it without reaching for the sink water.
Protective gear
Slip on a pair of silicone gloves before you handle hot wax. They’re heat‑resistant, flexible, and easy to clean. A simple apron or an old t‑shirt protects your clothes, and safety glasses guard against accidental splatters.
Don’t forget a splatter guard: a metal screen that sits on top of your pot while the wax heats. It catches any rogue droplets and gives you peace of mind.
Organize your tools
Lay out everything you’ll need before the wax hits the thermometer. A digital thermometer, stirring spoon, wick holder, and your fragrance bottle should each have a dedicated spot. When you’re not actively pouring, keep the stirring spoon in a heat‑proof bowl so it doesn’t sit in the hot wax.
If you love a little extra guidance, check out our Sewing for Beginners Tutorial: Step‑by‑Step Guide to Start Sewing with Confidence for a quick refresher on setting up a clean craft space—many of the same principles apply.
Quick safety checklist
Take a minute to double‑check each item before you turn the heat on. That pause feels almost like a tiny ritual, but it saves you from a messy clean‑up later. Once your space is set, you’ll notice the melting process feels calmer, and the final candle comes out looking—and smelling—far more professional.
- Work on a heat‑proof, level surface covered with a silicone mat.
- Ensure good ventilation—open a window or run a fan.
- Have a Class B fire extinguisher and a lid for the pot nearby.
- Wear silicone gloves, an apron, and safety glasses.
- Use a splatter guard or metal screen over the pot.
- Lay out thermometer, stirrer, wick holder, and fragrance bottle before heating.
- Keep children and pets out of the workspace.
After you’ve poured, let the candle cool undisturbed for a few hours. Then wipe any wax spills with a paper towel while it’s still soft – it’s easier than scrubbing hardened wax later. A tidy workspace makes the next batch feel like a fresh start.
Now that safety’s sorted, you’re ready to move on to measuring the wax, monitoring temperature, and finally pouring. Let’s keep that momentum rolling and turn your prepared workspace into a mini‑studio where creativity burns bright, safely.
Step 4: Melt Wax and Add Fragrance
Alright, the workspace is set, the safety checklist is checked, and you’re staring at that block of soy wax. It’s a little intimidating, I know – you’ve probably felt that flutter of “what if it burns?” before. The good news? Melting wax is basically the calm part of candle making for beginners at home. Think of it as a mini‑spa for the wax: gentle heat, a little stir, and then the sweet scent moment.
Heat the wax, don’t rush it
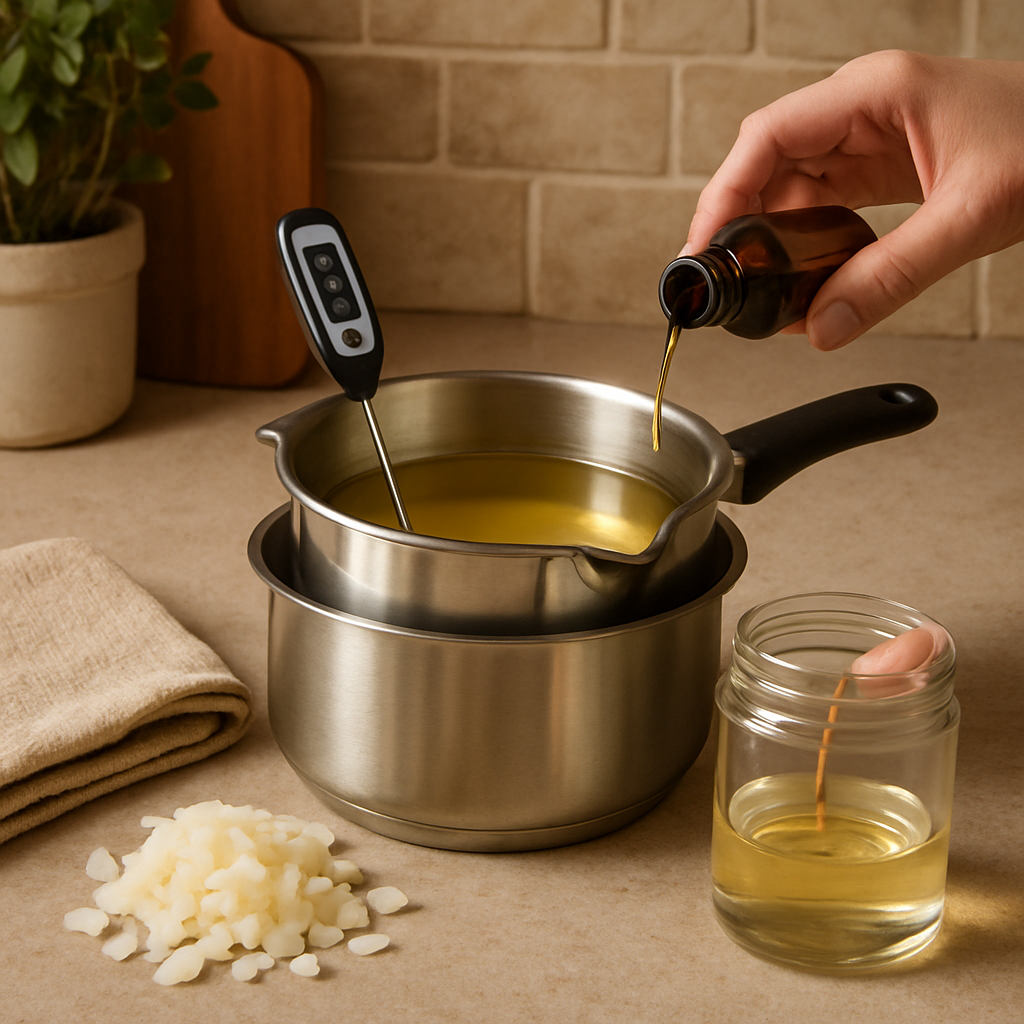
Grab your heat‑proof pitcher and set it in a double‑boiler or a pot with a few inches of water. Turn the burner to low‑medium – you want a slow, steady rise, not a boil. If you’re using a microwave, break the wax into small chunks and heat in 30‑second bursts, stirring in between. The key is patience; a gradual melt keeps the wax from scorching and preserves the fragrance’s integrity.
Pro tip: keep an eye on the wax’s surface. Once you see it turning from solid to a glossy, amber pool, you’re getting close. That’s the moment you start thinking about temperature.
Watch the temperature like a hawk
Most soy waxes melt around 120‑130 °F, but you’ll want to heat a bit higher – around 185 °F – before adding fragrance. Pull out your digital thermometer and dip it in the wax (no need to touch the pot). When the reading hits the 180‑190 °F sweet spot, you’re ready.
Why that range? If the wax is too hot, the fragrance can evaporate; too cool and the oil won’t bind properly, leading to a weak scent throw. A Beautiful Mess recommends aiming for about 1 ounce of fragrance per pound of wax, and that rule works best when you add the oil at the right temperature.
Add fragrance at the right moment
Now comes the fun part. Take your fragrance bottle, give it a quick shake, and pour the measured drops directly into the melted wax. If you’re working with essential oils, you might want to add a tiny splash of carrier oil (like jojoba) to help the scent disperse evenly.
Give the mixture a gentle stir for 30‑45 seconds. Use a silicone spatula – it won’t melt and it gives you a nice, controlled motion. Avoid vigorous whisking; you don’t want to introduce bubbles that could become unsightly pits later.
Stirring tips that actually matter
Start slow, then pick up the pace just enough to blend the fragrance fully. You’ll notice the wax taking on a faint hue if you’re using a liquid dye – that’s a good sign the oil is spreading. Keep the stir in a circular motion, hugging the sides of the pot, and then finish with a few gentle swirls in the center.
After you’ve stirred, let the wax sit for a minute. If you can still see a faint perfume rising from the surface, you’ve hit the sweet spot. If the scent seems faint, you might have added it a tad too early – no worries, you can always adjust the next batch.
Final check before you pour
Pull the thermometer out, wipe it clean, and take a quick temperature reading again. Ideal pouring temperature for soy wax is usually around 135‑145 °F. If you’re using a different wax, check its specific guidelines, but staying in that window helps avoid sinkholes and ensures a smooth top.
Here’s a quick mini‑checklist you can tape to the edge of your work surface:
- Wax fully melted, no solid chunks.
- Temperature at 180‑190 °F before adding fragrance.
- Fragrance added at 180‑190 °F, stirred 30‑45 seconds.
- Temperature cooled to 135‑145 °F before pouring.
- Wick centered and secured.
Take a breath, give yourself a high‑five, and get ready to pour. The melt‑and‑scent step is where the magic really starts to feel tangible, and you’ll notice the room filling with that buttery, citrus‑mint aroma (or whatever blend you chose). It’s that moment you realize candle making for beginners at home isn’t just a craft; it’s a little celebration of turning simple ingredients into a personal, fragrant experience.
And remember, every batch teaches you something – maybe you’ll discover a perfect temperature tweak or a new fragrance combo that becomes your signature. That’s the beauty of this hobby: it’s as much about learning as it is about creating.
Step 5: Pour Wax and Set Wicks
Now the wax is scented, the temperature is in the sweet spot, and you’re staring at a steady line of liquid gold ready to become a candle. Does your heart race a little? That’s normal – the pour is where everything you’ve done so far finally takes shape.
First, give the wax a final stir. A slow, circular motion for about 20 seconds lets any stray bubbles rise and ensures the fragrance is evenly distributed. If you see a hint of color swirling, you’ve nailed the mix.
Next, grab your pre‑secured wick. The little metal tab should be firmly glued to the bottom of the jar, and the wick itself should be centered with a wick holder or a couple of clothespins. A quick tap on the side of the jar helps the wick sit straight.
Ready to pour? Hold the pouring pitcher just above the jar’s lip and let the wax flow in a thin, steady stream. Aim for the center of the jar, but don’t worry if the wax hits the side a bit – it will level out as it cools.
Here’s a trick many beginners swear by: pour slowly for the first half, then pause for a few seconds, and finish the rest. That pause gives the wax a moment to settle, reducing the chance of sinkholes or cracks.
What about temperature? For soy wax, 135‑145 °F is the sweet range. If the wax is hotter, you risk a dull surface; if it’s cooler, the wax can set too fast and trap air pockets. Keep a thermometer handy and check right before you start the pour.
After you’ve filled the jar, let the candle sit undisturbed. Resist the urge to move it – even a tiny jolt can cause uneven cooling. Most soy candles need at least three hours to harden enough to handle a wick trim, but waiting four or five hours gives a smoother top.
While you wait, inspect the surface. A small crater in the center is common; you can fix it with a “top‑off” pour. Just melt a little extra wax to about 150 °F, pour a thin layer over the crater, and let it smooth out.
Once the wax is fully set, trim the wick to about ¼ inch. A short wick gives a clean, steady flame and prevents smoking. If the wick looks crooked after cooling, gently straighten it with a pair of tweezers before lighting.
And there you have it – a candle that’s ready for its first burn. Light it for a few minutes, let the melt pool reach the edge of the jar, then blow it out and let it cool. That first test tells you if the wick size was right and if the fragrance throw meets your expectations.
Want a quick reference while you work? Check the table below.
| Step | Ideal Range / Tool | Tip |
|---|---|---|
| Final Stir | 20 seconds, circular motion | Helps eliminate bubbles |
| Pouring Temp | 135‑145 °F (soy) | Use a digital thermometer |
| Cooling Time | 3‑5 hours undisturbed | Do not move the jar |
| Wick Trim | ≈¼ inch before first burn | Prevents smoking |
| Top‑off Fix | 150 °F wax, thin layer | Smooths surface cracks |
Remember, each batch teaches you something new. Maybe the next time you’ll experiment with a slightly lower pour temperature for a glassier finish, or you’ll try a larger wick for a bigger melt pool. The beauty of candle making for beginners at home is that you can tweak one variable at a time and see the results right away.
So go ahead, pour that wax, set those wicks, and watch your kitchen turn into a tiny fragrance studio. When the candle finally flickers, you’ll feel the satisfaction of having turned a simple block of wax into a personal, glowing piece of art.
Step 6: Finishing Touches and Curing
Now that your wax is poured and the wick is set, the real magic happens while the candle is cooling. This is the moment you get to fine‑tune the look, lock in the scent, and make sure the flame will stay steady for weeks.
Give it time – don’t rush the cure
We’ve all been tempted to yank the jar off the counter the minute the surface looks solid, right? But candle making for beginners at home really rewards patience. Let the candle sit undisturbed for at least three to five hours. That quiet period lets the wax molecules line up, which in turn reduces sinkholes and surface cracks.
Think of it like letting bread rise – you could poke it early and end up dense, or you could wait and get that fluffy crumb. Same principle here.
Top‑off any imperfections
When you peel back the lid after a few hours you might notice a little crater in the middle or a thin skin that’s started to pull away. No drama. Warm a spare batch of wax to about 150 °F (just warm enough to flow, not hot enough to melt the already‑set candle) and gently pour a thin layer over the defect.
This “top‑off” trick smooths the surface and seals any tiny air pockets that could cause a wick to sputter later. It’s the same tip Alpha Foodie’s guide notes for a flawless finish.
Trim the wick – the little detail that matters
Before you light your masterpiece, cut the wick down to roughly ¼ inch. A short wick gives a clean, steady flame and stops the candle from smoking. If you trim it too short, the flame will drown; too long and you’ll see a lot of smoke. A quick test: after trimming, hold the wick up to a light source – you should see a clear tip, not a fuzzy end.
And yes, you can do a second trim after the first burn if the wick shortens too much. It’s a tiny habit that pays off in a smoother, longer‑lasting burn.
First‑burn checklist
- Let the candle cool completely (room temperature, no drafts).
- Trim wick to ¼ inch.
- Burn for 2‑3 hours the first time, letting the melt pool reach the jar’s edge.
- Extinguish, let the candle sit another hour, then trim again if needed.
That first burn is your “test drive.” It tells you if the wick size was right, if the fragrance throw is strong enough, and whether any adjustments are needed for the next batch.
Storing your candles for future burns
After the cure, store the candles in a cool, dark place. Direct sunlight can fade dyes and degrade fragrance oils. If you’re stacking jars, place a piece of parchment paper between them to avoid any accidental scratching.
And if you’re planning to gift them, wrap each jar in a bit of kraft paper and tie with twine – it adds that handmade charm and also protects the surface.
Common curing questions
“Do I need to cover the candle while it cures?” – A loose lid or a piece of foil works fine; just don’t seal it airtight, or condensation might form.
“Can I speed up the cure with a hair dryer?” – It’s tempting, but rapid cooling can cause the wax to contract unevenly, leading to cracks. Slow, natural cooling is the safest bet.
“What if the scent feels weak after curing?” – Sometimes fragrance needs a second “cold‑pour” touch. Warm a small amount of wax to 150 °F, add a pinch more fragrance, and top‑off the surface. That extra boost often wakes up the aroma without overloading the candle.
Remember, every candle you finish is a little laboratory experiment. You’ve learned how temperature, timing, and tiny adjustments shape the final product. Next time you dive back into the kitchen, you’ll know exactly which step to tweak for a glassier finish or a brighter scent.
So go ahead, give your candle that patient cure, trim the wick, and light it up. You’ll see the glow of your effort – and maybe even hear a friend say, “Wow, you made that?”
FAQ
Do I really need a thermometer for candle making for beginners at home?
Yes, a digital thermometer is practically a safety net. Wax looks liquid at the right temperature, but if you’re too hot you’ll burn off fragrance, and if you’re too cool the wax won’t bind properly, leading to weak scent throw or surface cracks. A quick dip into the melt lets you hit the sweet spot—around 180 °F for adding fragrance and 135‑145 °F for pouring. It’s a tiny gadget that saves a lot of guesswork.
How long should I let my candle cure before lighting it?
The rule of thumb is to give it at least 24 hours, but three to five days is even better for a solid scent throw. During those hours the wax molecules settle, the fragrance locks in, and any tiny air pockets shrink away. If you rush the first burn, you might notice a weaker aroma or a slightly uneven surface. Patience here translates directly into a cleaner, longer‑lasting flame.
Can I reuse leftover wax and how do I store it?
Absolutely—you don’t have to toss that last bit of wax. Pour the remnants into a small, heat‑proof container, let it solidify, then label it with the wax type and any fragrance you added. Store the block in a cool, dark spot, ideally wrapped in parchment to keep dust out. When you’re ready for the next batch, gently remelt it and you’ll have a fresh base without wasting material.
What’s the best wick size for an 8‑oz soy candle?
For a standard 8‑oz glass jar, a cotton‑core wick labeled “#4” usually does the trick. If you’re loading the wax with a heavy fragrance load (over 1 oz per pound) or using a higher‑melting wax like coconut blend, bump up to a #6. The key is a steady, even melt pool—if the flame flickers or the wax pools unevenly, try a slightly larger wick next time.
Why does my candle develop a sinkhole and how can I prevent it?
Sinkholes happen when the wax cools too quickly or when there’s a temperature jump between pouring and the top layer solidifying. To avoid them, pour at the recommended 135‑145 °F and keep the room temperature stable—no drafts or open windows. If you still see a dip, you can warm a small amount of wax to about 150 °F and do a “top‑off” pour to smooth the surface.
Is it okay to add fragrance oil after the wax has cooled?
Adding fragrance once the wax is below 150 °F means the oil won’t disperse evenly, and a lot of the scent will evaporate before it even binds. The sweet spot is around 180‑190 °F: hot enough for the oil to mingle, but not so hot that the volatile notes blow away. Stir gently for 30‑45 seconds, then let the mixture cool before you pour.
How do I troubleshoot a candle that tunnels?
Tunneling occurs when the melt pool never reaches the edge of the container. First, check the wick size—if it’s too small, the flame can’t melt the wax far enough. Next, make sure you’re giving the candle a proper “first‑burn” of 2‑3 hours, allowing the melt to expand fully. If the problem persists, try a slightly larger wick or a higher pour temperature to encourage a wider melt pool.
Conclusion
There you have it—candle making for beginners at home is less a science experiment and more a friendly ritual you can fit into any weekend.
Think about the first time you lit that jar and watched the flame dance across a scent you chose yourself. That tiny moment of pride is what turns a simple hobby into a little burst of confidence.
Remember the core steps: gather your wax, pick a fragrance that makes you smile, heat with patience, pour in a steady stream, and give the candle time to cure. If a sinkhole appears, a quick top‑off fixes it; if the wick sputters, a trim or a larger wick sets it straight.
So, what’s next? Grab a fresh block of soy, try a citrus‑mint blend, and schedule a “first‑burn” night with a friend. The more you play, the better you’ll understand how temperature tweaks change the finish.
And don’t forget—CreativiU’s online craft community is just a click away if you ever need a quick tip or want to share your latest creation.
Ready to light up your space and maybe even turn those candles into a small side hustle? Your next masterpiece is waiting on the shelf.
Give it a try, and watch your confidence glow as bright as the flame.
Leave a Reply