Resin jewelry can go from a bottle of clear liquid to a polished pendant in less than a day.
If you’ve been watching friends post glittery charms on Instagram, you know the pull is real. You can create that glow yourself with just a few household items.
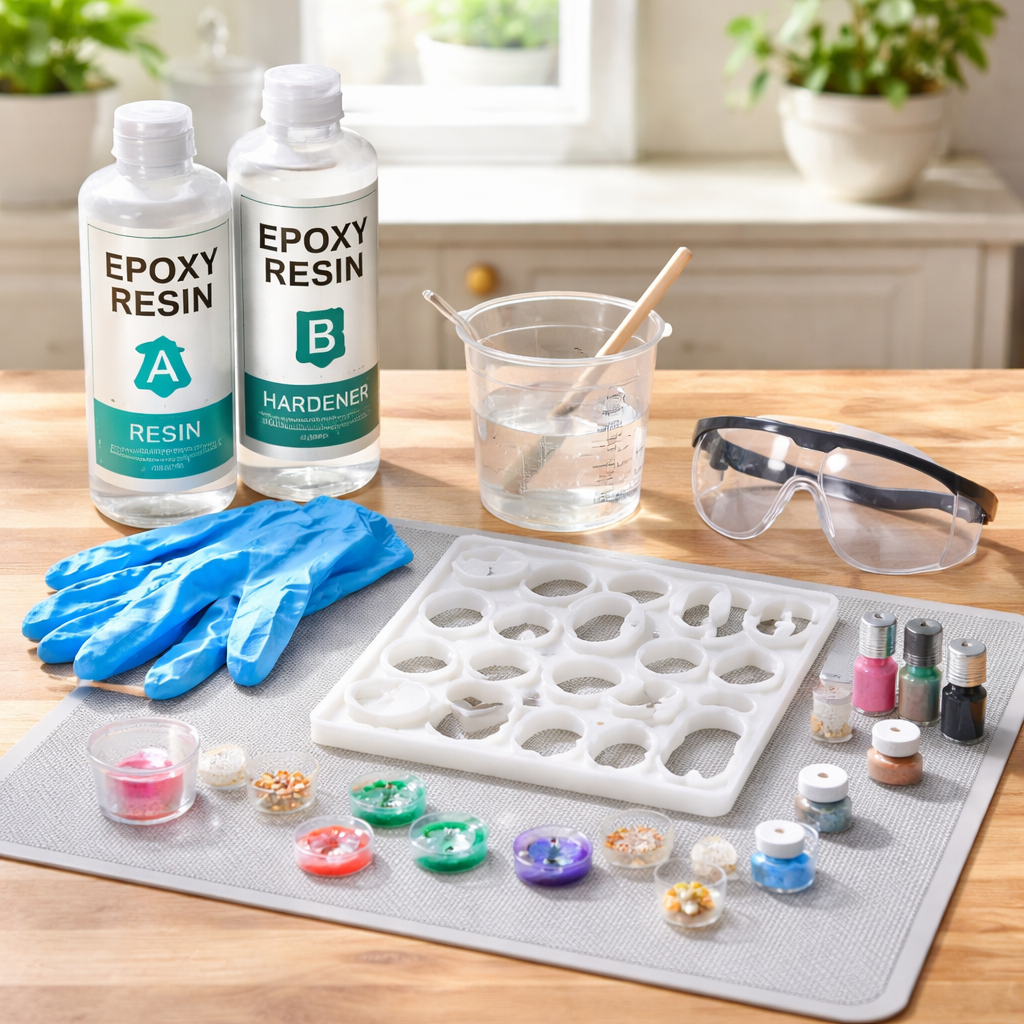
The biggest roadblock isn’t talent, it’s getting the right tools and staying safe. Clear epoxy resin, a matching hardener, silicone molds, a stir stick and nitrile gloves are all you really need to start.
First step: measure resin and hardener in equal parts. A kitchen scale or two graduated cups work fine, but keep the ratio spot‑on. Even a tiny slip makes the mix cloudy.
Next, give the mix a slow stir for about a minute, scraping the sides each time. This gentle motion keeps bubbles at bay.
A quick tap on the side of the cup and a brief pass with a heat gun or a kitchen torch will pop any lingering bubbles before you pour.
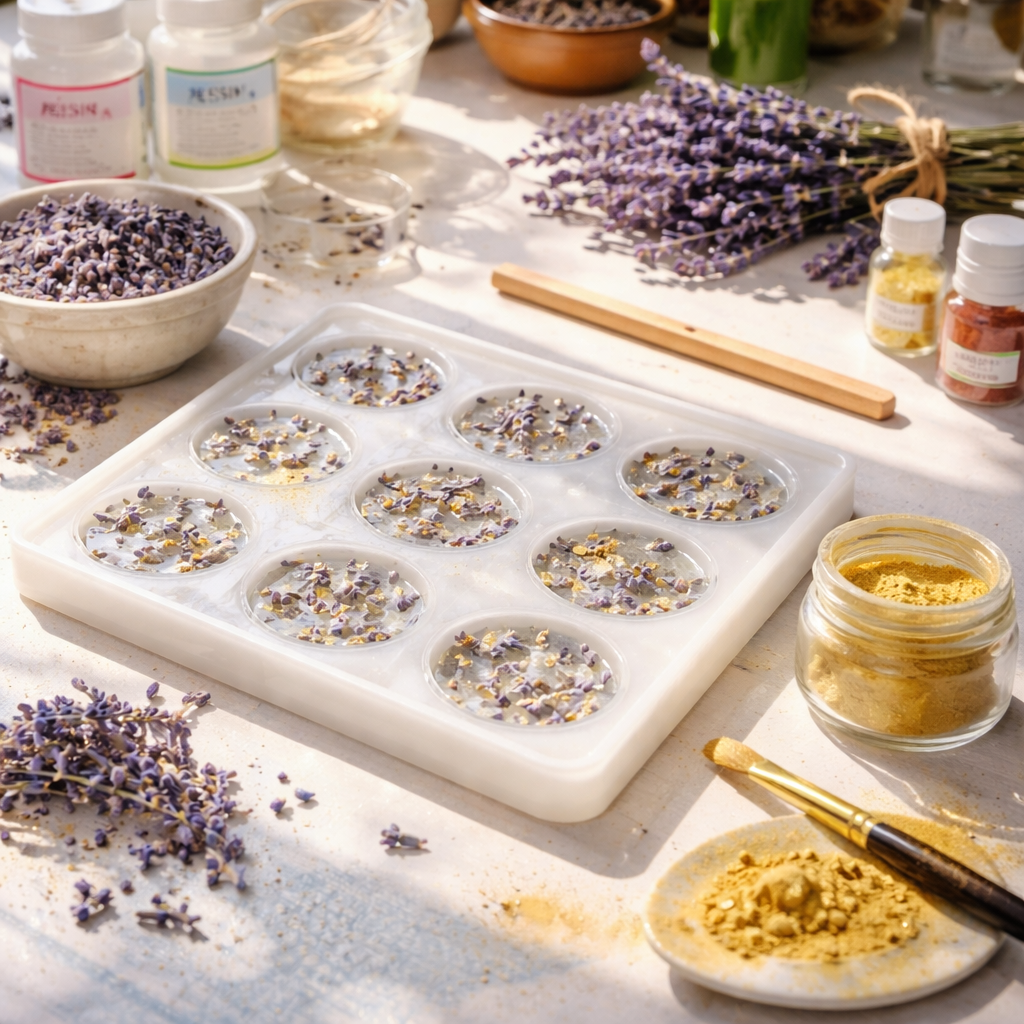
Take Jenna, a stay‑at‑home mom who used the same basic kit and pressed lavender buds from her garden. She followed the steps and after 24 hours had a batch of fragrant earrings that sold within a week. You can read more in our Resin Jewelry Making for Beginners: A Simple Step-by-Step Guide.
Once your pieces are ready, the next challenge is getting them seen. Planning regular posts on Instagram and Pinterest saves you time and keeps the audience engaged. A good way to stay on schedule is to use the best social media scheduling software for creators.
Grab your supplies, set up a safe workspace, and make that first pour today. You’ll be surprised how quickly a hobby turns into a tiny collection you can wear or gift.
Step 1: Gather Materials and Safety Gear
Before you start, you need the right tools and a safe space. This is the first thing you learn when you figure out how to make resin jewelry for beginners.
Core materials
Clear epoxy resin and its matching hardener are a must. Pick a brand that says it cures clear and stays hard. A silicone mold or a metal bezel gives you a smooth surface to pour into.
Measuring cups or a digital kitchen scale help you keep the mix exact. A wooden stir stick lets you scrape the sides without adding metal that could react.
Safety gear
Wear nitrile gloves so the resin doesn’t stick to your skin. Slip‑on safety goggles protect your eyes from splashes. Work in a room with a window or a fan; fresh air keeps fumes low.
Lay a disposable silicone mat on your table. It catches drips and is easy to toss when you’re done.
Need a quick visual reminder? Watch the short video below that shows how to set up your station step by step.
When you travel to craft fairs, you’ll want jewelry that stays secure. Check out this guide on best travel jewelry for women for ideas on sturdy designs.
If you plan to brand your pieces or add custom tags, a simple print shop can handle that. JiffyPrintOnline offers quick turnaround on small runs.
Here’s a quick checklist you can print and tape to your desk:
- Clear epoxy resin and hardener
- Silicone mold or bezel
- Graduated cups or digital scale
- Wooden stir stick
- Nitrile gloves, goggles, mask
- Silicone mat and trash bag
Keeping everything within arm’s reach saves you time and cuts down on spills. When you finish, seal your tools in a zip‑top bag so they stay clean for the next project.
A tidy workspace also makes it easier to spot bubbles early. Use a small lamp to shine light across the surface; any trapped air will pop up like tiny beads.
Step 2: Prepare Your Workspace and Mix Resin
Now that you have all the gear, it’s time to set up a spot that lets you work without distractions. A small table by a window works great – fresh air helps keep fumes down and gives you natural light to spot bubbles.
Lay a silicone mat or a piece of parchment on the surface. It stops the resin from sticking and makes cleanup a breeze. Keep two clear measuring cups side by side, label one “resin” and the other “hardener” with a permanent marker. This tiny habit saves you a brain‑fade moment later.
Gather your mixing tools
Grab a digital kitchen scale if you like weighing, or just use the cups for volume. A wooden stir stick is perfect – it’s cheap and you can toss it after use. Have a timer handy; you’ll want to stir for about a minute.
Warm the resin bottle in a bowl of warm (not hot) water for 2–3 minutes. Warm resin flows easier and traps fewer bubbles.
Mixing steps
1. Pour the measured resin into its cup.
2. Add the exact amount of hardener.
3. Stir slowly in a figure‑eight pattern. Scrape the sides and bottom every few seconds. Aim for a clear, amber colour.
4. Let the mix sit for a quick 30‑second pause. Bubbles rise on their own during this short rest.
5. Give the surface a quick pass with a hair dryer on low heat or a small heat gun held a few inches away. The gentle heat pops the remaining bubbles without scorching the mix.
Tip: If you’re a creative entrepreneur, you can record a short video of this process and share it on social media to show your audience how you keep things tidy and safe.
| Item | Why it matters | Pro tip |
|---|---|---|
| Silicone mat | Prevents resin from sticking | Reuse it for multiple projects |
| Warm water bath | Lowers resin viscosity | 2‑minute soak is enough |
| Heat gun or hair dryer | Removes trapped bubbles | Keep 6‑8 inches away, move constantly |
When you’ve got a clean, bubble‑free mix, you’re ready for the next step: pouring into your molds. Need a deeper walk‑through? Check out the full beginner’s guide to resin jewelry making for extra tips and troubleshooting tricks.
Step 3: Design and Pour Your First Piece
Now that your mix is ready, it’s time to turn that liquid into a real piece of jewelry. The design stage is where you decide what your pendant, charm, or earring will look like, then you actually pour the resin.
Pick a mold and plan your layout
Choose a silicone mold that matches the shape you want – a simple round earring cup works for beginners. Lay the mold on a silicone mat so nothing sticks to your work surface. Before you pour, picture where each element will sit. A quick sketch on a scrap of paper helps avoid guessing later.
Add embeds and colour
Drop your chosen embeds – dried flowers, tiny beads, or a splash of mica – into the mold. Keep them near the centre; they’ll sink if you place them at the edge. If you want colour, stir a few drops of pigment into a small side‑batch of resin, then pour that coloured mix over the embeds. This two‑tone look is popular among creative entrepreneurs who sell unique pendants.
Pro tip: pour a thin base layer first, let it sit for a minute, then add the embeds. After they’re settled, finish with the coloured top layer. The result is a “floating” effect that makes the piece feel more three‑dimensional.
Control bubbles
Air bubbles love resin. After each pour, give the mold a gentle tap on the side of the table – the bubbles rise to the surface. If a few stubborn bubbles remain, sweep a heat gun a few inches above the resin for about ten seconds. The heat thins the surface just enough for the bubbles to pop.
Cover and cure
When the mold is filled, cover it with a piece of cardboard or a silicone lid. This shields the resin from dust while it cures. Keep the workspace at room temperature (around 70‑75°F). Resist the urge to move the mold for the first 30 minutes; any disturbance can create lines.
Write down the amount of resin you used, the room temperature, and any tweaks you made. Those notes become a cheat‑sheet for your next design.
Need a place to store your finished pieces before you add findings? How to Create Resin Art Jewelry at Home: A Step‑by‑Step Guide walks you through safe handling and storage tips for beginners.
Step 4: Cure, Finish, and Add Findings
When the resin settles, you’ve reached the quiet part of the project. The piece looks glossy, but it’s still soft enough to need care.
Cover the mold with a thin cardboard or a silicone lid. This keeps dust out while the resin hardens. Keep the room at a steady 70 to 75°F (21 to 24°C). If your space gets chilly, a warm spot on a sunny windowsill works fine.
Resist the urge to move the mold for the first half hour. Any jostle can leave a line or a tiny ripple on the surface.
Got a few minutes? Write down how much resin you used, the room temperature, and any tweaks you made. Those notes become a cheat‑sheet for your next design.
Now it’s time to add the findings – the little bits that turn a resin charm into wearable jewelry. For earrings, grab a tiny bail or a jump ring. A strong craft glue like E6000 will hold the bail in place if you prefer a glue on method. Press the glue onto the cured piece, attach the bail, and let it dry for 24 hours.
If you like a cleaner look, drill a tiny pilot hole with a rotary tool, then screw in an eye pin or a jump ring. Seal the hole with a dab of glue so it stays water proof.
Once the findings are set, sand any rough edges with a fine grit sandpaper. A quick polish with a soft cloth brings back that glass like shine.
Need more tips on safe curing and storage? Check out our resin curing guide for detailed advice on temperature control and long term storage.
Take a step back, admire your work, and plan the next color or embed. With each batch you’ll get faster, cleaner, and more confident.
Conclusion
We’ve walked you through every step of how to make resin jewelry for beginners, from gathering the kit to polishing the final piece. The core rule stays simple: measure the mix, warm it a bit, de‑air, pour, let it cure, then sand and shine.
That first pendant you pull out of the mold is proof that patience pays off. Keep a tiny notebook handy. Note the resin amount, room temperature, and any tweaks. Those scribbles become your cheat sheet for the next design.
Need a quick way to level up your technique? Check out our Resin Art Tutorial: Master Essential Techniques for deeper tips on color blending and advanced finishes.
Now grab your starter kit, set up a clean workspace, and pour a simple piece today. One small experiment will show you what works for your style and schedule, and you’ll be ready to create jewelry you can wear or sell.
FAQ
What basic supplies do I need to start making resin jewelry?
You only need a few basics: clear epoxy resin and its matching hardener (most kits are 1:1), a silicone mold or two, a digital kitchen scale or two graduated cups, a stir stick, nitrile gloves, safety goggles, and a mask for fumes. A heat gun or kitchen torch helps pop bubbles, and a soft cloth or microfiber towel is handy for polishing. That’s everything you need to get started.
How do I avoid bubbles when mixing resin?
Bubbles love resin, but you can keep them at bay with a few tricks. Stir the mix slowly for one minute, scraping the sides each turn so you don’t pull air in. After stirring, let the cup sit for about thirty seconds; the biggest bubbles rise on their own. Then give the surface a quick pass with a heat gun held a few inches away for ten seconds. The heat thins the top layer just enough for the bubbles to pop.
What safety gear should I wear while working with resin?
Safety isn’t optional when you work with resin. Always wear nitrile gloves that fit snugly so the liquid can’t seep onto your skin. Put on safety goggles to protect your eyes from splashes, and use a mask or respirator to keep fumes from irritating your lungs. Work in a well-ventilated spot—open a window or run a small fan. A simple plastic sheet on your table catches drips and makes clean-up a breeze.
How long does it take for resin to cure enough to handle?
Resin usually reaches a skin-safe state in about 24 hours at room temperature (70-75 °F). You can handle the piece gently after that, but wait another 24 hours if you plan to sand or polish for a glass-like shine. Cooler rooms slow the cure, so if you’re in a chillier space add a low-heat lamp to keep the temperature steady. Always check the manufacturer’s cure time for the exact mix you use.
Can I use household items as molds for resin jewelry?
You can repurpose many household items as molds, as long as they’re non-porous and release the resin easily. Silicone baking molds, ice-cube trays, and even clean yoghurt containers work well. Avoid porous materials like wood or plaster—they’ll soak up the resin and make removal messy. Before you pour, spray the mold with a light mist of release spray or rub a thin layer of petroleum jelly to ensure the piece pops out clean.
How can I finish my pieces to make them look professional?
Finishing gives your jewelry that professional sparkle. First, sand any rough spots with fine-grit (400-600) sandpaper, but only if the resin is fully cured. Then wipe the piece with a damp microfiber cloth and a drop of mild dish soap to remove dust. For extra shine, polish with a dedicated resin polish or simply rub a bit of petroleum jelly on the surface and buff it with a soft cloth. Store finished pieces in a zip-lock bag away from direct sunlight to prevent yellowing.
Leave a Reply