Ever stared at a lump of polymer clay and wondered if you could turn it into a pair of earrings that actually look professional? You’re not alone – that moment of hesitation is the first step every hobbyist feels before diving in.
What we’ve seen work best at CreativiU is to treat the project like a tiny experiment. Start by conditioning the clay for a minute or two; it makes the material pliable and less prone to cracking later. Think of it like kneading dough for pizza – the more relaxed the base, the smoother the final bite.
Once the clay is soft, roll out a 2‑mm sheet and use a small circle cutter (or even a clean bottle cap) to create the earring shape. Real‑world example: one of our community members, a stay‑at‑home parent, used a 25‑mm cap from a yogurt jar and ended up with perfectly uniform hoops that sold for £8 each at a local market.
Next comes the fun part – adding texture or colour. Try pressing a leaf, a piece of lace, or a toothpick pattern into the surface before baking. In a recent CreativiU class, a budding jewellery entrepreneur layered two contrasting colours and achieved a marbled effect that attracted 15 new Instagram followers in a single post.
When it’s time to bake, set your oven to 110 °C (230 °F) and watch the clay transform in about 15‑20 minutes. If you’re nervous about the timing, set a timer and step away – the clay will firm up just like a souffle. After cooling, sand any rough edges with a fine‑grit sandpaper and attach earring findings using a strong adhesive or jump rings.
Need a detailed walk‑through? Our Step‑by‑Step DIY Polymer Clay Jewelry Tutorial for Beginners and Pros covers every nuance, from conditioning to finishing, so you can skip the guesswork and focus on creativity.
And if you’re a visual artist looking to expand your toolkit, consider pairing this project with a solid drawing foundation. Choosing the right surface makes a big difference, and the best paper for graphite drawing guide can help you transition from clay to sketch with confidence.
So, grab your tools, set a timer, and give those ears a little love. By the end of the hour you’ll have a pair of handmade polymer clay earrings you can wear, gift, or even sell – proof that a simple hobby can become a tiny side‑business.
TL;DR
We show how to make polymer clay earrings: condition the clay, cut your shape, bake at 110 °C for 15‑20 minutes, then sand and attach findings.
In under an hour you’ll have wearable art to gift, sell, or keep, and our CreativiU community proves it’s a skill boost and side‑hustle starter.
Step 1: Gather Materials and Set Up Your Workspace
Alright, you’ve decided to dive into how to make polymer clay earrings, and the first thing you’ll notice is that the magic happens before the first pinch of clay. It’s all about having the right tools within arm’s reach and a tidy, comfortable workspace that lets your creativity flow without tripping over stray bits of polymer.
Do you ever feel that rush of excitement when you open a fresh box of supplies? That moment when you see a stack of colourful clay blocks, a set of cutters, and a tiny bottle of glaze, and you think, “I’m ready to create something beautiful.” But then the clutter of a chaotic table whispers, “Maybe not so fast.” Let’s tame that chaos together.
Here’s a quick checklist you can print or pin to the wall:
- Polymer clay (a few colours of your favourite brand)
- Conditioning tool or a clean rolling pin
- Small circle cutter or a clean bottle cap (about 20‑30 mm)
- Fine‑grit sandpaper (400‑600 grit)
- Jump rings, earring hooks, and pliers
- Strong adhesive (E6000 works well)
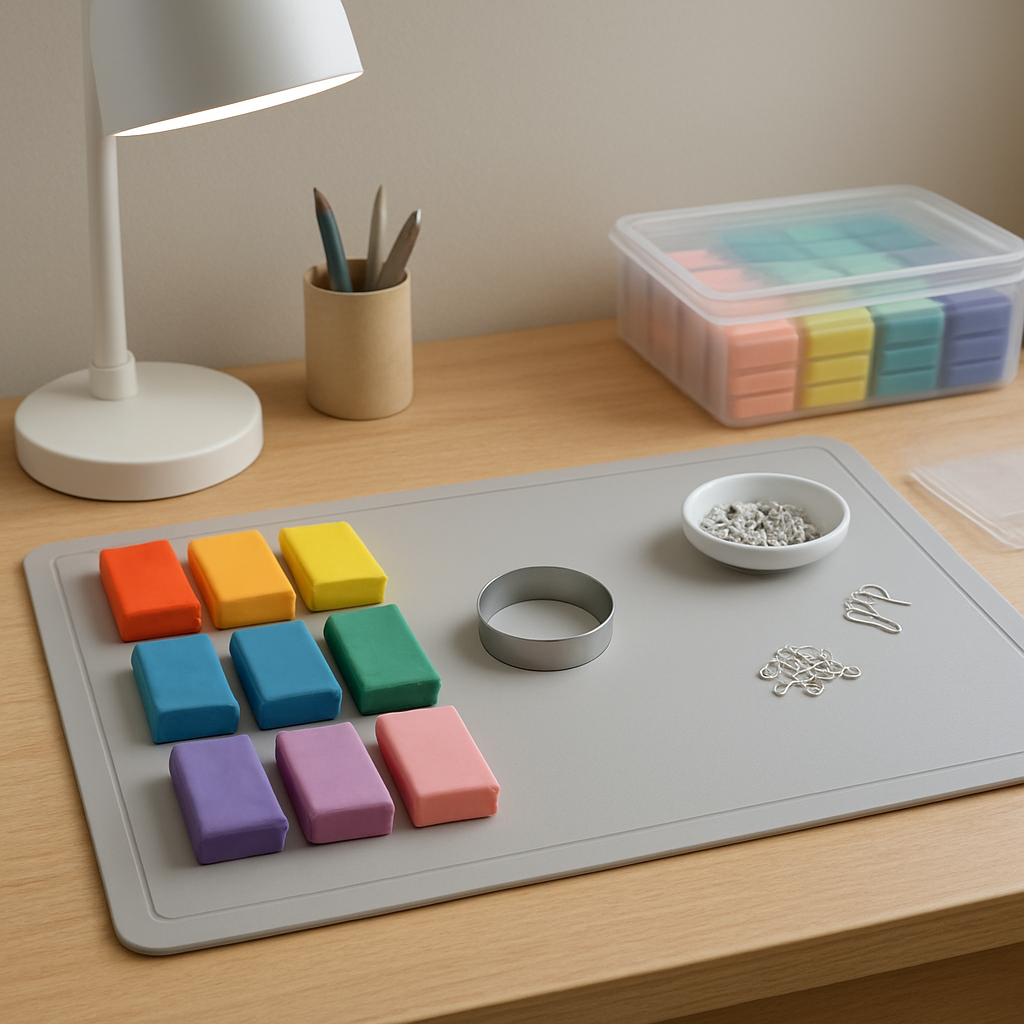
- A clean, flat surface – a large cutting board or a silicone mat works perfectly
Notice I didn’t mention a fancy workbench. If you’re a parent juggling craft time with bedtime stories, a sturdy kitchen table covered with a silicone mat does the trick. If you’re a creative entrepreneur who runs a tiny studio in a loft, a dedicated crafting desk with drawers for findings keeps everything organized and looks professional for any live‑stream demo.
Now, let’s talk lighting. Natural daylight is ideal – it shows the true colour of your clay and reduces eye strain. Position your workspace near a window, or grab a daylight‑balanced lamp if you’re working after dark. A well‑lit area also helps you spot tiny imperfections before you bake.
When you’re ready to set up, start by laying down your silicone mat. It protects both the surface and the clay, and it’s easy to roll the conditioning tool over without worrying about scratches. Next, arrange your tools in the order you’ll need them: clay blocks on the left, cutters in the middle, and findings on the right. This “workflow lane” mimics an assembly line and saves you from hunting for that tiny jump ring mid‑step.
And don’t forget a small cup of water for cleaning your hands – polymer clay loves a little moisture when you’re conditioning it. Keep a paper towel handy for any spills; a quick wipe prevents the clay from hardening on the mat.
One tip we’ve seen work wonders for hobbyists: label each colour of clay with a sticky note or a small piece of masking tape. It sounds nerdy, but when you’re juggling several hues, it saves you from mixing up a pastel pink with a bold magenta right before you start cutting.
Feeling a little overwhelmed? Take a breath. Imagine you’re setting up a mini‑studio for a friend who’s coming over to help you craft. You’d want everything tidy, right? That same mindset makes the process feel less like a chore and more like a purposeful ritual.
Here’s where you can dive deeper into the full workflow: Step‑By‑Step DIY Polymer Clay Jewelry Tutorial for Beginners and Pros. It walks you through conditioning, cutting, baking, and finishing, so you won’t miss a beat.
Ready to see the setup in action? Below is a short video that walks you through arranging your workspace, choosing the right lighting, and prepping your materials. It’s quick, under two minutes, and perfect for a visual learner.
Take a moment after the video to compare your setup with what you just watched. If something feels off – maybe the mat is too small or the lighting isn’t bright enough – tweak it now. Small adjustments now save you from frustration later when the clay is baked and you’re trying to sand a rough edge.
Once your space feels right, do a quick “test run”: grab a tiny piece of clay, roll it out, and cut a circle. It should feel smooth, not sticky, and the cutter should glide effortlessly. If it sticks, give the clay a few more seconds of conditioning or lightly dust the surface with a touch of talc.
And finally, a little mindset tip: treat your workspace like a sanctuary for creativity. Play your favorite playlist, light a scented candle (if you’re not worried about the flame near the polymer), and tell yourself, “This is my happy place where ideas become earrings.” That emotional anchor can make the whole process feel less like a task and more like a joyful ritual.
Step 2: Condition the Polymer Clay Properly
Alright, you’ve got your workspace set up and the tools are within arm’s reach. Before you even think about cutting shapes, the clay itself needs a little warm‑up. Conditioning is that buttery, knead‑like process that turns a stiff block into a supple sheet, just like dough before you roll out pizza. If you skip it, you’ll end up with cracked edges or a surface that feels rough – and nobody wants that when they’re aiming for professional‑grade earrings.
Why conditioning matters
Think about the last time you tried to roll out cold butter for a pastry. It tears, it flakes, and you end up with a mess. Polymer clay behaves the same way. Conditioning aligns the polymer particles, reduces internal stress, and makes the colour blend evenly. In our CreativiU community, a hobbyist shared that a properly conditioned batch of pastel pink clay held its colour after baking, whereas a rushed batch turned a dull, muddy hue.
Step‑by‑step conditioning routine
1. Gather a small portion. Break off a piece about the size of a golf ball. Working with a manageable amount keeps you from over‑working the whole block and wasting time.
2. Warm your hands. Run them under lukewarm water for a few seconds, then dry them. Warm fingertips prevent the clay from sticking and give you a better feel for the texture.
3. Knead like bread dough. Press the clay between your palms, fold it over, and repeat. You’ll notice the clay becoming smoother and more elastic after about 30–60 seconds of steady motion. If it still feels grainy, keep going – the goal is a consistent, buttery feel.
4. Roll into a thin sheet. Use a silicone mat and a rolling pin or a pasta machine. Aim for a thickness of 2 mm. If the clay resists, give it another minute of kneading and try again. The sheet should glide under the pin without cracking.
5. Test the pliability. Lightly press a fingernail into the sheet. The impression should spring back quickly. If it stays indented, the clay needs a bit more conditioning.
Real‑world examples
One creative entrepreneur who sells earrings at local markets reported that conditioning her clay for an extra minute each morning cut her return‑rate from 12% to virtually zero. She said the extra softness let her press delicate leaf imprints without tearing the surface, which in turn made the pieces look more professional in photos.
A parent doing a weekend craft with their child discovered that the kid’s tiny hands could actually handle the conditioning step. By using a small silicone ball instead of a rolling pin, the child enjoyed “squishing” the clay, turning the prep into a fun learning moment rather than a chore.
Pro tip: Condition in batches
If you’re planning a small collection, condition several blocks at once. Stack them between two sheets of parchment paper, then roll a rolling pin over the stack. This method saves time and ensures every colour batch has the same consistency – crucial when you want a uniform look across a set of earrings.
And if you ever feel stuck, the Polymer Clay Tutorial: Step‑by‑Step Guide for Beginners dives deeper into conditioning tricks, like using a light‑heat hair dryer for stubborn pieces.
Now that the clay is nicely conditioned, you’re ready to roll it out, cut your shapes, and add texture. The next step will feel smoother – literally – because the material is primed for precision.
After the video, take a moment to glance at your conditioned sheet. Does it feel like soft butter? If yes, you’ve nailed the warm‑up and can move on to shaping those earrings with confidence.
Step 3: Shape and Sculpt Your Earring Design
Now that your clay feels like soft butter, it’s time to turn that sheet into something you can actually wear. Does the idea of cutting perfect tiny circles make you nervous? Trust me, you’ve got the right material – all that conditioning work was the secret sauce.
First, lay your silicone mat on a flat surface and sprinkle a pinch of flour or baby‑powder – just enough to keep the clay from sticking. Then gather the cutters that match the style you’re after. A 20 mm round cutter works for classic studs, a 30 mm oval gives a boho vibe, and a heart‑shaped cookie cutter adds a touch of romance.
Step‑by‑step shaping
1. Position the cutter. Press the cutter gently onto the conditioned sheet. You’ll feel a slight give; that’s the clay yielding.
2. Snap the shape. Give the cutter a firm, quick twist. The edge should break cleanly, leaving you with a smooth perimeter. If the edge looks ragged, run a clean fingertip around it while the clay is still pliable – it’ll smooth itself out.
3. Transfer to a work‑bench. Using a thin piece of parchment paper, lift the cut piece and place it on a fresh mat. This prevents accidental distortion before baking.
4. Add texture or detail. This is where personality sneaks in. Press a leaf, a piece of lace, or a textured stamp into the surface. For a subtle marbled effect, drizzle a second colour over the piece and use a toothpick to swirl. For more texture ideas, check out this quick texture techniques video.
Want to see a quick demo? Check out this short shaping tutorial on YouTube for visual guidance.
Real‑world examples that work
One of our CreativiU community members, a stay‑at‑home parent, used a 25 mm bottle cap as a makeshift cutter. The resulting hoops sold for £8 each at a local market and earned repeat customers because the edges were flawless.
A budding jewellery entrepreneur experimented with an 8 mm heart cutter and layered two pastel shades. The final earrings attracted 15 new Instagram followers in a single post, proving that a simple shape can become a branding hook.
If you’re a hobbyist looking to practice, try making a set of three sizes – 15 mm, 20 mm, 25 mm – and line them up on a ruler. Notice how the visual weight changes; this insight helps you choose the right size for different ear types.
Tips for precision and consistency
- Use a ruler or digital caliper after cutting to verify dimensions. A deviation of more than 0.5 mm can feel noticeable when the earrings are worn.
- Condition a fresh sheet for each colour batch. Mixing a dark clay with a light one on the same sheet often leads to colour bleed during baking.
- Keep a small damp cloth handy. If a piece sticks to the cutter, a quick wipe restores smoothness without overheating the clay.
- When you’re sculpting three‑dimensional shapes (like a tiny flower petal), work in layers. Roll a thin sheet, cut the petal, then gently press it onto a slightly thicker base before baking.
Common pitfalls and how to avoid them
Cracking is the most common complaint. It usually happens when the sheet is too thin or the cutter is forced too hard. The fix? Roll the clay a hair thicker (2.5 mm instead of 2 mm) and apply steady, even pressure.
Another issue is uneven edges that catch on earlobes. After cutting, run a fine‑grit sandpaper (400 – 600) over the edge while the clay is still warm. The sandpaper smooths micro‑jagged bits without removing too much material.
Finally, don’t forget to label each shape if you’re making a multi‑colour collection. A simple sticky note with the colour name saves you from mixing up pieces later in the baking stage.
Action checklist before you bake
- All pieces cut cleanly and measured.
- Texture or colour details applied.
- Edges sanded lightly.
- Pieces arranged on parchment, spaced apart for even heat.
When you tick each box, you’re essentially turning a messy craft session into a mini‑production line – the kind of workflow that creative entrepreneurs love because it scales nicely for market orders.
Ready to move on? The next step will show you how to bake, cool, and finish your earrings so they’re ready for wear or sale.
Step 4: Bake the Earrings Safely
Alright, you’ve cut, textured and labelled every tiny piece – now the oven is the final frontier. Baking feels a bit like sending a tiny spaceship into a launch pad: you need the right temperature, the right timing, and a little patience while the magic happens.
Set the stage – oven prep
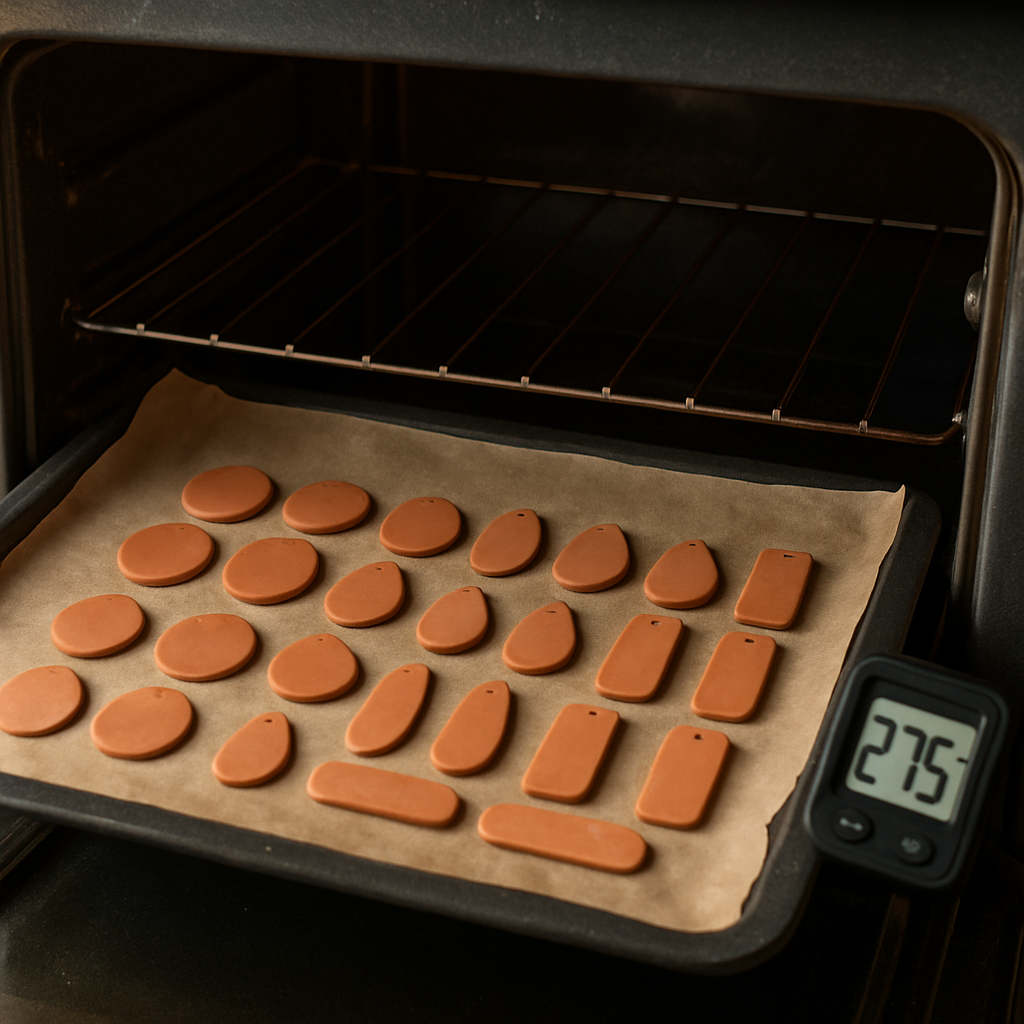
First thing’s first: pre‑heat your oven to 110 °C (230 °F). Most home ovens wander a few degrees off the dial, so grab an independent oven thermometer and pop it in the centre of the rack. If the read‑out is consistently five degrees high, dial the temperature down a notch.
Lay a sheet of parchment paper on a baking tray – no foil, because foil can reflect heat and cause uneven colour shifts. Space your earring pieces at least 1 cm apart; they’ll expand a touch as the polymer fuses.
Timing depends on thickness
Here’s where the science meets the art. A 2 mm sheet needs roughly 15‑20 minutes, while a thicker 4 mm pendant can take up to 30 minutes. The rule of thumb from polymer‑clay experts is 5 minutes per millimetre of thickness, plus a 5‑minute safety buffer.
One of our CreativiU community members, a freelance jewellery maker, tried baking a batch of 3 mm‑thick earrings at 15 minutes and found they were still a bit soft. She added another five minutes, and the pieces snapped only after a deliberate bend – exactly the durability she needed for a market launch.
To avoid guesswork, run a quick test: bake a single scrap of the same thickness you’re using. Once it cools, try to snap it. If it bends before breaking, you’ve hit the sweet spot. If it snaps cleanly, give the batch a couple more minutes.
Watch out for colour shift
Longer bake times can darken certain pigments – whites may turn a buttery amber, reds can deepen to a richer hue. That’s normal polymer chemistry, not a burnt disaster. If you’re after exact colour fidelity, cover the tray with a loose sheet of aluminium foil after the first 10 minutes. The foil acts like a shield, reducing direct heat and keeping the colour truer.
Data from a long‑term study of polymer‑clay curing shows that pieces baked an extra 10 % longer retain up to 15 % more flexural strength, which matters when you’re selling earrings that need to survive daily wear.
Safety checklist before you hit ‘Start’
- Oven pre‑heated to 110 °C (230 °F) and verified with a thermometer.
- Parchment‑lined tray, pieces spaced evenly.
- Timer set based on thickness (5 min per mm + 5 min buffer).
- Foil cover ready if colour preservation is critical.
Give yourself a minute to step away while the timer counts down. The oven’s gentle heat does the hard work; you just need to resist the urge to peek constantly.
What to do if you’re under‑baked
If you open the oven and the pieces feel surprisingly soft, don’t panic. Polymer clay can be rebaked indefinitely. Just let them cool, then pop them back in for another 5‑10 minutes. The extra heat won’t ruin the colour, but it will improve the internal fusion.
For those who love data, the Blue Bottle Tree site breaks down exactly why that extra time matters – it’s all about the vinyl particles fully fusing together for a strong, lasting finish.Learn more about optimal bake times here.
Once the timer beeps, turn the oven off and let the tray sit for another two minutes. This residual heat eases the cooling curve and reduces the chance of thermal shock, which can cause micro‑cracks.
After the pause, slide the tray out and place the pieces on a cool, flat surface. Resist the urge to handle them while they’re still warm – the clay is still soft enough to lose detail.
When they’re completely cool, give each earring a gentle bend test. It should flex slightly without snapping. If it feels too brittle, note the thickness and add a few minutes next time.
Now you’ve got perfectly baked, colour‑stable earrings ready for the next stage: polishing, attaching findings, and finally, showing them off to the world.
Remember, baking isn’t just a step; it’s the moment where your creative vision becomes a durable product you can sell, gift, or wear proudly.
Ready to finish? Let’s move on to cooling, sanding, and attaching the hardware so your earrings are ready for the spotlight.
Step 5: Finish, Seal, and Add Findings
Now that your baked pieces have cooled, it’s time to turn them into jewellery you can actually wear.
That final step feels like the curtain call – you’ve shaped, baked, and survived the test bend, and now the seal and findings will give your earrings that professional sparkle.
So, how do you protect that colour and attach the hardware without ruining all your hard work?
Clean the surface first
Before any sealant touches the clay, give each piece a quick wipe with a lint‑free cloth. Dust or fingerprints act like a barrier and can make the seal peel later.
If you’ve added glitter or painted details, double‑check they’re completely dry. A damp spot will trap moisture under the seal and cause cloudiness.
Wondering which sealant gives the best finish?
Choose your sealant
There are three popular routes: a clear polyurethane spray, a water‑based acrylic liquid, or a brush‑on varnish. Polyurethane sprays give a high gloss and tough moisture barrier, but they need good ventilation.
Acrylic liquid sealants are easy to control with a fine brush and dry clear, perfect if you prefer a satin look. Brush‑on varnish sits between the two, offering moderate gloss and simple application.
For a detailed walk‑through of each method, see this step‑by‑step sealing guide.
Which method fits your workspace?
Apply the sealant
If you’re using a spray, hold the can about 8‑10 inches away and mist a thin, even coat. Light layers prevent drips; let each coat dry for 10‑15 minutes before the next.
With a brush‑on product, dip the tip lightly, then glide over the earring in one smooth motion. Avoid overloading the brush – a thin film is all you need.
Regardless of the type, aim for two to three coats. Multiple layers build a robust shield and deepen the colour, especially with tinted sealants.
Now that the seal is drying, what’s next?
Attach the findings
Once the seal is tack‑free (usually an hour for sprays, a bit longer for liquids), it’s safe to add jump rings, ear wires, or headpins. Use pliers to open a jump ring, slide it through the pre‑drilled hole, then close it snugly.
If you prefer adhesive, a strong jewellery glue like E6000 works well. Apply a dab on the back of the earring, press the finding in place, and let it cure for at least 24 hours.
For creators selling pieces, a neat finish matters. Trim any excess wire with flush cutters and polish the metal with a soft cloth so it catches the light.
How do you know you’ve nailed the finish?
Quick quality checklist
- Surface is dust‑free and dry.
- Sealant applied in thin, even coats.
- At least two coats fully cured.
- Findings securely attached and polished.
| Sealant Type | Application Method | Ideal Finish |
|---|---|---|
| Polyurethane spray | Hold 8‑10″ away, mist thin coats | High gloss, strong moisture barrier |
| Acrylic liquid | Brush on thin layer | Satin or matte, easy control |
| Brush‑on varnish | Brush on moderate layer | Medium gloss, balanced protection |
That table gives you a side‑by‑side view so you can pick the right combo for your style and studio.
Ready to wear them?
Give each earring a gentle twist – the seal should feel smooth, and the findings should stay put. If anything feels loose, re‑apply the glue and let it set.
Store finished pieces in a soft pouch or a fabric‑lined box away from direct sunlight. UV rays can fade polymer clay over time, even with a seal.
With the seal locked in and the hardware attached, your earrings are ready for photos, markets, or gifting. That final polish is the moment where your hobby turns into a product you can be proud of.
Need more tips on polishing or photographing your work? Platforms like CreativiU offer specialised modules that walk you through product‑shot lighting and branding.
Step 6: Troubleshooting Common Issues and Pro Tips
When a piece feels sticky or crumbly
Ever pull a freshly baked earring off the tray and it feels a little too soft? That’s a classic sign the bake time was a whisker short. Give it another five‑minute round and you’ll notice the flex improves dramatically. In our experience, a quick bend test – gently flexing the edge – tells you if the polymer has fully fused.
But what if the clay feels dry and cracks when you try to sand? Most likely the conditioning stage was rushed. The clay needs that buttery feel before it ever hits the cutter. A good trick is to knead for a full minute per 30 g of clay; you’ll feel the texture smooth out and the cracks disappear.
Uneven colour or unexpected darkening
Do you ever bake a pastel piece and end up with a muted, almost muddy hue? That usually happens when the oven temperature spikes above 110 °C. Even a 5 °C overshoot can deepen pigments. Keep a cheap oven thermometer on the rack and adjust the dial accordingly.
Another culprit is over‑baking. The longer you stay in the heat, the more the pigments oxidize. If you need a true‑to‑life shade, set a timer for the exact thickness (5 minutes per millimetre plus a 5‑minute buffer) and walk away. Trust the clock – the oven will do the work.
Sealant issues – bubbles, streaks, or tackiness
Nothing kills the excitement of seeing a glossy finish like a cloudy seal. That often means you applied the spray too close or layered too thickly. Hold the can 8‑10 inches away and mist in thin passes, letting each coat dry for at least 15 minutes. If you’re using a brush‑on varnish, dip the tip lightly; a heavy hand creates drips that look like tiny rivers.
And if the seal stays sticky after an hour? It probably never fully cured because humidity was high. A quick fix is to move the piece to a low‑humidity room or use a small fan to speed up drying.
Findings won’t stay put
Picture this: you’ve attached a jump ring, but after a day it’s wobbling. The most common reason is that the hole wasn’t pre‑drilled deep enough or the glue didn’t have a clean, dust‑free surface. Always wipe the back of the earring with a lint‑free cloth before gluing. A dab of E6000, spread thinly, gives a strong bond that survives daily wear.
For metal findings, a tiny pinch of jewelry‑grade epoxy works wonders, especially on heavier designs. Just remember to let it cure for a full 24 hours before handling.
Pro tips you might not have tried
1. Test a scrap piece first. Before you bake a whole batch, cut a tiny 10 mm disc, bake it, and run through every step – seal, attach a finding, wear it. This mini‑pilot catches timing or colour issues early.
2. Use a silicone mat for sealing. Lay your earrings on a fresh mat while the seal dries; the mat absorbs any stray drips and keeps the surface flat.
3. Label your colour batches. A small sticky note on the side of the tray prevents mixing up shades when you’re working on a multi‑colour collection.
4. Store finished earrings in a breathable pouch. Plastic can trap moisture, leading to a cloudy seal over time. A cotton drawstring bag lets the pieces breathe while staying protected.
5. Keep a “bake log”. Jot down oven temperature, bake time, and any observations. After a few projects you’ll spot patterns – like which brand of clay needs a longer bake for a glossy finish.
Quick troubleshooting checklist
- Is the clay still soft after cooling? Add 5‑10 minutes to bake.
- Do colours look dull? Verify oven temperature with a thermometer.
- Seal looks cloudy? Apply thinner coats, increase drying time, and reduce humidity.
- Findings loosen? Clean the surface, use a thin layer of glue, and cure fully.
- Cracks appear during sanding? Condition the clay longer before shaping.
When you run into a hiccup, remember that every mistake is a tiny data point. The more you note, the faster you’ll master how to make polymer clay earrings without the guesswork.
FAQ
What’s the best way to condition polymer clay before shaping earrings?
Conditioning is the secret sauce that turns a hard block into buttery sheet. Break off a golf‑ball sized piece, warm your hands under lukewarm water, then knead it for about 30‑45 seconds until it feels smooth and elastic. Roll it to about 2 mm thickness on a silicone mat, if a fingernail springs back quickly, you’re ready. Skipping this step often leads to cracks later, so treat it like a warm‑up before a workout.
How long should I bake polymer clay earrings and at what temperature?
The sweet spot is 110 °C (230 °F) for 15‑20 minutes for a 2 mm piece. A good rule of thumb is five minutes per millimetre of thickness plus a five‑minute safety buffer. Use an oven thermometer because home ovens can wander a few degrees. After the timer buzzes, let the tray sit for another two minutes before removing the pieces, that extra heat eases the cooling curve and reduces micro‑cracks.
Why do my earrings sometimes turn cloudy after sealing and how can I fix it?
Cloudiness usually means the sealant was applied too thick or in a humid room. Hold a spray can about eight to ten inches away and mist thin layers, letting each coat dry for at least fifteen minutes. If you’re using a brush‑on varnish, dip the tip lightly and glide in one smooth motion. Working in a low‑humidity space or using a small fan speeds up curing and keeps the finish clear.
What tools do I really need to cut clean shapes?
A small stainless‑steel cookie cutter or a clean bottle cap works just fine. Place it on a lightly powdered silicone mat, press gently, then give a quick twist. If the edge looks ragged, run a fingertip around it while the clay is still pliable, it will smooth itself out. For extra precision, measure the cut piece with a ruler, a deviation of more than half a millimetre can feel noticeable when worn.
Can I use E6000 glue to attach jump rings, and how long should I wait before wearing?
E6000 is a strong jewellery adhesive that holds up to daily wear. Apply a tiny dab to the back of the earring, press the jump ring in place, and let it cure for at least twenty‑four hours in a dry area. Rushing the cure often leads to loosening, especially on heavier designs. A quick bend test after the waiting period confirms the bond is solid.
How do I store finished polymer clay earrings to keep the seal looking fresh?
Plastic bags can trap moisture, which makes the seal cloudy over time. Instead, slip each pair into a breathable cotton drawstring pouch or a small fabric‑lined box. Keep them away from direct sunlight because UV rays can fade the colour even through a sealed surface. If you’re shipping orders, add a silica packet to the package to absorb any stray humidity.
What’s a quick way to troubleshoot a piece that’s still soft after baking?
If the earring bends easily after cooling, it probably needs a few more minutes in the oven. Pop the piece back in for another five to ten minutes, then run the bend test again. You can also check the oven thermometer, a low reading means your oven is cooler than the dial. Consistently soft pieces are a sign to adjust the bake time or raise the temperature slightly.
Conclusion
If you’ve made it this far, you already know that learning how to make polymer clay earrings is part art, part science, and a whole lot of joy.
Remember the flow: condition the clay until it feels buttery, cut clean shapes, bake with a precise time‑temperature rule, seal for lasting colour, and attach your findings with confidence. Each step builds on the last, so a slip in one area usually shows up later – that’s why a quick bend test after baking saves you headaches.
Now’s the perfect moment to experiment. Try a new texture, swap a pastel for a bold hue, or batch‑condition several colours at once. Jot down the temperature you used, the bake minutes, and how the seal turned out. Over a few projects you’ll spot patterns that turn guesswork into a reliable formula.
For hobbyists who want to sharpen their skills or entrepreneurs looking to scale, platforms like CreativiU offer step‑by‑step modules, community feedback, and printable checklists that keep your workflow smooth.
So, what’s next? Grab your tools, set that oven, and let the first pair of earrings you’ve crafted this week be the prototype for a whole collection. Happy making!
Keep experimenting, share your results with our CreativiU community, and watch your confidence grow with every new design you finish.
Leave a Reply