Ever stared at a block of polymer clay and thought, “I could make something amazing, but where do I even begin?” You’re not alone. That moment of excitement mixed with a pinch of uncertainty is exactly what fuels our creativity.
In this intro, we’ll walk you through why a solid polymer clay tutorial matters. Whether you’re a hobbyist looking for a weekend project, a creative entrepreneur hoping to add a new product line, or a parent searching for a mess‑controlled activity for the kids, the right guidance can turn a vague idea into a polished piece you’re proud to wear or sell.
Think about the last time you tried a DIY craft without a roadmap. Maybe the colors didn’t blend, the pieces cracked, or the finish looked dull. That’s often because the fundamentals—like conditioning the clay, selecting the proper bake temperature, and using the right tools—were skipped. A step‑by‑step tutorial eliminates those guesswork moments.
Here’s a quick snapshot of what you’ll learn later in the article:
- How to condition polymer clay so it’s supple and free of air bubbles.
- Choosing the perfect sculpting tools without breaking the bank.
- Mastering basic techniques such as rolling, pressing, and embossing.
- Getting a flawless bake every time, no matter if you’re using a home oven or a dedicated kiln.
Real‑world example: Sarah, a freelance jewelry maker from Ontario, started with a simple pair of earrings. By following a detailed tutorial, she discovered how to embed tiny glitter flakes and achieve a glossy finish that sold out within days on her online shop. She now expands her line to necklaces and brooches, all rooted in the same core process.
Another scenario: a family of three gathered around the kitchen table for a rainy Saturday. The kids rolled out shapes, you added texture with everyday objects, and together you baked a batch of mini‑pendants. Not only did they learn a new skill, they also created keepsakes that now hang on the fridge.
If you’re wondering where to find a tutorial that speaks your language, check out our Step‑By‑Step DIY Polymer Clay Jewelry Tutorial for Beginners and Pros. It breaks down each stage with photos, tool lists, and pro tips that even seasoned crafters appreciate.
Ready to dive deeper? Grab your clay, preheat the oven, and let’s turn that spark of curiosity into a tangible, beautiful result. The journey from raw material to finished piece is just a tutorial away.
TL;DR
If you’re ready to turn a simple block of polymer clay into polished jewelry or fun kid projects, our step‑by‑step polymer clay tutorial shows exactly how, with clear photos, tool lists, and baking tips.
Follow it, and you’ll finish your first piece confidently, even if you’ve never crafted before, today.
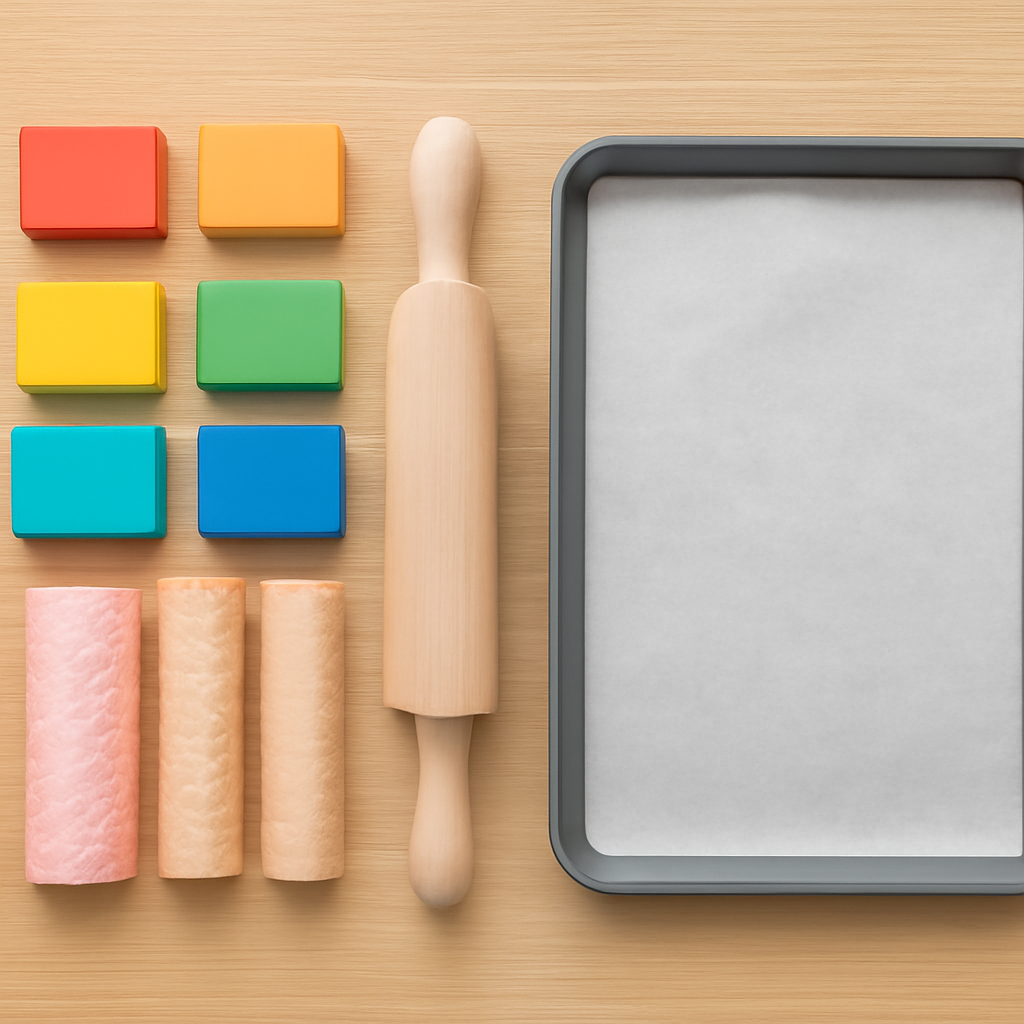
Step 1: Gather Materials
Before you even think about shaping that first bead or sculpting a tiny animal, you’ve got to get your toolbox ready. I know the excitement can make you want to dive straight in, but trust me – a well‑stocked, organized workspace saves you from a lot of frustration later.
Basic Clay and Conditioning Tools
First up, the clay itself. If you’re just starting, Sculpey iii or Fimo Soft are the go‑to choices because they stay pliable and are forgiving when you’re still learning to condition. A quick tip we’ve seen work for many CreativiU members: run the clay through a pasta‑machine roller for a few passes – it speeds up conditioning and gives you an even consistency.
Next, you’ll need a few essential hand tools. A simple craft knife, a needle‑point stylus, and a small rolling pin (or an old pasta‑roller) cover most beginner tasks. You don’t have to splurge; even a clean butter knife can double as a scraper.
Specialty Supplies for Creative Entrepreneurs
If you’re planning to sell your pieces, think about adding a few extras now so you don’t have to hunt later. A set of metal or silicone clay cutters lets you pop out uniform shapes for charms or pendants. For texture, a couple of texture rollers or even a piece of lace can give your work a professional look without extra cost.
Don’t forget the baking gear. Line a cookie sheet with parchment paper – it protects the surface and makes cleanup painless. Some creators even use a piece of aluminum foil to support delicate arches while they bake.
Safety and Comfort
Ventilation matters. Work near a window or turn on a fan; polymer clay releases a faint odor when it cures, and while it’s non‑toxic, good airflow keeps the space pleasant. And grab a pair of latex or nitrile gloves if you’re prone to skin irritation – they’re cheap and keep your hands clean for the next project.
For those who love a tidy studio, we recommend a small storage bin with dividers. Keep colours separated, tools in their own slots, and you’ll spend less time rummaging and more time creating.
Real‑World Examples
Take Maya, a hobbyist‑turned‑online seller from Vancouver. She started with a basic set of Sculpey iii, a rolling pin, and a cookie sheet. After a month of experimenting, she added a silicone cutter set and began selling matching earrings. Her sales jumped 150 % once she upgraded to a professional‑grade oven thermometer – a tiny tool that guarantees consistent bake temperatures.
Another example: the Johnson family in a small Ontario town turned a rainy Saturday into a mini‑workshop. The kids used cookie cutters from the kitchen, while dad used a needle tool to add fine details on tiny animal figurines. The whole family ended up with a set of personalized keychains they later gifted to friends.
Want a step‑by‑step guide that walks you through choosing the right ear‑ring tools? Check out our How to Make Polymer Clay Earrings guide for a deeper dive.
Backlink Inspirations
Looking for design inspiration beyond clay? The colour palettes and composition ideas on Gratitude Studios’ landscape paintings can spark fresh colour mixes for your next project.
And if you’re thinking about branding your finished pieces, consider custom packaging from Quench Bottles. A sleek, branded bottle can turn a simple charm into a memorable gift set.
Finally, give yourself a quick checklist before you start:
- Choose your clay brand (Sculpey iii or Fimo Soft).
- Gather conditioning tools (rolling pin or pasta machine).
- Collect basic sculpting tools (knife, stylus, needle).
- Set up baking supplies (parchment paper, cookie sheet).
- Ensure ventilation and safety gear.
Once everything’s laid out, you’ll feel a surge of confidence – that’s the magic of preparation. Now you’re ready to move on to conditioning the clay and shaping your first piece.
Step 2: Conditioning Polymer Clay
Okay, you’ve got your workspace set up, the tools are within arm’s reach, and you’re staring at that block of polymer clay like it’s a mystery you need to solve. Ever felt that tiny twinge of frustration when the clay feels a bit stiff or crumbly? That’s totally normal, and it’s exactly why we condition it first.
Conditioning isn’t magic, it’s simply making the clay pliable enough to roll, shape, and stick to itself without fighting it. Think of it as a quick warm‑up before a workout – you don’t want to jump straight into a sprint.
Warm the clay gently
Start by softening the clay with a little body heat. Hold a small piece in your palms for a minute or two, or slip it into a warm (not hot) water bath wrapped in a zip‑lock bag. If you’re in a chilly studio, a quick pass with a hair dryer on low works wonders. The goal is just to take the edge off; you don’t want to start curing the clay.
Hand‑warming is perfect for a few colour blocks, while the water bath shines when you’re conditioning a whole block at once. Once it’s a bit softer, you’re ready for the real work.
Three core conditioning techniques
There are three tried‑and‑true methods that most crafters swear by. You can use one, mix them, or switch depending on the brand you’re working with.
- Kneading: Roll the softened clay between your palms, pressing and folding until it feels uniformly smooth. This is the fastest way to break up any stiff spots.
- Folding: Flatten the clay with a rolling pin or pasta machine, then fold it in half and press. Repeat a few times, rotating the direction each pass. Folding helps chase out air bubbles and blends colours if you’re mixing pigments.
- Stretching: Pull the clay gently, then fold it back onto itself. Repeating this stretch‑fold cycle aligns the polymer particles, giving the clay a silkier feel.
In practice, I usually start with a quick knead, then run the slab through the pasta machine a couple of times, folding between passes. The result? A buttery‑soft sheet that bends without cracking.
Need a deeper dive into why these steps matter? Craftenify breaks down the science behind conditioning and offers a handy checklist.
Quick readiness tests
Before you dive into sculpting, run a fast “feel test.” Roll a tiny piece into a snake; it should bend easily without snapping. Flatten a ball into a thin sheet – no cracks, no gritty texture. Finally, do a gentle tear test: a well‑conditioned piece will rip cleanly, leaving smooth edges.
If any of these feel off, give the clay another round of kneading or a few more passes through the machine. You’ll know it’s ready when it feels like soft putty you could spread on toast (but don’t actually do that).
Watch the video above for a visual walkthrough of each technique – it’s a great supplement to the written steps.
Common pitfalls (and how to avoid them)
One myth you’ll hear a lot is that conditioning somehow “activates” the clay’s strength. The Blue Bottle Tree points out that strength comes from proper baking, not conditioning. What conditioning really does is improve workability and self‑adhesion.
Another trap is over‑conditioning. If the clay gets too sticky, pause for a few minutes; it will relax back to a workable state. You can always re‑warm it later.
Choosing the right tool for your brand
Soft brands like Sculpey III often need just a quick hand‑knead. Stiffer lines such as Premo or Kato may require a pasta machine and a few extra folds. If you’re dealing with a crumbly bar, add a dab of clay softener (just a pinch) and work it in during the kneading stage.
Now you’ve got that smooth, elastic slab ready for shaping, embossing, or any other creative adventure you have in mind.
Quick reference table
| Method | Best for | Key tip |
|---|---|---|
| Kneading | All brands, especially soft clays | Warm in your hands first; use firm pressure. |
| Folding (with roller) | When mixing colours or removing air bubbles | Fold in multiple directions; avoid trapping air. |
| Stretching | Stiffer or fracturing clays (e.g., Premo) | Pull gently, then fold back; repeat until silky. |
With your clay conditioned, you’re officially past the “meh” stage and into the “let’s create something beautiful” zone. Grab your tools, pick a design, and enjoy the smooth glide of properly conditioned polymer clay. Happy crafting!
Step 3: Shaping Techniques
Now that your clay is buttery smooth, it’s time to start giving it a shape that tells a story. You might be wondering whether to roll, press, or sculpt – the answer depends on the piece you have in mind and the vibe you want to create.
Basic roll‑and‑cut method
Grab a clean rolling pin or the pasta‑machine roller you used during conditioning. Roll the slab to about 2 mm thickness; that’s thick enough to hold detail but thin enough to stay flexible. Then, using a cookie‑cutter, a craft knife, or even a simple kitchen biscuit cutter, press out the silhouette you need.
Pro tip: after you cut, gently lift the shape and place it on a piece of parchment. If the edges feel a little soft, let them sit for a minute – the clay will firm up just enough to hold its outline.
Embossing and texture
Embossing is where the magic really shows. Take a textured roller, a piece of lace, or even a leaf you found outside. Lay the tool on the slab and roll gently, watching the pattern sink into the surface. For a deeper imprint, press the tool with the heel of your hand and roll back over it.
Imagine a kid in the Johnson family using a pine‑cone imprint for a woodland‑themed pendant – the result is a charming, one‑of‑a‑kind texture that feels personal.
Three‑dimensional sculpting
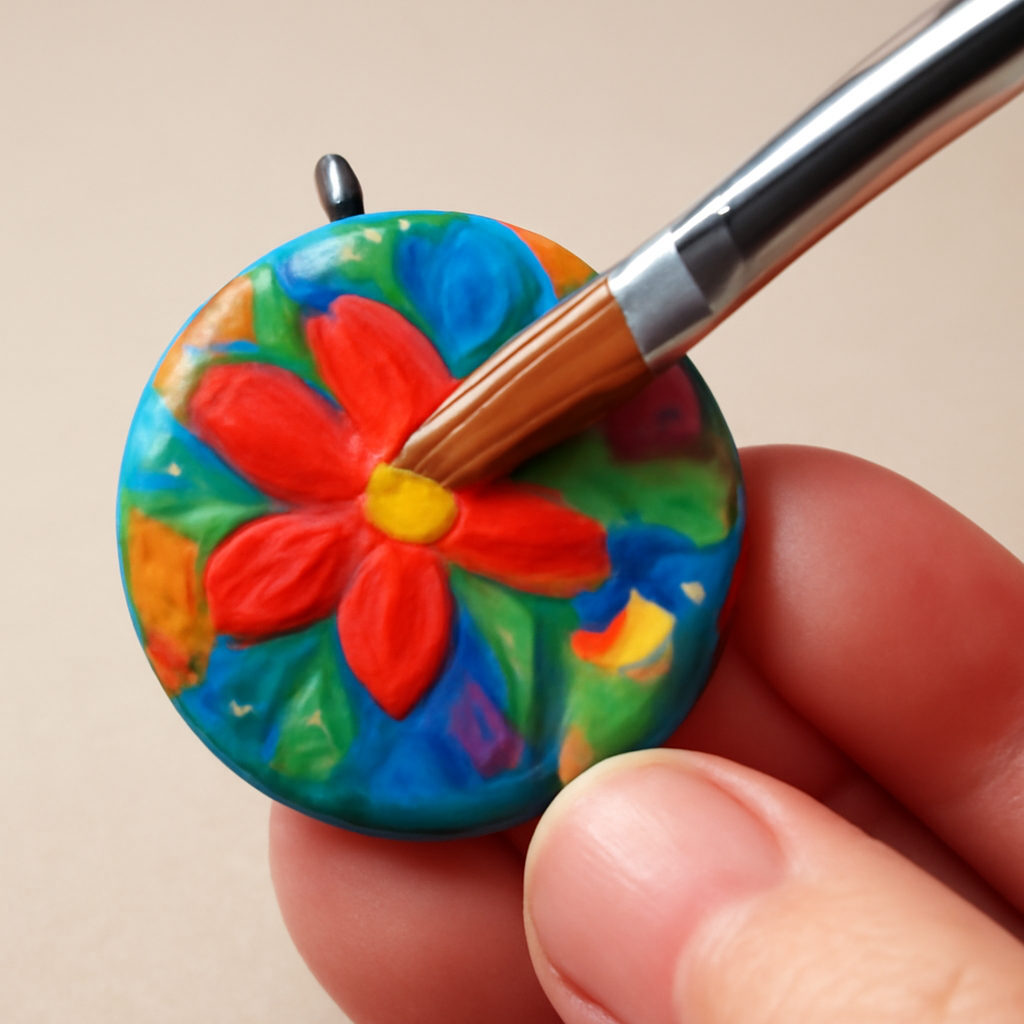
If you’re after a three‑dimensional form, start by pulling a small ball of clay and rolling it into a snake. Coil the snake around a needle‑point stylus to create a tight spiral, or wrap it around a simple wire form for a mini‑bracelet. The key is to keep the coil loose enough that it doesn’t snap, then smooth the joins with a fingertip.
One of our CreativiU community members, a hobbyist‑turned‑entrepreneur, used this technique to craft a tiny “flower” charm that became a bestseller after adding a dab of glaze.
Combining techniques for mixed‑media pieces
Don’t feel forced to stick to one method. A popular approach is to roll a base, emboss a pattern, then add sculpted accents on top. For example, roll a round disc, emboss a mandala design, and then sculpt a tiny 3‑D leaf that sits in the centre. The contrast between flat and raised surfaces catches light beautifully.
Because light plays a huge role, you might want to think about how the finished piece will be displayed. A quick glance at creative lighting ideas can help you choose a spotlight or LED strip that highlights those textures.
Check your work as you go
Every few minutes, run a “finger test”: lightly press the surface. If it feels smooth and springy, you’re good. If you notice a hard spot, it means the clay has started to firm – gently warm it in your palms and smooth it out before it cracks.
Another quick check is the “tear test”. Pinch a corner and pull; a well‑shaped piece will tear cleanly, leaving a neat edge rather than jagged bits.
Final polishing before bake
Once you’re happy with the shape, give the piece a light dusting of cornstarch or talc. This reduces stickiness and makes it easier to handle when you move it to the baking sheet. Then, arrange the pieces on parchment, making sure they don’t touch – even a tiny bridge can fuse two parts together during baking.
If you’re planning a collection, consider using the wire wrapping jewelry tutorial as a next step to add findings and create a polished finished product.
Take a moment to admire the shape you’ve just created. You’ve moved from a plain slab to a piece that feels tactile, looks unique, and is ready for the oven. That’s the sweet spot where preparation meets creativity.
Step 4: Baking and Finishing
Alright, you’ve shaped your piece and it’s looking just the way you imagined. The next big question is: how do we turn that soft, pliable slab into a hard‑wearing jewel without ending up with a melted mess? That’s where the bake and the finish become the heart of any polymer clay tutorial.
Set the right temperature (and trust your thermometer)
Most brands whisper “about 265 °F (130 °C)” in the packaging, but ovens love to play tricks. A cheap dial can be five degrees off, and that little variance can mean the difference between a glossy finish and a burnt, discoloured piece. The safest move? Grab an oven thermometer and set the oven to the manufacturer’s recommendation – usually 265 °F to 275 °F (130 °C‑135 °C) for Sculpey iii, Premo! and similar clays. Noble Riot explains why that extra check matters.
Preheat the oven for at least ten minutes so the heat stabilises, then slide your parchment‑lined sheet in. Keep the door closed; every time you open it the temperature drops and your piece can end up unevenly baked.
Time it right for thickness
Do you remember the old saying “thick‑but‑slow, thin‑but‑fast”? Polymer clay follows that rule to the letter. As a rule of thumb, bake for a minimum of 30 minutes per ¼ inch of thickness. If your pendant is a hefty ¾ inch, bump the time up to 90 minutes, or add an extra 15‑minute block after the first run if the piece still feels soft when cooled.
One quick trick we love at CreativiU: after the initial bake, press a fingernail into an inconspicuous spot. If the dent springs back, you’re good. If it stays, pop it back in for another 10‑15 minutes. It’s a low‑tech way to avoid under‑baking without a second thermometer.
Choose a baking surface that plays nice
Metal trays sound convenient, but they can create hot spots that scorch the clay. Instead, use a flat, heat‑resistant surface like an unglazed ceramic tile, a glass baking sheet, or a silicone mat. Those materials spread heat evenly and keep the bottom of your piece from turning dark.
We also recommend a light dusting of cornstarch on the parchment before you place the clay – it reduces stickiness and makes post‑bake handling a breeze.
Cool down before you touch
Patience is a tiny super‑power here. Let the oven turn off and the tray sit for about five minutes, then move it to a wire rack. The clay continues to cure as it cools, so rushing it can leave a soft centre.
If you’re working on a collection, label each piece with a sticky note while it’s still warm. That way you won’t mix up designs later, and you’ll have a tidy workflow for the finishing stage.
Finishing: sand, buff, and seal
Now the fun, tactile part begins. Jessama Tutorials explains the best sanding materials. Sanding removes fingerprints and evens out any minor bumps. Wet/dry sandpaper in the 400‑800 grit range works well for most beads; start gentle and work up to finer grits. For a showroom shine, finish with a polishing cloth – it gives a silk‑like sheen that you can’t fake with spray paint.
If you’ve got a Dremel or a small rotary tool, a quick pass with a polishing wheel can speed things up, but hand‑buffing is perfectly fine for smaller projects. And don’t forget to seal your work if you plan on daily wear – a thin coat of clear polymer glaze or a brush‑on acrylic sealer locks in colour and adds durability.
Here’s a quick checklist to keep at your workstation:
- Oven thermometer set to 265‑275 °F.
- Par‑chement or silicone mat on a flat tile.
- Bake time based on thickness (30 min/¼‑inch).
- Cool 5 min in oven, then 5 min on rack.
- Wet/dry sandpaper → polishing cloth → seal.
Give yourself a moment to admire the finished piece. The colour should be vibrant, the surface smooth, and the structure solid. If something feels off, you now have the tools to troubleshoot – adjust temperature, extend bake time, or refine your sanding routine. And remember, every bake is a learning curve that gets easier with each project.
Ready to add findings, wire‑wrap, or a splash of enamel? That next step will turn your baked masterpiece into a market‑ready treasure. Happy baking!
Step 5: Painting and Sealing
Now that your piece is baked and sanded, the fun part really begins – bringing colour and protection to life. Have you ever wondered why some finished pieces look flat while others pop like tiny jewels?
That difference is almost always down to how you paint and seal. In this step‑by‑step guide we’ll walk through everything from priming to the final gloss, so you can walk away with a piece that looks museum‑ready and can survive everyday wear.
1. Prep the surface
Even the best paint will struggle on a dusty surface. Grab a soft, damp cloth and gently wipe away any sanding residue. Let the piece dry completely – a quick 2‑minute fan blow works wonders.
Pro tip: a light dip in 400‑grit wet/dry sandpaper followed by a wipe with a tack cloth gives a whisper‑smooth canvas without removing detail.
Primer – the secret sauce
If you skip primer, you’ll end up with patchy colour and chips later. A thin coat of white or gray acrylic gesso works for most colours; black gesso is perfect when you plan to use metallic paints.
Apply with a small flat brush, using long, even strokes. Wait 10‑15 minutes until it’s tacky, then add a second ultra‑thin layer. The double‑coat trick adds depth without adding bulk.
Choose the right paint
Acrylic paint is the go‑to for polymer clay because it adheres well and dries quickly. If you need extra blending time, water‑mixable oil paints are an option, but they’ll add days to your timeline.
For vivid, opaque colour, try FolkArt matte acrylics or Model Color paints – they already contain flow improvers, so you’ll get smooth coverage straight from the bottle. Check out this detailed painting guide for brand‑specific mixing ratios.
Here’s a quick palette checklist:
- Base colour – medium opacity.
- Shadow wash – thin the base colour with a touch of water or acrylic thinner.
- Highlights – dry‑brush a lighter shade on raised edges.
- Details – use a fine‑point brush or cotton swab for eyes, dots, and tiny accents.
Painting process – layer by layer
Start with the base colour. Load your brush, dab off excess on a paper towel, then sweep across the piece in one smooth motion. If you see streaks, smooth them immediately with a clean, damp brush.
Next, add a shadow wash. Dilute your base colour 1:3 with water, then brush over recessed areas. Let it dry, then blend the edges with a clean brush to avoid harsh lines.
For highlights, dip a dry brush in a lighter hue, tap off most of the paint, and lightly sweep over the highest points. This technique, called dry‑brushing, instantly gives a three‑dimensional feel.
Finally, lock in the tiny details – eyes, lettering, or tiny beads. A precision tip cotton swab works like a miniature paintbrush and lets you work without smudging surrounding colour.
Sealing – protect your masterpiece
Even though polymer clay itself is baked solid, any paint you add is vulnerable to wear, moisture, and UV light. A clear seal keeps colour vibrant and adds a professional finish.
There are three main sealers you might consider:
- Matte acrylic varnish – perfect for a subtle, non‑shiny look. Great for everyday jewellery that should blend with skin tones.
- Satin varnish – gives a soft sheen without the high gloss; ideal for fabric‑like textures.
- Gloss resin – creates a glass‑like dome, excellent for beads or pendants you want to showcase under light.
Application tip: use a soft foam brush, apply a thin, even coat, and let it cure for at least 15 minutes before handling. If you’re working on a collection, a second coat after the first has dried adds extra durability.
One real‑world example: Maya, a hobbyist‑turned‑online seller from Vancouver, swears by a two‑coat matte varnish on her everyday earrings. She says the finish resists fingerprint smudges and survived a month of daily wear without chipping.
Another case: the Johnson family created a set of key‑chains with bright acrylic paints. After sealing with a gloss resin spray, the kids’ colours stayed vivid even after a week of being tossed in a backpack.
Quick quality checklist
Before you call it finished, run through this short list:
- Surface is dust‑free and dry?
- Primer is fully cured (no tacky spots)?
- Paint layers are even, no streaks, and fully dry?
- Sealant applied in thin coats, no drips?
- Final piece feels smooth to the touch and looks consistent under light?
If any answer is “no,” give that step another minute – the extra patience saves you a lot of re‑work later.
And there you have it – a fully painted and sealed polymer clay piece ready for gifting, selling, or simply admiring on your desk.
Step 6: Troubleshooting Common Issues
Even after you’ve followed every step, something can still go sideways. The good news? Most hiccups have a simple fix, and you don’t have to scrap the whole project.
Uneven baking or soft spots
If a piece feels squishy in the centre after cooling, the bake time was probably too short for its thickness. Remember the rule of thumb: 30 minutes per ¼ inch. Try the “finger‑press test” – press a hidden spot with a clean fingertip; if it springs back, you’re good. If it stays indented, pop the piece back in the oven for another 10‑15 minutes.
One of the most common complaints from hobbyists is paint that flakes off after a few days of wear. This usually means the surface wasn’t fully cured before priming, or the primer layer was too thick. Solution: after sanding, wipe the piece with a tack cloth, then wait at least 10 minutes before applying primer. Apply primer in a feather‑light coat – you should barely see the brush strokes. Once the primer is tacky (not wet), add your base colour.
For entrepreneurs who sell jewellery, a quick “water droplet test” helps: sprinkle a tiny drop of water on a hidden area. If it beads, the seal is intact; if it spreads, the paint is still vulnerable and needs another seal coat.
Sealer runs or hazy finish
Gloss resin sprays can pool in recessed areas, leaving a cloudy film. The trick is to spray from a distance of about 12‑18 inches and use short bursts rather than a continuous stream.
If you notice a hazy veil after the first coat, sand lightly with 800‑grit sandpaper while the piece is still slightly tacky, then apply a second thin coat. This “wet‑sand” method evens out the surface and restores clarity.
Matte acrylic varnish can feel sticky if applied too thickly. Thin it with a couple of drops of water or a dedicated acrylic medium, then brush on a thin layer. Let each coat dry for at least 15 minutes before handling.
Air bubbles in the clay
Air bubbles are sneaky because they often hide under a layer of paint. If you see a tiny bubble after sealing, use a fine needle to pop it, then smooth the spot with a damp brush before the seal dries.
Preventive tip: after conditioning, roll the clay through a pasta machine twice, folding the slab between passes. This compresses any trapped air and gives you a denser, bubble‑free base.
Sticky or tacky finish after sealing
Sometimes the final piece feels a little tacky to the touch. That usually means the sealer didn’t cure fully, either because humidity was high or the temperature was too low.
Move the piece to a well‑ventilated area and let it sit for 24 hours. If it’s still sticky, sand lightly with 400‑grit paper, wipe clean, and apply a second, thinner coat of sealer.
Quick troubleshooting checklist
- Did you preheat the oven and use a thermometer?
- Is the bake time matched to thickness?
- Did you sand and clean before priming?
- Are primer and paint applied in thin, even coats?
- Did you spray sealer from the correct distance and in short bursts?
- Is the final piece fully cured (no tackiness) after 24 hours?
When you run through this list, most issues resolve themselves without having to start over.
Real‑world example: Maya’s rescue
Maya, a Vancouver‑based hobbyist, once found that her first batch of earrings developed a faint haze after the gloss spray. She followed the “wet‑sand, re‑coat” method, and the finish went from cloudy to glass‑like. The same trick saved her a whole inventory of pieces that would have otherwise needed to be remade.
Another story comes from the Johnson family. Their kids noticed tiny bubbles under the paint on a set of key‑chains. Using a fine needle to pop the bubbles and a quick dab of acrylic medium before the final seal eliminated the imperfections, and the kids were thrilled to see a flawless result.
If you’re still stuck after trying these steps, consider watching a short troubleshooting video that walks through each fix in real time. It’s a handy visual aid that complements the written guide on YouTube.
Remember, every mistake is just a learning curve. The more you troubleshoot, the faster you’ll spot the warning signs next time, and the smoother your polymer‑clay workflow will become.
Conclusion
You’ve just walked through every stage of a polymer clay tutorial, from conditioning the block to polishing the final piece.
If you ever felt stuck, remember the simple checklists we sprinkled throughout – a quick finger test, a bake‑time calculator, and a dust‑off before sealing. Those tiny habits are what separate a hobbyist from a confident creator.
What matters most is momentum. Grab the next colour you’ve been eyeing, set a timer for a 15‑minute shaping sprint, and let the clay speak. You’ll notice the learning curve flattening after a few projects.
For arts‑and‑crafts hobbyists, those steady wins translate into more beautiful gifts and, eventually, a small stream of sales. Creative entrepreneurs often turn that confidence into a branded line, using the same workflow we just refined.
Parents, you now have a repeatable activity that blends play with skill‑building – perfect for weekend tables or virtual craft clubs. And if you crave deeper dives, the CreativiU library is packed with advanced modules that expand on texture, mixed media, and marketing your work.
So, what’s the next step? Pick a piece, apply the checklist, and share your results with the community. Every finished charm is proof that the polymer clay tutorial isn’t just a set of instructions – it’s a launchpad for your creative journey.
FAQ
What polymer clay brand should a beginner start with?
Most hobbyists find Sculpey® III or Fimo® Soft to be the friendliest options. They soften quickly, bake at the same temperature, and keep colours vibrant after curing. If you’re after a slightly firmer feel for intricate details, Premo® works well but may need a bit more conditioning. Try a small pack of each – the tactile feel will tell you which one clicks with your style.
How often should I condition my clay during a project?
Think of conditioning like warming up before a workout. A quick knead every 10‑15 minutes keeps the material pliable, especially if you’ve been shaping for a while or the room is cool. You’ll notice the clay pulling away from your fingers if it starts to stiffen – that’s your cue to roll it through the pasta machine or give it another hand‑knead. Consistency prevents cracks later.
Can I bake polymer clay in a regular home oven?
Absolutely, as long as you use an oven thermometer. Most ovens run a few degrees hotter or cooler than the dial shows, and that small variance can cause discoloration or soft spots. Preheat to the manufacturer’s recommended 265‑275°F (130‑135°C), place your pieces on parchment or a silicone mat, and avoid opening the door mid‑bake. A 10‑minute preheat stabilises the temperature for an even cure.
Why does my finished piece look dull after baking?
A dull finish usually means the surface wasn’t sanded or polished before sealing. Lightly wet‑sand with 400‑800 grit paper, wipe away dust with a tack cloth, then apply a thin coat of clear acrylic varnish or a brush‑on glaze. In our experience at CreativiU, a quick buff with a polishing cloth after the first coat adds that glass‑like sheen without extra effort.
How can I prevent air bubbles when mixing colours?
Air loves to hide in folds, so flatten the clay, fold it, and run it through the pasta machine a couple of times. Each pass squeezes out trapped pockets. If you’re blending two colours, start with a thin layer of each, then roll them together before the final conditioning. A quick “finger test” – the clay should feel uniformly soft, not spongy – confirms the bubbles are gone.
Is it safe to bake polymer clay with kids around?
Yes, as long as you follow basic safety steps: use a dedicated baking tray, keep the oven door closed, and let the pieces cool on a wire rack before handling. Ventilate the room, especially if you’re using a kitchen oven, and keep children away from the hot surface. Teaching kids the finger‑test and simple shaping techniques turns the whole process into a fun, supervised learning activity.
What’s the best way to store leftover polymer clay?
Wrap each colour tightly in plastic wrap or store in zip‑lock bags with a slice of fresh bread to maintain moisture. Keep the bags in a cool, dark drawer – extreme heat can make the clay brittle, while direct sunlight may cause colour fading. If a block becomes hard, a quick warm‑up in your palms or a brief dip in warm (not hot) water revives it without cooking the polymer.
Leave a Reply