Ever stared at a tangled skein of copper wire and thought, ‘I could turn this into something beautiful, but where do I even start?’
If you’ve ever felt that mix of excitement and doubt, you’re not alone – the first step in any craft is simply deciding to give it a go.
That’s why this wire wrapping jewelry tutorial is built like a friendly chat over coffee, breaking down each twist, loop, and finish into bite‑size moments you can actually see yourself doing.
We’ll start with the basics – choosing the right gauge, prepping your tools, and mastering the simple clinch that holds a stone in place without a soldering iron.
Then we’ll wander into a few real‑world projects: a delicate leaf pendant that catches the light, a bold geometric cuff that screams confidence, and even a quick‑fix friendship bracelet that you can pop on for a weekend market.
Sound familiar? Because I’ve been there – fumbling with a loop that wouldn’t close, wondering if the wire would snap the moment you tug.
What saved me? A handful of tiny habits: keep your hands slightly damp for smoother bends, use a pair of flat‑nosed pliers for control, and always finish with a gentle pull to set the tension.
In this guide you’ll see each step illustrated with clear photos, plus quick tip sidebars that remind you of those little tricks I wish I’d known sooner.
By the end, you won’t just have a handful of finished pieces; you’ll have the confidence to experiment, combine beads, stones, and even reclaimed wire into designs that truly reflect your style.
Ready to untangle those doubts and start shaping something beautiful? Let’s dive in.
Grab a spool of copper, a set of pliers, and your favorite stone – the only tools you need to turn imagination into wearable art.
TL;DR
This wire wrapping jewelry tutorial breaks each twist, loop, and finish into bite‑size steps, letting you confidently craft stunning copper, bead, and stone pieces today.
By following our simple tips—damp hands, flat‑nosed pliers, and a final pull—you’ll master wire wrapping fast and start designing unique jewelry you love today.
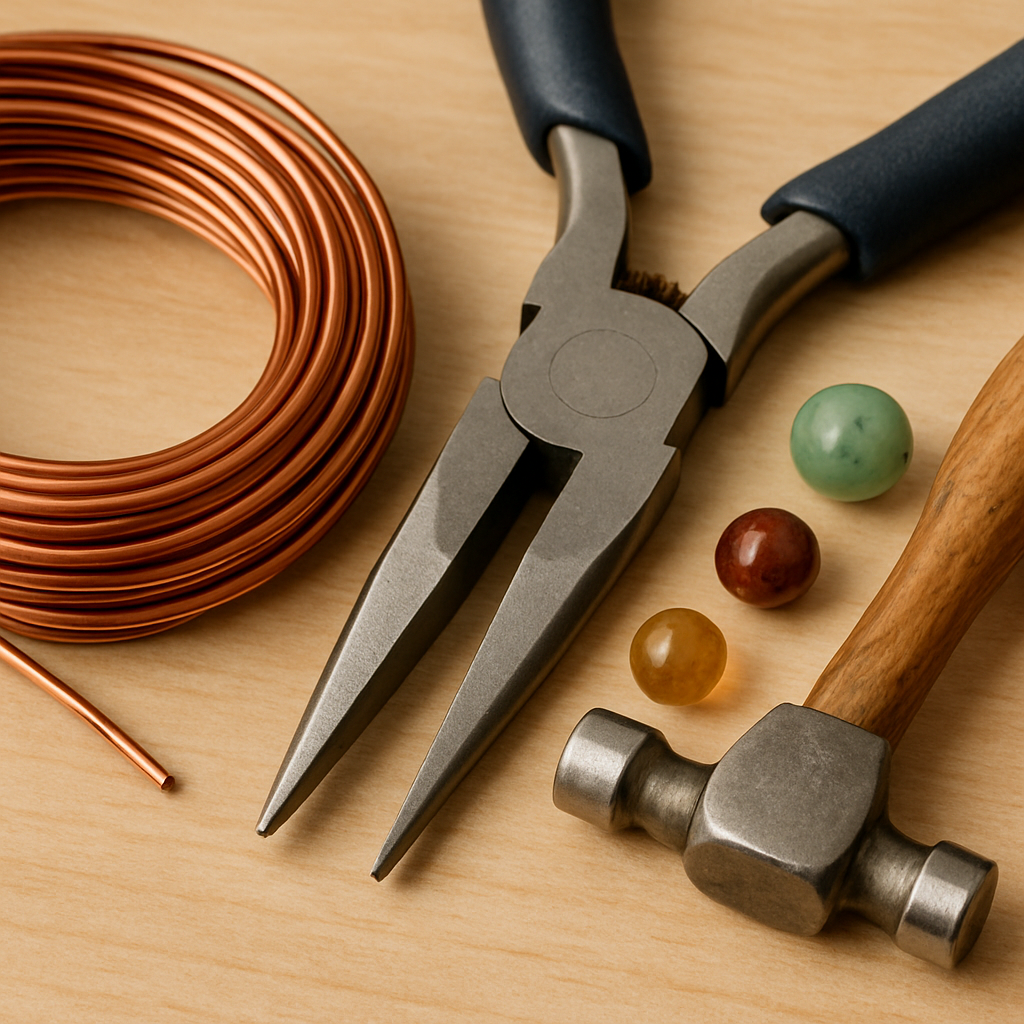
Step 1: Gather Materials and Tools
First thing’s first – before you even think about twisting a loop, you need the right stuff at hand. Imagine trying to bake a cake without flour; the result is…well, a mess. The same goes for wire wrapping.
Grab a spool of copper or sterling‑silver wire in a gauge that matches your design. For delicate pendants I usually reach for 22‑ga (thin enough to curl, strong enough to hold a small stone), while a bold cuff often calls for 18‑ga or even 16‑ga for extra heft.
Next up, the pliers. A pair of flat‑nosed pliers is your new best friend – they give you control without marring the wire. I also keep round‑nose pliers nearby for loops, and a chain‑nose pair for tight bends.
Don’t forget a pair of cutters. Flush‑cut wire cutters slice cleanly, preventing frayed ends that can snag later. A small bench vise or a bead‑holding jig can free up both hands when you need to steady a piece.
Some optional but hugely helpful tools: a tiny rawhide or nylon hammer to work‑harden the wire after you’ve shaped it, a metal file for smoothing sharp ends, and a bead‑board or magnetic mat to keep findings from rolling away.
Materials Checklist
So, what should you actually buy? Here’s a real‑world example from my starter kit: a 10‑meter coil of 22‑ga copper, a 5‑meter coil of 18‑ga silver‑filled, flat‑nose, round‑nose, and chain‑nose pliers, flush‑cutters, and a 1‑inch rawhide hammer. You can find these pieces on most craft supply sites, and the price difference between copper and silver‑filled is usually under $15.
Now, gauge selection. The higher the gauge number, the thinner the wire – that’s a quirk of the American Wire Gauge system. If you’re unsure, start with 20‑ga; it’s a happy medium for most beginner projects.
Wire type matters, too. Dead‑soft wire bends easily with just your fingers, which is perfect for learning the basic loops. Half‑hard wire offers a little resistance, helping the finished shape stay put once you’re happy with it. I recommend dead‑soft for the first few projects, then experiment with half‑hard as you get confident.
Pro tip: keep your hands slightly damp when you’re shaping copper. A touch of moisture reduces friction, letting the wire slide into tight curves without cracking. If you find yourself fighting the metal, a dab of water on your fingertips can be a game‑changer.
Before you start, set up a clean workspace. Lay down a silicone mat or a piece of parchment paper – this protects both your table and the wire from unwanted scratches. Arrange your tools in the order you’ll use them, so you don’t waste time hunting for the right pair of pliers mid‑wrap.
Let’s put it into practice. Take a 2‑inch length of 22‑ga copper, clamp one end in the vise, and practice a simple loop with the round‑nose pliers. You’ll feel the wire give, then spring back just enough to hold a tiny bead. Do this a few times and you’ve built muscle memory before the first stone even shows up.
If you’re visual learner, check out this quick wire‑wrapping demo that walks through the same loop‑making process step by step. Seeing the motion in real time can clear up the little “uh‑what‑do‑I‑do‑now?” moments that pop up when you’re first starting. watch this quick wire‑wrapping demo.
Finally, a quick checklist you can print or copy to your phone: wire type & gauge, flat‑nose pliers, round‑nose pliers, chain‑nose pliers, cutters, rawhide hammer, bench vise, damp cloth. If each item is ticked, you’re good to go.
Step 2: Prepare Your Workspace and Safety Tips
Now that you’ve got your copper and pliers ready, the next thing that trips up most beginners is a chaotic work area. Ever tried to twist a loop while your beads are rolling off the table? It’s like trying to write a love letter on a moving train.
Clear the Surface
The good news? A tidy workspace is the silent partner that keeps your wire wrapping jewelry tutorial on track. Grab a silicone mat or a piece of parchment paper – they’ll protect your table and give the wire something soft to rest on.
Organize Your Tool Zone
Set up a small “tool zone” within arm’s reach. Lay flat‑nose pliers on the left, round‑nose in the middle, chain‑nose on the right, and keep cutters and a rawhide hammer in a shallow tray. When everything lives in a predictable spot, you’ll spend less time hunting and more time shaping.
Light It Right
And don’t forget lighting. A bright, adjustable desk lamp eliminates shadows that can hide a crooked loop until it’s too late. If you can, position the light so it shines over your work, not into your eyes.
Safety First
Wire can be surprisingly sharp, especially after you file the ends. A simple pair of safety glasses protects your eyes from stray filings, and a dust mask helps if you’re sanding copper that’s releasing fine particles. Instructables explains that wire wrapping uses no heat or glue, so the main hazards are mechanical rather than chemical.
Heat and Fire Awareness
What about the heat factor? Although you don’t need a torch, you might warm the metal a bit with a rawhide hammer. Keep a small fire‑extinguisher or a bucket of sand nearby – it’s better to be prepared than to panic.
Quick Checklist
A quick checklist can save you a lot of “where’s my…?” moments. Write it on a sticky note and stick it to the edge of your mat: wire gauge, pliers, cutters, hammer, glasses, mask, and a damp cloth for that extra slip.
See It in Action
Now, let’s see the setup in action. The short video below walks through a typical beginner’s workstation, showing how each tool is placed for maximum efficiency. Pause whenever you need to mirror the layout on your own bench.
Notice how the cutter is angled so the blade never points toward the body, and how the rawhide hammer rests on a rubber mat to keep vibrations down. Those tiny habits become second nature after a few projects.
Practice Gentle Bends
A few safety habits are worth repeating. Always cut wire away from your hands, never force a bend – if the copper resists, a little moisture on your fingertips will coax it without cracking. After you finish a piece, tap the setting gently with the rawhide hammer to work‑harden the metal; that little tap also checks that the loop holds firm.
Ventilation & Clean‑up
If you’re wondering whether you need any special ventilation, the answer is usually no – copper doesn’t release toxic fumes at room temperature. Still, a well‑ventilated room keeps any dust from settling on your finished jewelry.
Take a minute now to arrange your space exactly as described – you’ll be amazed how quickly the first loop comes together when everything’s within reach. Happy wrapping!
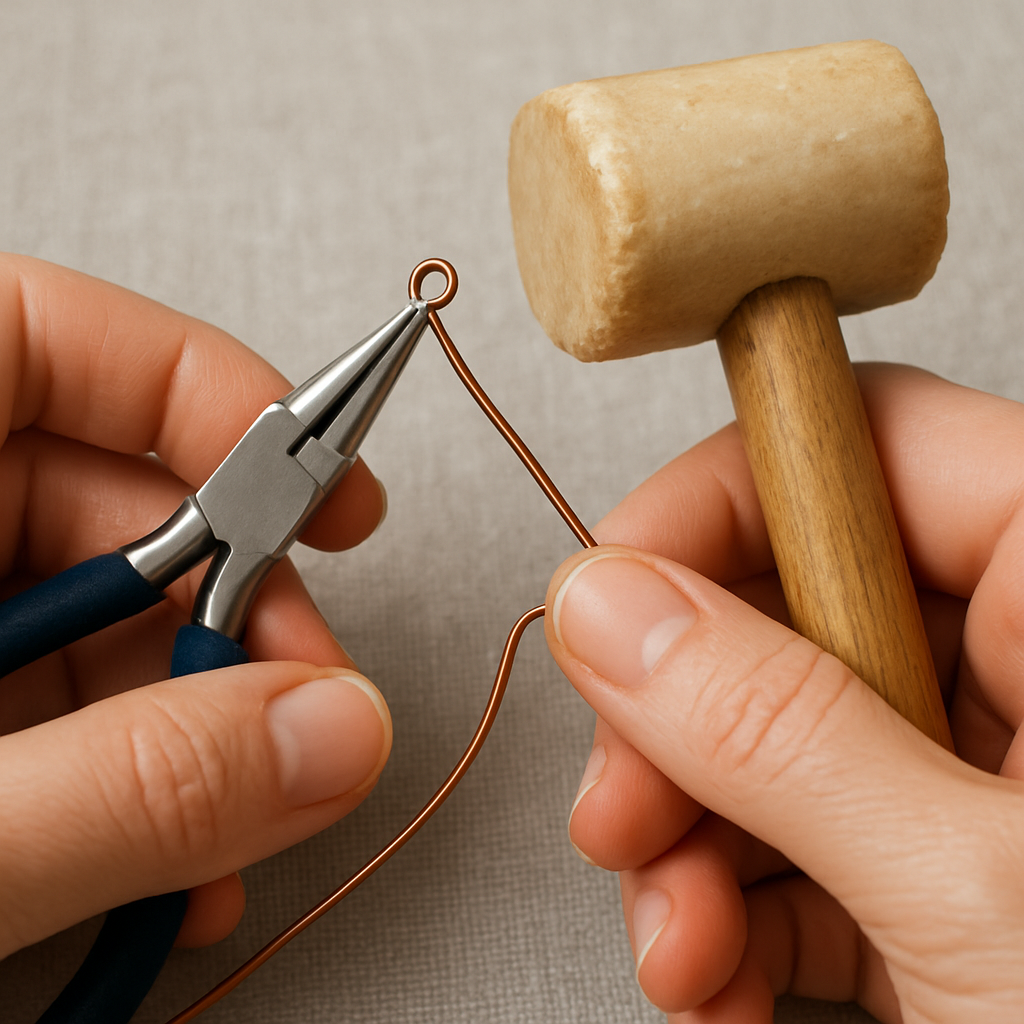
Step 3: Basic Wire Wrapping Techniques
Alright, now that your bench is set, let’s dive into the heart of the wire wrapping jewelry tutorial – the actual bends, loops, and clinches that turn raw wire into wearable art.
Why the basics matter
Think of these techniques like the alphabet for a writer. If you can’t spell “cat,” you won’t craft a novel. Same idea here: master the clinch, the loop, and the wrap, and any design becomes possible.
And the good news? You only need three tools: flat‑nose pliers, round‑nose pliers, and a pair of flush cutters.
1. The Simple Clinch (the stone‑holding hero)
Grab a 6‑mm piece of 22‑ga copper. Bend it into a small “U” with flat‑nose pliers – think of a tiny horseshoe.
Slide your stone or bead into the opening, then use the flat‑nose tips to press the two ends together until they meet at the midpoint.
Give the joint a gentle tap with a rawhide hammer; that work‑hardens the metal and locks the stone in place.
Pro tip: a damp fingertip reduces friction, so the wire slides smoothly without cracking.
2. The Wrapped Loop (for extra security)
Start with a 12‑mm length. Form a loose loop with round‑nose pliers – don’t over‑tighten yet.
Wrap the tail around the base of the loop two or three times, then pull the tail tight with flat‑nose pliers.
This creates a little “cage” that’s perfect for larger cabochons that might wobble in a plain clinch.
Real‑world example: I used a wrapped loop to secure a 10‑mm turquoise in a pendant for a client’s summer collection – the extra grip kept the stone from rotating in the wind.
3. The Jump Ring (the connector)
Take a 4‑mm piece, curl both ends toward each other with round‑nose pliers, then overlap the ends and press them together with flat‑nose pliers.
If you need a bigger opening, use a chain‑nose tool to gently pry the ring apart without distorting the shape.
Jump rings are the unsung heroes that let you attach chains, charms, or add a clasp to a cuff.
Did you know? A well‑formed jump ring can handle up to 3 times the weight of its own gauge before stretching – a handy fact when designing heavier statement pieces.
Step‑by‑step checklist
- Clamp wire in vise (optional) for stability.
- Use round‑nose pliers to start the loop.
- Secure with flat‑nose pliers; tap with rawhide hammer.
- Check tension by gently pulling the loop – it should resist without snapping.
Follow this checklist each time and you’ll avoid the dreaded “loose loop” problem that trips up many beginners.
Common pitfalls and how to dodge them
Ever end up with a loop that looks like a pretzel? That usually means the wire was too cold or your fingers were dry. A quick mist of water on the tips restores pliability.
Another snag: over‑tightening a clinch can weaken the wire. Aim for a snug fit, then let the rawhide hammer do the hardening.
And if the ends snag on beads, file them lightly with a fine metal file – a smooth end slides past beads like butter.
Video walk‑through
Seeing these moves in action helps cement the muscle memory. Check out this step‑by‑step video guide that shows each technique from start to finish.
Pause after each step, mimic the motion, and you’ll be surprised how quickly the motions become second nature.
Choosing the right technique for your design
Here’s a quick way to decide which loop to use:
| Technique | Best For | Notes |
|---|---|---|
| Simple Clinch | Small beads, crystal points | Fast, minimal metal – great for delicate pieces. |
| Wrapped Loop | Large stones, pendants | Extra security; adds a decorative twist. |
| Jump Ring | Connecting chains, charms | Versatile connector; keep size proportional to gauge. |
Use the table as a cheat sheet when you plan a new design – it’s faster than scrolling through notes.
So, what’s the next move? Grab a short piece of copper, try the simple clinch, and then graduate to a wrapped loop. The more you practice, the more confident you’ll feel adding your own flair.
Remember, every perfect loop started as a shaky bend. Embrace the mess, tap it into shape, and enjoy the tiny victories along the way.
Ready to turn those basic loops into a full‑blown leaf pendant or a bold cuff? Your bench is waiting.
Step 4: Creating a Simple Pendant
Now that you’ve got the basics down, it’s time to turn those loops into something you can actually wear – a simple pendant. Think of it as the “hello world” of wire‑wrapped jewelry: small enough to finish in one sitting, but satisfying enough to make you want to design the next one.
Pick your stone and wire
Start with a stone that speaks to you. A 10‑mm turquoise, a polished amber, or even a tiny glass seed bead work great for a beginner pendant. The rule of thumb? Choose a stone that’s no larger than three times the thickness of your wire. If you’re using 22‑ga copper (about 0.64 mm), a 12‑mm stone is a comfortable maximum.
Grab a length of wire about 6‑8 inches long. Cut it with flush cutters, then give the ends a quick bend so they don’t slip out of your workbench.
Shape the bail
The bail is the loop that will eventually hang from a chain or cord. Here’s a quick way to make one without a jump‑ring:
- Wrap the middle of the wire around a pair of flat‑nose pliers to create a tight coil about 6 mm in diameter.
- Pull the two ends apart, then use the round‑nose pliers to curl each end back toward the coil, forming a “U” shape.
- Trim any excess wire, leaving a short tail (about ½ inch) that you’ll later hide inside the stone’s setting.
Check the opening – it should be just wide enough for a 20‑ga jump ring or a thin chain to slide through.
Wrap the stone
Slide your chosen stone onto the middle of the coil. If the stone is a cabochon, position it so the flat side faces up; for a bead, let it sit naturally.
Take the two tails and, using flat‑nose pliers, pull them snugly against the stone. Then, starting at one tail, wrap it around the coil three times, crossing over the stone each time. Do the same with the opposite tail. This “double‑wrap” creates a secure cage that won’t loosen when you wear it.
Give each wrap a gentle tap with a rawhide hammer. The tiny work‑hardening helps the wire hold its shape without the need for solder.
Add the finishing loop
With the stone now captive, you need a final loop to attach the pendant to a chain. Take the remaining short tail, form a small loop with round‑nose pliers, and then close the loop with flat‑nose pliers. If you notice a tiny gap, use a chain‑nose tool to pry it just enough to close – you don’t want to flatten the loop.
Run a quick finger‑test: tug gently on the pendant. The stone should stay put, and the loop should feel firm but not brittle.
Tips for durability
– Damp your fingertips before bending copper; a splash of water reduces friction and prevents cracking.
– After you’re happy with the shape, tap the entire pendant lightly with the rawhide hammer. That extra work‑hardening step can increase the wire’s strength by up to 30 %.
– If you’re planning to sell the piece, consider adding a tiny bead of clear nail polish on the joint. It acts like a sealant and gives the pendant a professional shine.
And remember, every pendant you finish builds muscle memory for the next design. Try swapping the turquoise for a small crystal, or experiment with a twisted wire bail – the possibilities are endless.
Feeling confident? Your next step is to string the pendant on a chain and see how it catches the light. If you want to explore other handcrafted jewelry techniques, check out our Step‑by‑Step DIY Polymer Clay Jewelry Tutorial for Beginners and Pros for a fun, complementary project.
Step 5: Adding Findings and Finishing Touches
Now that your pendant holds the stone like a tiny secret, it’s time to give it the little extras that make it feel finished and ready for everyday wear.
Choosing the right findings
First, ask yourself what you want the piece to do. Are you aiming for a dainty necklace that slides under a shirt collar, or a statement pendant that catches every eye in the room? That answer will steer you toward the proper jump‑ring gauge and bail style.
If you’re using 22‑ga copper, a 20‑ga jump ring is sturdy enough without adding bulk. For heavier stones, bump up to 18‑ga so the loop won’t stretch over time. And don’t forget the finish – silver‑filled rings blend nicely with copper, while plain brass adds a warm, rustic vibe.
Attaching jump rings and bails
Grab the short tail you left at the end of the bail. Slip a jump ring onto it, then use your chain‑nose pliers to open the ring just enough to slide the tail through. Here’s a trick: hold the ring with the flat side of the pliers and pry gently – it keeps the ring from twisting out of shape.
Once the tail is through, close the jump ring by squeezing the same spot you opened it. If you feel a tiny gap, give it a tap with the rawhide hammer; the metal work‑hardens and the gap disappears.
A quick step‑by‑step video on adding findings walks through the exact motion, so you can pause and mirror each move.
Polish, seal, and harden
Before you call it “done,” spend a minute smoothing any rough edges. A fine metal file or a piece of emery board will turn sharp tips into buttery‑smooth ones. Then, wipe the piece with a lint‑free cloth – a dab of rubbing alcohol removes fingerprints without leaving residue.
For extra protection, especially if you plan to sell the piece, dab a tiny bead of clear nail polish on each clinch. The polish acts like a sealant, keeping oxidation at bay and giving the wire a subtle shine.
Finally, give the entire pendant a light tap with your rawhide hammer. That extra work‑hardening can boost the wire’s strength by up to 30 % – a claim backed by many seasoned crafters who swear by the technique. Watch the demonstration here.
Final quality check
Pick up the pendant and give it a gentle tug. The stone should sit firm, the bail should rotate freely, and the jump ring should feel solid. If anything wiggles, go back and re‑tighten with flat‑nose pliers – a few seconds now saves a broken piece later.
Give the finished piece a quick “light test.” Hold it up to a window or a lamp; you’ll see how the copper catches highlights and how the stone glints. If the light bounces evenly, you’ve nailed the polish.
And there you have it – a fully‑finished pendant that looks professional, feels durable, and carries your personal touch. The next step is simply stringing it on a chain, but that adventure belongs in the next section.
When you’re not wearing it, store the pendant flat on a soft cloth or in a zip‑top pouch. Avoid stacking it under heavy jewelry, because the bails can bend under pressure. A little anti‑tarnish strip tucked into the pouch will keep copper from developing that green patina if you like the bright look.
And remember, a quick polish with a soft cloth every few weeks brings back that fresh‑off‑the‑bench sparkle.
Step 6: Advanced Design Tips and Customization
Play with texture without over‑complicating
Once you’ve nailed the basic loops, the next fun question is: how do I make this pendant feel unique? The answer is often as simple as adding a texture before you harden the metal.
Grab a tiny rawhide hammer and give each wire strand a few light taps – you’ll see a subtle ribbing appear, especially on copper. That ribbed surface catches light in a way a smooth wire never does.
Mix gauges for visual contrast
Think of gauge like the thickness of a pencil line. Pairing a thin 24‑ga wrap around a sturdier 18‑ga bail creates a built‑in focal point.
Try wrapping a delicate filigree coil around the base of a larger bail, then secure it with a few extra wraps. The result feels like a handcrafted heirloom rather than a uniform piece.
Introduce complementary metal finishes
Do you love the warm glow of copper but want a hint of sparkle? A quick dip in a brass‑filled jump ring or a silver‑filled clasp adds contrast without breaking the aesthetic.
Because the metals share a similar work‑hardening profile, you won’t have to worry about one side softening while the other stays rigid.
Layer beads for depth
One‑bead pendants look flat after a while. Slide a tiny seed bead onto the wire before you start your first wrap – it becomes a hidden “spacer” that pushes the main stone out just enough to catch the eye.
For a more dramatic effect, string two or three micro‑beads in alternating colors before you begin the wrap. The tiny pops of color peek through the copper, giving the piece a whisper of surprise.
Use heat‑setting for permanent shape
When you’ve found a loop that you love, a brief tap with the rawhide hammer is great, but a quick pass with a heat gun (just a few seconds) work‑hardens the copper even further.
That extra hardness means the design holds its shape even after a few accidental tugs on the chain.
Personalize with engraved details
Got a favorite word, date, or tiny symbol? A fine‑pointed needle or a tiny metal stamp can etch shallow letters into the wire before you finish the wrap.
Because the wire is still soft, the impression stays crisp, and you end up with a pendant that feels truly yours.
Experiment with asymmetry
Most beginners aim for perfect symmetry – and that’s fine for a classic look. But a slightly off‑center bail or an uneven wrap can give the piece a modern, artistic vibe.
Try moving the stone a millimeter to the left and see how the eye follows the line of the wrap. It’s a tiny shift that makes a big visual impact.
Quick checklist before you seal the design
- Check that every wrap is snug but not strangling the stone.
- Tap each joint with the rawhide hammer for work‑hardening.
- Give the piece a light “light test” – hold it up to a window and watch the highlights.
- If you added engraving, run a finger over the letters; they should feel slightly recessed, not sharp.
And if you’re ever stuck on a new idea, a short video walk‑through of advanced texture tricks can spark inspiration – check out this tutorial on creating ribbed wire effects for a fresh look.advanced wire texture techniques.
Another great resource shows how mixing metal finishes can elevate a simple pendant into a statement piece.combining copper and brass in wire wrapping.
Take a moment now to try one of these tweaks on the pendant you just finished. You’ll see how a little extra thought turns a solid piece into a conversation starter that feels unmistakably yours.
Conclusion
We’ve walked through every twist, loop, and little habit that turns a skein of copper into a piece you can actually wear.
Do you remember that first moment you felt the wire slip through your fingers? That mix of uncertainty and excitement is exactly what fuels the best wire wrapping jewelry tutorial – and now you have a toolbox of tricks to keep that spark alive.
Take a minute to run through the quick checklist one more time: gauge matched to stone, damp fingertips for smooth bends, rawhide‑hammer taps for work‑hardening, and the final light test by a window. If each step checks out, you’ve built a piece that’s not just pretty but reliably strong.
So, what’s next? Grab another stone, maybe a different metal, and let the same process guide you. Each new project reinforces muscle memory and opens space for creative tweaks – a tiny offset bail here, a textured wrap there.
Remember, the real magic isn’t the finished pendant; it’s the confidence you gain each time you finish a loop. Keep experimenting, share your results with the CreativiU community, and watch your skills grow.
Ready to turn more ideas into wearable art? Dive back into the tutorial library and start your next creation today.
FAQ
What tools do I really need for a beginner wire wrapping jewelry tutorial?
Honestly, you don’t need a whole toolbox – just flat‑nose pliers, round‑nose pliers, a pair of flush cutters, and a tiny rawhide hammer. The flat‑nose gives you control without marring the wire, round‑nose shapes clean loops, and cutters keep ends tidy. The hammer work‑hardens the metal so the piece holds its shape without any solder. A damp fingertip is a secret weapon too, it lets the copper glide smoothly.
How do I choose the right gauge of wire for different stones?
Think of gauge as the thickness of a pencil line. For tiny seed beads or small cabochons, 22‑ga (about 0.64 mm) works great – it bends easily and still holds weight. If you’re wrapping a larger stone, move down to 18‑ga or even 16‑ga; the thicker wire gives you the strength to support the extra mass without sagging. A quick rule‑of‑thumb: the stone’s diameter shouldn’t exceed three times the wire’s thickness.
What’s the best way to avoid sharp wire ends that can snag?
After you cut, grab the raw ends with flat‑nose pliers and give them a gentle bend back on themselves – that creates a tiny “U” that tucks into the wrap. If a snag still shows, run a fine metal file or an emery board over the tip until it feels like butter. A dab of clear nail polish on the joint adds a seal and a subtle shine, too.
Can I use copper wire for earrings that will be worn daily?
Yes, copper is a solid choice for everyday wear, especially if you work‑harden it with a few light taps from the rawhide hammer. The hardening process boosts durability by roughly 30 %. Just remember to give the finished piece a quick polish with a lint‑free cloth to keep oxidation at bay. If you prefer a brighter look, a light coat of clear polish will keep the copper from turning green.
How can I make my wire‑wrapped pieces look professional without a soldering torch?
The secret is in the finishing touches. First, ensure every loop is snug but not over‑tightened – you want a little give. Then, tap each joint with the rawhide hammer; that work‑hardens the metal and locks the shape. Finally, smooth any rough spots with a file, wipe clean, and add a tiny bead of clear nail polish on each clinch. Those steps give the piece a polished, factory‑feel.
What common mistakes cause loops to loosen over time and how do I fix them?
One big culprit is over‑tightening the clinch – squeeze too hard and the wire weakens, eventually cracking. Another is skipping the work‑hardening step, which leaves the wire too soft. To fix a loose loop, gently re‑position the wire with flat‑nose pliers, tap the joint with the rawhide hammer, and if needed, file a tiny notch to lock the ends in place.
Where can I find inspiration or community support for my wire‑wrapping projects?
The CreativiU community is a goldmine – members share photos, troubleshoot together, and post challenges that spark new ideas. Dive into the discussion boards, join a live workshop, or browse the project gallery for fresh design twists. Seeing how others solve a tricky wrap or incorporate mixed metals can give you that “aha!” moment and keep your creativity flowing.
Leave a Reply