Dyeing fabric at home can feel like magic. You take a plain white shirt, dunk it in a pot, and pull out something new. But without the right steps, you get a mess instead of a masterpiece.
This guide walks you through fabric dyeing techniques from start to finish. You’ll learn which dye to pick, how to prep your fabric, and how to set the color so it lasts. By the end, you’ll be ready to tackle any project with confidence.
CreativiU offers on-demand video courses that teach these exact methods. With a low-cost trial and a supportive community, it’s the perfect place to build your skills.
Step 1: Choose Your Dyeing Method
Before you buy anything, decide what look you want. Different dye types give different results. And the fabric you use matters too.
Fiber-reactive dyes work best on natural fibers like cotton, linen, and rayon. They bond with the fabric and stay bright after many washes. Acid dyes are for protein fibers like wool and silk. All-purpose dyes(like Rit) are easier to find but fade faster. Natural dyes use plants, bugs, or minerals. They give earthy colors but need more prep.
Then think about technique. Tie-dye is the classic method. You fold, twist, and tie the fabric, then apply dye. Ice dyeing uses ice on top of the fabric, and the dye melts into it slowly. Ombre gives a gradient effect. Shibori is a Japanese resist-dye technique. Each method needs a different approach.
If you’re a beginner, start with tie-dye using fiber-reactive dyes. It’s forgiving and gives great results. As you get comfortable, try shibori or ice dyeing.
Watch this quick overview of dye types and techniques from our partners at Waxon Studio: fabric dyeing playlist on YouTube.
| Dye Type | Best For | Color Fastness | Prep Needed |
|---|---|---|---|
| Fiber-reactive | Cotton, linen, rayon | Excellent | Soda ash pre-soak |
| Acid | Wool, silk, nylon | Very good | Vinegar bath |
| All-purpose | Most fabrics, but duller | Moderate | Hot water, salt |
| Natural | Plant and animal fibers | Variable | Mordanting required |
Bottom line: Start with fiber-reactive dyes and tie-dye to get the hang of fabric dyeing techniques online tutorial before moving to advanced methods.
Step 2: Gather Essential Supplies and Safety Gear
You don’t need a whole studio. But some supplies are non-negotiable. Here’s what to have on hand before you start.
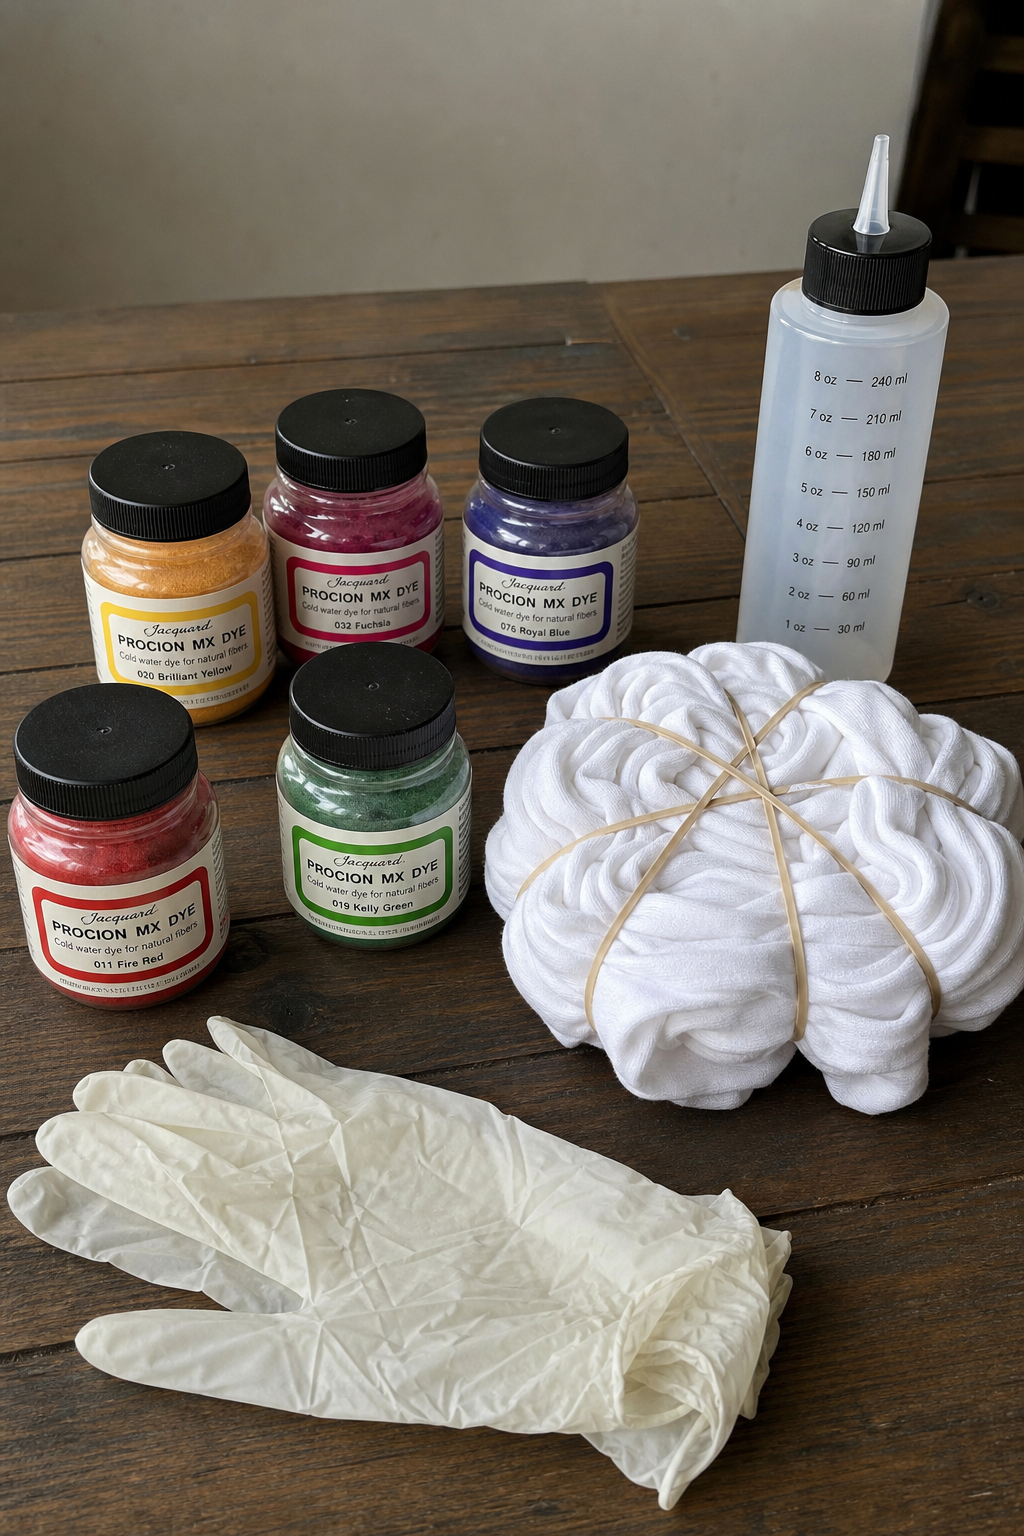
Dye, Buy powder or liquid. Powder is cheaper and lasts longer. Fabric, 100% natural fibers take dye best. Pre-wash it to remove sizing. Rubber gloves, Dye stains skin. Nitrile gloves work better than latex. Plastic drop cloth, Protect your work surface. Large pot or bucket, For immersion dyeing. Use stainless steel or enamel. Avoid aluminum. Soda ash, Fixes dye on cotton. You can buy it or make it from baking soda. Vinegar, For acid dyes on wool. Measuring spoons and cups, Accuracy matters.
Safety isn’t optional. Work in a well-ventilated area. Wear an apron or old clothes. Keep kids and pets away. Read the dye label for specific warnings. Some dyes contain chemicals that can irritate skin or lungs.
For a complete list with tips, check out Master Fiber Art with These Inspiring Online Classes at CreativiU, which includes a full supply guide.
Bottom line: Gather all supplies before you start , running to the store mid-project ruins the flow.
Step 3: Prepare Fabric for Dyeing
This step makes or breaks your results. Dirty fabric or unremoved chemicals block the dye. You need to scour the fabric first.
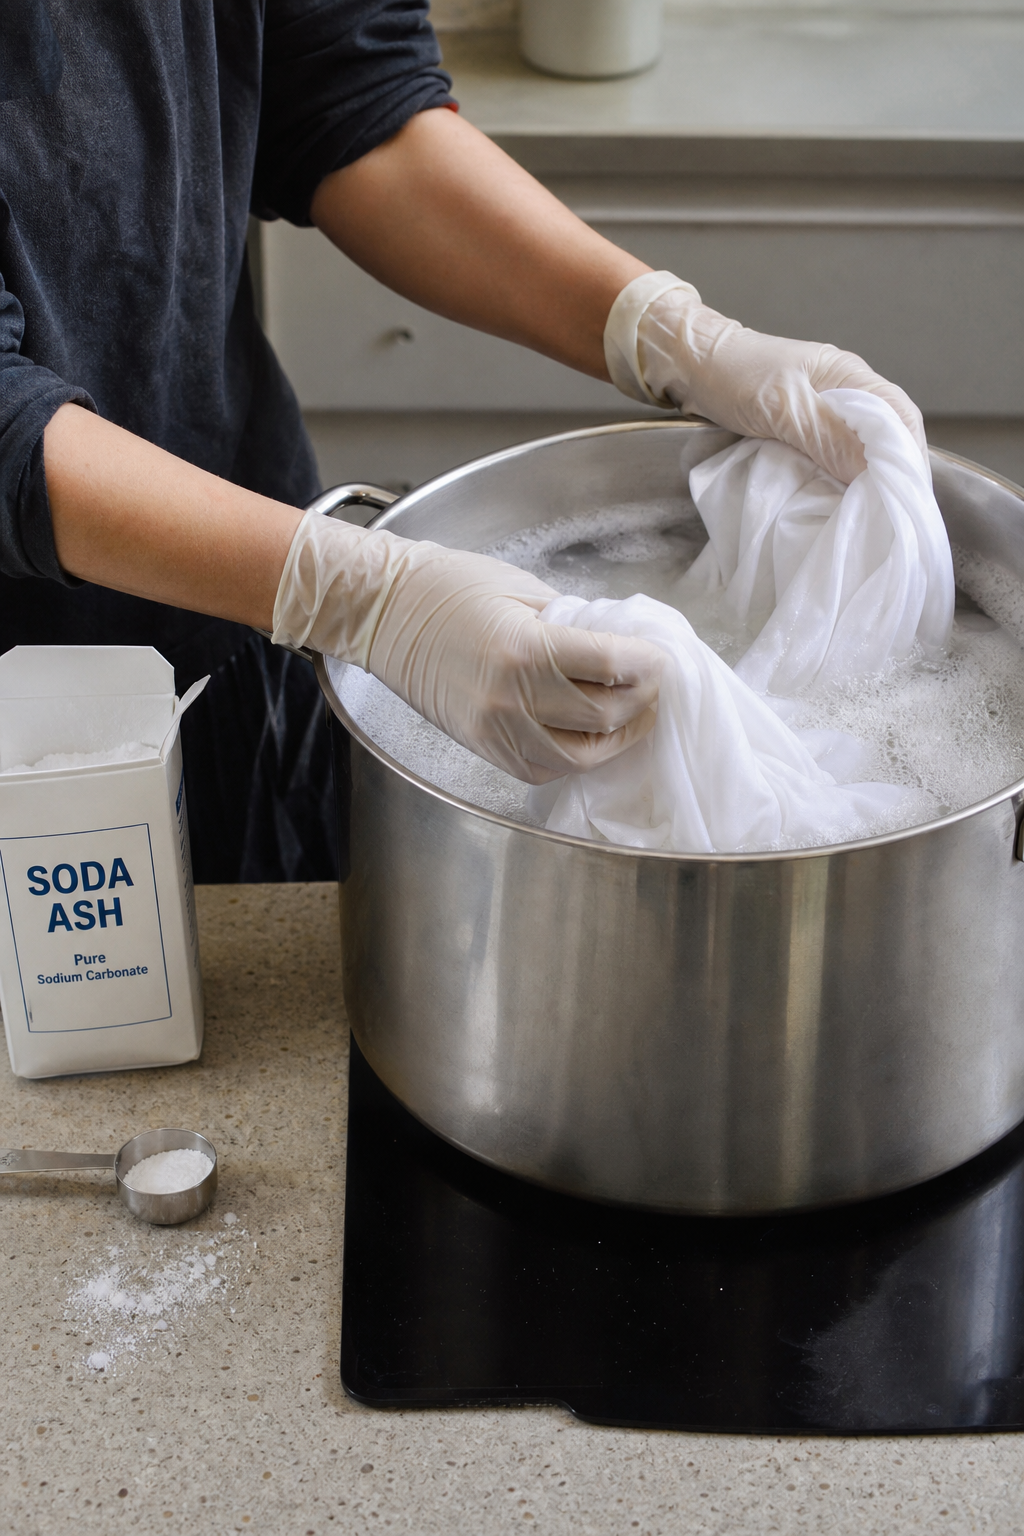
Scouring removes waxes, oils, and dirt. For natural fibers like cotton, use a hot wash with soda ash and mild detergent. Fill a pot with water, add 1 tablespoon soda ash and 1 tablespoon soap per gallon, simmer your fabric for 2 hours. Rinse well. For delicate protein fibers like wool, use cold water and a pH-neutral soap, soak overnight, and rinse gently.
Why is this important? According to Fabrics-Store’s guide on preparing fabric for dyeing, scouring ensures even color penetration and stronger color retention. They recommend machine-washing on hot (60-90°C) for cotton or linen, then the pot method for best results.
If you buy PFD (Prepared for Dye) fabric, you only need a quick rinse. That saves time.
Bottom line: Always scour new fabric , skipping this step is the #1 cause of uneven color.
Step 4: Apply Dye Using Your Chosen Technique
Now the fun part. Mix your dye according to the package instructions. For fiber-reactive dyes, dissolve powder in warm water, then add to your dye bath or bottle. For tie-dye, fill squeeze bottles with the dye solution. For immersion, use a large pot big enough to let fabric move freely.
Tie-dye steps: Wet the fabric, wring it out, then fold and tie with rubber bands. Apply dye to different sections. Wrap in plastic and let sit 8-24 hours. The longer you wait, the brighter the color.
Immersion dyeing: Fill pot with hot water, add dye and salt (for fiber-reactive) or vinegar (for acid dyes). Submerge fabric, stir often, and simmer for 30-60 minutes. Turn off heat, let cool, then rinse.
Ice dyeing: Place fabric on a rack over a bucket. Cover with ice. Sprinkle dye powder on top. Let melt. The slow release creates unique patterns.
Watch this video demonstration of ice dyeing technique:
For more structured lessons, CreativiU’s online tutorials break down each method into bite-sized modules with peer support. A Practical Guide to Online Embroidery Classes for Beginners also covers fabric prep and stitching that pairs well with dyed fabric.
“Consistent technique beats fancy equipment every time.”
Bottom line: Follow the dye manufacturer’s timings, but don’t be afraid to experiment , each batch teaches you something new.
Step 5: Set, Rinse, and Care for Dyed Fabric
You’re almost done. Setting the dye locks the color so it doesn’t bleed in the wash. Rinsing removes excess dye. Care keeps the color vibrant.
Setting: After dyeing, let the fabric sit in a plastic bag for 8-12 hours (tie-dye) or cool in the pot (immersion). Some dyes need a heat set , follow your dye’s instructions. For fiber-reactive dyes, a soda ash pre-soak already starts the bonding process.
Rinsing: Start with cold water. Rinse until water runs almost clear. Then wash with warm water and a mild detergent. Repeat until no more color comes out. Some recommend using a product like Synthrapol to prevent dye from redepositing.
Caring: Always wash dyed items separately in cold water for the first few washes. Use a gentle cycle. Avoid bleach. Line dry in shade , sunlight fades colors. Refer to Wikipedia’s article on dye for more on color fastness.
If you sell your dyed pieces, you’ll need to invoice clients. Planneretic’s free invoice maker lets you create polished PDFs in 60 seconds , perfect for creative entrepreneurs.
Bottom line: Proper setting and rinsing prevent color bleed; cold washes preserve your work.
FAQ
Can I dye synthetic fabrics like polyester?
Yes, but it’s harder. Polyester needs disperse dyes that require high heat (near boiling). The process can be done in a large pot, but the fumes are strong. Work outdoors and wear a mask. Natural fibers like cotton are much easier for a fabric dyeing techniques online tutorial beginner.
How do I get even color in immersion dyeing?
Stir frequently , every few minutes. Make sure the fabric moves freely. Don’t overcrowd the pot. For large pieces, dye in sections or use a washing machine’s dye cycle. Pre-wetting the fabric also helps dye absorb evenly.
Why did my tie-dye turn out muddy?
Muddy colors happen when you apply too much dye or mix complementary colors (like red and green) on wet fabric. Let each color set before adding another. Use squeeze bottles for control. Also, wash the dyed fabric separately after setting.
How long should I let dye sit before rinsing?
For fiber-reactive dyes, at least 8 hours, but 24 hours gives deeper colors. For acid dyes, you can rinse as soon as the water cools. All-purpose dyes need several hours too. Follow the package , every dye is different.
Can I dye fabric that’s already been dyed?
Yes, but the result will be a blend of the old color and new. Lighter colors work best as an overdye. To strip color, you can use a color remover (like Rit Color Remover). But it won’t go back to pure white , expect a tinted base.
What does scouring mean, and is it necessary?
Scouring is deep cleaning fabric to remove natural oils, waxes, and manufacturing residues. It is necessary for even dyeing. Without it, the dye may not penetrate, leading to splotchy results. Use soda ash and detergent for cotton; mild soap for wool. Wikipedia’s scouring page explains the process in detail.
How do I fix fabric that came out too light?
You can redye it with a stronger concentration. Or use a different dye method: for example, immersion gives deeper color than spray. If the fabric is still damp, you can add more dye immediately. For cotton, a second soda ash treatment helps.
Are natural dyes as good as synthetic?
Natural dyes produce beautiful, earthy colors but are less predictable. They need mordanting (using alum, iron, etc.) to bond with fabric. Color fastness varies , some natural dyes fade quickly. For beginners, synthetic fiber-reactive dyes are more reliable and come in a wider range.
Conclusion
Fabric dyeing at home is a skill you build with practice. You learned the five steps: choose your dye, gather supplies, prepare fabric, apply dye, and set it. Each step matters. Skip one, and you’ll likely get dull or uneven results.
Start small. A single T-shirt or a set of napkins. Use fiber-reactive dyes. Keep a notebook of what you tried and how it turned out. Over time, you’ll develop an intuition for color mixing and pattern placement.
If you want structured guidance, CreativiU’s platform offers on-demand courses that teach fabric dyeing techniques online tutorial in detail. With a transparent $1-then-$7.95/month pricing and a 30-day free trial, it’s the most learner-friendly option available. The community forum lets you share results and get feedback from peers and experts. You’ll also find related classes on upcycling and embroidery that complement your new dyeing skills.
To create a dedicated craft space, consider sustainable furniture from Radis, their birch plywood pieces blend durability with clean design. And for all the time you’ll spend watching tutorials and mixing colors, protect your eyes with prescription blue light glasses from Clarity to reduce strain. Now grab some fabric and start dyeing. Your first project might be imperfect, but the next one will be better.
Leave a Reply