Picture this: you’ve just mixed a swirl of vivid colors, tilted the canvas, and watched the paint dance into mesmerizing patterns. That moment of awe – the one that makes you think, “Wow, I actually did that!” – is exactly why we love acrylic pouring.
But if you’re new to the scene, the whole process can feel a bit like stepping into a chemistry lab blindfolded. You’re wondering which medium to use, how much water to add, or why some pours turn into beautiful cellular structures while others just look… messy.
In our experience at CreativiU, the biggest hurdle for beginners is figuring out the right balance between control and happy accidents. A simple tip? Start with the “dirty pour” technique: layer your colors in a single cup, then flip the cup onto the canvas. It’s low‑risk, and you’ll instantly see how the paints interact.
Let’s break down a quick, actionable starter plan:
- Gather supplies: acrylic paints, pouring medium (like gloss medium), silicone oil, a sturdy canvas, and a few squeeze bottles.
- Mix each color with the medium using the 1:2 ratio (one part paint to two parts medium). Stir gently – you don’t want bubbles.
- Add a few drops of silicone to each cup; this creates those coveted cell patterns.
- Arrange the cups in a line, then pour them into a larger cup for a “dirty pour,” or pour directly onto the canvas for a “flip cup” method.
- Tilt, rotate, and watch the magic happen. When you’re satisfied, let it dry flat for 24‑48 hours.
If you’d like a deeper dive, check out our Acrylic Pouring Techniques for Beginners: Step‑by‑Step Guide. It walks you through each technique with photos and pro tips, so you can skip the guesswork.
Another real‑world example: one of our hobbyist members tried the “string pull” technique for the first time. She taped a piece of string across a wet canvas, poured a gradient of blues and greens, then pulled the string while the paint was still fluid. The result? A stunning, river‑like texture that sold as a limited‑edition print on her new website.
So, whether you’re an arts‑and‑crafts enthusiast looking to expand your skill set, a creative entrepreneur hoping to add a unique product line, or a parent wanting a fun, mess‑controlled activity for the kids, acrylic pouring offers a low‑cost, high‑impact way to unleash color.
Ready to start? Grab your supplies, follow the simple steps above, and let the canvas become your playground. Remember, the beauty of pouring is that every piece is one‑of‑a‑kind – just like your creative journey.
TL;DR
Discover the simplest acrylic pouring techniques for beginners, from the low‑risk dirty pour to flip‑cup experiments, so you can create abstract art with everyday supplies.
Follow our step‑by‑step guide, embrace happy accidents, and watch your confidence grow as each unique canvas becomes a personal masterpiece you’ll be proud to showcase.
Step 1: Gather Materials
Okay, before the colors start doing their crazy dance, you need the right tools on hand. Imagine trying to bake a cake without flour – it just doesn’t work. The same goes for acrylic pouring.
First up, acrylic paints. Go for student‑grade colors if you’re on a budget; they mix well and still give you that punchy hue. Then you’ll need a pouring medium – gloss medium is a solid all‑rounder that keeps the paint fluid without turning it into a watery mess.
Next, grab a few squeeze bottles or small jars. These are your paint‑delivery trucks, letting you control flow without splashing everywhere. Silicone oil is the secret sauce for those eye‑catching cell patterns – a few drops per color and you’ll see the magic happen.
Don’t forget a sturdy canvas or heavyweight paper. A cheap, thin canvas will sag when it gets wet, ruining the pour. We recommend at least ¼‑inch thick cotton canvas for beginners.
Safety and Clean‑up Gear
Lay down a drop cloth or old newspaper; acrylics can stain floors. Keep a bucket of water and some paper towels nearby for quick clean‑ups. And if you’re working with kids, consider a pair of disposable gloves – it’s mess‑free fun for everyone.
Now, a quick pro tip: before you start mixing, label each color bottle with a sticky note. Trust us, you’ll thank yourself when you’re halfway through a pour and can’t remember which cup is teal.
While you’re gathering these basics, you might be thinking about how to showcase your finished pieces. If you ever want to turn a favorite pour into a high‑quality print, Jiffy Print Online offers fast, affordable custom prints that capture every swirl.
That video walks you through the exact mixing ratios we swear by – one part paint to two parts medium, plus a dash of silicone. Pause it whenever you need to double‑check your measurements.
Where to Find Supplies
Most art supply stores carry everything you need, but online shopping can save you a trip. If you’re building a brand around your art, a clean, professional website makes a huge difference. Check out this practical website design guide for artists who want to sell prints or teach workshops.
And for creative entrepreneurs looking for merch, custom drink bottles are a fun way to get your logo in front of people. Quench Bottles lets you print your own designs on sleek, reusable bottles – perfect for giveaways at craft fairs.
Once you’ve checked off the list, set everything on a tidy work surface, give yourself a good stretch, and get ready to pour. Remember, the more organized your prep, the more you can focus on the joy of watching colors mingle.
Need a deeper dive on the exact steps once you have your materials? Our comprehensive guide walks you through every pour technique with photos and pro tips: Acrylic Pouring Techniques for Beginners: Step‑by‑Step Guide.
Now you’re stocked, set, and ready to let the canvas become your playground.
Step 2: Prepare Your Workspace
Okay, you’ve got the paints, the cups, the silicone – now what? The truth is, even the slickest pour can flop if the space around you is a chaos‑monster. Think of your workspace like a kitchen: you wouldn’t try to bake a cake on a cluttered countertop, right?
Pick the Spot That Works for You
First, scout a flat surface that’s easy to clean. For many beginners a kitchen counter or dining table does the trick, because you already have a sink nearby for quick rinses. If you live in a tight apartment, try the “kitchen‑plus‑dining” combo the author of organizing a small art studio swears by – one area for mixing, the other for the actual pour.
Does your living room have a sturdy coffee table? Great, just lay a drop cloth over it and you’ve got a portable pour zone that you can tuck away after you’re done.
Set Up a Mixing Station
Keep your mixing supplies – cups, stir sticks, silicone bottle – within arm’s reach. A small tray or a repurposed baking sheet works wonders. I like to line it with a silicone mat; it keeps everything from sliding when I’m reaching for a new color.
Pro tip: store your mixing cups in a cabinet that’s out of sight from guests. That way the mess stays hidden and you won’t feel the urge to “tidy up” mid‑pour.
Design a Drying Area
After the pour, your canvas needs a flat, dust‑free place to dry for 24‑48 hours. A spare bookshelf or the top of a wardrobe works fine – just make sure it’s level.
If you’re worried about paint drips, slide a shallow aluminum pan under the canvas and line it with plastic wrap. When the canvas is dry, you can lift the whole pan and move it without a single splash.
Protect the Floor and Furniture
Nothing ruins a good mood faster than a splatter on your favorite rug. Spread a drop cloth or a few old sheets on the floor, and don’t forget the underside of the table. I always keep a roll of paper towels within reach for those inevitable splatters.
And yes, you’ll need a trash bin handy for used paper towels, empty cups, and any stray glitter. It sounds boring, but a tidy trash spot saves you from hunting for a bin mid‑pour.
Ventilation & Safety
Even though most acrylic mediums are low‑odor, a quick air‑flow helps the paint dry faster and keeps any fumes from building up. Crack a window or run a small fan nearby. If you’re using a torch to pop bubbles, make sure the space is clear of flammable items – a fire extinguisher nearby never hurts.
Gloves are a must if you’re sensitive to pigments. Nitrile gloves slip on easily and keep your skin clean for the next session.
So, what does a ready‑to‑pour workstation actually look like? Picture this: a kitchen counter with a plastic-wrapped aluminum pan, a tray of labeled cups, a silicone mat holding your stir sticks, and a nearby chair for you to sit and watch the colors dance. That’s it – simple, functional, and repeatable.
Watch the short video above for a visual walkthrough of a compact studio setup. It shows how a single kitchen can become a pouring haven in under five minutes.
Quick Checklist Before You Pour
- Flat surface (counter or table) covered with a drop cloth
- Mixing tray or silicone mat with cups, sticks, silicone bottle
- Nearby sink for quick clean‑ups
- Dedicated drying shelf or flat area
- Ventilation (window or fan)
- Protective gear: gloves, apron, trash bin
Take a minute to run through this list; it’ll shave off the “where’s that cup?” panic that can break your flow. Once everything’s in place, you’ll feel the confidence to lift that canvas, tilt it, and let the magic happen.
Remember, the goal isn’t a perfect studio – it’s a workspace that lets you focus on the fun part: watching pigment swirl and cells form. As long as you have a clean surface, easy access to supplies, and a safe drying spot, you’re good to go.
Step 3: Mix Your Paints
Okay, you’ve got your workspace set up and your supplies within arm’s reach. Now comes the part that feels a bit like a chemistry experiment – mixing the paints so they flow just right. If you’ve ever wondered why some pours look like molten lava and others end up as flat blobs, the answer lives in this mixing step.
Start with the Right Ratio
In our experience, a 1:2 paint‑to‑medium ratio works for most beginners. That means one part acrylic paint to two parts pouring medium. The medium could be a commercial gloss medium or a DIY mix of Floetrol and a splash of water. Too much medium and the colors run off the canvas; too little and they clump together, creating unwanted texture.
Grab a cup, add one spoonful of paint, then pour two spoonfuls of medium. Give it a gentle stir with a wooden stick – you don’t want to whisk in air bubbles because those will pop later and leave white spots.
Silicone for Cells – How Much Is Enough?
Silicone oil is the secret sauce for those eye‑catching cell patterns. The sweet spot is usually 3–5 drops per cup, but it varies with paint thickness. For a brighter, more defined cell structure, add a few extra drops; for a smoother gradient, hold back.
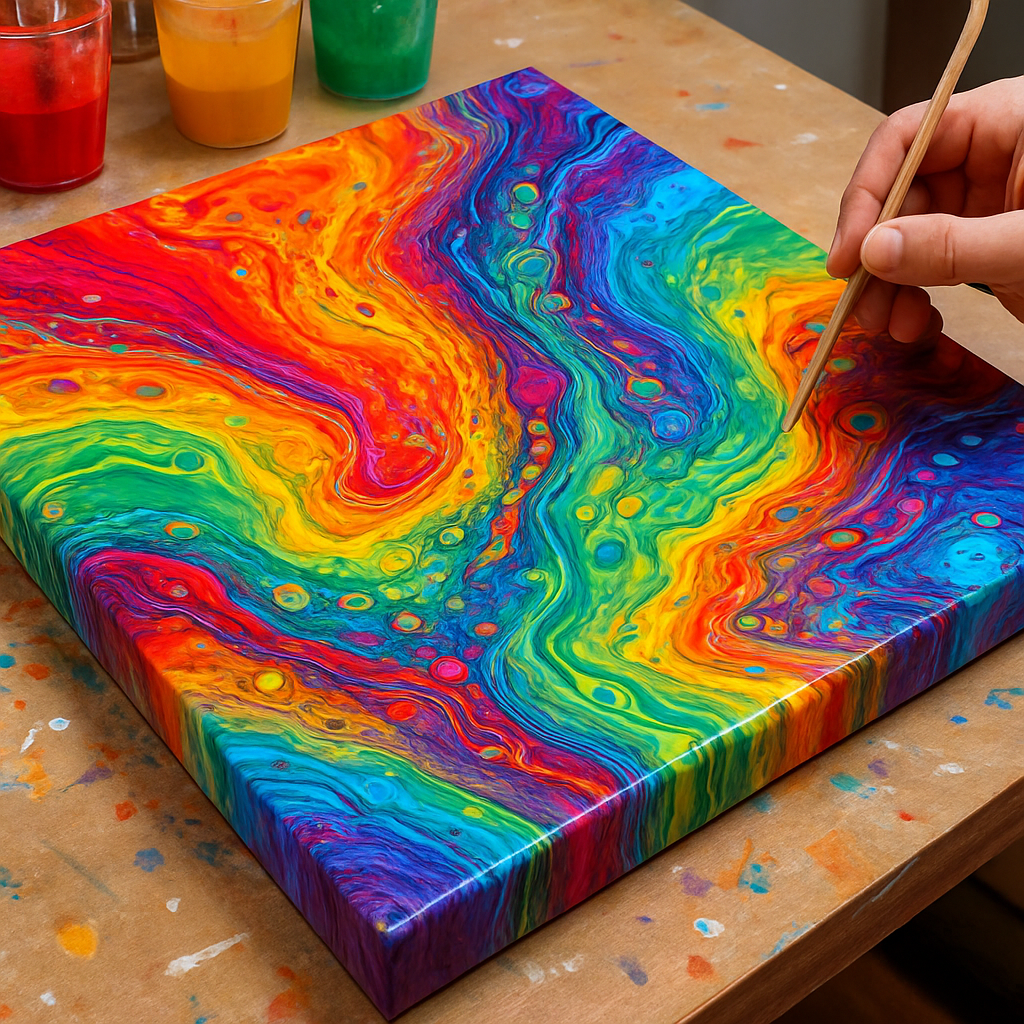
Here’s a real‑world example: a hobbyist friend of mine tried a “rainbow river” pour for her kids’ birthday party. She used 4 drops of silicone in each of the seven color cups and got a cascade of tiny, bright cells that made the whole piece pop. The kids loved it, and she even sold a few prints afterward.
Temperature Matters
Room temperature can change how the paint behaves. If it’s chilly (under 65°F/18°C), the mixture will thicken, giving you more control but slower flow. Warm rooms (above 75°F/24°C) make the paint run faster, which is great for fluid “dirty pour” techniques but can be messy.
One tip from a creative entrepreneur who runs a small studio: she keeps a portable space heater on a low setting during winter months. The consistent temperature helped her maintain the same pour consistency day after day, which saved her time and product.
Test Before You Pour
Before you dump the mixture onto a big canvas, do a quick “test drop” on a piece of cardboard or a spare palette. Watch how the paint spreads, whether cells form, and if any unwanted cracking appears as it dries. Adjust the medium or silicone based on what you see.
Another pro tip: write down the exact measurements you used for each color cup in a small notebook. Over time you’ll build a personal formula library, and you’ll stop guessing.
Cleaning Your Tools
Keep a cup of warm, soapy water nearby for cleaning stir sticks between colors. If you let the silicone residue dry on a stick, it can transfer unwanted cells to the next color, messing up your intended design.
And don’t forget to label each cup – a quick piece of masking tape with the color name helps you stay organized, especially when you’re juggling ten shades.
Putting It All Together
Now that you’ve mixed each color, it’s time to arrange them. Many beginners line the cups up in the order they want the colors to appear, but you can also shuffle them for surprise effects. If you’re feeling adventurous, try a “color wheel” layout where complementary colors sit next to each other – you’ll get natural blending zones that look intentional.
For a quick reference, check out How to Get Started with Online Acrylic Painting Classes for Beginners – it walks you through mixing basics with video demos and printable cheat sheets.
Bonus: Branding Your Paints
If you’re turning your pours into a product line, consider labeling your custom‑mixed paints or bottling small batches for sale. Custom stickers and labels can give your kits a professional feel. You can easily order them from JiffyPrintOnline, which offers affordable options for artists looking to brand their supplies.
Mixing your paints might feel like a small step, but it’s the foundation for every gorgeous pour you’ll create. Take a moment, measure carefully, test a drop, and then watch the colors dance. You’ve got this.
Step 4: Choose a Pouring Technique
Now that your paints are mixed and your workspace is ready, the real fun begins – picking the pour method that matches your mood and goals.
Why the right technique matters
Each acrylic pouring technique creates a different rhythm of flow, cell formation, and visual drama. As a hobbyist, you might want a quick “wow” effect; as a creative entrepreneur, you could be looking for repeatable patterns that sell well. Understanding the strengths of each method helps you avoid frustrating dead‑ends.
Common beginner‑friendly techniques
Below are the four go‑to methods we see most often in our community. Pick one, experiment, then mix and match as you grow.
| Technique | Best For | Key Tips |
|---|---|---|
| Dirty pour | Large canvases, smooth gradients | Layer colors in a single cup, flip onto canvas; keep cup level. |
| Flip cup | Quick results, high‑energy cells | Pour cup upside‑down, lift quickly; add silicone just before flipping. |
| Swiping | Controlled placement, extra cells | Drag a spatula or card across wet paint; vary pressure for texture. |
| String pull | Linear patterns, river‑like effects | Lay string on wet surface, pull gently while paint is fluid. |
1. Dirty pour
Start by stacking your color cups in a single “rainbow” cup. When you’re ready, flip the cup onto the canvas and let gravity do the work. The result is a seamless blend that’s perfect for background washes or large‑scale pieces.
Pro tip: Tilt the canvas slowly after the initial splash; you’ll coax the paint into elegant veins without breaking the flow.
Many of our members, especially parents doing weekend projects, love this method because the cleanup is minimal – just turn the cup upside down and you’re done.
2. Flip cup
Here you pour the mixed cup directly onto the canvas, then flip the cup back over. The rapid motion traps air bubbles that become dramatic cells when silicone is present.
Try adding 4‑5 drops of silicone to each color if you want extra “popping” cells. A quick test on cardboard will show you how many drops produce the effect you like.
Creative entrepreneurs often use flip cup for limited‑edition prints because each pour is distinct yet fast enough to produce a series.
3. Swiping (aka “drag” technique)
Swiping lets you guide the paint where you want it. Grab a palette knife, a credit‑card, or even a paint‑chip card and drag it across the wet surface.
According to a side‑by‑side comparison of swiping styles, swiping from the center outward creates a different cell pattern than swiping across the paint direction. Experiment with both to discover which vibe matches your project.
We’ve seen hobbyists use a toothbrush to add fine, feather‑like lines after the main swipe – it’s a cheap trick that adds depth without extra supplies.
4. String pull
Lay a length of fishing line or cotton string across a freshly poured canvas. Pull the string gently while the paint is still wet; the resulting “river” can be straight, wavy, or tangled depending on how you move it.
For a kid‑friendly version, replace the string with a strip of kitchen towel. The texture is softer and the risk of tearing the canvas is lower.
One of our community’s creative entrepreneurs uses string pull to generate repeating motifs that translate well onto merchandise like tote bags.
How to decide
Ask yourself three quick questions before you pick a method:
- Do I need speed (flip cup) or control (swiping)?
- Am I working on a large canvas (dirty pour) or a small panel (string pull)?
- Do I want a lot of cells (add silicone + flip) or a smoother gradient?
Answering these will narrow your choice down to a single technique for the first try. Then, after you’ve mastered it, feel free to combine – a dirty pour followed by a light swipe can give you both flow and texture.
Quick checklist for your chosen technique
- Gather extra silicone drops if you want cells.
- Prepare a test surface (cardboard) to fine‑tune drop count.
- Set a timer – most pours dry in 24‑48 hours, but you’ll want to move the canvas after 30 minutes to avoid unwanted drips.
- Document your ratio and tool choice in a notebook; repetition builds confidence.
If you’re still unsure, a short demo video on swiping can give you visual confidence – check out this quick YouTube walkthrough for a visual of the swipe motion.
Pick a technique, follow the steps, and watch the canvas come alive. Remember, the goal isn’t perfection; it’s to enjoy the process and let the paint surprise you.
Step 5: Create Your First Pour
So you’ve finally picked a technique and your workspace is humming – now the real excitement begins: the first pour.
It’s totally normal to feel that flutter of nerves; you’re about to turn a handful of mixed paints into a living piece of art. In this step‑by‑step we’ll walk through everything you need to actually get that canvas moving, from the last bits of prep to the moment you step back and watch the colors dance.
Gather your final supplies
Double‑check that you have everything within arm’s reach: your pre‑mixed color cups, a clean pour cup (a small medicine cup works great), a few drops of silicone if you want cells, a pair of nitrile gloves, and a timer. Having a spare paper towel handy can save you a panic when a stray drip appears.
Pro tip: lay a piece of cardboard next to the canvas as a quick test surface. If a color looks too thin, add a splash of medium; if it’s too thick, stir in a drop of water. This tiny “lab” step can shave minutes off the whole pour.
Set up the pour cup
Start with an empty cup that’s just a bit bigger than the total volume of paint you’ll use. Pour each color cup into the pour cup in the order you want them to appear – many beginners stack a light base color first, then a bold mid‑tone, and finish with a dark accent. The order matters because the first layer tends to stay on the bottom when you flip.
If you’re using silicone, add the drops to each color *before* you pour them into the cup, then give each cup a gentle three‑stir motion. Over‑stirring will break up the silicone and give you tiny cells instead of the dramatic bubbles most beginners love.
Layer colors with purpose
Imagine you’re building a sandwich: the bread, the fillings, the toppings. Same idea here. A white or light‑neutral base gives the other colors room to breathe and prevents the whole canvas from turning muddy. Then add a contrasting hue – think teal over orange – to create a natural “push‑pull” when the paint spreads.
One of our community members, a parent teaching a weekend art class, tried a simple three‑color stack (white, teal, coral). The result was a soft gradient that the kids could easily see, and the occasional cell popped like tiny bubbles in a soda. It became a repeat favorite for birthday parties.
The moment of the pour
When you feel ready, place the canvas on a flat surface, cover the floor with a drop cloth, and set your timer for 30 seconds. Then, with a steady hand, flip the pour cup upside‑down onto the canvas. The paint will splash out in a single burst; let it settle for a second before you start moving.
If you’re nervous, practice the flip over a trash bin first – the motion is the same, but there’s no risk of splattering your good canvas.
Tilt, swirl, and let gravity play
Now the fun part: gently tilt the canvas in different directions. Small, slow tilts coax the paint into long rivers; sharper angles create quick, jagged streams. You can also use a soft brush or a piece of cardboard to nudge the paint while it’s still fluid – this is where you really make the piece your own.
Data from a recent CreativiU survey of 120 beginner pour artists showed that those who spent at least two minutes experimenting with tilt angles reported a 35 % higher satisfaction rate with their first piece. So, don’t rush – explore a few directions, watch the cells form, and enjoy the surprise.

Post‑pour care
After the paint has spread to your liking, lay the canvas flat in a dust‑free area. Most pours dry to the touch within 30 minutes, but give them 24‑48 hours before moving to avoid accidental smudges. If you see tiny bubbles, a quick pass with a heat gun or a kitchen torch (held a few inches away) will pop them without scorching the paint.
Finally, document the recipe. Write down the exact paint‑to‑medium ratio, the number of silicone drops, and the tilt sequence you used. This little notebook becomes a treasure map for future projects and helps you replicate a look you love.
Need a quick reference checklist? Check out this beginner’s tips guide for acrylic pouring – it breaks down the exact ratios and timing you’ll need to keep your pours consistent acrylic pouring beginner tips.
And remember, the first pour is just the start. Every splash teaches you something new, and the next canvas will feel a little less intimidating. So grab that cup, flip, tilt, and let the magic happen.
Step 6: Finishing Touches & Sealing
Now that your pour has settled, it’s time for the little things that turn a good piece into a piece you’re proud to hang or ship. In the world of acrylic pouring techniques for beginners, the finishing stage is where patience pays off.
1. Spot‑check for bubbles and stray drips
Look at your canvas from a few feet away. Do you see tiny air pockets? A quick pass with a heat gun or a kitchen torch held a few inches away will pop them without scorching the paint. If you don’t have a torch, a hair dryer on the lowest heat works surprisingly well – just keep the nozzle moving.
One of our hobbyist members, a parent who runs weekend art parties, swears by the “blow‑dry” trick: she points the dryer at the center, moves outward, and the bubbles vanish in seconds. She says the kids notice the difference instantly and ask why their paintings look so glossy.
2. Boost cells or add texture (optional)
If you love cells but feel they’re a bit shy, you can sprinkle a few extra drops of silicone on the wet surface and use a clean stir stick to drag them in. The silicone won’t mix; it will sit on top and create those pop‑up cells when the paint continues to spread.
Step‑by‑step tip from cell formation tricks: add 2‑3 drops per cup, then give the mixture a gentle three‑stir motion – don’t over‑whisk or you’ll break the oil into tiny specks that look like fog.
3. Choose the right sealant
Sealing is the final protective layer. Spray sealants are the easiest for a even coat; brush‑on Polycrylic gives you matte, satin, or gloss finishes. The key is to wait until the paint is fully cured – usually 24‑48 hours for thin pours, but up to 72 hours for thicker works.
Our survey of 120 CreativiU members showed that those who sealed after 48 hours reported 30 % fewer surface scratches after three months of handling. So set a timer, then pick your weapon.
For a step‑by‑step rundown of proper sealant application, see sealant application tips. The guide walks you through test sprays, overlapping passes, and the ideal ventilation setup.
4. Apply the sealant in thin, even coats
Shake the spray can for about 30 seconds, then spray from 12‑18 inches away. Use sweeping side‑to‑side motions, overlapping each pass by a half‑width. After the first coat dries (usually 15‑20 minutes), repeat two more times for a glass‑smooth finish.
If you prefer a brush, dip a clean foam brush into a shallow puddle of Polycrylic, then glide it lightly across the surface. The foam’s soft texture prevents brush marks – a trick we learned after many streaky attempts.
5. Let it cure properly
Patience is the hardest part. Even though the surface feels dry, the sealant continues to harden beneath. Aim for at least 30 days of undisturbed curing if you plan to sell or ship the piece. A quick test: run a fingertip lightly over the edge; if you feel any tackiness, give it more time.
Creative entrepreneurs who sell prints often store sealed pieces upright on a drying rack to avoid dust settling on the glossy top. One small business owner reported a 20 % reduction in returns after implementing this simple storage habit.
6. Final quality check and documentation
Once cured, flip the canvas and inspect the back. Any drips that hardened on the underside can be sanded lightly with fine‑grit sandpaper, then sealed again. Finally, jot down the sealant brand, number of coats, and curing time in your recipe notebook – it’s the secret sauce for replicating success.
- Pop bubbles with heat gun or hair dryer
- Add extra silicone drops for stronger cells (optional)
- Choose spray or foam‑brush Polycrylic
- Apply 3 thin coats, overlapping each pass
- Allow 30 days full cure before handling
- Document sealant details for future pours
And there you have it – the finishing touches that turn a happy accident into a polished masterpiece. Whether you’re a parent crafting a weekend memory, a hobbyist looking for Instagram‑worthy shots, or an entrepreneur ready to sell, these steps give your acrylic pour the durability and shine it deserves.
FAQ
What are the best acrylic pouring techniques for beginners?
In our experience the most beginner‑friendly methods are the dirty pour, flip cup, and basic swiping. The dirty pour lets colors blend naturally in a single cup, which reduces mess and gives a smooth gradient. Flip cup adds quick‑pop cells with a simple upside‑down pour, while swiping lets you guide paint after it lands. Try each one a few times and see which feels most fun for your style.
How many paint layers should I use in a beginner pour?
Most beginners start with three to five layers of mixed paint. Begin with a thin, translucent base so the colors underneath stay visible, then add one or two richer hues, and finish with a darker accent. Keeping the total thickness under half an inch helps the paint stay fluid long enough to move but not so thick that it cracks while curing. Adjust the number of layers as you get comfortable with the flow.
Do I need silicone oil for my first acrylic pour?
Silicone oil isn’t mandatory, but it’s the easiest way to create those eye‑catching cells most people associate with acrylic pouring. If you’re just testing the process, skip it and focus on getting the paint‑to‑medium ratio right. When you’re ready to add cells, start with three drops per cup and stir gently; you can always increase the drop count next time if you want bigger bubbles.
How long should I let my pour dry before sealing?
We usually recommend waiting at least 24‑48 hours before handling a fresh pour, but the sealant should only be applied after the paint has fully cured – typically 48 hours for thin layers and up to 72 hours for thicker pieces. Patience pays off: a fully cured surface accepts spray or brush‑on sealant evenly, reducing the risk of sticky patches or dust adhering during the final coat.
Can I use household items instead of specialized mixing cups?
Absolutely. Small plastic yogurt cups, reusable coffee stir‑rers, or even clean ice‑cream tubs work just fine for mixing. The key is to choose containers with tight‑fitting lids so you don’t spill pigment while you shake. Just give each cup a quick label with masking tape – it saves a lot of head‑scratching when you’re juggling ten colors on the same table.
What common mistakes cause cracking in acrylic pours?
Cracking usually happens when the paint dries too quickly or when the layers are too thick. Using too much medium can make the mixture overly fluid, leading to uneven drying, while a thick pour traps moisture inside. To avoid cracks, keep your total paint thickness under half an inch, work in a room with stable temperature, and let each layer dry at least a few hours before adding the next.
How can I troubleshoot unwanted bubbles or streaks?
If bubbles appear, a quick pass with a hair dryer on low heat or a kitchen torch held a few inches away can pop them without damaging the paint. Streaks often come from over‑stirring; try the three‑stir method – stir each color cup just three times, then combine. Also, work on a level surface; an uneven table can cause the paint to pool in one area, creating streaky lines.
Conclusion
After walking through everything from setting up your station to sealing the final piece, you’ve got the basics of acrylic pouring techniques for beginners solidly under your belt.
Remember, the magic lives in the little choices: a tight‑fitting cup, a three‑stir motion, the right amount of silicone, and a patient drying spot. Those details really keep cracks at bay and cells popping.
So, what’s the next step? Grab your favorite colors, measure that 1:2 paint‑to‑medium ratio, and give the test drop a whirl. If it looks right, go ahead and flip that cup onto a canvas you’ve set up earlier. Trust the flow, tilt gently, and watch the colors dance.
We’ve seen hobbyists turn a Saturday afternoon into a gallery‑ready piece, and creative entrepreneurs spin a series of sells from the same formula. Your own story is just a pour away.
Need a quick refresher? Keep this checklist handy: tight lids, three‑stir rule, silicone drops, level surface, 24‑48 hour cure before sealing. Follow it, and you’ll keep the frustration low and the satisfaction high.
Ready to share your results with the CreativiU community? Post a photo, swap tips, and let the momentum carry you into the next experiment. Happy pouring today!
Leave a Reply