Ready to spin a vase from your kitchen table? A virtual pottery wheel basics class lets you learn the feel of clay without ever leaving home. In this guide you’ll walk through every step , from setting up a tiny studio to fixing the most common beginner hiccups. By the end you’ll know exactly how to center, pull, and finish a piece, and you’ll have a clear path to keep improving.
Step 1: Setting Up Your Virtual Pottery Studio
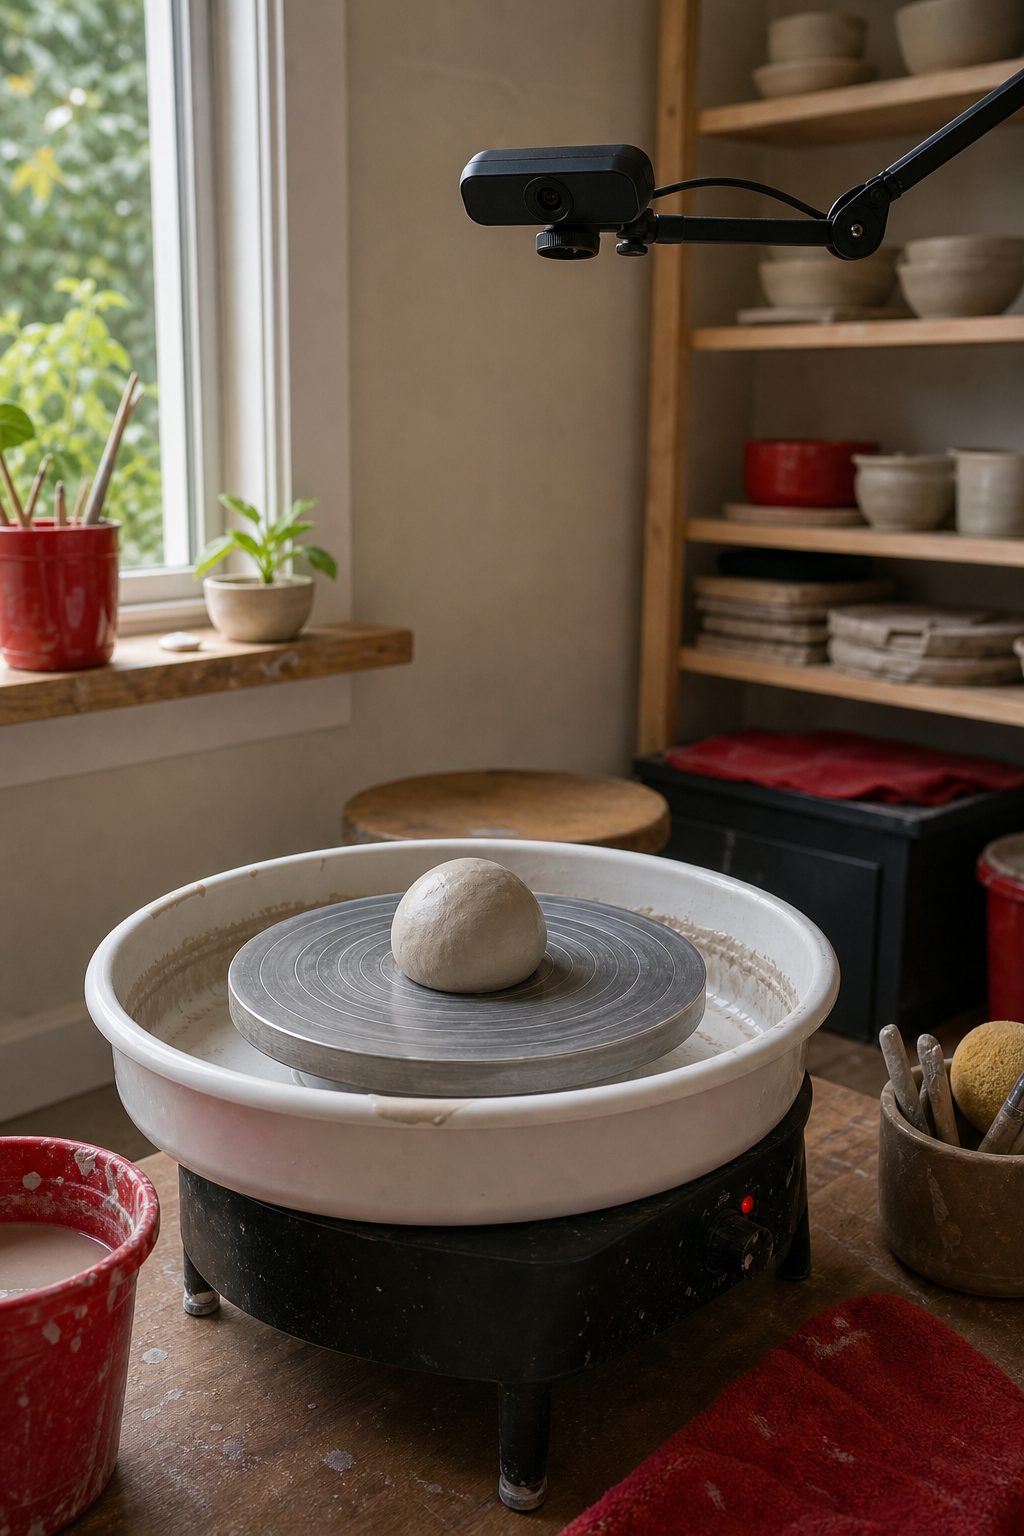
First, pick a spot where you can move a wheel freely. A hallway corner works well because the floor is flat and the walls stay out of the way. Lay a sturdy mat down to protect both the floor and your wheel’s base.
Next, gather the tech you’ll need. A laptop or tablet with a webcam, a stable internet connection (at least 5 Mbps upload), and a simple video‑conference app are enough. Position the webcam about three feet from the wheel, angled down so it sees both your hands and the spinning clay.
Because you’ll be learning online, a clear audio feed matters. Clip a lapel mic to your shirt and run a quick sound test before the first lesson. Speak a short phrase while the wheel runs; if you hear hiss, adjust the mic placement.
Now think about lighting. Natural light from a nearby window helps you see glaze colors and water spots. If daylight isn’t an option, use a desk lamp at a 45‑degree angle to avoid harsh shadows.
Finally, secure the wheel. A tabletop wheel should sit on a stable table and be strapped with a rubber band or clamp if the surface wobbles. For floor‑mounted wheels, bolt the base to the floor or use a heavy‑duty sandbag.
When you’ve checked space, tech, lighting, and stability, you’re ready for the first lesson. A Usable Guide to Online Pottery Wheel Classes for Beginners walks you through each of these checks in checklist form, so you can tick them off before you hit “Play.”
According to Wikipedia’s pottery wheel page, the wheel’s speed and direction are the two variables that most affect a beginner’s control, which is why we stress variable‑speed dials and hand‑controlled levers later.
Step 2: Preparing Your Clay for the Wheel
Before you even turn the wheel, the clay needs a uniform texture. That starts with wedging , a simple kneading process that pushes out air bubbles and aligns the particles.
Take a handful of stoneware clay, flatten it into a pancake, fold it over, and repeat. The motion feels like making a sandwich, but you keep folding until the clay feels smooth and springy.
If you notice a hard spot, press it flat with the heel of your hand. A soft spot can be smoothed by adding a little water and kneading again.
Water content matters a lot. Clay that’s too dry will crack when you pull; clay that’s too wet will slump. Aim for a consistency that feels like firm dough , firm enough to hold its shape, but soft enough to leave a faint imprint when you press a finger.
Measure the amount you need by weight. A 25‑lb bag of stoneware lasts a week of practice for most beginners. If you’re short on space, split the bag into smaller containers so you can grab a ball without lifting the whole sack.
Once wedged, roll the clay into a ball about the size of a baseball. This ball will become your starting mound.
When you’re ready, place the ball on the wheel’s head, splash a little water on it, and press it down gently to stick.
For a quick reference on the tools you’ll need, see A Usable Guide to Online Pottery Wheel Classes. It lists the needle tool, rib, sponge, and wire cutter , the basics you’ll use in every lesson.
Keep a small notebook nearby. Jot down the clay’s feel each day; that habit helps you spot trends in moisture and work‑ability.
Step 3: Learning the Centering Process
Centering is the first real skill you’ll practice on the wheel. It’s the act of making the clay sit perfectly in the middle of the spinning head.
Start the wheel at a medium speed , about 250 RPM is a good baseline for most beginners. Place the wedged ball on the head and press it down with both palms.
While the wheel spins, use your thumbs to open a small hole in the middle of the ball. Your thumbs act like a pair of gentle scoops, pulling the clay inward.
Now bring both hands up, fingers pointing inward, and apply even pressure as the wheel turns. The goal is to keep the pressure balanced so the ball stays upright and doesn’t wobble.
If the ball starts to wobble, stop the wheel, let the clay settle, and try again. A wobble usually means the pressure is uneven or the speed is too high.
When the clay finally forms a smooth, symmetrical mound, you’ve achieved a solid center. This mound will be the base for every future piece.
Here’s a quick checklist you can tape to your wall:
- Wheel speed ~250 RPM
- Both hands on the clay, thumbs opening the center
- Even pressure, no wobble
- Stop and re‑wedge if needed
Practice this drill three times per session. Consistent practice builds the muscle memory you need for later steps.
Centering may feel awkward at first, but the more you repeat it, the smoother it becomes. Think of it like finding the sweet spot on a bike’s pedals , a small shift makes all the difference.
Step 4: Opening and Pulling a Cylinder
Once your clay is centered, you can open a hole and pull up walls. This creates the basic cylinder shape that underlies most bowls and cups.
Lower the wheel speed to about 200 RPM. Using both thumbs, press down in the middle of the mound to make a shallow depression. Keep the pressure light , you’re just breaking the surface, not flattening it.Next, wedge your index fingers into the hole and pull the clay upward. Your fingers act like a guide; the wheel does most of the work. Pull a little, let the wheel spin the clay back, then pull again. This “push‑pull” rhythm creates a smooth wall.
Maintain a consistent wall thickness , about the width of a pencil for beginners. If the wall gets too thin, it will collapse; too thick, and it will look heavy.
As you pull, keep the wheel speed steady. If the wall starts to wobble, slow the wheel slightly and steady your hands.
When the cylinder reaches the desired height (usually 4‑5 inches for a basic cup), let the wheel spin down slowly. Use a wooden rib to smooth any uneven spots while the clay is still leather‑hard.
Take a quick photo of your cylinder. Visual proof helps you spot issues you might miss while watching the wheel.
To keep your hands from getting sore, rest your elbows on a low stool or the side of the wheel. This anchor gives you better control and reduces fatigue.
Step 5: Trimming and Finishing Your Piece
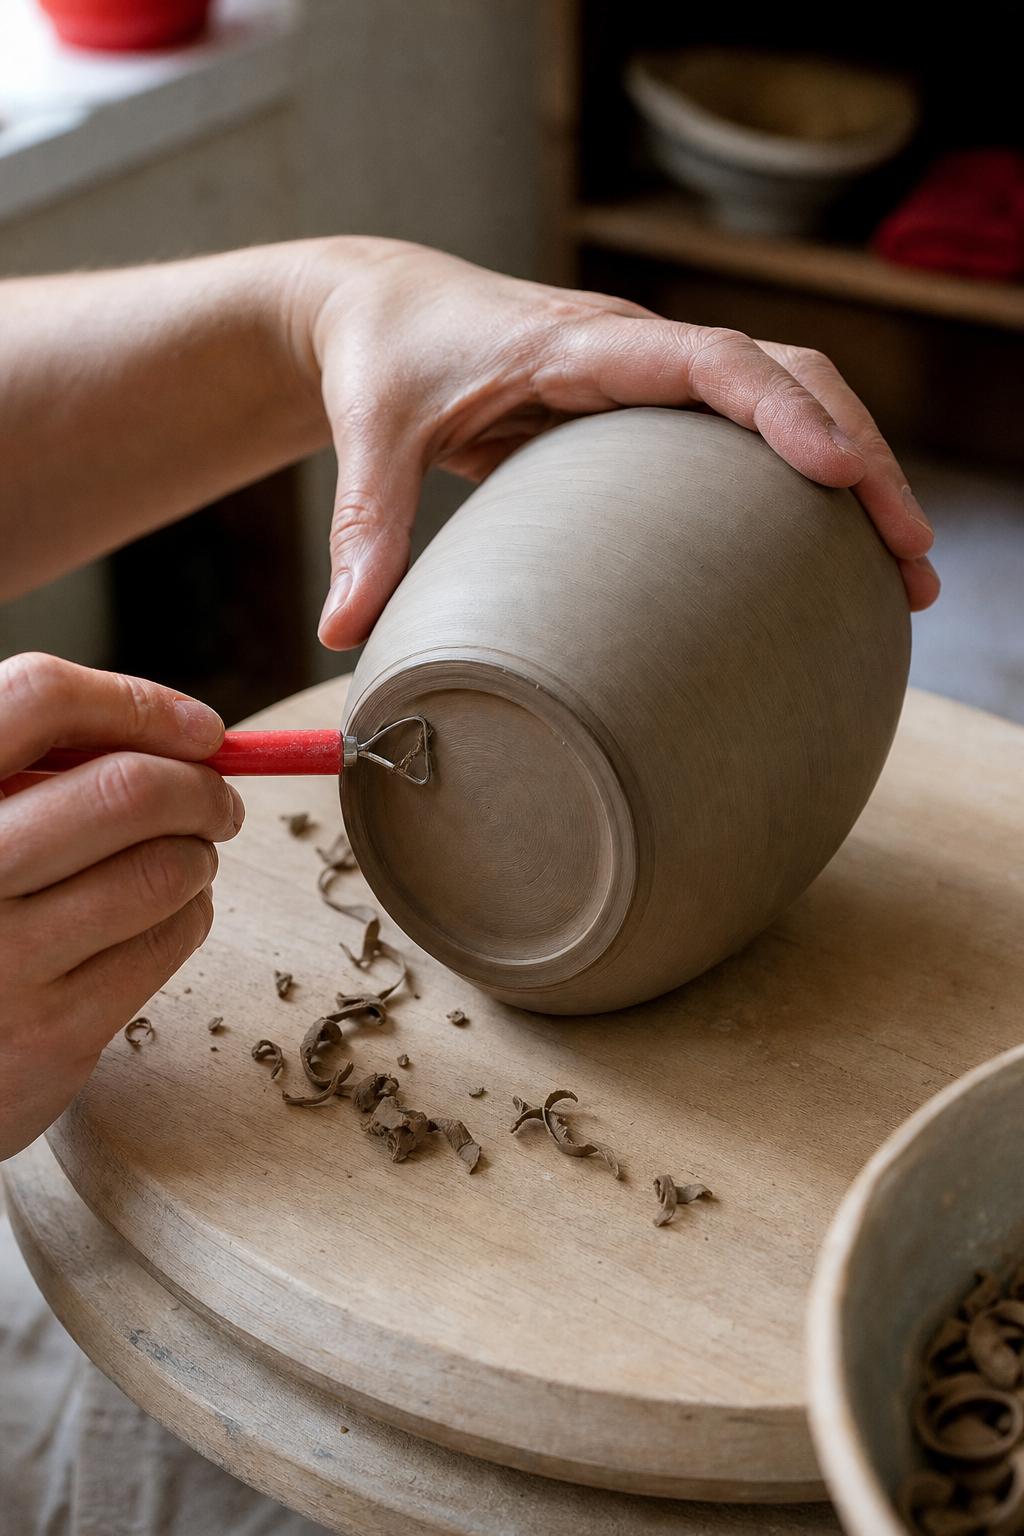
Trimming refines the shape and creates a clean foot on your piece. Do this when the clay is leather‑hard , firm enough to hold shape but still a bit pliable.
Place a small bat (a removable wooden board) on the wheel head. Slip your cylinder onto the bat; the bat makes it easy to rotate the piece without wobbling.
Switch the wheel to a low speed, around 100 RPM. Using a trimming needle or a small loop tool, cut away excess clay from the base. Aim for a uniform foot that’s about a quarter of an inch wide.
After you trim, smooth the foot with a damp sponge. A smooth foot helps the piece sit flat on a shelf or kiln.
If you want a glaze, now is the time to dip or brush it on. Even a thin coat of clear glaze can add a nice sheen and protect the surface.
Let the piece dry completely before firing. This can take 24‑48 hours depending on humidity.
When you’re ready to fire, follow the kiln schedule recommended for your clay type. Most stoneware needs a bisque fire to 1000 °C, then a glaze fire to about 1200 °C.
For more detailed steps on trimming and finishing, check out How to Choose and Thrive in an Online Pottery Class – CreativiU. It includes a short video that shows the trimming motion from a top‑down view.
After trimming, label your piece with the date and project name. This habit helps you track progress over weeks and months.
Step 6: Troubleshooting Common Beginner Challenges
Even after you follow each step, you’ll hit snags. Below are the most frequent hiccups and how to fix them.
Air pockets, If the clay wobbles after you’ve centered, you likely have trapped air. Stop the wheel, take the clay off, wedge it again, and press out any bubbles.
Dry clay, Hard, dry clay resists shaping. Sprinkle a few drops of water on the surface, then knead it into the body until it feels pliable again.
Too much water, Over‑wet clay becomes soupy and collapses when you pull. Pat the surface with a dry sponge, then let it sit for a few minutes before you try again.
Wrong clay type, Some clays are meant for hand‑building, not wheel throwing. For beginners, a smooth stoneware like Amaco Buff Stoneware works well because it stays firm enough to pull walls.
Arm placement, Keep your elbows close to your body and rest them on the wheel’s base or a low stool. This anchor gives you steady pressure and avoids fatigue.
When you encounter a problem, pause the video, note the issue, and try the suggested fix. Recording a short clip of the mistake and posting it in the class forum often brings quick advice from peers.
According to the National Park Service’s guide on pottery techniques, proper moisture balance and consistent wedging are the two biggest factors in avoiding cracks during firing. NPS pottery guide reinforces that point.
“Even seasoned potters say the most common mistake is skipping proper wedging. It’s the step that saves you from wasted time later.”
FAQ
What equipment do I need for a virtual pottery wheel basics class?
You’ll need a small electric wheel (tabletop or floor‑mounted), a laptop or tablet with webcam, a stable internet connection, basic hand tools (needle, rib, wire cutter, sponge), a bucket of water, and a mat or splash pan. A lapel mic and a desk lamp improve audio and lighting. All of these items fit in a modest corner space and cost under $400 for a starter kit.
How much clay should I start with?
A 25‑lb bag of stoneware clay is a usable amount for a beginner. It lasts a week of daily practice and lets you experiment with several projects without running out. If space is tight, split the bag into smaller containers so you can grab a manageable ball each session.
Can I learn at my own pace, or do I need live sessions?
Both options work, but most virtual pottery basics classes, including CreativiU’s, give you on‑demand video lessons plus a live Q&A forum. On‑demand lessons let you pause and rewind; live Q&A lets you ask specific questions and get feedback in real time.
How long does it take to become comfortable with centering?
Most beginners feel steady after 5‑10 focused practice sessions, each lasting 15‑20 minutes. Consistency beats marathon sessions. Track your centering time in a simple spreadsheet , note speed, wobble, and success rate , and you’ll see improvement week by week.
What should I do if my piece collapses while pulling?
First, stop the wheel and assess the wall thickness. If it’s too thin, add a small coil of clay around the base and rebuild the wall. If the clay is too wet, let it firm up a few minutes before pulling again. Always keep the wheel speed moderate; high speed can make the wall snap.
Is there a community where I can share my work?
CreativiU offers a dedicated forum where members post photos, ask questions, and receive feedback from instructors and peers. The community is active, supportive, and focused on beginner growth, making it a valuable resource beyond the video lessons.
Do I need a kiln to finish my pieces?
For a true finished piece you’ll need a kiln to bisque‑fire and glaze‑fire. If you don’t own one, many local studios rent kiln time by the hour. Some beginners start with air‑dry clay for practice, then move to kiln‑fired stoneware when they’re ready.
How much does a virtual pottery wheel basics class cost?
CreativiU offers a $1 trial day, after which the subscription is $7.95 per month. The low entry price, clear community support, and on‑demand format make it a cost‑effective option compared with other platforms that hide pricing or offer only vague “beginner” labels.
Conclusion
Starting a virtual pottery wheel basics class is easier than it sounds. With a tidy corner, a reliable wheel, and a few hand tools, you can begin shaping clay from day one. Follow the step‑by‑step flow , set up your studio, wedge and prep the clay, master centering, pull a cylinder, trim the foot, and troubleshoot as needed. Use the community on CreativiU to get feedback, stay motivated, and track progress.
Remember, pottery is as much about patience as it is about skill. Treat each session as a short, focused practice block, record what you learn, and celebrate each small win. When you feel ready, move on to more complex forms, glazing, and firing. Your virtual studio is a launchpad for a craft that can grow with you for years to come.
Leave a Reply