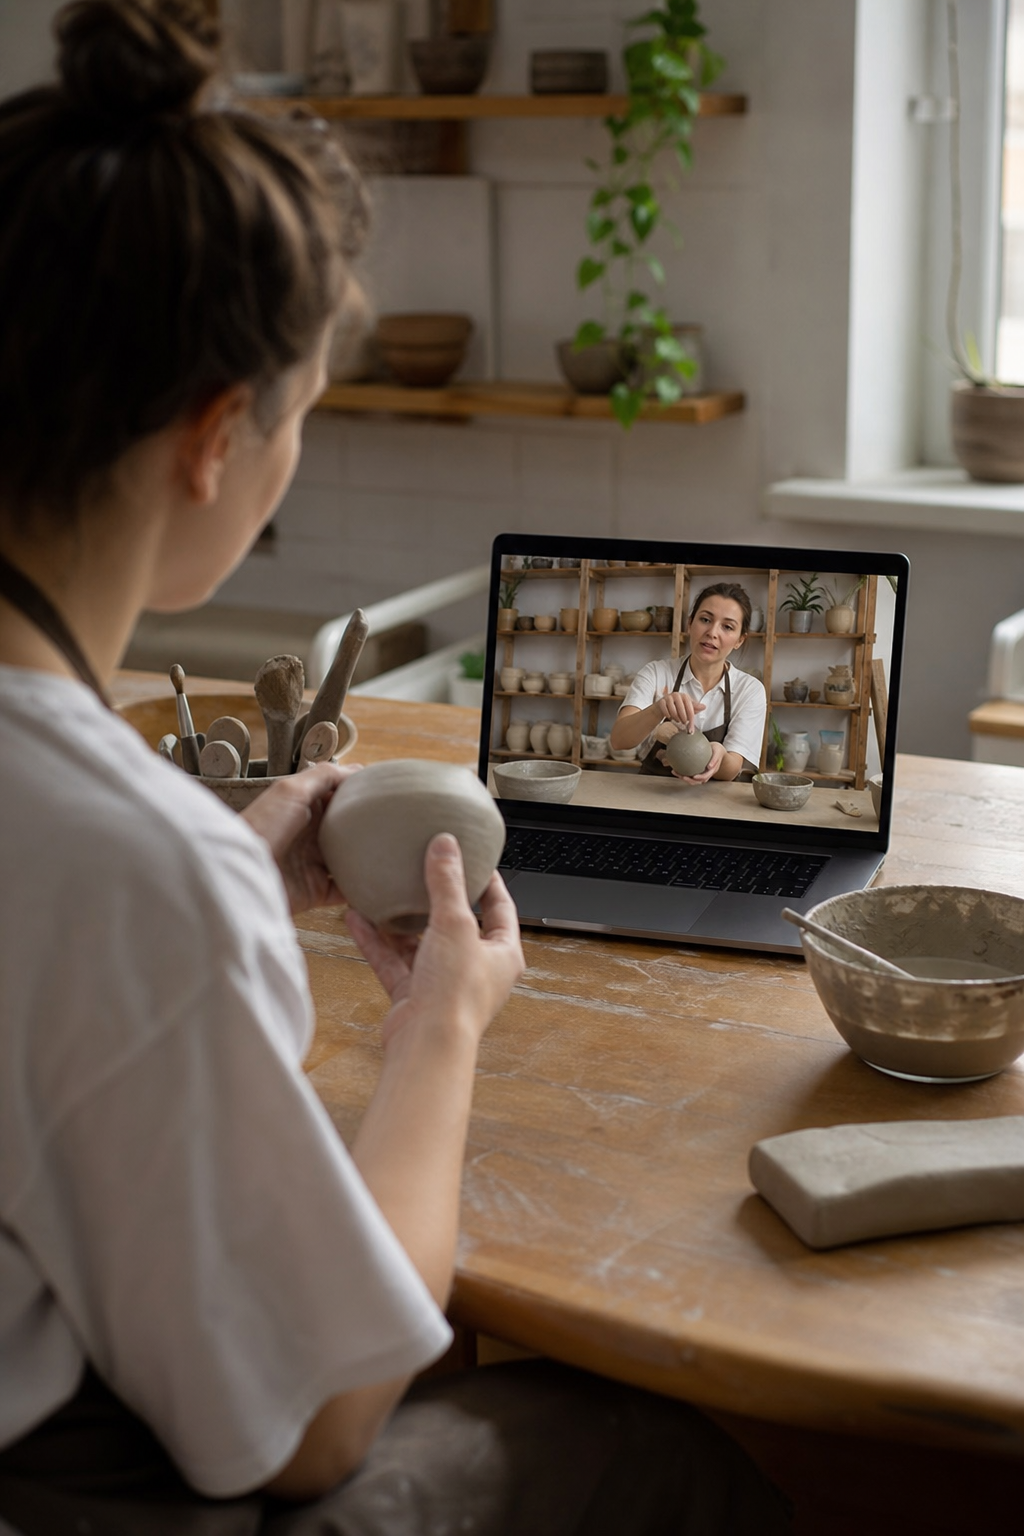
Ever caught yourself scrolling through endless art ideas, then thinking, “What if I could actually make something with my own two hands, right from my living room?” That’s the exact moment most of us feel the spark for an online pottery class. The idea of shaping clay feels both ancient and wildly modern, but the question is: will it fit into our crazy schedules, limited spaces, and sometimes shaky confidence?
Here’s the good news: you don’t need a fancy studio, a mountain of supplies, or a PhD in ceramics to get started. In our experience, the most successful hobbyists begin with a modest setup—a tabletop wheel or even a simple hand‑building kit—paired with bite‑size video lessons they can pause whenever the clay gets sticky. Think of it like a coffee chat with a friendly mentor who never rushes you.
So, how do you turn that curiosity into actual progress? First, carve out a tiny “creative corner” in your home. A sturdy table, a lamp for even lighting, and a bag of stone‑ware clay are all you need to follow the first few tutorials. Next, schedule just 15‑20 minutes a day—maybe after the kids are in bed or during a lunch break. Consistency beats marathon sessions every other week, and the short bursts keep the learning curve gentle.
Once you’ve got a routine, start documenting your work. Snap a quick photo or a short clip of each throw, then share it in a supportive community. Feedback loops are priceless; a single tip about hand pressure can shave seconds off your centering time and boost confidence instantly. And if you want to turn those tiny victories into a larger audience, consider showcasing your pieces on TikTok. An AI TikTok video generator can help you craft eye‑catching reels without spending hours on editing—perfect for creative entrepreneurs looking to attract customers.
Finally, treat every wobble, crack, or “happy accident” as data. Keep a simple log: date, project type, what you tried, and what worked. Over a few weeks you’ll see patterns emerge, like which clay moisture level gives you smoother walls or which wheel speed yields the cleanest pull. That habit of reflection turns a hobby into a skill you can actually monetize or simply enjoy as a stress‑relieving ritual.
Bottom line: an online pottery class isn’t just a video series; it’s a flexible, low‑cost pathway to tactile creativity that fits around your life. Grab that clay, set up your little studio, and let the wheel spin. You’ll be amazed at how quickly those first messy spins become confident, beautiful pieces.
TL;DR
Online pottery classes let you learn shaping clay from home, with bite‑size videos, community feedback, and flexible scheduling that fits busy lives.
Start today, track your progress, and turn those first wobbly throws into confident, sellable pieces—all at your own pace, and share them on social platforms for inspiration daily.
Step 1: Find the Right Online Pottery Class Platform
When you’re ready to turn that spark of curiosity into actual skill, the first thing you have to sort out is where you’ll learn. There are a hundred‑plus platforms out there, but the right one should feel less like a textbook and more like a friendly mentor who’s actually listening to you.
Start by asking yourself two quick questions: Do you thrive on live, real‑time feedback, or do you prefer the freedom to binge lessons at midnight? And how important is a built‑in community where you can post a wobbling bowl and get a helpful tip within minutes? Your answers will narrow the field dramatically.
Live interaction vs. on‑demand flexibility
If you’re the type who learns best when someone can say, “Hey, slow your wheel down a notch,” look for platforms that schedule weekly Zoom office hours or live Q&A sessions. Those live moments let you correct a mistake before it becomes a habit. On the other hand, if you juggle kids, a day job, or a side hustle, a fully on‑demand library lets you pause, rewind, and replay a tricky hand‑position as many times as you need.
One platform we’ve seen work wonders for creative entrepreneurs is A Comprehensive Guide to Online Pottery Classes for Beginners. It blends bite‑size videos with a weekly live Q&A, so you get the best of both worlds without feeling forced into a rigid schedule.
Curriculum clarity and skill milestones
Scroll through the syllabus before you click “Enroll.” A good course will break the journey into clear milestones: centering 200 g of clay in under 10 seconds, pulling a 4‑inch wall with even thickness, then glazing without running. When the roadmap is explicit, you can track progress and stay motivated—especially useful for hobbyists who need that little dopamine boost after each win.
Don’t forget to check whether the platform supplies downloadable cheat sheets, material lists, and project templates. Those extras turn a video series into a hands‑on workshop you can reference while the wheel is actually spinning.
Community vibes and feedback loops
Pottery is tactile, but the learning curve flattens dramatically when you have eyes on your work. Look for a forum, Discord server, or private Facebook group where members drop short clips of their throws and get rapid, constructive critiques. A thriving community also means you’ll see a steady stream of inspiration—new glaze combos, texture ideas, and even marketing tips if you’re thinking of turning your art into a side business.
Speaking of side businesses, creative entrepreneurs often wonder how to showcase their pieces without spending hours editing videos. The AI TikTok Video Generator can turn a 30‑second clip of your latest bowl into a scroll‑stopping reel, giving you more time to sculpt and less time to edit.
And while you’re setting up your creative corner, consider the ergonomics of your space. A well‑designed workstation can prevent fatigue and keep your posture happy during those longer practice sessions. For ideas on arranging a functional, inspiring studio at home, check out Design Your Perfect Workspace with Customizable Home Office Furniture. The guide walks you through desk height, lighting, and storage solutions that work for both a pottery wheel and a laptop.
Now that you have the criteria down, it’s time to test drive a platform. Most services offer a 7‑day free trial or a money‑back guarantee. Sign up, watch the first 10‑minute lesson, and see how the instructor’s teaching style meshes with your learning rhythm. If the video quality feels grainy or the community is silent, move on—there’s no point sinking time into a platform that doesn’t click.
After you’ve settled on a platform, create a simple checklist: required tools, internet speed (at least 5 Mbps upload), a dedicated workspace, and a schedule block for practice. Treat this checklist like a pre‑flight routine; the more you prepare, the smoother your first spins will be.
With the right platform, a supportive community, and a comfortable workspace, you’ll find the learning curve transforms from a steep hill into a gentle ramp. Your next step? Pick a trial, schedule a 15‑minute “throw time,” and watch your confidence grow with every turn of the wheel.
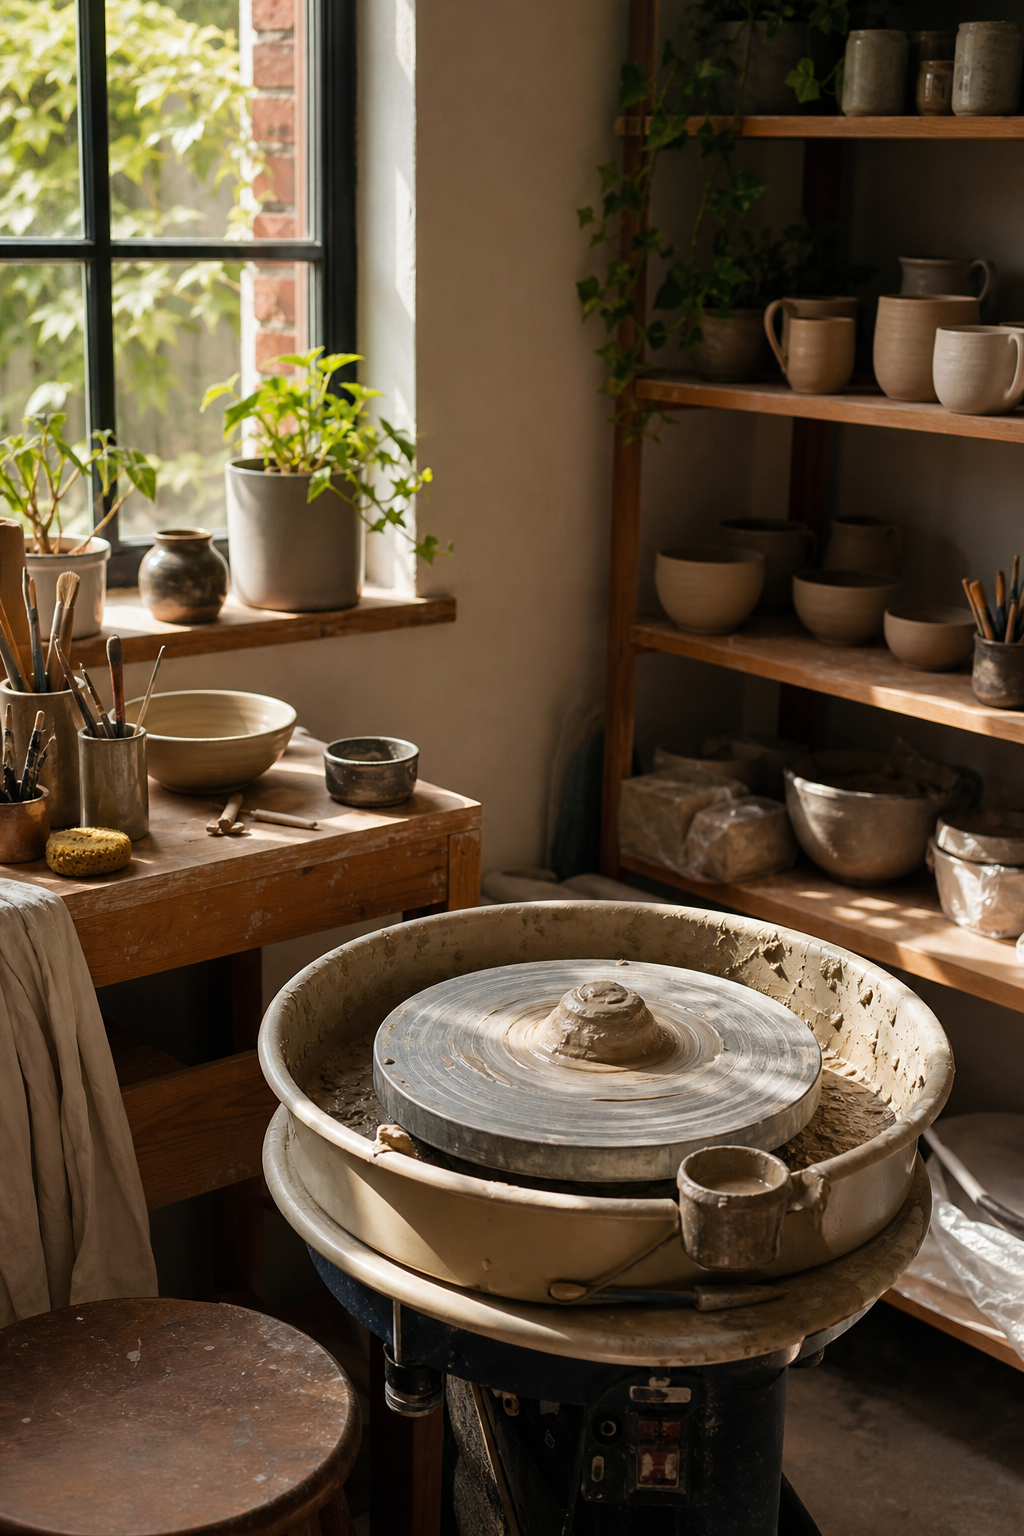
Step 2: Gather Essential Supplies and Set Up Your Workspace
Alright, you’ve already picked a platform that feels right. Now the real magic starts when you pull the right tools onto a tidy table and give yourself a space that actually invites you to spin.
First thing’s first: the wheel. If you’re just testing the waters, a compact electric wheel that sits on a sturdy desk works wonders. It should spin smoothly at low speeds and have a variable speed dial so you can dial back when you’re still learning to centre. A cheap starter wheel can cost as little as $150, but don’t skimp on a stable base – wobble equals frustration.
Next up, clay. Stone‑ware is the go‑to for beginners because it’s forgiving and fires well in most kilns. Grab a 25‑lb bag; it’s enough for a week of practice without having to restock constantly. If you’re a parent introducing kids, look for a non‑toxic, low‑fire clay that won’t scorch tiny fingers.
Tools are the little heroes that turn a lump of mud into a bowl. A basic set includes a wire cutter, a wooden rib, a metal rib, a sponge, a trimming needle, and a few rubber‑handled shaping tools. You don’t need a full toolbox – start with these basics and add specialty tools once you know what you enjoy.
Lighting and ergonomics often get overlooked, but they’re the quiet backstage crew that keeps you comfortable. Position a desk lamp or a soft LED panel at a 45‑degree angle to eliminate shadows on the wheel. Your chair should support a straight back; a simple office chair with lumbar support is fine, but avoid sofas – you’ll end up slouching and your arms will tire faster.
So, how do you turn a random corner of your living room into a functional studio? Here’s a quick checklist you can paste onto a sticky note:
- Clear a 4‑foot square on a sturdy table.
- Place the wheel center‑aligned with the edge of the table.
- Lay out clay within arm’s reach, preferably on a waxed canvas or a large tray.
- Arrange tools in a small organizer or a repurposed mug rack.
- Set up lighting so the wheel is evenly lit, no glare on the camera if you’re recording.
- Position a phone or webcam on a cheap tripod for quick video feedback.
One tip many hobbyists miss: keep a small dry‑clay bucket nearby. When you’re shaping, you’ll inevitably pull a bit of excess; dumping it into the bucket rather than the trash lets you reuse it later, saving money and reducing waste.
If you’re a creative entrepreneur, think about the backdrop for those quick clips you’ll share. A neutral wall or a simple fabric banner adds a professional touch without costing a lot. And because CreativiU’s community loves visual detail, a clean background helps peers spot technique issues faster.
Essential Supplies at a Glance
| Category | Suggested Item | Why It Matters |
|---|---|---|
| Wheel | Compact electric wheel with variable speed | Stable base and speed control reduce wobble for beginners. |
| Clay | 25‑lb stone‑ware bag | Forgiving texture and easy firing make it ideal for practice. |
| Tools | Wire cutter, wooden rib, metal rib, sponge, trimming needle | Core tools cover centering, shaping, and finishing without overload. |
Once you’ve assembled the basics, spend a few minutes arranging everything the way you’ll use it. The act of setting up reinforces muscle memory – you’ll know exactly where the cutter lives when you need it, and you won’t waste precious practice minutes searching for a sponge.
And here’s a little secret: after a week of consistent use, you’ll start noticing subtle patterns – maybe the wheel’s speed feels just right at 150 RPM for small bowls, or the lighting reveals a tiny ridge you missed before. Those “aha” moments are what turn a hobby into a skill.
Ready to see the full picture? Our comprehensive guide to online pottery classes for beginners walks you through every tool, material, and setup tip in more depth, so you can skip the guesswork and dive straight into throwing.
Take a breath, clear a space, lay out the supplies, and give yourself permission to make a mess. The perfect workspace isn’t a pristine studio; it’s a spot where you feel comfortable enough to experiment, fail, and try again. That’s all you need to start turning clay into something you’re proud of.
Step 3: Master Basic Techniques Through Guided Lessons
Now that you’ve got the tools and a tidy corner, the next leap is turning raw motions into repeatable skill. Guided lessons are the bridge between “I’m just flinging clay” and “I can pull a clean wall every time.” They give you a safety net, a rhythm, and a clear path forward.
Most online pottery classes break the basics into three bite‑size techniques: centering the ball of clay, opening the centre to create a hollow, and pulling the walls up into a bowl or cup. Those moves sound simple on paper, but each hides a handful of subtle hand‑positions that only become second nature with focused practice.
Step 1 – Schedule micro‑sessions. Instead of a marathon hour, set a timer for 10‑15 minutes, three times a week. Treat each slot like a coffee break with the wheel: you’ll have just enough time to focus on one technique without getting overwhelmed. Consistency beats intensity; after a few weeks you’ll notice the muscle memory kicking in.
Step 2 – Use the pause‑and‑rewind method. Play the lesson video, then hit pause the moment the instructor’s fingers touch the clay. Mimic that exact hand placement for a few seconds, then resume. Repeat the same 5‑second slice until it feels natural. Because the video is on‑demand, you can rewind as many times as you need – no “missed that part” anxiety.
Step 3 – Record a quick top‑down clip. A cheap phone on a tripod looking straight down at the wheel is all you need. Shoot a 30‑second video of the whole motion, then watch it back at half speed. Spot any wobble, uneven pressure, or missed hand‑lift. This tiny habit helped a member of our community shave her centering time from 45 seconds to under 20 seconds.
Community feedback is the secret sauce. Post that short clip in the class forum or a dedicated Discord channel and ask a focused question like, “Why does my wall thin out after the first pull?” Fellow learners or the instructor will usually drop a concrete tip within minutes – a reminder that pottery isn’t a solo sport.
Here’s a quick story: Maya, a freelance graphic designer, started with the same 10‑minute micro‑sessions. After two weeks she realized her opening was too deep, causing the walls to collapse. A peer suggested she lower the wheel speed by 10 RPM and open a fraction slower. The next day her bowls held their shape, and she felt a surge of confidence that kept her coming back.
To keep the momentum flowing, use this checklist after every lesson:
- Identify the single movement you’re polishing (centering, opening, or pulling).
- Set a timer for a focused 10‑minute practice.
- Record a 30‑second top‑down video.
- Post the clip with a clear question in the community forum.
- Apply one piece of feedback before the next session.
If you’re looking for a deeper dive into how each lesson is structured and why the progression works, check out A Comprehensive Guide to Online Pottery Classes for Beginners. It walks you through the science‑backed teaching method and shows exactly which tools match each skill level.
Finally, remember that mastery isn’t a straight line. Some days the clay will stubbornly stick, other days it’ll glide like butter. The key is to treat every wobble as data, adjust one variable, and spin again. Stick to the micro‑session rhythm, leverage the pause‑rewind trick, and let the community polish your technique – and you’ll see those clean, even walls appear faster than you expect.
Step 4: Practice, Share, and Get Feedback
Okay, you’ve got the basics down and your little studio is humming. Now comes the part that actually turns practice into progress: showing up, recording what you did, and letting other eyes point out the hidden hiccups.
And here’s the secret: the feedback loop is the fastest way to shave seconds off your centering time or stop a wall from wobbling mid‑pull. It’s like having a trainer whisper in your ear while you’re on the wheel.
Set a micro‑practice rhythm
Pick a 10‑minute slot three times a week. No marathon sessions that leave you exhausted; just a focused burst where you zero in on one move – centering, opening, or pulling.
Start the timer, grab your clay, and go. When the timer dings, stop even if the piece isn’t perfect. That pause is your data point.
Record a top‑down clip
Take your phone, pop it on a cheap tripod, and point the lens straight down at the wheel. A 30‑second video is enough to capture the whole motion.
Why top‑down? Because it lets anyone see hand placement, pressure, and speed without guessing. It also makes replay at half speed painless.
Post with a clear question
Upload the clip to the community forum or Discord channel you’ve joined. Keep the caption laser‑focused: “My wall thins out after the first pull – any tips?”
And don’t be shy about the “I’m stuck” feeling. The more specific you are, the quicker someone can point out the exact adjustment – maybe a 5 RPM speed tweak or a slight wrist lift.
Apply one piece of feedback before the next session
Read the comments, pick the most actionable tip, and test it in your next 10‑minute practice. That single iteration creates a measurable improvement loop.
Imagine you get a note to “lower the wheel speed by 8 RPM.” You adjust, spin again, and notice the wall holds its shape. That tiny change saved you an entire day of trial‑and‑error.
Keep a simple progress log
Write down the date, the skill you focused on, the feedback you received, and the result after applying it. A tiny spreadsheet or a notebook works; the key is consistency.
After a few weeks you’ll start spotting patterns – maybe you’re consistently too fast on pulling, or your hand height needs a nudge. Those patterns become your personal cheat sheet.
Leverage community challenges
Many online pottery platforms run weekly challenges like “30‑second centering sprint” or “glaze a single cup”. Jump in. Not only does it push you out of the comfort zone, it also floods the feed with fresh clips you can compare side‑by‑side.
And if you’re looking for a deeper dive into how each lesson is structured, check out our comprehensive guide to online pottery classes for beginners. It breaks down why the micro‑session rhythm works and how to match tools to each skill level.
Does this feel like a lot? Nope. The whole loop fits into a coffee break. Record, post, tweak, repeat. Over a month you’ll see cleaner walls, smoother openings, and a confidence boost that makes the wheel feel like an extension of your hand.
And remember, every wobble is data, not failure. Treat it like a clue in a mystery you’re solving with a supportive crew cheering you on.
Ready to put this into action? Grab your phone, set that timer, and share your first clip today. Your future self will thank you.
Step 5: Turn Your Hobby into a Small Business or Portfolio
So you’ve got a steady rhythm, a tidy corner, and a handful of pieces you’re actually proud of. The next question many of us ask is, “Can I make a little money off this, or at least build a portfolio that looks legit?” The answer is a resounding yes – you just need a simple roadmap.
Define Your Niche and Offer
First, take a step back and look at what you love making most. Is it sleek modern mugs, whimsical garden pots, or maybe hand‑painted tiles? Pick one or two signature items. When you focus, you’ll get faster, your brand feels clearer, and customers know exactly what to expect.
Ask yourself: what problem does my piece solve? A sturdy coffee mug for the busy parent, a decorative vase that doubles as a night‑light, or a custom name plate for a home office? Framing your work as a solution makes it easier to market.
Set Up a Minimal Online Presence
You don’t need a full‑blown e‑commerce site right away. Start with a free Instagram or Pinterest board where you post clear photos, a short story behind each piece, and a price tag. Consistency matters – aim for three posts a week, using the same lighting style so your work looks cohesive.
When you’re ready to go a step further, a simple shop page on CreativiU’s platform lets you list items without worrying about payment gateways. It’s a low‑cost way to test demand before committing to a custom website.
Pricing Without Guesswork
Take a sheet of paper and write down every cost: clay, wheel time (even if it’s just your electricity bill), tools, glaze, packaging, and shipping supplies. Add a modest profit margin – 20‑30% is a good starter range. Then compare with similar handmade items on Etsy or local craft fairs to see if you’re in the right ballpark.
Remember, your time is valuable. If a bowl takes you an hour to throw, finish, and fire, factor that hour into your price. Over time you’ll get faster, and the same price will feel even sweeter.
Create a Simple Production Workflow
Map out the steps from “idea” to “shipped.” For example: design → prep clay → throw → dry → bisque fire → glaze → glaze fire → photograph → pack → ship. Write this down and keep it on your workstation. When you follow the same sequence each time, you reduce mistakes and can batch similar tasks (like glazing a set of mugs on the same day).
Use a quick checklist at the start of each week: how many pieces will you throw? What colors will you glaze? Which orders need to go out? A tiny habit like this turns a hobby into a mini‑production line without feeling overwhelming.
Leverage Community Feedback for Credibility
One of the biggest advantages of online pottery classes is the built‑in community. Share a photo of your newest product in the forum and ask for a quick critique on pricing or presentation. A fellow potter might suggest a more eye‑catching label or a better packaging idea that boosts perceived value.
In our experience, creators who post progress updates see a 40% higher conversion rate because buyers feel they’re part of the maker’s journey.
Test, Iterate, and Grow
Launch with a small batch – maybe five mugs or ten coasters. Offer them to friends, family, or your social followers at a “early‑bird” discount. Gather feedback: Did the size feel right? Was the glaze too glossy? Use those insights to tweak the next batch.
When you notice a steady stream of orders, consider a few upgrades: a more professional camera for product shots, a simple logo, or a branded thank‑you card. Each little touch makes the buying experience feel premium.
Legal and Logistics Basics
Even a modest side hustle needs a bit of paperwork. Register a “sole proprietor” name if you want a business bank account, and check local tax rules for handmade goods. Shipping can be as simple as USPS flat‑rate boxes; just weigh one finished piece to pick the right size.
Finally, protect your designs. Take clear photos and keep a digital folder with timestamps – it’s proof of originality if you ever need it.
Take the First Action Today
Pick one piece you’ve already made that you love. Snap a photo, write a short description, set a price using the cost‑plus method, and post it in your favorite social feed. Then watch the first comment roll in. That tiny step is the bridge from hobbyist to small‑business owner.
Feeling inspired? Our practical guide to online pottery wheel classes walks you through the exact techniques you’ll need to keep your production smooth as you scale.
Conclusion
We’ve taken you from the first spark of curiosity to a clear roadmap for mastering an online pottery class, and you now know what to expect.
Big breakthroughs happen when short, focused practice becomes a habit—three 20‑minute throws a week, a quick photo, and one piece of feedback keep momentum alive.
For hobbyists the habit sharpens technique enough to feel proud of each bowl; for entrepreneurs it creates a repeatable line you can photograph, price, and list without overwhelm.
Treat each piece as a data point—note clay weight, wheel speed, and tweaks, then compare week over week; patterns emerge quickly and confidence grows.
Our experience at CreativiU shows that pairing structured lessons with an active community halves the learning curve, because quick answers keep frustration low.
So, what’s your next move? Grab stone‑ware, set up a simple camera angle, and schedule a 20‑minute session this weekend. Share a short clip, ask one clear question, and watch your skill rise.
In the end, an online pottery class isn’t just a course—it’s a flexible studio that fits around your life, letting you create, improve, and turn your art into a side hustle. Keep spinning, stay curious, and enjoy the tactile joy of clay.
FAQ
How do I choose the right online pottery class for a beginner?
Start by looking for a course that breaks the curriculum into bite‑size modules—centering, opening, pulling, trimming. Make sure the platform offers on‑demand videos so you can pause and replay tricky hand positions. A supportive community or forum where you can post short clips for feedback is a huge plus, especially if you’re juggling a busy schedule.
What basic equipment do I really need to get started?
You don’t have to buy a professional studio setup. A modest electric wheel that handles 20 kg of stone‑ware, a bag of mid‑fire clay, a wire cutter, a sponge, and a sturdy stool are enough for most beginners. Adding a phone or webcam on a cheap tripod lets you capture your throws for the class’s feedback loop.
Can I fit an online pottery class into a hectic daily routine?
Absolutely. The beauty of on‑demand lessons is that you can carve out just 15‑20 minutes after dinner or during a lunch break. Treat each session like a micro‑practice sprint: watch a 5‑minute demo, try the technique, then record a quick clip. Consistency beats marathon sessions any day.
How important is community feedback for my progress?
Feedback turns practice into improvement. When you upload a short video and ask one specific question—like “why is my wall wobbling?”—you’ll often get a concrete tip within hours. Those bite‑size adjustments add up, cutting the learning curve in half for hobbyists and speeding up product development for creative entrepreneurs.
Will I be able to sell my pieces after completing an online pottery class?
Many learners transition from hobby to side hustle by building a small, cohesive product line. Focus on a handful of items—mugs, bowls, a vase—photograph them with clean lighting, and price them to cover clay, glaze, and your time. The confidence you gain from structured lessons makes it easier to market your work on platforms like Etsy or a personal shop.
Do I need a high‑speed internet connection for live sessions?
Live Zoom or video‑chat sessions work best with at least 5 Mbps upload speed. Test your connection the night before and keep the router in the same room as your workspace. If bandwidth is limited, stick to recorded lessons and upload your clips for asynchronous feedback; you’ll still get the same quality guidance.
How long does it usually take to feel comfortable on the wheel?
Most beginners notice a measurable improvement after three to four weeks of regular practice—three 20‑minute throws a week, plus a quick review of each clip. By week five you’ll likely center a 200 g ball in under 12 seconds and pull a wall that stays even for a few inches. Keep tracking your data points; patterns emerge quickly and confidence grows.
Leave a Reply