Resin jewelry feels like magic, but you don’t need a lab to make it. In under an hour you can mix, pour, and shape a piece that looks store‑bought. This guide walks you through every step, from gathering tools to the final polish, so you can finish a pendant or a pair of earrings without guesswork.
By the end you’ll know which supplies work best, how to avoid bubbles, and why the curing stage often takes longer than you expect. Let’s start creating.
Step 1: Gather Your Supplies
Before you mix anything, line up the basics. Clear epoxy resin and its hardener are the heart of the project. A 1:1 volume ratio is standard, and most beginner kits include a measuring cup for each component. Look for a kit that lists “low‑odor” or “UV‑stable” on the label; these formulas reduce fumes and keep color true.
You’ll also need a few tools that cost less than a coffee. A wooden stir stick, a silicone spatula, and a small zip‑top bag for storing leftover resin are enough for a first run. Safety gear is non‑negotiable: nitrile gloves protect your skin, safety goggles keep resin off your eyes, and a simple dust mask helps if you work in a small room.
Having a clean, level workspace makes cleanup easier. A silicone mat or a sheet of parchment paper provides a non‑stick surface and catches drips. If you can, work near a window or use a small fan to improve ventilation , the CDC notes that epoxy fumes can cause irritation in enclosed spaces ( CDC safety guidance).
Here’s a quick checklist you can print out:
- Clear epoxy resin and matching hardener
- Measuring cups (one for each part)
- Wooden stir sticks and silicone spatula
- Nitrile gloves, safety goggles, dust mask
- Silicone mat or parchment paper
- Silicone molds for the shape you want
If you prefer a ready‑made package, the Brilliant Resin Starter Kit bundles most of these items and even includes a spring drill for small holes. It’s a solid choice for beginners who want a “class in a box.”
Once you have everything laid out, you’re ready to move on to the mold.
Step 2: Prepare Your Mold
Silicone molds are the most forgiving option for jewelry. They release the cured piece without force, which means you won’t crack delicate edges. Pick a shape that matches the final item , a simple round earring cup is perfect for a first project.
Before you pour, clean the mold surface. Wipe it with a lint‑free cloth dampened with isopropyl alcohol. This removes dust that could mar the finish. Let the mold dry completely; any moisture can create bubbles when the resin meets it.
Place the mold on a flat surface. If you work on a table that tends to wobble, set a piece of cardboard underneath to keep it steady. Some crafters like to tape the mold’s edges to a sheet of wax paper; this catches drips and protects the tabletop.
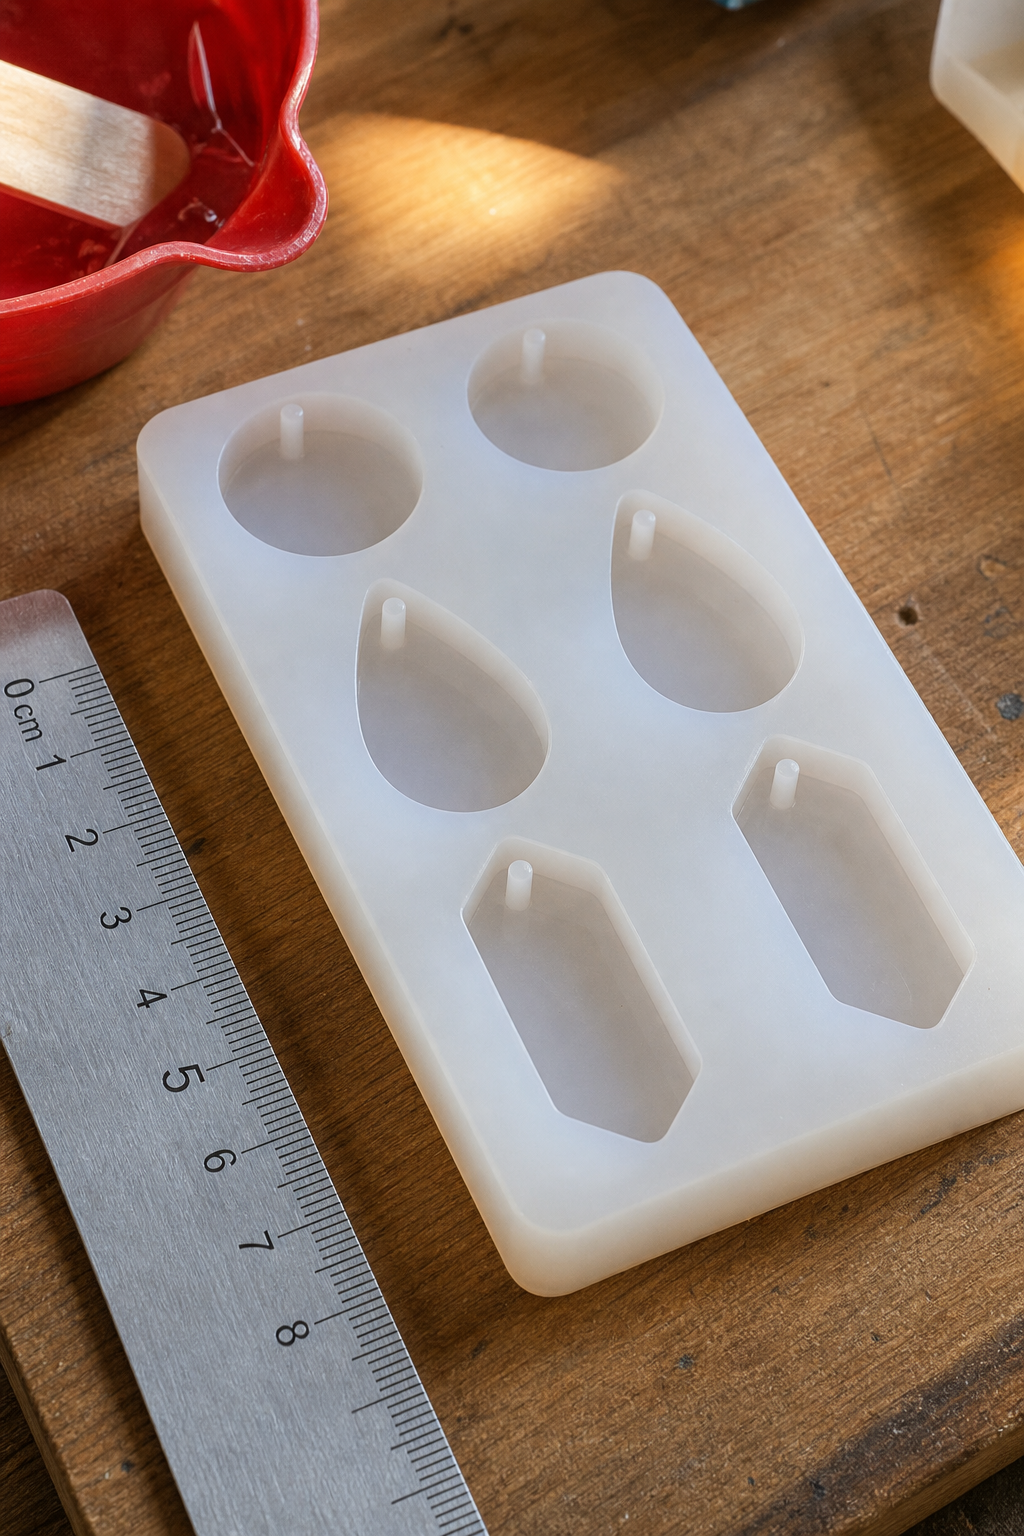
Now you have a clean, stable mold ready for the liquid. The next step is where the chemistry happens.
When you’re set, move on to mixing the resin.
Step 3: Mix and Color the Resin
Measure the resin and hardener side by side. If you use cups, fill each to the same line; if you have a scale, weigh them to equal grams. Accuracy matters , a 5% mismatch can turn a clear piece cloudy.
Pour the resin into the mixing cup first, then add the hardener. Stir slowly in a figure‑eight motion for about 30 seconds, then switch to a gentle circular motion for another 30 seconds. Scrape the sides and bottom of the cup regularly; this ensures no pockets of unmixed material remain.
After the initial stir, let the mixture sit for 30 seconds. Small bubbles will rise to the surface during this pause. If you see a few that linger, give the cup a gentle tap on the workbench to pop them.
Now comes the fun part: color. You can use resin‑safe pigments, mica powders, or liquid dyes. A rule of thumb is 1‑2% pigment by volume for dyes and up to 5% for mica. Add the color to the clear resin before the hardener , this helps the pigment disperse evenly.
Stir the color in gently , over‑stirring re‑introduces air. Once the hue looks even, you’re ready to pour.
If you need a visual reference for mixing, the How to Make Resin Jewelry for Beginners page walks through each motion step by step.
Now the mixture is ready to meet the mold.
Step 4: Pour and Add Embellishments
Position the mold so its opening faces up. Hold the mixing cup close to the mold and pour a thin stream along the side wall. This technique reduces the chance of trapping air compared to pouring straight down.
After the first layer settles (about 2 minutes), you can add inclusions. Tiny charms, glitter, dried flower petals, or even a sprinkle of mica add visual interest. Use tweezers to place each piece precisely; a misplaced flower can shift the balance of the design.
When you’re happy with the layout, finish the pour by filling the rest of the mold. Tap the mold gently on the work surface to settle the resin and release any hidden bubbles.
If bubbles still appear, run a heat gun or a hair dryer over the surface for 5‑10 seconds. The warm air thins the top layer, letting bubbles rise and pop.
Some creators like to create a layered effect. Let the first pour cure to a tacky state (about 15 minutes), then add a second color or a different set of embellishments. This adds depth without mixing the colors.
When the resin looks smooth and bubble‑free, cover the mold with a piece of cardboard to keep dust out.
Step 5: Curing and Demolding
Resin cures through a chemical reaction that hardens the mixture. Most clear epoxy resins reach a handleable state in 4‑6 hours at room temperature, but full strength can take up to 24 hours. The exact time depends on ambient temperature and humidity.
Place the covered mold in a well‑ventilated area away from direct sunlight. Heat speeds up curing, but too much heat can cause the resin to become cloudy. Aim for a room temperature between 70 °F and 78 °F.
While you wait, resist the urge to touch the piece. Even a light tap can leave fingerprints that become visible after polishing.
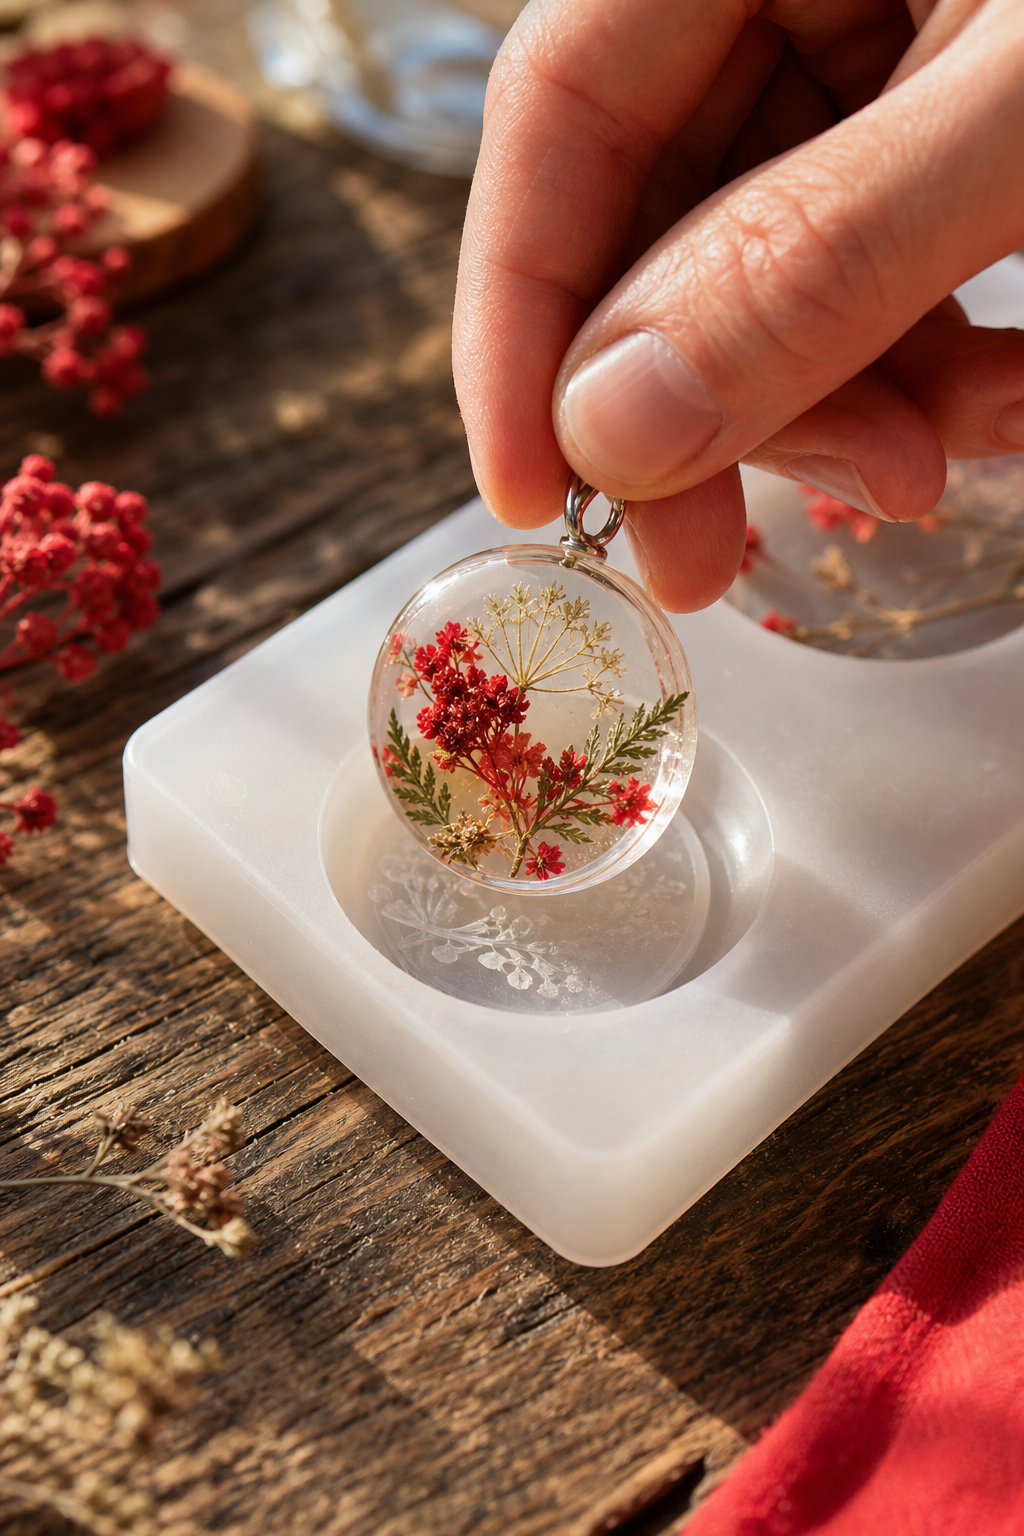
When the curing time has passed, flex the silicone mold slightly to release the piece. If the resin sticks, a quick roll of a piece of wax paper over the surface can help. The piece should pop out cleanly; if it resists, give it a few more hours.
Now you have a solid, clear base ready for finishing. The next step is where many beginners spend the most time.
Let’s move on to polishing and attaching findings.
Step 6: Finishing Touches
First, examine the piece for rough edges. Use a set of fine‑grit sandpaper, starting at 400 grit and moving up to 1500 grit. Sand in a circular motion and keep the surface wet to avoid heat buildup.
After sanding, wipe the piece with isopropyl alcohol to remove dust. A clean surface is important for the glue to bond well.
Now attach the findings. For earrings, use a small jump ring and an earring hook. Tiny jewelry pliers help open and close the rings without stressing the resin. For pendants, a bail or a loop can be glued with a clear jewelry adhesive. The Resin Jewelry Making for Beginners guide suggests roughening the back with 400‑grit sandpaper before applying glue for a stronger hold.
Give the glue the recommended cure time , usually 24 hours , before wearing the piece. Once dry, give the jewelry a final polish with a soft cloth or a polishing compound designed for acrylic surfaces.
“The finishing stage can take up to three days, but it’s what makes a piece look professional,” says a seasoned crafter.
Now your resin jewelry is ready to wear or gift. Store finished pieces in a dust‑free pouch to keep them shining.
Frequently Asked Questions
Can I use regular household glue to attach findings?
Regular white glue is not strong enough for resin surfaces. A clear jewelry adhesive or epoxy designed for metal‑to‑resin bonds provides a durable hold. Apply a tiny amount, press the finding in place, and let it cure for at least 24 hours before handling.
Do I need a heat gun to remove bubbles?
A heat gun or a hair dryer on low heat is the most reliable tool for popping bubbles. If you don’t have one, you can gently blow on the surface or use a small torch held far enough away to avoid scorching. The goal is to thin the top layer just enough for bubbles to rise.
How long does the resin stay workable?
Workability, also called “pot life,” varies by brand but is usually 20‑30 minutes at room temperature. Warm the resin slightly before mixing to extend this window by a few minutes. If it starts to thicken, you can add a tiny amount of fresh resin to the mix.
Can I reuse leftover resin?
Yes, if you store it in an airtight container away from light and heat. Make sure the container is sealed tightly; exposure to air can cause the resin to cure inside the bottle. Label the container with the date so you know how long it’s been stored.
Is it safe to work without a mask?
Epoxy fumes can irritate the lungs, especially in small, unventilated spaces. A simple dust mask reduces inhalation of particles, while a respirator mask offers better protection. Always work near an open window or use a fan to move air out of the room.
What if my piece stays cloudy after curing?
Cloudiness often results from improper mixing or trapped bubbles. To fix it, sand the cloudy layer with 800‑grit paper, then polish with a clear coat. For future pours, stir slower, tap the mold, and use heat to pop bubbles before the resin sets.
Conclusion
Making resin jewelry is a blend of chemistry and art. By gathering the right supplies, preparing a clean mold, mixing and coloring carefully, and giving the piece ample curing time, you can produce professional‑looking accessories from your kitchen table. The biggest time sink is the sanding and assembly stage, so plan for a few extra days after the initial pour. With practice, you’ll cut down on bubbles, speed up curing, and explore endless design ideas.
If you want more project ideas or a community to share your work, the CreativiU platform offers courses and feedback that can spark fresh inspiration. Grab your supplies, follow each step, and enjoy the satisfaction of wearing something you made yourself.
Leave a Reply