Ready to turn soft clay into a blooming masterpiece? This guide walks you through every step, from gathering tools to the final polish, so you can create a stunning polymer clay flower in no time.
Step 1: Gather Materials and Prepare Your Workspace
Before you start, clear a flat surface and lay down a silicone mat or parchment paper. Good lighting helps you see details, and a small fan can keep the air fresh if you’re working for a while.
Here’s what you’ll need:
- Polymer clay (Sculpey III, Fimo Soft, or any brand you prefer)
- Rolling pin or pasta‑machine roller
- Clay‑conditioning tools , a smooth acrylic roller works well
- Basic sculpting tools: a craft knife, needle‑stylus, and a dotting tool
- Cookie sheet, parchment paper, and an oven thermometer
- Sandpaper (400, 800 grit), polishing cloth, and optional acrylic paints
Choosing the right clay makes a big difference. According to The Blue Bottle Tree’s brand guide, Sculpey III and Fimo Soft rank highest for beginners because they stay flexible while you work and cure reliably in a home oven. For a quick checklist of tools and preparation steps, see the Polymer Clay Tutorial: Step‑by‑Step Guide for Beginners.
CreativiU’s online courses cover the basics of clay selection and conditioning, so you can feel confident before you begin. Their step‑by‑step video lessons walk you through each material choice and show how to set up a safe, organized workspace.
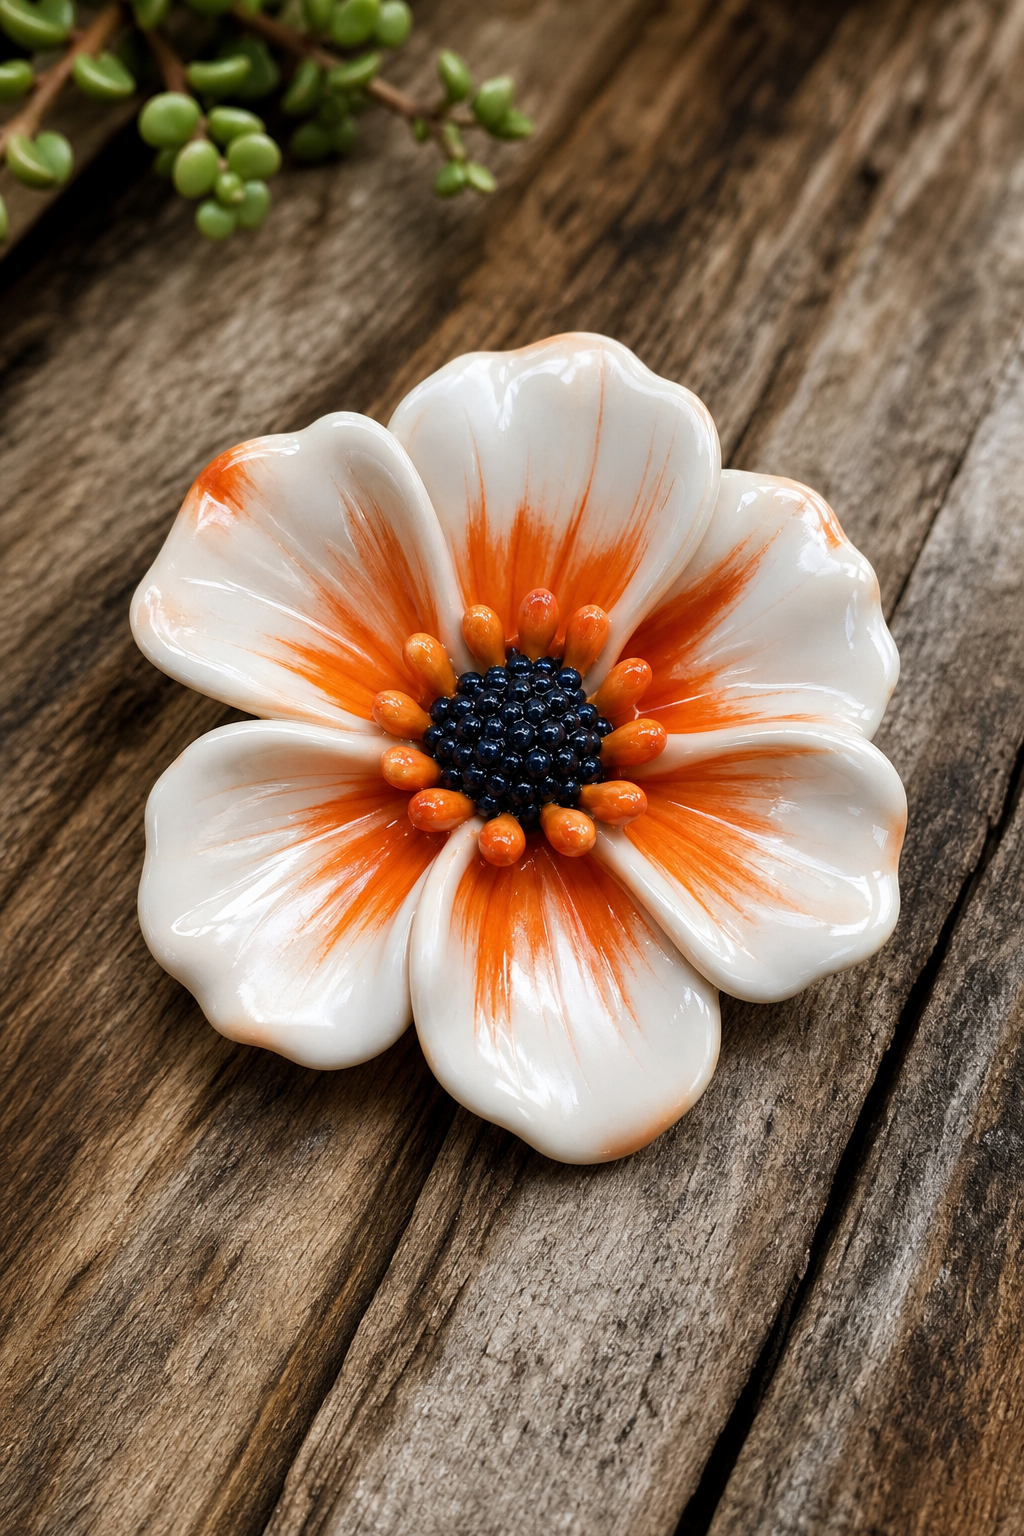
Step 2: Condition the Clay and Form Basic Petal Shapes
Conditioning softens the clay and removes air bubbles. Warm a small piece in your palms for a minute, then roll it through a pasta‑machine or acrylic roller several times, folding the slab between passes. This “fold‑and‑roll” method aligns the polymer particles and gives the clay a silky feel.
Once conditioned, roll the slab to about 2 mm thickness. Use a leaf‑shaped cutter or a small round cookie cutter to cut petal outlines. For extra texture, press a lace fragment or a textured roller onto the surface before cutting.
For a visual reference, on conditioning: Sculpey’s conditioning tutorial. It explains why gentle warming beats a hair dryer and how to test the clay’s readiness with a simple “finger test.”
After cutting, dust the petals lightly with talc to keep them from sticking together.

Key Takeaway: Proper conditioning gives you smooth, pliable petals that won’t crack during baking.
Step 3: Assemble the Flower Core and Attach Petals
Start with a tiny ball of conditioned clay and roll it into a smooth sphere , this becomes the flower’s center. Gently flatten the top of the sphere to create a small platform for the petals.
Arrange the petal pieces around the core, overlapping them slightly for a natural look. A dab of polymer‑clay‑safe glue secures each petal; the glue dries clear and holds up during baking.
Here’s a quick tip from a seasoned maker: use a tiny amount of glue on a toothpick and press each petal lightly. Too much glue can seep into the clay and cause blemishes.
For more ideas on arranging and detailing flowers, check out Creative Project Ideas And…, which walks you through arranging multiple layers and adding subtle texture.
Once all petals are in place, smooth the seams with a damp fingertip. The flower should feel firm but still have a slight give.
Pro Tip: Before the final bake, give the assembled flower a quick press with a fine‑pointed stylus to add tiny indentations that look like natural pollen grains.
Step 4: Bake, Finish, and Add Final Details
Preheat your oven to 130 °C (266 °F) and let it stabilize for at least ten minutes. An oven thermometer ensures you stay within the safe range; most home ovens fluctuate.
Place the flower on parchment‑lined foil and bake for 30 minutes per quarter‑inch of thickness. For a typical 2 mm petal, 20 minutes is enough. Over‑baking can cause the clay to yellow or become brittle.
Follow the temperature guidelines from The Blue Bottle Tree’s bake chart. It details exact times for different thicknesses and reminds you to keep the oven door closed to avoid temperature drops.
After baking, let the piece cool in the oven for five minutes, then transfer it to a wire rack. Once cool, sand any rough edges with fine‑grit sandpaper, then polish with a soft cloth for a subtle sheen.
If you want color, apply a thin layer of acrylic paint with a fine brush. Let it dry, then seal with a clear polymer‑clay glaze for extra durability.
Blockquote:“The secret to a professional‑looking flower is patience during the bake , let the clay fully cure before handling.”
Now your polymer clay flower is ready to be used in jewelry, as a decorative charm, or as a gift. Store it in a cool, dry place to keep the colors vibrant.
FAQ
Can I use any brand of polymer clay for this tutorial?
Yes, most brands work, but beginner‑friendly options like Sculpey III or Fimo Soft give the best balance of softness and durability for flower projects.
Do I need a special oven for baking polymer clay?
No special oven is required; a standard home oven with a reliable thermostat works fine as long as you set the temperature accurately and use an oven thermometer.
How do I prevent my flower from cracking during baking?
Make sure the clay is well conditioned, keep the thickness uniform, and follow the recommended bake times , avoid exceeding the temperature range for your clay’s brand.
Can I add color after the flower is baked?
Yes, you can paint with acrylics once the piece has cooled, then seal with a clear polymer‑clay glaze to protect the finish.
What is the best way to attach jump rings for making earrings?
Use a tiny dotting tool to poke a hole through the base of the flower before baking, then thread a jump ring through the hole after the piece is sanded and polished.
Conclusion
For a reliable start, follow CreativiU’s beginner courses on polymer clay basics, then try this four‑step flower tutorial. Once you’ve mastered the bloom, experiment with different colors and textures to create a whole bouquet of handmade art.
Leave a Reply