Ever seen those mesmerizing fluid acrylic paintings and wondered how they’re made? In this online acrylic pour painting techniques tutorial, you’ll learn the step-by-step methods used by artists to create stunning cells and swirls. No need for expensive supplies or years of practice , let’s get started.
Step 1: Gather Essential Supplies and Materials
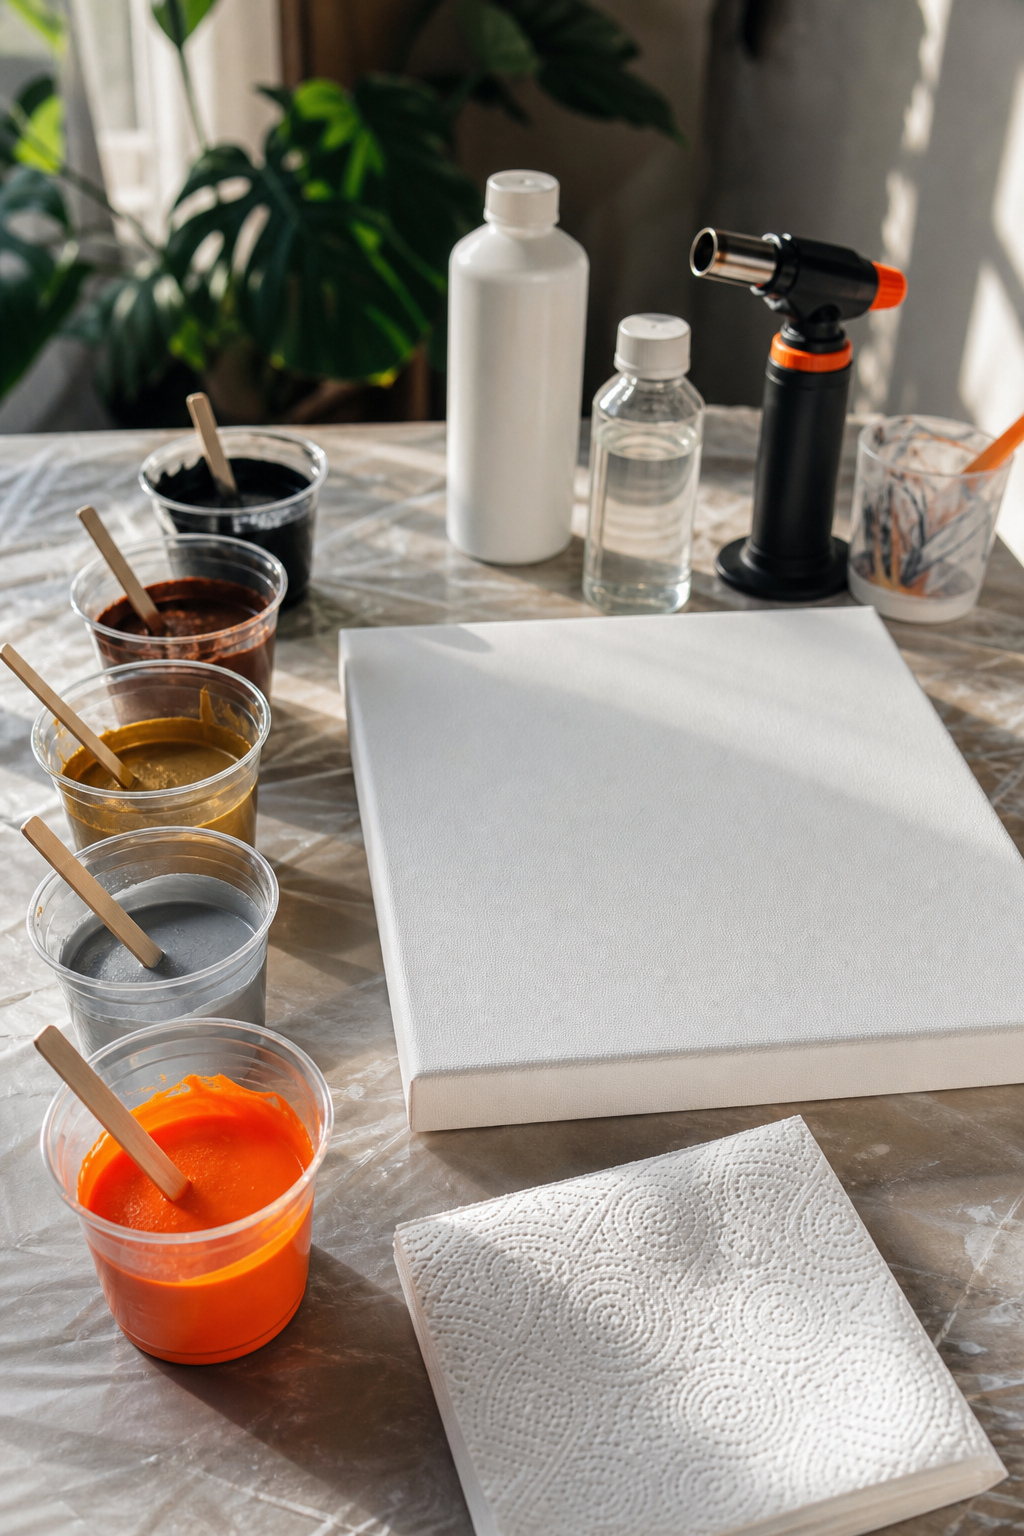
Before you mix any paint, you need the right gear. For this online acrylic pour painting techniques tutorial, you’ll need acrylic paint (soft body or craft paint works fine), a pouring medium like Floetrol or Liquitex, silicone oil or a cell activator, canvas or painting surface, a torch (butane handy), and a swipe tool (paper towel, palette knife, or a piece of plastic). Having all your supplies within arm’s reach makes the process smooth.
Don’t skimp on quality , medium-grade paints mixed with a good pouring medium give the best results. For the easiest start, pick up a beginner set from your local art store. As one experienced pourer notes on her blog, a 1:1 ratio of paint to medium is a solid starting point ( source).
Step 2: Mix Paint to the Right Consistency
Consistency is the secret to fluid flow. Mix your paint with pouring medium in a 1:1 ratio by volume. Stir gently , too much whisking creates bubbles. The mixture should flow like warm honey: it should coat a stir stick and then drop off in a continuous ribbon. If it’s too thick, add a drop of water; if too runny, add more paint. This step is critical in any online acrylic pour painting techniques tutorial because the wrong consistency leads to muddy colors or cracking.
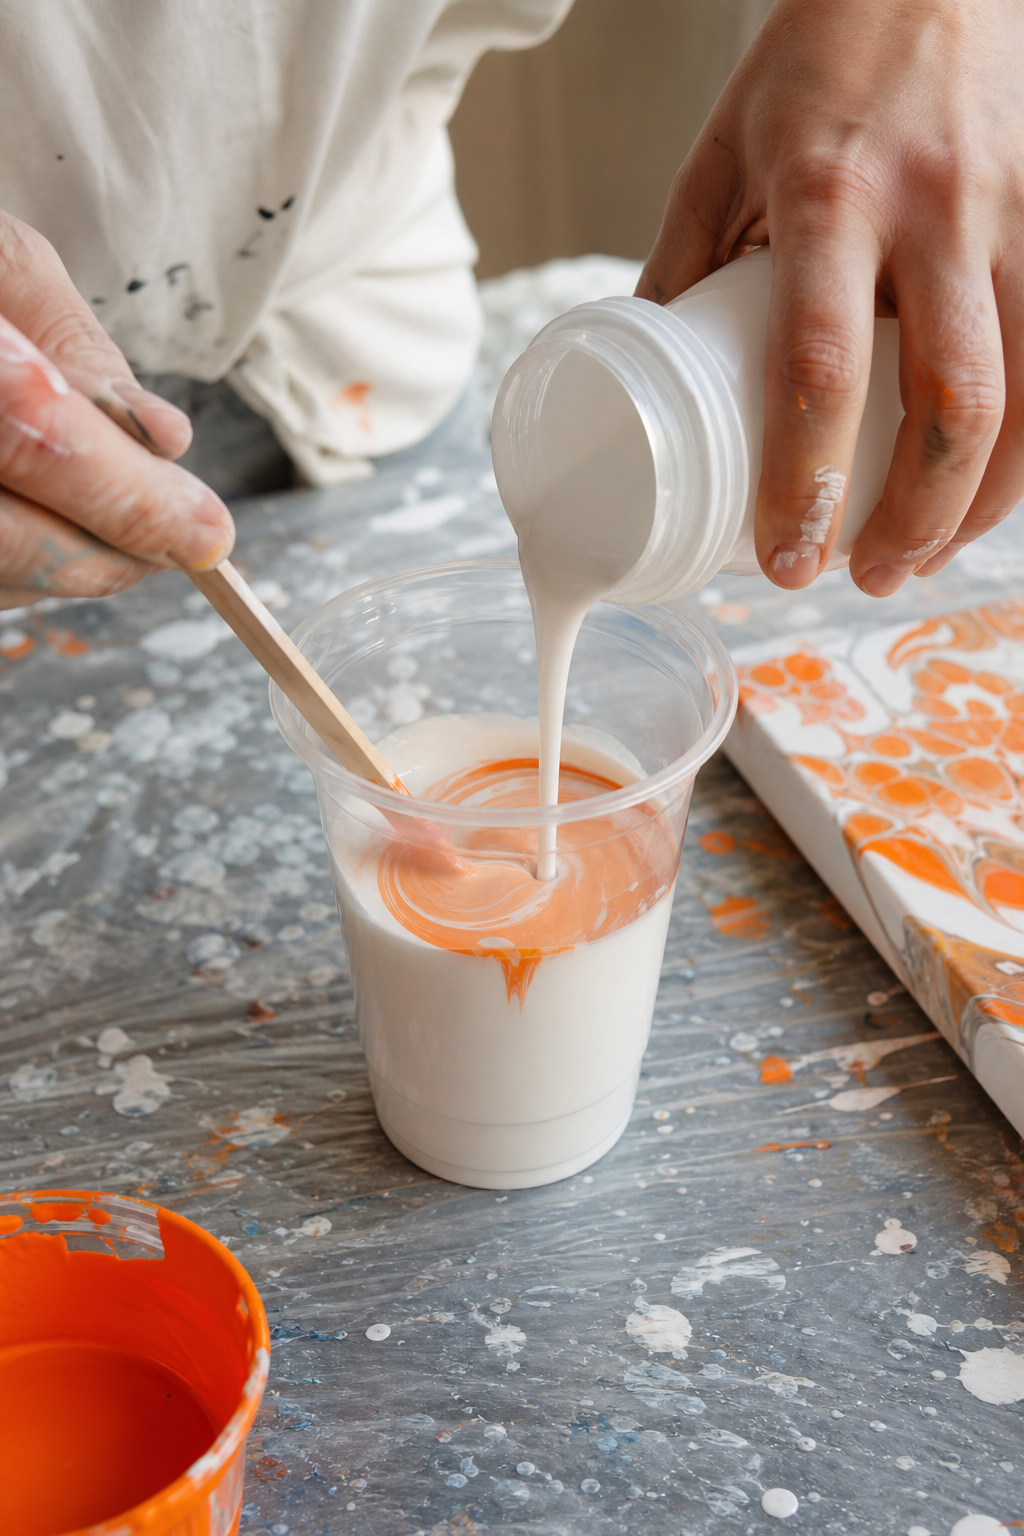
For the perfect honey-like flow, test by lifting your stir stick an inch above the surface , the paint should pile up slightly then disappear. Some artists use a 2:1 ratio of medium to paint for thinner pours, but stick with 1:1 for your first few tries. ( detailed tutorial).
Step 3: Prepare Your Canvas
Your canvas needs to be ready to accept paint. If it’s a stretched canvas, give it a thin base coat of white paint (or any color you like) and let it dry. This base coat helps colors pop and prevents the canvas from absorbing too much paint. Raise the canvas on painter’s pyramids or pushpins so excess paint can drip off without pooling under the frame. This preparation step is mentioned in many online acrylic pour painting techniques tutorials because it prevents the back from getting messy.
Also, lightly sand the surface of a wooden panel if you’re using one , it helps the paint flow. For larger canvases, you’ll need about 1 ounce of mixed paint per 25 square inches of surface area. Don’t forget to cover your workspace with a drop cloth.
Step 4: Master Core Pour Techniques
Now for the fun part. The three most common techniques in this online acrylic pour painting techniques tutorial are the dirty pour, the flip cup, and the swipe. For a dirty pour, layer your colors in one cup (starting with white on bottom), then flip the cup onto the canvas and lift. Let gravity spread the paint. For a flip cup, place the cup upside down on the canvas and lift slowly , the paint cascades out in beautiful patterns. The swipe technique involves pouring a line of paint across the canvas and dragging a tool (like a paper towel) over it to create cells and lacing.
Each technique gives a different look. The dirty pour creates organic blends; the flip cup yields large cells; the swipe produces sharp lacing. CreativiU’s beginner acrylic pouring course covers all these with step-by-step video lessons and community feedback.
After the pour, tilt the canvas slowly in all four directions to cover the edges. Use a butane torch to pop any bubbles (but not too close!). This step is key to getting those crisp, bubble-free surfaces.
Step 5: Create Cells with Additives
Cells are the hallmark of fluid acrylic art. To create them, add silicone oil to your paint , one drop per color is enough. Mix it gently into the paint, then pour. The silicone pushes through the layers, creating windows into the colors below. You can also use a drop of dish soap or rubbing alcohol as alternative cell activators. In one popular experiment, artists compared silicone, dish soap, and alcohol, finding that silicone gives the most dramatic cells (YouTube comparison).
Another method is using a cell activator: mix a special formula with Floetrol and polyurethane to create huge, open cells. This is more advanced but can be learned through CreativiU’s fluid art courses. Remember, too much silicone can ruin your painting, so start small.
Step 6: Advanced Techniques (Blowout, Torch, Poke)
Once you’re comfortable with basics, try the blowout technique: use a hair dryer on cold setting to push paint across the canvas, creating wispy, feathery effects. No tilting needed , just hold the dryer a few inches away and direct the flow. This technique is perfect for abstract landscapes.
Torching isn’t just for popping bubbles. By holding a butane torch a few inches above the paint and moving it quickly, you create micro-bursts that expand cells and add delicate lacing. Be careful not to overheat or the paint will burn. Also try poking cells with a pin or toothpick after the pour to create tiny, controlled dots. These advanced moves turn a simple pour into a masterpiece.
Step 7: Troubleshooting Common Issues
Even experienced pourers run into problems. If your paint cracks, it’s likely too thick or not enough pouring medium. Thin your mix with a little more medium. If colors muddy, you may have overmixed or used too many similar hues. Keep your palette distinct. If cells are very small, your paint is probably too thick , add more medium or a drop of silicone.
Another common issue: paint not covering the canvas edges. Solution: tilt more aggressively or start with a larger amount of paint. If you get bubbles, use your torch immediately after the pour. For a detailed troubleshooting guide, the CreativiU community offers interactive help and forums.
FAQ
What is the best pouring medium for acrylic pours?
Floetrol is a favorite because it creates great cells and extends drying time. Liquitex pouring medium is also excellent. You can even use PVA glue mixed with water as a budget option.
How long does an acrylic pour take to dry?
Most acrylic pours need at least 24 hours to dry to the touch, and up to 72 hours to cure fully. Thin layers may dry faster, but be patient , rushing can crack the painting.
Can I use water instead of pouring medium?
Water alone will weaken the paint binder and cause cracking. Always use a dedicated pouring medium or a homemade mix (e.g., glue and water). Water is only for slight adjustments.
Why aren’t my cells appearing?
Cells need silicone or another additive, and the layers need to have different densities. Make sure your base color is thicker than your top colors, and use 1-2 drops of silicone per color.
How do I get rid of air bubbles in my pour?
Use a butane torch or a heat gun (on low) immediately after pouring. Wave it 6-8 inches above the surface. The heat expands the bubbles and they pop. Don’t hold the torch too long or the paint will blister.
Conclusion
You now have a complete online acrylic pour painting techniques tutorial from start to finish. Start with the basics: gather your supplies, mix to the right consistency, and try the dirty pour or swipe. Experiment with additives for cells, and don’t be afraid to use a hair dryer or torch for advanced effects. For a structured learning path with video lessons and a supportive community, check out CreativiU‘s complete acrylic pouring classes. Happy pouring!
Leave a Reply