Screen printing at home feels like a secret club, but it’s really just a set of simple habits. In this guide you’ll learn screen printing at home from scratch, step by step, and walk away with a first printable shirt. We’ll cover workspace, supplies, stencil making, printing, and curing, plus a few pro tips that save you time and money.
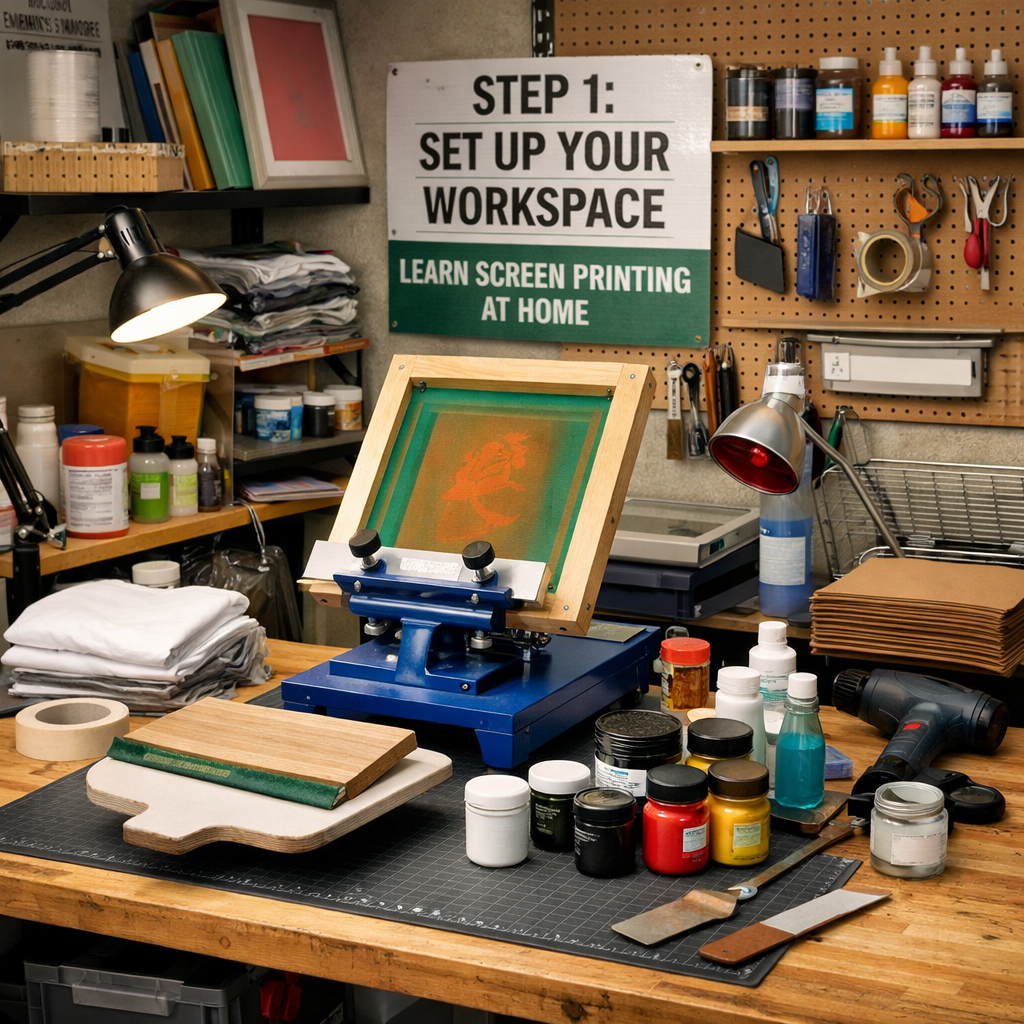
Step 1: Set Up Your Workspace
Before you pour ink or pull a squeegee, you need a clean, organized spot. Think of the space as a mini studio. A small table, a sturdy chair, and a wall that won’t mind a few splashes are enough.
First, pick a room with good ventilation. Screen printing emits fumes, especially when you cure ink. A garage with a window or a spare bedroom with a fan works well. Keep the area dust‑free; dust will stick to wet ink and ruin your prints.
Next, control the light. Emulsion is light‑sensitive, so you need a dark area for coating and exposing screens. Many hobbyists use a blackout curtain or a closet that blocks sunlight. Yellow‑filtered amber lights are safe for handling coated screens because they don’t trigger premature exposure. Wikipedia explains the chemistry behind light‑sensitive emulsion.
Set up a workbench at a comfortable height , about waist level. This reduces back strain when you pull the squeegee. Lay a piece of plywood or a thick board on the bench; it will protect the table and give a flat surface for the screen.
Arrange your tools within arm’s reach. A small tray for ink, a rack for screens, and a container for cleaning water keep everything tidy. Label each tray so you don’t mix water and chemicals.
Finally, think about safety. Wear nitrile gloves when handling chemicals, and keep a fire‑proof mat under the heat‑press or heat gun. A simple first‑aid kit nearby never hurts.
Bottom line:A tidy, ventilated, dark workspace lets you focus on the art, not on accidents.
Step 2: Gather Essential Materials
Now that your space is ready, you need the right gear. The list looks long, but you can start with a beginner’s kit and add items later.
Here’s a quick checklist of the basics:
When you’re just starting, a ready‑made screen‑printing kit bundles most of these items. Kits often include a screen, a few inks, a squeegee, and a simple exposure lamp. You can buy a kit online or at a craft store.
If you prefer to pick each piece, look for reputable suppliers. For inks, water‑based varieties give a soft hand feel and are easier on the environment. The CDC notes that proper ventilation reduces exposure to ink fumes.
Don’t forget the little things that make a big difference: a hygrometer to track humidity (important for emulsion drying), a light‑safe timer for exposure, and a set of disposable gloves.
CreativiU offers an online course that walks you through each of these items, shows where to buy them, and even gives you a community to ask questions. How to start silk screen printing for beginners is the perfect place to begin.
Bottom line:Gather a core set of tools, start simple, and let your kit grow as you improve.
Step 3: Create Your First Stencil
With supplies in hand, it’s time to make the stencil that will block ink where you don’t want it. This is where the magic begins.
First, clean the screen. Use a mild detergent and a soft brush to remove dust. Rinse well and let it dry completely. A clean screen prevents unwanted ink leaks.
Next, coat the screen with emulsion. Pour a thin layer of emulsion onto the mesh and spread it evenly with a squeegee. Work in total darkness or under amber light to avoid early exposure. Let the first coat dry for about 20 minutes, then add a second coat for durability.
While the emulsion dries, prepare your artwork. Print your design onto a transparent film using a laser printer. The design should be solid black; any gray will let light through and blur the edges.
When the screen is dry, place the film on the mesh and secure it with tape. Position the exposure unit about 2‑3 inches above the screen. Expose the screen according to the emulsion’s instructions , most beginners start with a 10‑minute exposure and adjust after a test.
After exposure, wash the screen with a gentle spray of water. The unexposed areas will wash away, leaving clear pathways for ink. Use a soft brush to help the water reach all corners. When the stencil is dry, tape the edges of the screen to stop ink from seeping.
“The perfect stencil starts with a clean screen and a precise exposure time.”
Test your stencil on scrap fabric before moving to your final garment. If you see any ghosting or missed spots, re‑coat the screen or adjust the exposure time.
Now you have a reusable stencil that can print the same design dozens of times.
Bottom line:Clean, coat, expose, and wash , repeat until the stencil shows crisp, clear lines.
Step 4: Print and Cure Your Design
It’s time to bring ink onto fabric. Lay your garment on a flat surface, smooth out wrinkles, and position the screen on top. Align the screen with the design using registration marks if you’re printing multiple colors.
Pour a line of ink at the top of the screen. Hold the squeegee at a 45‑degree angle and pull the ink down in one smooth motion. Apply even pressure; you should feel the squeegee glide without snagging. Lift the screen carefully , the ink should have transferred cleanly.
If the print looks thin or uneven, try a second pass with a little more ink. For multi‑color jobs, let each layer dry or flash before adding the next color.
Now cure the ink so it won’t wash out. Heat guns work for small areas, but a heat press gives the most even results. Set the press to the ink’s recommended temperature , around 320 °F for water‑based inks and 300 °F for plastisol. Place a Teflon sheet over the print to protect it, then press for 20‑30 seconds.
If you only have a heat gun, move it constantly across the print to avoid hot spots. Test the cure by gently stretching a corner of the print; if the ink cracks, it needs more heat.
Let the garment cool before handling. This prevents smearing and lets the ink fully set.
Bottom line:Consistent pressure while printing and proper heat curing lock the design in place for lasting wear.
FAQ
Can I use household lights for exposure?
You can, but the results are unpredictable. Household bulbs emit a mix of wavelengths, some of which may partially expose the emulsion and cause ghosting. A dedicated LED exposure unit or a metal‑halide lamp gives consistent, controllable light. If you must use a house light, do a step‑wedge test to find the exact exposure time for your emulsion.
What mesh count should I choose for beginners?
Most beginners start with 110‑mesh screens. This count balances ink flow and detail, letting you print bold graphics without worrying about fine lines. As you get comfortable, you can experiment with higher mesh counts (160‑180) for finer artwork.
Do I need a separate washout booth?
A full‑size washout booth isn’t required. A large bucket lined with a trash bag works fine for rinsing screens. Just be sure the water drains away from your home’s plumbing , use a trap or pour the waste into a bucket for safe disposal.
How often should I replace my squeegee?
Squeegees wear out after about 50 prints, depending on pressure and ink type. Look for cracks, hardened rubber, or a loss of flexibility. A fresh squeegee gives smoother ink transfer and reduces streaks.
Is water‑based ink really better for the environment?
Yes. Water‑based inks use water as the solvent, so they emit fewer volatile organic compounds (VOCs) than plastisol inks. They also soak into fabric, giving a softer feel. Just remember they need a higher cure temperature and longer drying time.
Can I print on dark fabrics?
Printing on dark garments works best with a white under‑base layer. Apply a thin coat of white water‑based ink, let it dry, then print your design on top. This ensures the colors stay vibrant and don’t appear muted.
What safety gear do I need?
Wear nitrile gloves when handling emulsion and inks, a mask if you’re sanding screens, and eye protection when using an exposure unit. Good ventilation is essential, especially when curing ink with heat.
When you follow these steps, you’ll learn screen printing at home with confidence and create prints you’re proud of.
Screen printing at home is a rewarding hobby that blends art and craft. By setting up a proper workspace, gathering the right tools, learning stencil creation, and curing your prints correctly, you’ll produce professional‑looking shirts without leaving the house. CreativiU’s online community makes the journey easier , you get a step‑by‑step curriculum, peer feedback, and mentorship for just a low monthly fee. Ready to start? Grab a screen, mix some ink, and let your creativity flow.
Leave a Reply