Ever tried to stitch a name onto a pillow and ended up with tangled thread? You’re not alone. Most beginners hit a snag before they even walks you through an interactive sewing machine embroidery basics tutorial so you can get a clean result the first time. We’ll cover everything from powering up the machine to fixing the most common hiccups. By the end you’ll know how to set up, hoop, load a design, start the stitch, and troubleshoot like a pro.
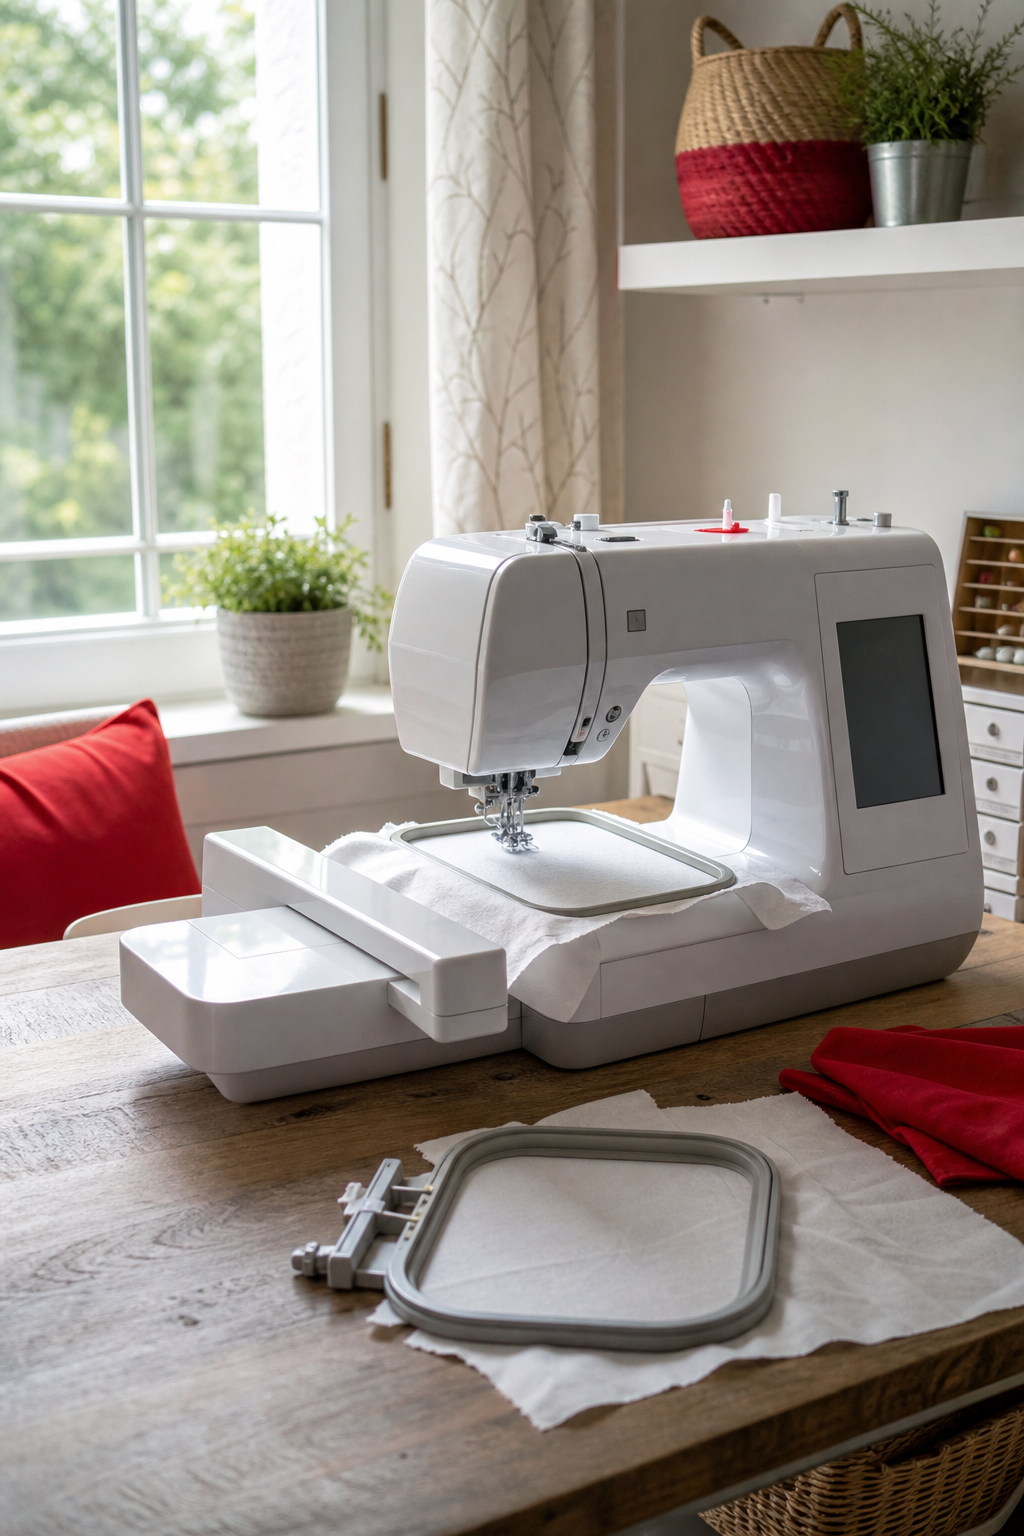
Step 1: Setting Up Your Machine for Embroidery
Before any stitching, make sure the machine is ready. Plug it into a grounded outlet and turn the power switch on. Most modern embroidery machines have a voltage selector; set it to match your home supply. Next, wind a bobbin. Place a fresh bobbin on the winding spindle, pull the th, and engage the winder. When the bobbin fills, the machine will stop automatically.
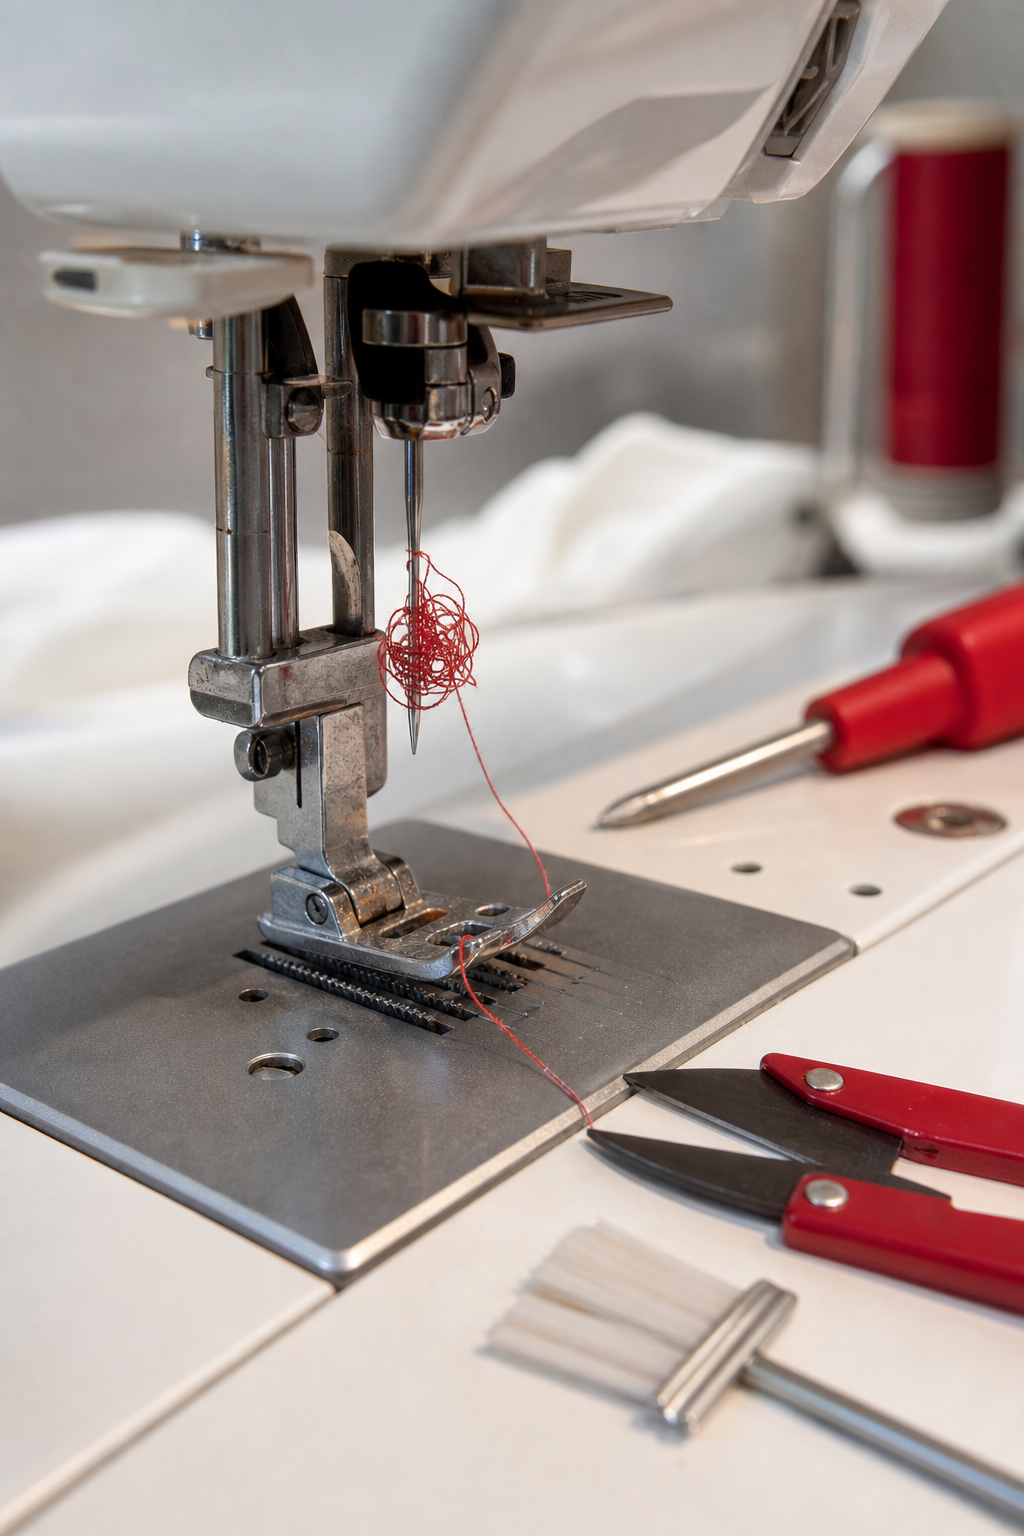
Now thread the upper needle. Follow the arrows printed on the machine’s metal frame , they act like a map. Pull the thread through the first tension disc, loop it around the take‑up lever, then guide it down through the remaining guides. Finally, pass the thread through the needle eye from front to back. A quick test stitch on a scrap of muslin will tell you if tension is balanced, but if you need a refresher on machine operation, our How to Use a Sewing Machine for Beginners guide can help. If the top side looks loose, turn the tension knob a notch tighter; if the bobbin side shows loops, loosen the bobbin tension slightly.
Once the machine runs smoothly, you’re ready to attach the embroidery unit. Some combo machines have a removable embroidery arm; lock it into place . Check that the needle is the correct type for embroidery , a ball‑point or sharp needle works best on most fabrics.
Pro tip: run a 5‑inch straight stitch on a scrap fabric after you finish threading. If the stitch looks even on both sides, you’re good to go.
Step 2: Hooping and Stabilizing Fabric
Hooping holds the fabric taut so the needle can move without pulling. Start by choosing the right hoop size , a 4×4 inch hoop works for small motifs, while a 5×7 inch hoop gives room for larger designs. Place the inner hoop on a flat surface, lay your fabric over it, and then set the outer hoop on top. Pull the fabric gently until you feel a slight give , tight enough that it doesn’t sag, but not so tight that it ripples.
Stabilizer is the secret to clean embroidery on stretchy or sheer fabrics. Pick a stabilizer that matches the weight of your fabric: tear‑away for light cotton, cut‑away for knits, and fusible for delicate silk. Cut a piece slightly larger than the hoop, then sandwich it between the fabric layers before you close the hoop. This prevents puckering and keeps the stitches even.
After you secure the hoop, give the fabric a quick visual check. The grain should run parallel to the hoop’s edge, and any printed pattern you plan to follow should sit in the center. Pin the back of the fabric to the inner hoop if you need extra hold.
According to Wikipedia’s overview of embroidery, using a stabilizer is essential for achieving professional‑grade results on any fabric type.
Step 3: Selecting and Loading a Design
Choosing the right design sets the tone for the whole project. Most machines let you browse built‑in fonts and motifs, but you can also import a .pes or .dst file from a design library. If you’re just starting, pick a simple shape , a leaf, a heart, or a short word. Complex images with many colors are better saved for later practice. For a structured introduction to embroidery techniques, our Online Embroidery Classes for Beginners offer hands-on lessons.
To load a design, insert a USB flash drive into the machine’s port. Handle the menu to “Designs” and select “Import.” The screen will show a thumbnail of the pattern; confirm the selection and assign thread colors. If the design includes multiple layers, the machine will prompt you to change thread after each section.
Before you hit start, run a preview on the screen. Some machines let you zoom in and see exactly where each stitch will land. This helps you spot any mis‑alignments or areas where the fabric might need extra support.
For a deeper dive on design formats, see the official Embroidery Design FAQ (not a competitor page, but an industry‑wide resource).
Step 4: Positioning and Starting the Embroidery
Now the fun part begins , telling the machine where to stitch. Use the arrow keys or touchscreen to move the design within the hoop. Align the top‑left corner of the pattern with the fabric’s edge if you want a straight border, or center it for a balanced look. Most machines show a dotted outline; that’s where the needle will start.
Set the stitch length and width according to the fabric weight. Light cotton works well with a 2‑mm length and 1‑mm width; denim needs a longer stitch to avoid breaking the thread. After you’ve set the parameters, press the start button. The machine will lower the needle, pierce the fabric, and begin stitching in a smooth motion.
If you notice the fabric shifting, pause the machine and tighten the hoop a notch. A loose hoop can cause the design to drift, leaving a blurry outline. Once you’re satisfied with the position, let the machine run to completion. When it finishes, the needle will rise automatically.
According to Wikipedia’s entry on embroidery machines, most modern models include a “jump stitch” feature that lifts the needle between separate design areas, reducing visible lines.
Step 5: Troubleshooting Common Issues
Even with careful setup, problems can pop up. The first sign of trouble is thread breakage. If the thread snaps repeatedly, check the tension settings. Too tight on the top thread will strain the bobbin thread; too loose will cause loose stitches. Adjust one knob at a time and run a test stitch.
Puckering appears when the fabric is pulled too tightly in the hoop. Loosen the hoop just enough so the fabric rests flat without sagging. If the design includes dense stitching, add a heavier stabilizer to keep the fabric from distorting.
Skipped stitches often mean a dirty needle or a worn needle. Replace the needle with a fresh one that matches the fabric type. Clean the needle plate with a soft brush to remove lint that can block the needle’s path.
If the machine stops mid‑design, look for a thread jam. Open the bobbin case, remove any tangled thread, and re‑thread both the bobbin and upper thread. A quick run of a few stitches on scrap fabric will confirm the issue is solved.
When you’ve ironed out the problem, run the design again from the beginning. This ensures the fix didn’t affect stitch alignment.
Frequently Asked Questions
What kind of fabric works best for beginner embroidery?
Start with medium‑weight cotton or linen. These fabrics hold the stabilizer well and let you see the stitches clearly. Avoid stretchy knits until you’ve mastered tension control, because they can pull the stitches out of shape.
Do I need a special hoop for each project?
No. A standard 5×7 inch hoop covers most beginner projects. You can swap to a smaller hoop for monograms or a larger one for full‑color images. The key is to keep the fabric taut without overstretching.
How often should I replace the embroidery needle?
Every 8‑10 hours of stitching, or whenever you notice frayed thread or missed stitches. A fresh needle reduces breakage and keeps the stitch quality consistent.
Can I use regular sewing thread for embroidery?
Yes, but embroidery floss gives a richer look because it’s made of multiple strands. If you prefer sewing thread, use a higher‑quality polyester or cotton thread to avoid lint and breakage.
What’s the best way to store finished embroidered pieces?
Lay them flat in a drawer or roll them gently inside a breathable fabric tube. Avoid folding over the stitched area, as this can cause creases that show through the stitches.
How do I clean my machine after an embroidery session?
Turn the machine off and unplug it. Remove the hoop and brush out lint from the needle plate and feed dogs. Wipe the exterior with a dry cloth. If you used a fusible stabilizer, let the machine cool before removing any residue.
Is it worth joining an online embroidery community?
Absolutely. Communities give you feedback on your designs, share tips on tension settings, and often host free pattern swaps. CreativiU’s own forum is a great place to start because it’s focused on interactive learning.
Conclusion
Learning interactive sewing machine embroidery doesn’t have to be a mystery. By following this step‑by‑step tutorial you’ve learned how to set up your machine, hoop and stabilize fabric, choose and load a design, position it correctly, and fix the most common hiccups. With each project you’ll get faster, and the results will look cleaner. If you’re looking for a place to practice, CreativiU offers a $1 interactive class that walks you through every step with video help and a supportive community. That low‑cost, hands‑on experience beats pricey software that leaves you on your own. So fire up your machine, pick a simple design, and start stitching. Your next embroidered gift or home décor piece is just a few minutes away.
Leave a Reply