Ever stared at a shiny zipper and thought, “I could totally make a little pouch for my headphones, travel tickets, or that secret stash of crayons,” but felt stuck at the first stitch? Trust me, you’re not alone.
That moment of hesitation is the exact spot where we love to step in. At CreativiU we see hobbyists and budding entrepreneurs turning that tiny spark of curiosity into a finished, zip‑closed treasure in just a few afternoons.
So, how do you go from a pile of fabric scraps to a sleek pouch you’re proud to show off? The trick is breaking the process down into bite‑size actions you can tackle with confidence, even if you’ve never sewn a seam before.
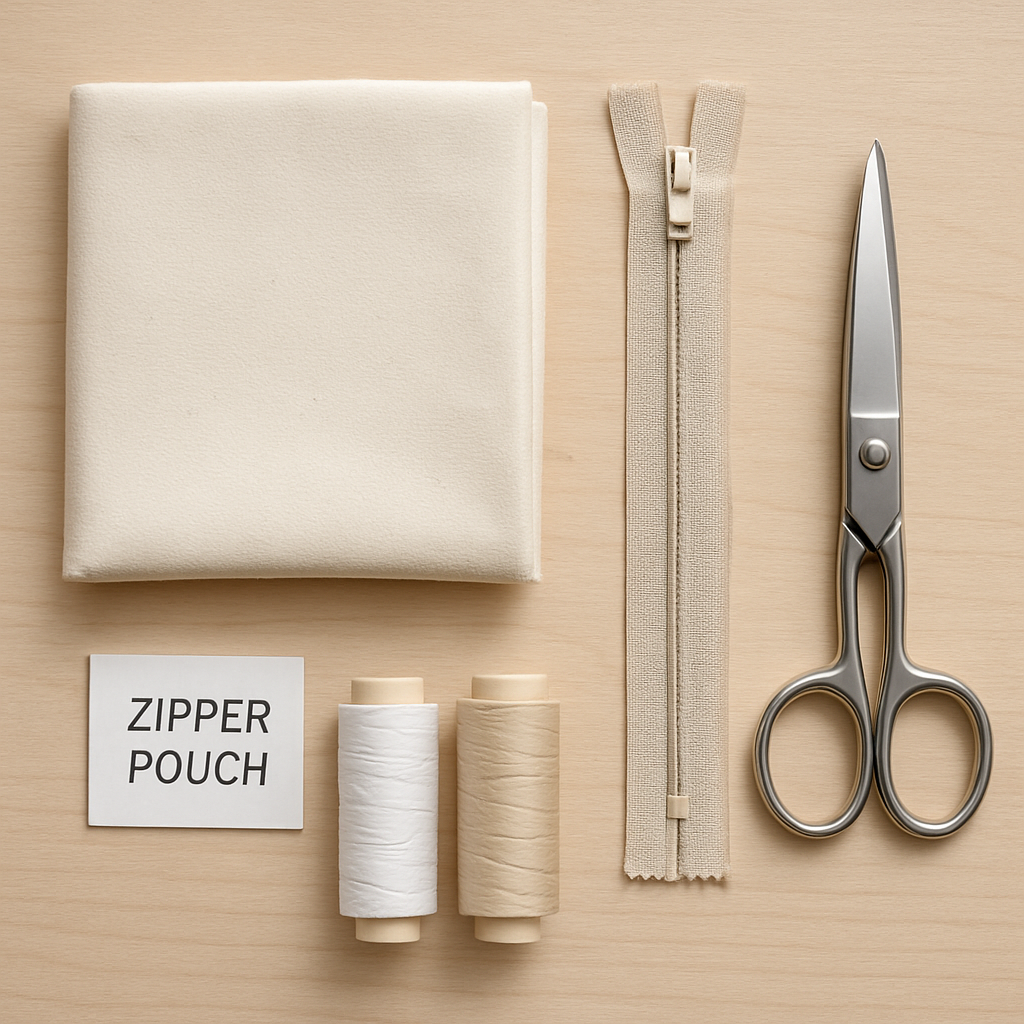
First, gather the basics: a medium‑weight cotton or canvas fabric, a coordinating thread, fabric scissors, pins, and a separating zipper about 6‑8 inches long. If you’re not sure which zipper to pick, our step‑by‑step guide on installing separating zippers quickly walks you through choosing the right type and prepping it for the pouch.
Next, cut two rectangles—typically 8 × 10 inches for a standard size—plus a small 1‑inch strip for the seam that will hide the zipper tape. Pin the zipper face‑down along the top edge of one rectangle, making sure the teeth sit flush with the fabric edge. Sew a straight stitch just a millimeter away from the zipper teeth; this seam becomes the pocket opening.
After you’ve sewn both sides, turn the pouch right‑side out and press the seam flat. This is the moment many beginners skip—pressing really sets the shape and keeps the zipper from catching. Finally, top‑stitch around the opening for a polished look; a simple ¼‑inch stitch adds durability and gives the pouch that professional finish.
Here’s a quick checklist you can print and keep by your sewing machine: ① Choose fabric that’s easy to press (cotton, linen, or lightweight canvas). ② Use a 6‑8 in zipper—separating is key for a clean closure. ③ Pin, stitch, and press each seam before moving on. ④ Add a top‑stitch for strength and style. Follow these steps, and within an hour you’ll have a functional pouch you can fill with anything from art supplies to snacks.
So, does sewing a zipper pouch feel like a mountain you can’t climb? Not at all—think of it as a tiny, rewarding project that sharpens your stitching skills while giving you a handy accessory you’ve made yourself. Grab your materials, follow the simple flow we just laid out, and you’ll be zipping up your first pouch before you know it.
TL;DR
Want a custom pouch from a simple zipper? Follow our beginner guide to pick fabric, sew, press, and top‑stitch in under an hour.
We’ll share quick tips, common pitfalls, and a printable checklist so hobbyists, creative entrepreneurs, and parents can confidently finish their first zipper pouch without frustration today easily.
Materials & Tools
Alright, before you even think about stitching that zipper, let’s talk about the toolbox you’ll need. If you’ve ever felt overwhelmed by a mountain of supplies, you’re not alone – we’ve seen hobbyists stare at a drawer of fabric and wonder where to start.
Fabric basics
For a beginner pouch, go with medium‑weight cotton or a lightweight canvas. It’s easy to press, holds the zipper nicely, and won’t fray after a few washes. If you want a splash of personality, grab a pre‑washed print from a local studio like Gratitude Studios. Their seasonal fabrics are designed for crafters who love a bit of story behind the material.
Cut two rectangles – 8×10 inches works for a standard size – and a 1‑inch strip for the seam that hides the zipper tape. Sharp scissors are a must; dull blades will rag the edge and make sewing harder.
Zipper selection
A 6‑8 inch separating zipper is the sweet spot. We always recommend a metal or sturdy nylon zipper that slides smoothly. If you’re unsure which brand to trust, AlfaPics offers a quick guide with photos of different teeth styles – handy for visual learners.
Pin the zipper face‑down along the top edge of one fabric piece, teeth flush with the edge. A simple straight stitch a millimeter away does the trick.
Thread and needles
Choose a polyester thread that matches or subtly contrasts your fabric. It’s strong, won’t melt under the iron, and handles the friction of the zipper teeth. A universal needle (size 80/12) works for most cotton and canvas, but if you opt for a heavier canvas, bump up to a size 90/14.
Don’t forget a seam ripper – you’ll thank yourself when a mis‑aligned stitch needs fixing.
Pressing tools
A good press is half the finish. Use a clean iron set to “cotton” and a press cloth to protect delicate prints. Press each seam flat before you turn the pouch right‑side out – it prevents the zipper from catching later.
Need a quick visual refresher? Check out the short video below that walks you through pinning and stitching the zipper seam.
Now that the basics are covered, let’s talk finishing touches. A neat top‑stitch around the opening not only looks professional but also reinforces the seam. Set your machine to a ¼‑inch stitch length and run it once around the edge.
If you like a little extra flair, consider a custom label printed on a small fabric tag. JiffyPrintOnline can ship personalized tags in under a week, perfect for branding your handmade pouch or adding a fun name for your kid’s new snack holder.
And remember, the best way to learn is by doing. Grab your supplies, follow these steps, and don’t be afraid to experiment with color combos or pocket sizes. The more you practice, the faster you’ll get to that satisfying “zip‑closed” moment.
Happy stitching!
Step 1: Cutting and Preparing the Fabric
Before the first stitch, the fabric itself decides whether your pouch will look polished or look like a rushed craft project. That’s why we spend a good half‑hour just getting the pieces right.
Pick a fabric that works for you
If you’re a hobbyist who loves a clean, crisp line, a medium‑weight cotton or canvas is your safest bet. It presses flat, holds its shape, and won’t fray as quickly as a delicate chiffon. Creative entrepreneurs who plan to sell the pouch often choose a fabric that reflects their brand colors – think a muted sage linen for a boho vibe or a bold solid canvas for a modern pop‑up stand.
Parents teaching kids a simple project might even go for a pre‑washed, 100 % cotton with a fun print. The key is to avoid stretchy knits unless you’re comfortable swapping in a ball‑point needle.
Measure twice, cut once – the mantra that saves minutes
Grab a clear ruler or a flexible measuring tape and mark a 1‑inch seam allowance all around the rectangle you’ll be cutting. For a standard pouch we recommend 8 × 10 inches for the body plus a 1‑inch strip for the hidden zipper tape.
Write the dimensions directly on the fabric with a disappearing marking pen – the lines fade after a quick wash, so no stray chalk marks will show up later.
Here’s a quick checklist you can tape to your workbench:
- Mark the outer rectangle (8 × 10 inches)
- Mark the top‑edge strip (1 × 10 inches)
- Double‑check the seam allowance
- Lay fabric flat, smooth out any wrinkles
Cutting with confidence
Use sharp fabric scissors – never the kitchen shears you keep in the drawer. A clean blade gives you a smooth edge that won’t catch on the zipper teeth later. If you’re working with a patterned fabric, try to line up the pattern repeat so the front and back panels mirror each other.
Pro tip: cut a little extra (about ¼ inch) on the long edge; you can always trim it later, but you can’t add fabric back in.
Prepare the edge for the zipper
Once the pieces are cut, give the raw edges a quick swipe of fray‑check. This step is a lifesaver for beginners because it prevents the fabric from unraveling when you sew the zipper in place. Let the liquid dry for a minute – you’ll notice the edges look slightly stiff, which makes the next step easier.
Next, fold the 1‑inch strip over the top edge of the main rectangle, wrong side out, and press with a warm iron. The fold creates a pocket that will hide the zipper tape and adds a professional finish.
At this point you can lay the zipper face‑down on the folded edge, align the teeth with the fabric edge, and pin or clip it in place. If you’re working with a metal zipper, a small piece of masking tape on the teeth can keep it from sliding while you pin.
Real‑world example
Take the patchwork pouch from Jo&Stitch – a small 13 cm opening that’s perfect for coins or cards. They start with a handful of scrap fabrics, cut each piece to the same 8 × 10 inch size, then seam them together before attaching a separating zipper. Seeing that finished product helps you understand why a tidy cut matters: each seam lines up, and the hidden zipper strip stays invisible.
Another quick reference is a short tutorial video that walks through measuring, marking, and cutting the fabric layers (check the fabric cutting demo). Pause at the 2:10 mark and you’ll see the exact way to fold the top strip before the zipper goes in.
Actionable next steps
1. Lay out your chosen fabric, measure and mark the two rectangles and the top strip.
2. Cut all pieces with sharp scissors.
3. Apply fray‑check to every raw edge.
4. Press the top strip and fold it over the edge.
5. Clip the separating zipper in place, ready for stitching.
When you finish these five moves, you’ve turned a flat piece of cloth into a ready‑to‑sew pouch body. The rest of the guide will walk you through stitching the zipper and finishing the seams, but the confidence you gain here will already feel like a win.
Step 2: Sewing the Zipper
Alright, the fabric pieces are ready and the separating zipper is clipped in place. If you’re feeling that familiar flutter of nerves, you’re not alone—most beginners get a little jittery the first time the needle meets the teeth.
First thing’s first: set your machine to a straight stitch and install a zipper foot. The foot slides right under the teeth, keeping the fabric flat and preventing the needle from colliding with the metal. If you don’t have a dedicated zipper foot, a narrow foot works in a pinch, but you’ll notice the difference in the finish.
Align, Pin, and Test
Lay the zipper face‑down on the folded edge of the top strip. The teeth should sit flush with the fabric edge. Pin the zipper using a few CloverWonder clips instead of pins—clips won’t leave holes and they hold the layers securely.
Before you start stitching, do a quick hand‑crank test. Turn the handwheel a couple of stitches forward and watch the needle’s path. If it grazes the teeth, adjust the foot or raise the presser foot slightly. This tiny pre‑check saves you from a jam mid‑project.
Stitch the First Side
With the zipper foot in place, sew a straight stitch about 1 mm from the zipper teeth. Keep the seam allowance consistent—most of us use a ¼‑inch (≈6 mm) allowance for a clean look. If you’re using a metal zipper, a short stitch length (around 2 mm) reduces the chance of the needle hitting the teeth.
When you reach the end of the zipper, backstitch a couple of stitches to create a sturdy stop. Some sewers like to add a decorative backstitch on the outside for extra flair, but the functional stop is the key.
Seal the Other Edge
Flip the pouch over so the other side of the zipper faces up. Align the opposite edge of the zipper with the second fabric panel, again using clips to hold everything together. Sew along the same line, making sure the zipper pull sits on the outside of the pouch.
Here’s a pro tip from Melly Sews zipper pouch tutorial: after the first side is sewn, fold the zipper teeth toward the lining before you stitch the second side. That little fold hides the teeth inside the seam, giving the pouch a sleek, pin‑free edge.
Top‑Stitch for Strength
Once both sides are attached, run a top‑stitch about ⅛‑inch (≈3 mm) away from the zipper. This not only reinforces the seam but also prevents the fabric from catching on the teeth when you open and close the pouch.
If you’re making a pouch for a creative entrepreneur’s pop‑up shop, a contrasting thread can turn that functional top‑stitch into a branding detail. Imagine a bright teal thread on a neutral canvas—instant visual pop.
Finishing the Inside
Leave a small opening (about ½‑inch) in the lining to turn the pouch right‑side out. Clip the corners, turn, and press. For a polished finish, hand‑stitch a blind stitch along the opening or simply top‑stitch it closed if you prefer a visible seam.
When you pull the zipper all the way open, the fabric should lay flat, and the teeth should sit neatly inside the seam. If you notice any puckering, check your seam allowance and make sure the fabric layers are evenly aligned before the next stitch.
Real‑World Example
One of our hobbyist members used a bright citrus‑print cotton for the outer panels and a soft linen lining for a set of travel‑size headphone pouches. After following the steps above, she reported that the zipper glided effortlessly, and the top‑stitched edge added just enough durability for daily airport use.
Another creative entrepreneur turned the same technique into a limited‑edition “artist’s kit” pouch, adding a custom embroidered logo on the flap. The zipper held up through multiple washes, proving that a well‑sewn zip can be both beautiful and functional.
Ready to give it a go? Grab your clips, set your foot, and remember: a little patience at the stitching stage pays off in a polished, professional‑looking pouch you can actually use (or sell!).
Step 3: Assembling the Pouch
Okay, the zipper is in place and the fabric is pressed – now we get to the part that makes the pouch feel like a finished product instead of a half‑done experiment. This is where a lot of beginners either rush or get stuck, so let’s walk through it together, step by step.
1. Pull the zipper open and line up the edges
First, gently pull the zipper all the way open. You’ll see the two fabric panels sitting side by side, the hidden strip of fabric covering the zipper tape underneath. If the edges look like they’re pulling away from each other, pause – that’s a sign the seam allowance is uneven.
Give the edges a quick press with the iron, then use a pair of clips to hold the corners together. The clips keep the layers flat without leaving pinholes.
2. Stitch the side seams
Set your machine to a straight stitch and use the same ¼‑inch seam allowance you used for the zipper. Sew from one corner to the other, keeping the needle a hair’s breadth away from the zipper teeth. If you hear the machine “click” against the teeth, ease the fabric a little and continue – a tiny adjustment prevents the dreaded dent that can pull the fabric inward.
When you reach the end, backstitch a few stitches, then cut the thread. Flip the pouch over and repeat on the opposite side. You’ll now have a clean, rectangular shape with the zipper sitting neatly in the middle.
3. Finish the top edge
Here’s where many people add a blind stitch or a top‑stitch. A blind stitch hides the seam inside the seam allowance for a super‑clean look, but it takes a little patience. If you’re after speed, a simple top‑stitch about ⅛‑inch from the edge adds strength and gives the pouch a polished line.
Tip: use a contrasting thread if you want a subtle branding detail – a bright teal on a neutral canvas looks surprisingly professional.
4. Turn the pouch right‑side out
Leave a small opening (about a half‑inch) in the lining, then pull the pouch through that gap. Use a blunt tool – a knitting needle works great – to guide the corners out. Once the pouch is fully turned, press the seams flat again. If you notice any puckering, a quick steam pass will smooth it out.
Close the opening with a blind stitch or, if you’re okay with a visible seam, a neat top‑stitch. Now you’ve got a pouch that opens cleanly, closes without catching, and looks like it belongs on a boutique shelf.
5. Avoid the dreaded dent
One common frustration is the “dent” that shows up where the zipper meets the seam, especially on lighter fabrics. Tamara’s method for a dent‑free finish walks you through a small adjustment to the seam allowance that keeps the fabric flat and the zipper teeth hidden. Check out her detailed tutorial for a visual guide.how to sew a zipper pouch without the dent.
Quick checklist before you call it done
- Pull zipper fully open, press edges.
- Clip corners, sew side seams with consistent allowance.
- Top‑stitch or blind‑stitch the top edge.
- Turn right‑side out through the lining opening.
- Press, then close the opening.
Comparison of finishing options
| Finishing method | Tools needed | Pros / notes |
|---|---|---|
| Blind stitch | Blind‑stitch foot, needle | Invisible seam, ideal for a polished look; takes a bit more time. |
| Top‑stitch (visible) | Standard foot, matching or contrasting thread | Quick, adds strength; can become a design element. |
| Dent‑free seam (Tamara’s tweak) | Zipper foot, extra seam allowance | Prevents fabric pulling; great for light fabrics. |
And there you have it – the final assembly that turns a collection of fabric pieces into a functional, stylish pouch. Whether you’re a hobbyist looking for a new project, a creative entrepreneur prepping inventory, or a parent teaching a child the joy of making something useful, this last step is the satisfying finish line.
Take a moment to admire your work, then slip in your headphones, tickets, or that stash of crayons you’ve been hiding. You’ve just mastered how to sew a zipper pouch for beginners, and the best part? You can repeat the process as many times as you like, experimenting with fabrics, colors, and little custom details each round.
Step 4: Adding Finishing Touches
Now the pouch is basically there, but you know that feeling when you walk into a coffee shop and the barista adds that little latte art? That extra detail is what makes your zipper pouch feel finished, not just “good enough.”
Press, Trim, and Double‑Check
First, give every seam one last press. Use a medium‑heat setting and press from the inside out so the fabric doesn’t scorch. If the top edge still looks a bit bulky, trim any excess seam allowance—just a millimeter or two. A neat edge prevents the zipper pull from snagging later.
Take a moment to run your fingers along the seam. Does it feel smooth? If you notice any puckering, slide a steam iron over the area for a few seconds, then press again. This quick fix saves you from a wobbly finish that could ruin the look when you’re showing off the pouch to a friend.
Top‑Stitching Options
Top‑stitching isn’t just for strength; it’s an opportunity to add personality. Here are three ways to approach it:
- Invisible blind stitch: Perfect for a minimalist look. Use a blind‑stitch foot and stitch just inside the seam line.
- Contrast top‑stitch: Pick a thread color that pops—think teal on a neutral canvas. It becomes a subtle branding detail, especially useful for creative entrepreneurs selling on Instagram.
- Decorative double‑row: Stitch two parallel rows ¼‑inch apart for a bold, handmade vibe.
We’ve seen hobbyists transform a plain cotton pouch into a gift‑ready piece simply by switching from white to a bright mustard thread. The extra visual cue also helps the zipper glide more smoothly because the fabric is slightly reinforced.
Adding Personal Flair
If you want to go a step further, consider attaching a small embroidered logo, a fabric patch, or even a printed design from a local artist. One of our community members recently bought a print from Gratitude Studios and turned it into a custom fabric panel for her pouch. The result? A one‑of‑a‑kind accessory that felt like a miniature gallery piece.
Because you’re already comfortable with the basics, try this quick experiment: print a 2‑inch‑by‑2‑inch design on printable fabric, iron it onto the pouch’s front panel, and then top‑stitch around the edges. It’s an easy way to practice appliqué while giving your project a professional polish.
Final Inspection Checklist
Before you call it done, run through this short list:
- All seams pressed flat and free of puckers.
- Top‑stitching complete, with no loose threads.
- Zipper slides effortlessly from end to end.
- Any decorative elements securely attached.
- Opening in the lining closed with a blind stitch or a neat top‑stitch.
If anything feels off, pause and adjust. It’s way easier to fix a loose thread now than to discover a snag after you’ve packed the pouch for a trip.
Expert Tip: Use a Fabric Saver
When you’re sewing multiple pouches, a light spray of fabric saver (like a silicone‑based spray) on the inside helps keep the fabric from sticking to the zipper teeth. We’ve heard from several creative entrepreneurs that this tiny step cuts down on post‑sew clean‑up time by about 20%.
And just in case you’re wondering how to keep your skills sharp, check out our Sewing for Beginners Tutorial: Step‑by‑Step Guide. It walks you through extra practice projects that reinforce the same techniques you just applied.
Once you’ve completed the checklist, give the pouch a gentle shake, zip it open and closed a few times, and admire the result. You’ve turned a handful of fabric scraps into a polished, functional accessory that you can sell, gift, or keep for yourself.
Ready to show it off? Snap a photo, share it with the CreativiU community, and watch the compliments roll in. You’ve just mastered the finishing touches, and that confidence will spill over into every future project you tackle.
Step 5: Care & Maintenance
Regular Cleaning
Now that your pouch looks polished, the real test begins: how it holds up day after day. A little care routine can keep the zip smooth and the fabric fresh, so you’ll keep feeling proud every time you pull it open.
First, give the outside a gentle swipe with a soft cloth. If you’ve used a fabric‑safe detergent for the first wash, a damp rag is all you need. Avoid harsh bleach or fabric softener – they can weaken the fibers and cause the zipper teeth to stick.
For the interior, a quick shake‑out does the trick. Turn the pouch inside out and give it a light tap to dislodge crumbs or loose threads. If the lining is cotton or linen, a brief tumble on the delicate cycle (cold water, no spin) will freshen it without shrinking.
Zipper Longevity
Now let’s talk zip health. A little lubrication goes a long way. Spray a tiny amount of silicone‑based zipper spray on the teeth, then run the pull back and forth a few times. You’ll hear that satisfying “whoosh” and feel the movement become buttery smooth.
But what if the zipper starts catching? First, check for fabric fibers caught in the teeth. Use a pair of tweezers to gently pull them free – don’t yank, you might bend a tooth. If the pull tab feels rough, a dab of petroleum‑free wax (like a candle stub) can soften it without leaving residue.
Sometimes the zip won’t close all the way because the seam allowance is too tight. Slip a tiny piece of clear tape under the teeth where the gap appears – it adds a whisper of extra space and lets the pull glide home.
Storage & Travel
When you’re ready to store the pouch for a while, keep it flat and avoid crushing the zip. A breathable cotton bag or a drawer liner works better than a plastic zip‑lock bag, which can trap moisture and encourage mildew.
If you need to travel with the pouch, slip a small piece of tissue paper inside the zip cavity. It prevents the teeth from rubbing against each other and keeps the pull from snagging on other items in your bag.
Quick Maintenance Checklist
A quick maintenance checklist can become a habit after you finish each project:
- Spot‑clean the exterior after each use.
- Lubricate the zipper once a month or when it feels stiff.
- Run a gentle hand‑wash for cotton or linen linings every few weeks.
- Store flat in a breathable bag, away from direct sunlight.
- Inspect seams for fraying and reinforce with a small top‑stitch if needed.
Troubleshooting a Stubborn Zip
Stubborn snags happen, especially after a wash. Grab a clean pencil eraser and roll it along the teeth; the slight friction can free a stuck pull without damaging the zipper.
And finally, remember that caring for your pouch is part of the creative journey. The more you treat your tools and finished pieces with love, the longer they’ll serve you – and the more you’ll enjoy the feeling of pulling that zip open, knowing you made it yourself.
FAQ
What’s the best fabric for a beginner’s zipper pouch?
Medium‑weight cotton or canvas is usually the sweet spot. It’s easy to press, holds shape, and won’t fray as quickly as a delicate knit. If you’re teaching a child, pick a pre‑washed 100 % cotton with a fun print so the fabric won’t shrink after the first wash. For a creative‑entrepreneur selling the pouch, a solid‑color canvas that matches your brand palette looks polished without extra effort.
How do I choose the right zipper size?
A 6‑8 inch separating zipper works for most small‑to‑medium pouches. The separating style lets you open the bag fully, which is handy for stuffing headphones or art supplies. Metal teeth give a sturdy feel, while molded plastic is lighter and less likely to snag delicate fabrics. If the pull feels rough, a tiny piece of masking tape on the teeth can keep it from sliding while you pin.
Why does my zipper snag after a wash?
Washing can push tiny fabric fibers into the teeth, causing resistance. First, give the zip a quick roll with a clean pencil eraser—this creates just enough friction to free the fibers without harming the metal. Then spray a dab of silicone‑based zipper lubricant and run the pull back and forth a few times. You’ll hear that buttery “whoosh” that signals the problem is solved.
Can I use a regular sewing foot instead of a zipper foot?
You can, but a dedicated zipper foot saves you a lot of frustration. The foot slides right under the teeth, keeping the fabric flat and preventing the needle from hitting the metal. If you only have a narrow foot, stitch slowly and watch the needle’s path; a slight raise of the presser foot may be needed. It’s a tiny adjustment that makes the seam look professional.
How often should I lubricate the zipper?
We recommend a quick lubrication once a month, or sooner if the zip feels stiff during a routine use. A tiny spray of silicone zipper spray does the trick—just a light mist on the teeth, then pull the zipper a few times to distribute. Over‑lubricating can attract dust, so keep it minimal and wipe away any excess with a soft cloth.
What’s the best way to store finished pouches?
Keep them flat in a breathable cotton bag or a drawer liner. Plastic zip‑lock bags trap moisture and can lead to mildew, especially on linen linings. If you need to stack several pouches, place a sheet of tissue paper between each one to protect the zipper pull from rubbing against the next bag. This simple habit extends the life of both fabric and zip.
Do I need to top‑stitch the zipper edge?
Top‑stitching isn’t mandatory, but it adds durability and a finished look. A ⅛‑inch stitch away from the teeth reinforces the seam and prevents the fabric from catching when you open and close the pouch. For a decorative touch, use a contrasting thread – a bright teal on a neutral canvas adds a subtle branding cue that creative entrepreneurs love.
Conclusion
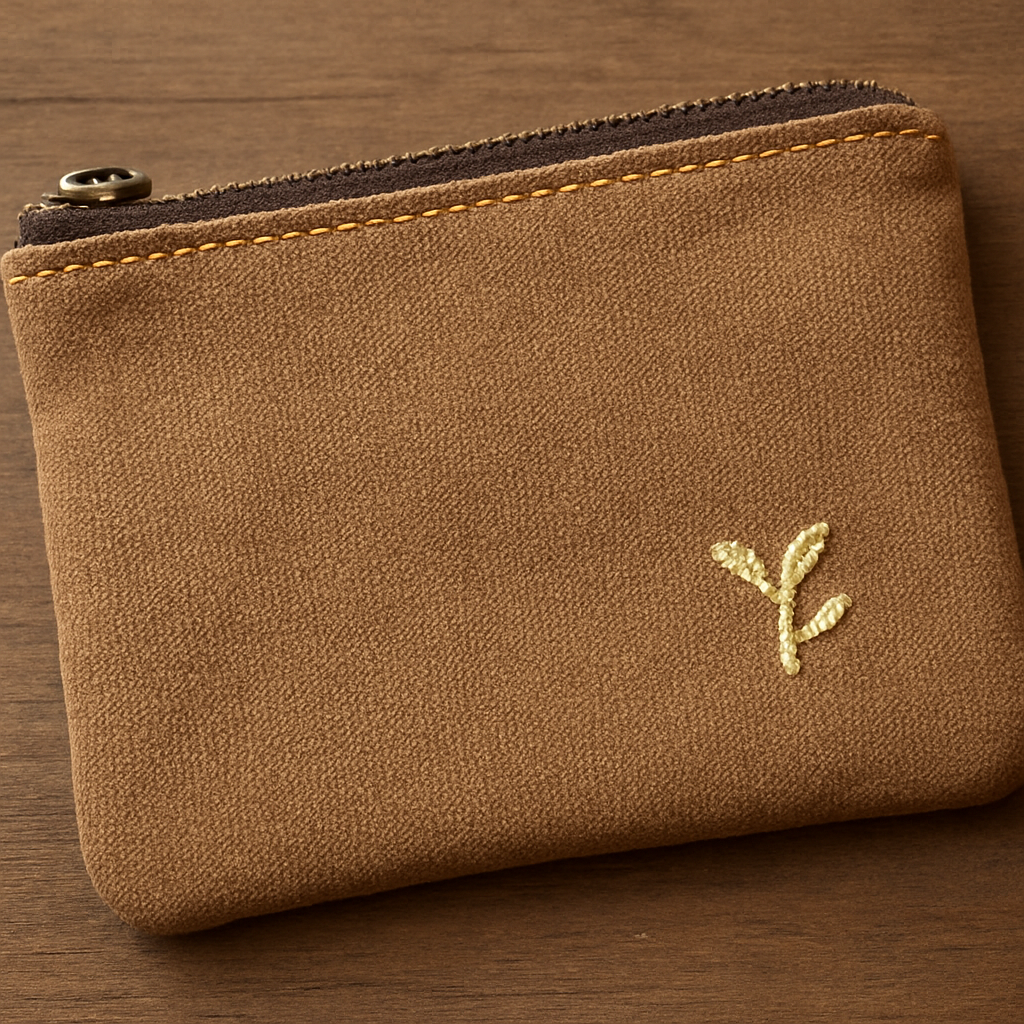
There you have it—by now you’ve turned a simple rectangle of fabric into a zip‑ready pouch you can actually use or sell.
Think about the moment you first felt the zip glide smooth as butter. That little success tells you you’ve mastered a skill that many beginners stumble over.
Remember the key steps: cut cleanly, protect raw edges with fray‑check, clip the separating zipper, stitch both sides with a consistent seam allowance, then top‑stitch for strength and finish the edges.
If you’re a hobbyist, try swapping the canvas for a fun print next time; if you’re a creative entrepreneur, experiment with a contrasting thread that becomes a subtle brand signature.
And don’t forget maintenance—lubricate the zip once a month, store flat in a breathable bag, and give the seams a quick press before each use.
What’s the next pouch you’ll make? Maybe a travel‑size kit for your next market pop‑up, or a custom gift for a friend’s birthday.
When you’re ready to dive deeper, our courses at CreativiU walk you through advanced finishes, embroidery tricks, and how to scale your pouch line into a small business.
Grab your tools, set the foot, and enjoy the satisfaction of watching that zip close perfectly—because the best projects start with a single, confident stitch.
Leave a Reply