Hey creators! Ever stare at a plain tee and wish you could turn it into a one‑of‑a‑kind masterpiece without splurging on pricey fabric paints? In this guide I’ll show you how to transform everyday acrylics into a soft, washable fabric paint, step by step, so you can start upcycling your wardrobe right now.
We’ll cover everything from prepping your fabric to heat-setting the final design. No special tools needed , just acrylic paint, a textile medium (or a few household substitutes), and a bit of patience. By the end, you’ll have a durable, crack‑free piece you can wear and wash again and again.
Step 1: Prepare Your Fabric for Painting
Before you even open a paint bottle, get your fabric ready. This step makes the biggest difference in how well the paint sticks and how long it lasts.
Start by pre‑washing your fabric. Toss it in the washing machine with cold water and a mild detergent. No fabric softener , that leaves a coating that can block paint absorption. A quick wash removes sizing and chemicals from manufacturing. After washing, let the fabric air dry completely. Then iron it on a low setting to smooth out wrinkles. A flat, wrinkle‑free surface lets your brush glide evenly.
Next, set up your workspace. Lay a piece of cardboard or plastic inside the garment (or between layers) to prevent paint from seeping through to the back. Use clamps or binder clips to keep the fabric taut. This stops wrinkling and helps you paint clean lines. If you’re working on a t-shirt, slide a piece of cardboard inside , it creates a firm surface and catches any bleed‑through.
Industry best practices emphasize pre‑washing and ironing before starting any fabric project. These steps are recommended for optimal paint adhesion and longevity.
Pro Tip:If your fabric is thin or loosely woven like muslin, use a piece of freezer paper underneath. Iron the shiny side onto the fabric to create a temporary barrier. It peels off easily later.
Common mistake people make: skipping the pre‑wash. That can cause the paint to peel off after the first wash. Take the extra 20 minutes , it’s worth it.
Step 2: Mix Acrylic Paint with a Textile Medium
Acrylic paint straight from the tube is too stiff for fabric. It will dry crunchy and start cracking after a few wears. The secret is to mix it with a textile medium, which softens the paint and makes it flexible.
Here’s the basic method: In a small dish, combine one part textile medium with two parts acrylic paint. Stir for about two minutes until the mixture is smooth and has a yogurt‑like consistency. If it’s too thick, add a drop of water. Too thin, add more paint.
But here’s where opinions differ. Some brands, like the one used by Kornelija Newcomer in her popular YouTube tutorial, recommend a 1:1 ratio. Others, like the guide from some craft blogs, suggest 2 parts paint to 1 part medium. The important thing is to check the instructions on your specific textile medium. The consistency after mixing should be creamy , not watery.
You can also use a DIY version mixed with household items. One popular recipe from some DIY tutorials uses one tablespoon of acrylic paint, half a tablespoon of a craft adhesive, and half a tablespoon of fabric softener (preferably dye-free and scent-free). Mix well and you get a soft, flexible fabric paint. The craft adhesive helps adhesion, and the fabric softener keeps the paint bendable.
Whichever method you choose, mix enough for your entire project. You don’t want to run out halfway and try to match the color. And always test the mix on a scrap of fabric first , check for color and flexibility.
Key Takeaway: The right mixture makes your paint soft and durable. Stick with a genuine textile medium for best results, but the DIY option works in a pinch.
Step 3: Apply the Paint in Thin, Even Layers
Now for the creative part. But don’t just glop on the paint. Applying it in thin layers is the secret to a smooth, crack‑free finish.
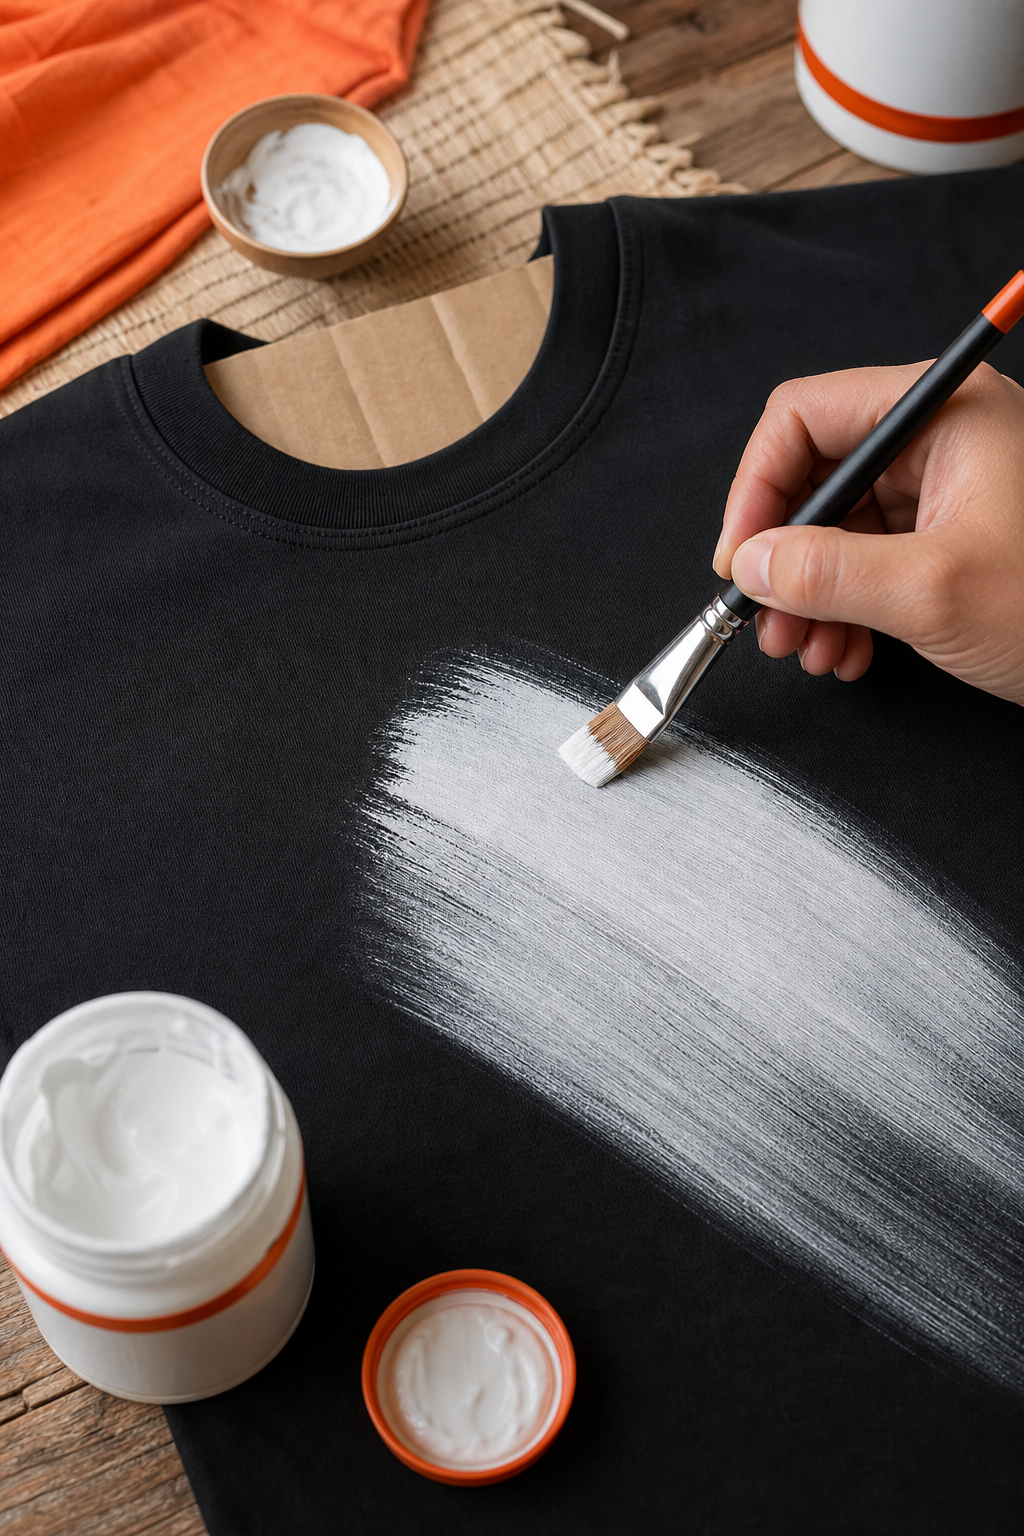
Start with a flat brush for large areas. Load the brush with a moderate amount of paint , not too thick. Spread it in long, even strokes, going in one direction. Don’t overwork the paint; stop when the coverage is even. Let that layer dry completely (about 15-20 minutes) before adding a second layer.
For fine details, switch to a round brush. Dip only the tip and use light pressure. If you need clean edges, use painter’s tape or masking tape. Press it down firmly so paint doesn’t bleed underneath. Peel the tape off while the paint is still wet for the sharpest lines.
Avoid puddling. Thick areas of paint will crack when dry. If you see a puddle, spread it out with your brush or blot it with a paper towel. Better to apply two thin coats than one thick coat.
According to a guide from a leading art supplies brand, applying acrylic paint in thin layers prevents the paint from peeling or cracking later. It emphasizes letting each layer dry fully before adding the next. This is important for longevity.
Pro Tip: Use a spray bottle to lightly mist the fabric if the paint starts to drag. A little moisture helps the paint flow smoothly.
Common mistakes: using too much paint (cracks later), painting on wrinkled fabric (uneven coverage), and not letting layers dry (colors blend into mud). Improve your time. Fabric painting is a slow and steady process.
Step 4: Allow the Paint to Dry and Cure Properly
Patience pays off. After you finish painting, let the fabric dry flat for at least 24 hours. Don’t rush this. Hanging the fabric can cause the paint to drip or wrinkle.
Place the painted item on a clean, flat surface in a well‑ventilated area away from direct sunlight. Sunlight can fade some pigments. Let it rest undisturbed. After 24 hours, the paint will feel dry to the touch, but it hasn’t fully cured yet. Curing is the process that bonds the paint to the fabric fibers.
For best results, wait a full 72 hours before heat-setting (covered in next step). During this time, store the fabric flat. Avoid bending or folding it. The paint needs time to form a strong film.
Why does curing matter? Without it, the paint may wash out. Even if you heat-set immediately, the chemical bond isn’t complete. Think of it like letting specific set , you need time before putting weight on it.
A respected paint manufacturer recommends allowing fabric paint to cure for at least 24 hours before heat-setting. One commonly recommended medium is specifically designed for wearable fabrics, and they stress the importance of following the recommended dry time.
Key Takeaway: Dry 24 hours flat, then cure 72 hours before washing. Don’t skip this step.
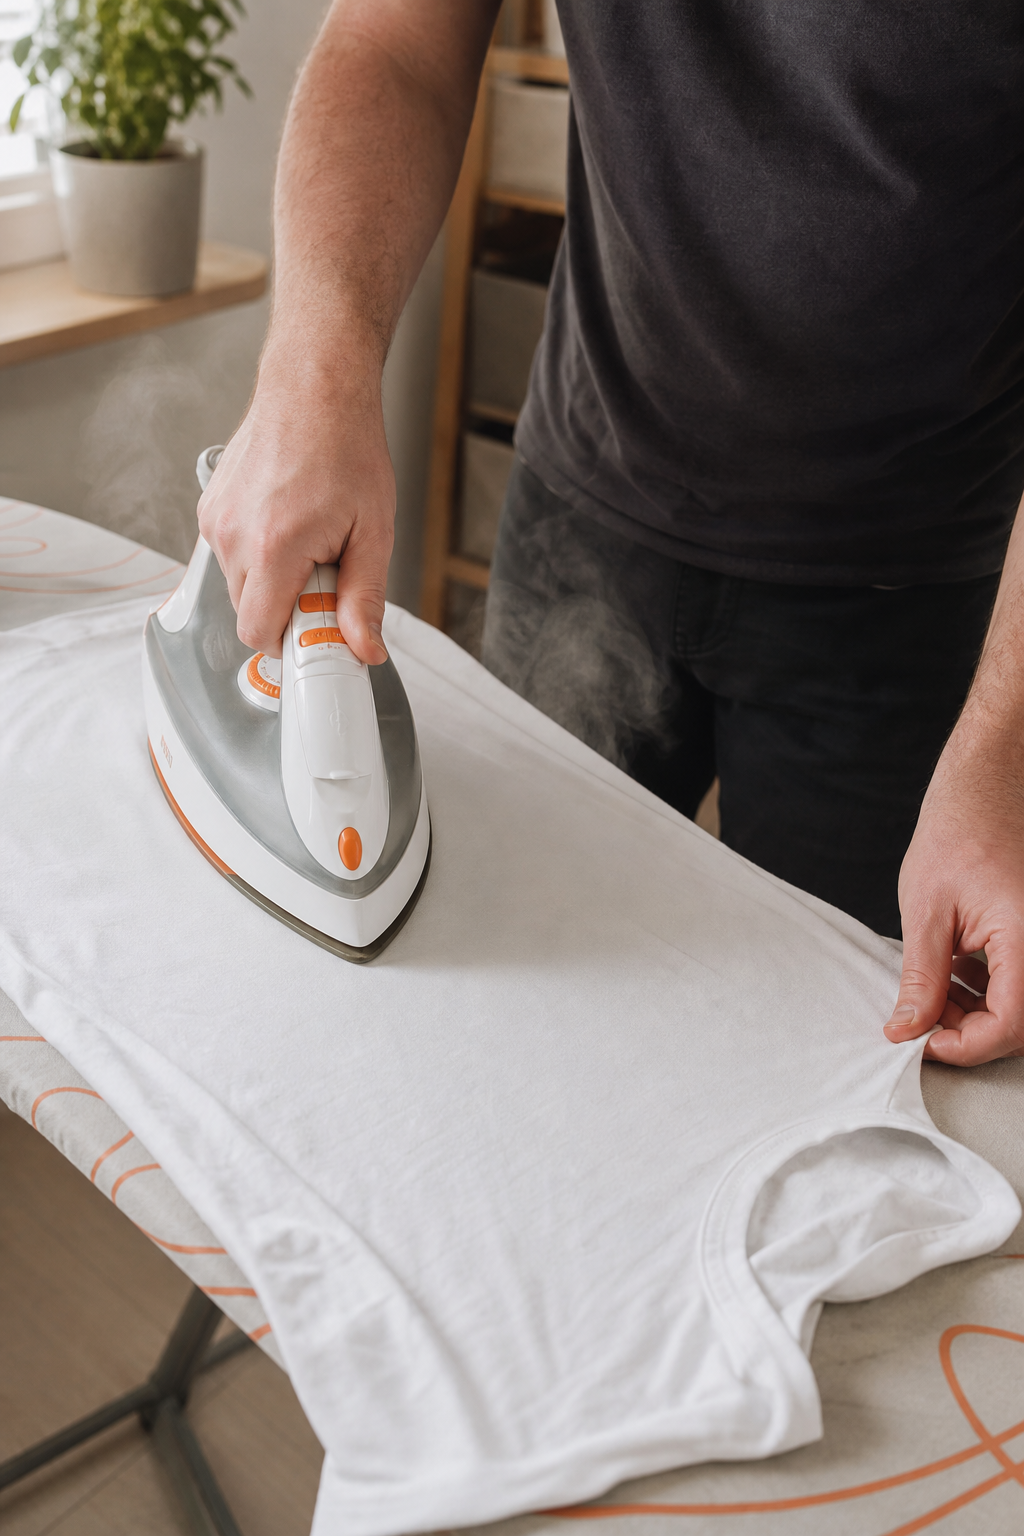
Step 5: Heat-Set the Paint for Durability
Heat-setting is what makes your painted design permanent. Without it, the paint will wash off after a few cycles. This is the non-negotiable step that locks the paint into the fibers.
The most common method is using an iron. Set your iron to its highest heat setting (usually cotton or linen). Make sure the steam function is off , you want dry heat. Place a piece of parchment paper or a thin cotton cloth over the painted area. This prevents the iron from sticking or burning the paint.
Press the iron firmly onto the parchment paper, holding it in place for 15-20 seconds. Move the iron to a new section, overlapping slightly, until you’ve covered the entire painted area. Don’t slide the iron , lift and press. Sliding can smear the design.
Alternatively, you can use a clothes dryer. According to some craft sources, you can tumble dry the fabric on high heat for 30 minutes. This works, but it’s less controlled. You might not get even heat over the painted area. For best results, stick with the iron.
Another option: use a heat press if you have one. Set it to 305°F (about 150°C) and press for 60 seconds. This gives even, consistent heat.
Some people even use the sun. Some sources mention that you can place the fabric in direct sunlight for a few hours. UV rays help set the paint, but this method is slower and less reliable.
Pro Tip: After heat-setting, let the fabric cool completely before handling. The paint needs to re-solidify.
Common mistake: ironing directly on the paint without a barrier. This can melt the paint and ruin your design. Always use parchment paper or a cloth.
Step 6: Wash and Care for Your Painted Fabric
Your painted fabric is now dry and heat-set. But proper washing will extend its life. Follow these care instructions to keep your design looking fresh.
For the first wash, turn the garment inside out. Use cold water and a gentle cycle. Add a mild detergent , avoid bleach or fabric softeners, as they can break down the paint. Wash alone or with similar colors. Don’t overload the machine.
After washing, air dry if possible. Tumble dry on low heat if you need to use the dryer. High heat can degrade the paint over time. Remove the fabric promptly to prevent wrinkles.
Ironing is okay, but again, turn the garment inside out or use a pressing cloth. Touch up the design lightly if needed.
Store painted fabrics flat or loosely folded. Avoid hanging heavy fabrics for long periods , the weight can stretch the fabric and cause the paint to crack. For t-shirts, fold them normally.
Hand washing is always safest. If you hand wash, use cold water and a small amount of detergent. Gently swish the fabric, then rinse. Don’t wring or twist , that can damage the paint. Instead, press the water out and lay flat to dry.
How often should you wash? Only when necessary. Over-washing will fade any paint. Spot clean when possible. For minor stains, dab with a damp cloth instead of a full wash.
Key Takeaway: Turn inside out, cold water gentle cycle, air dry. These steps keep your painted fabric looking vibrant for years.
Frequently Asked Questions
Can I use regular acrylic paint on fabric without textile medium?
Yes, but you won’t like the results. Regular acrylic paint dries stiff and cracks after a few washes. The texture is uncomfortable against skin, and the paint will peel off in chunks. Textile medium or a DIY substitute (like a commercial fabric medium and fabric softener) is essential for flexibility and durability. Without it, your design won’t last through machine washing.
What is the best ratio of acrylic paint to textile medium?
It depends on the brand you use. Many textile medium bottles recommend a 1:1 ratio, but some crafters prefer 1 part medium to 2 parts paint for better coverage. The key is to achieve a yogurt-like consistency. If the mixture is too thick, add more medium or a drop of water. Too thin, add more paint. Test on a scrap first.
How long does acrylic paint take to dry on fabric?
The paint will feel dry to the touch in about 15-30 minutes, but that’s just the surface. For deep drying, allow 24 hours. Full curing (chemical bonding) takes 48-72 hours. During this time, keep the fabric flat and undisturbed. Don’t wear or wash it until after heat-setting.
Can I machine wash painted fabric?
Yes, but only after heat-setting. Turn the garment inside out, use cold water on a gentle cycle, and avoid fabric softener. Air drying is best. Machine washing on hot or high spin can damage the paint. For the first few washes, hand washing is safer. Over time, the paint becomes more resistant.
Do I have to heat-set the paint? What happens if I skip it?
Heat-setting is mandatory if you want the design to survive washing. Skipping this step means the paint remains loosely bonded and will wash off after one or two cycles. Heat activates the binders in the textile medium, fusing the paint to the fabric. Without it, you’ll be disappointed. Always heat-set with an iron or dryer.
What kind of fabric works best for acrylic painting?
Natural fibers like cotton, linen, and hemp work best. They absorb the paint well and hold color long. Synthetics like polyester or nylon are more challenging , the paint may sit on top and peel. Blends (e.g., 50% cotton, 50% polyester) can work but require more careful preparation. Always test on a hidden area first.
Can I paint on dark fabric with light acrylic paint?
Yes, but you may need multiple layers. Start with a white base layer or mix the paint with white to increase opacity. Apply thin layers, letting each dry fully. You’ll achieve good coverage after 2-3 coats. If the fabric is very dark, consider using fabric primer first. Light colors on dark fabric may require a bit more patience.
How do I fix mistakes after painting on fabric?
If the paint is still wet, wipe it off immediately with a damp cloth. If dry, you have options: paint over the mistake with a matching color, or use a fabric paint remover (test first). For small errors, hand-painting over them often works. You can also incorporate mistakes into the design , turn a blotch into a flower or abstract shape.
Conclusion
Painting on fabric with acrylics is a fantastic way to personalize clothing, gifts, and home decor. The process is straightforward: prepare your fabric, mix your paint with a textile medium, apply thin layers, allow proper drying, heat-set for permanence, and care for your creation gently.
Each step matters. Pre-washing prevents peeling. The right mix ensures flexibility. Thin layers avoid cracking. Drying and curing build strength. Heat-setting locks in the design. And careful washing keeps it looking new.
Don’t be afraid to experiment. Try different brushes, mixing ratios, and techniques. The more you practice, the better your results. And if you want to explore more painting skills, check out our Acrylic Painting for Beginners Step by Step guide for foundational techniques. For inspiration on fabric painting ideas for beginners, we have a whole tutorial with project ideas. And if you’re curious about other mediums, our exploration of free acrylic painting courses can help you advance.
Now grab your paints, pick an old shirt, and start creating. You’ll be amazed at what you can make. Happy painting!
Leave a Reply