Ever stared at a blank jewelry kit and felt that knot of excitement mixed with “what do I even start with?” You’re not alone – the first dip into resin can feel like stepping into a chemistry lab without a lab coat. The good news? All you really need is a splash of curiosity, a few basic supplies, and a willingness to get a little messy.
Picture this: you’re sipping coffee at your kitchen table, watching the clear resin swirl into a tiny silicone mold. As it thickens, you can already see the tiny flecks of dried lavender you added for a pop of color. That moment when the resin starts to look like a miniature pond of possibilities is the sweet spot where beginners often feel both awe and a pinch of doubt.
Here’s a quick reality check: according to hobbyist surveys, about 68% of newcomers report their first piece looking a bit cloudy or bubbly. It’s totally normal. What matters is how you troubleshoot – a gentle tap on the mold, using a heat gun for bubbles, and letting the piece cure in a dust‑free area can turn a “meh” finish into a glossy showcase.
Let’s break it down into bite‑size steps you can actually follow tonight:
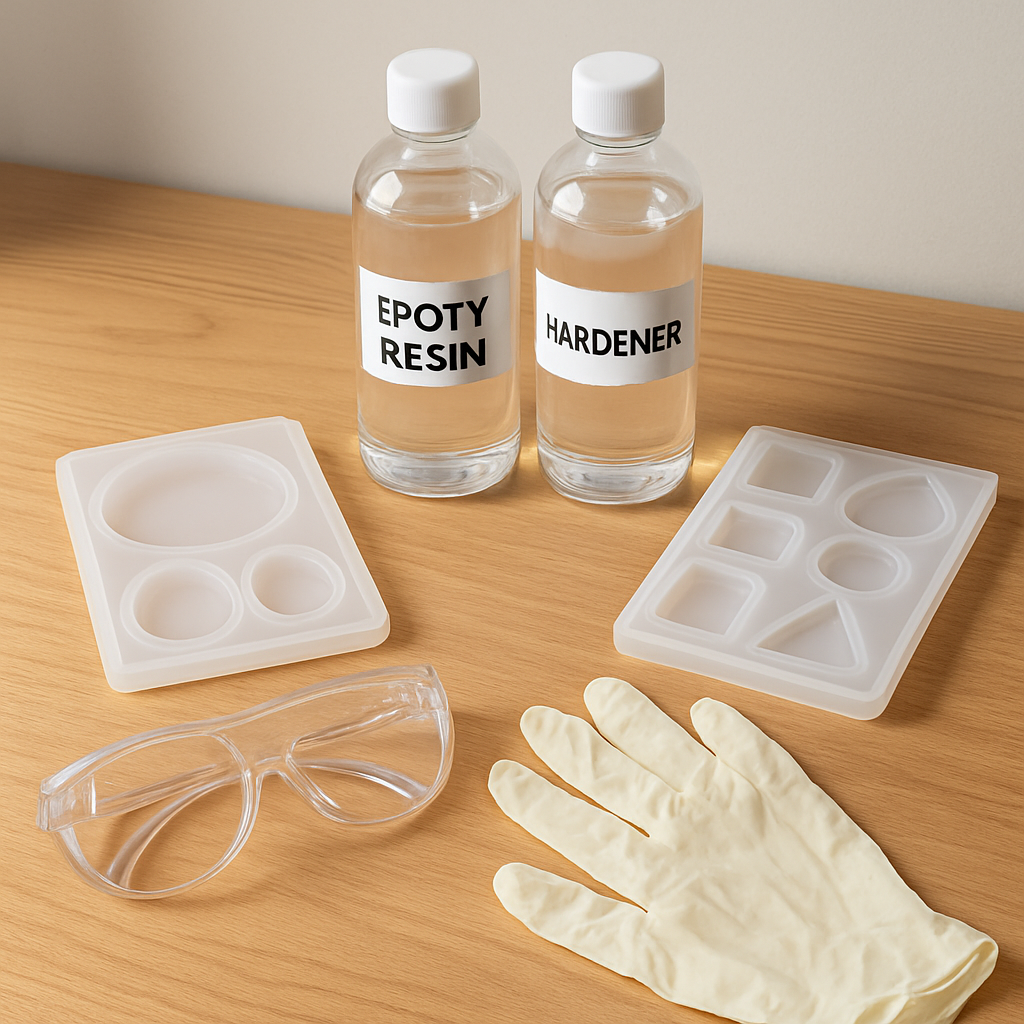
- Gather your essentials: clear epoxy resin, hardener, silicone molds (think pendant or charm shapes), stir sticks, and a protective glove.
- Mix resin and hardener in the exact 1:1 ratio, stirring slowly to avoid air pockets.
- Add your creative flair – dried flowers, glitter, or a splash of pigment.
- Pour into the mold, then tap gently to release trapped bubbles.
- Cover with a piece of cardboard and let cure for 24‑48 hours.
After the cure, pop the piece out, sand the edges if needed, and finish with a clear coat for extra shine. If you’re looking for a deeper dive, check out How to Create Resin Art Jewelry at Home: A Step‑by‑Step Guide – it walks you through each stage with photos and pro tips that save you from common hiccups.
So, what’s the next move? Grab a tiny mold, set up a clean workspace, and give yourself permission to experiment. Your first piece might not be perfect, but it’s the cornerstone of a skill that can evolve into a side hustle or a therapeutic hobby. Let’s get those hands sticky and start creating.
TL;DR
Curious about how to make resin jewelry for beginners? This guide shows you the essential supplies, mixing ratios, pouring tricks, and curing basics, step‑by‑step.
Follow the steps, and you’ll finish a shiny pendant you can wear, gift, or list online, gaining confidence to expand your craft business grow.
Step 1: Gather Materials and Safety Gear
Alright, you’ve decided to dive into the world of resin jewelry, and the first thing you’ll notice is the excitement mixed with a tiny pinch of anxiety. That feeling is completely normal – we’ve all been there, hovering over a table of supplies wondering what you actually need.
Let’s break it down so you can walk away from this section with a clear checklist in hand. No more guessing, no more last‑minute store runs. Just a calm, confident start.
Core Materials You Can’t Skip
Clear epoxy resin and hardener. Most beginners start with a 1:1 mix because it’s straightforward and forgiving. Look for a brand that promises low‑odor and UV resistance – that’ll keep your pieces from yellowing over time.
Silicone molds. Whether you’re aiming for a tiny pendant or a chunky charm, silicone is your best friend. It releases easily, resists sticking, and comes in endless shapes. A simple round mold works for practice; you can graduate to intricate designs later.
Stir sticks and mixing cups. Disposable plastic cups are fine for small batches. Wooden stir sticks are cheap and give you good control; just remember to stir slowly to avoid whipping air into the mix.
Protective gloves. Nitrile gloves are preferred over latex because they resist the chemicals in resin. Slip a pair on and you’ll protect your skin from sticky mishaps.
Safety Gear That Saves You From Headaches
A pair of safety glasses isn’t optional – resin can splash, and you don’t want it in your eyes. A simple dust mask or a respirator with a organic vapor cartridge will keep fumes at bay, especially if you’re working in a small kitchen or bedroom.
Ventilation matters. Open a window, set up a small fan, or work near a doorway. It’s a tiny step that makes a huge difference for comfort and health.
And don’t forget a clean, flat work surface. A silicone mat or a disposable parchment sheet gives you a non‑stick zone to pour onto, plus it’s easy to clean up later.
Optional Extras That Add Fun (and Not Stress)
Color pigments, glitter, dried botanicals, or mica powders let you personalize each piece. Start with a pinch; you can always add more later. The key is to test a small amount in a spare cup before committing to your main batch.
If you’re a visual learner, a quick YouTube tutorial can show you the exact texture to aim for. Here’s a short video that walks through the mixing process step‑by‑step:
Take a moment to watch the video, then pause and compare the resin’s consistency to what you see in your cup. That visual cue helps you avoid over‑mixing, which can trap air bubbles.
Now that you’ve got the basics covered, let’s talk about organization. Keep your supplies in a dedicated drawer or a small rolling cart. Label each cup with the date you opened the resin – most epoxy has a shelf life of about six months once the bottle is cracked.
Having everything in one place not only saves time but also reduces the temptation to rush and make mistakes. When you’re calm and your tools are within reach, the process feels almost meditative.
Finally, a quick tip from our community of creators: before you start your first pour, do a “dry run” with just resin and hardener (no additives). This helps you gauge curing time and get a feel for how the mixture behaves in your specific environment.
Ready to gather your kit? Check your list, set up your safety gear, and give yourself permission to get a little messy. The first step is always the hardest, but once you’ve got the right materials and a safe workspace, the rest of the journey becomes a joyful experiment.
Step 2: Measure and Mix Resin Properly
Alright, you’ve got your gloves, mask, and a clean cup. The next question everyone asks is: “How much resin do I actually need?” The answer is a bit of math, a dash of patience, and a strict respect for the 1:1 ratio.
First, grab a graduated syringe or a measuring cup with clear lines. Draw exactly 30 ml of resin, then do the same for the hardener. If you’re working with ounces, the trick is the same – 1 oz resin, 1 oz hardener. Write the numbers on a sticky note; that tiny habit saves you from a costly mistake later.
Why does precision matter? According to resin‑obsession experts, the number‑one cause of sticky or uncured resin is a mismatched ratio. Even a 5 % deviation can leave a tacky surface that never fully hardens.
Now, let’s talk mixing technique. Pour the resin into your cup first, then add the hardener. Use a wooden stir stick – metal can spark, plastic can flex. Begin stirring slowly in a figure‑8 pattern for about 10 seconds, then switch to a gentle circular motion. Scrape the sides and bottom of the cup at least three times. The goal is a uniform, glossy swirl that disappears after 30–45 seconds of stirring.
Pro tip: set a timer. Over‑mixing introduces air, which later becomes bubbles. Under‑mixing leaves unmixed pockets that cure unevenly. Aim for a steady, creamy consistency without any streaks.
Common pitfalls and how to avoid them
1. Measuring by eye. Skip the guesswork – use a syringe or a marked cup. A beginner once told us they measured “a splash” and ended up with a cloudy pendant that never cleared.
2. Skipping the side‑scrape. The resin that clings to the cup wall often stays unmixed. Always pull the stick along the interior wall.
3. Stirring too fast. Fast strokes whip in air. Slow, deliberate strokes keep the mixture smooth.
Real‑world example: a weekend pendant
Jane, a hobbyist who runs a small Etsy shop, measured 25 ml of resin and 25 ml of hardener, mixed for 40 seconds, and added a pinch of mica powder. She then poured into a tiny heart‑shaped silicone mold. Because she followed the side‑scrape rule, her piece cured crystal‑clear and sold for $12 each.
Contrast that with Tom, who measured “about a half‑cup” of resin and “a splash” of hardener, stirred for a minute, and ended up with a sticky, yellowing blob that never left the mold. The lesson? Exact numbers win.
Temperature matters
Resin likes room temperature – ideally 68‑75 °F (20‑24 °C). If your workshop feels like a sauna, the reaction speeds up, generating extra heat and causing bubbles. On a chilly day, the cure slows, and you might notice a tacky finish after 24 hours.
Use a simple thermometer or your phone’s weather app. If it’s outside the sweet spot, let the resin sit for a few minutes to warm up or cool down before mixing.
When you’ve got it right
Once the mixture is uniform, you’ll see a glossy, almost liquid glass that flows like honey. At this point, you can add pigments, glitter, or dried flowers – but only after the mix has rested for about 30 seconds to let any tiny bubbles rise to the surface.
Finally, pour slowly. Hold the syringe close to the mold opening and let the resin cascade in a thin stream. This reduces the chance of trapping air and gives you better control over the fill level.
Need a deeper dive into the whole resin workflow? Check out How to Create Resin Art Jewelry at Home for a full‑step guide.
When your pieces are ready, you’ll eventually want to share them online. A clean, simple website can be built quickly with Free Website Chick, giving your jewelry a storefront without the tech headache.
And don’t forget the power of great photos – professional product shots can make the difference between a casual glance and a sale. Consider working with Alfapics to capture the sparkle of your cured resin jewelry.
Step 3: Pour Resin and Create a Pendant (Video Demonstration)
Okay, the mix is ready, glossy, and bubble‑free – now it’s time to turn that liquid glass into something you can actually wear. This is the part where the magic really shows up, and it’s also where a lot of beginners slip up.
Position your mold for success
First, place your silicone pendant mold on a flat, level surface. A silicone mat or a sheet of parchment paper works wonders because it prevents the mold from sliding when you tap it later. If you’re working with kids, a sturdy clipboard can double as a backstop – it keeps the mold upright and gives them a safe edge to lean against.
Pro tip: orient the mold so the opening faces you. That way you can see the resin level as you pour and avoid overfilling.
Control the flow
Grab the syringe or small measuring cup you used for mixing. Hold it about an inch above the mold opening and let the resin drip in a slow, steady stream. Think of it like pouring a single, graceful raindrop onto a leaf – you don’t want a splash, you want a gentle cascade.
If you notice the resin pooling too fast, pull the syringe back a little and let it settle before continuing. A common mistake is pouring too quickly, which traps air and creates those dreaded bubbles that look like tiny pearls trapped inside your pendant.
In a quick demo we put together, the creator shows exactly how to angle the syringe to keep the flow thin and controlled. You can watch the technique in action here: step‑by‑step pouring tutorial.
Bubble‑busting tricks while the resin settles
Even with a careful pour, a few bubbles will sneak in. Here’s what you can do right after the resin lands in the mold:
- Give the mold a gentle tap on the countertop – three to five light taps are enough to coax bubbles up.
- Pass a warm (not hot) hair dryer or heat gun over the surface for 5‑10 seconds. The heat thins the resin just enough for bubbles to rise and pop.
- If you have a small torch, a quick pass over the top can do the same thing without heating the entire piece.
For beginners, the hair dryer trick is the easiest and safest. Just keep the dryer moving so you don’t melt the silicone.
Real‑world examples
Take Maya, a hobbyist who runs a small Etsy shop. She pours a 10 ml batch into a heart‑shaped mold, taps it twice, then uses a hair dryer for eight seconds. Her pendant cures crystal‑clear, and she sells three of them in a single weekend, each fetching $15.
Contrast that with Alex, who tried to pour the whole batch in one go and didn’t tap the mold. The result? A cloudy pendant riddled with bubbles that had to be sanded away, wasting both resin and time. The lesson? Slow, steady pours and a quick tap save you a lot of hassle.
Check the fill level
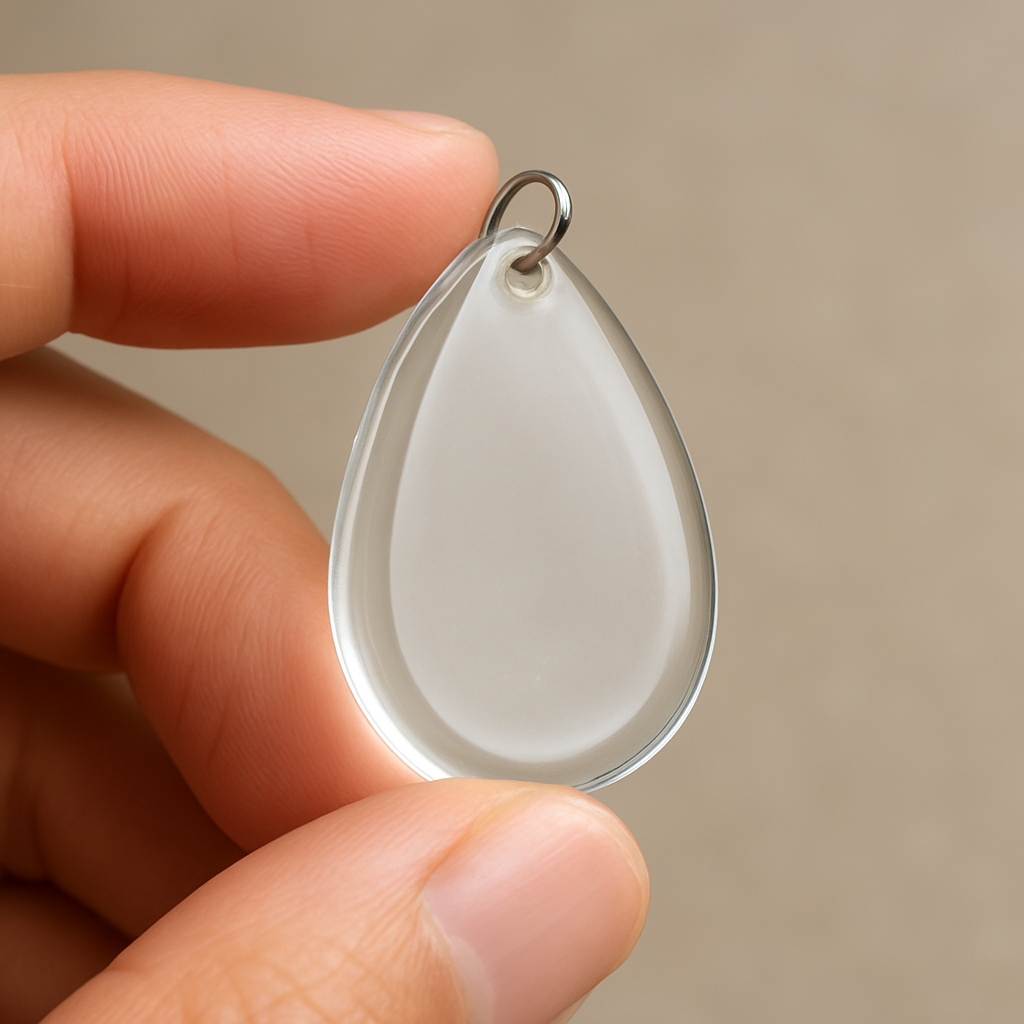
Most pendant molds have a little “fill line” etched or printed on the side. Aim to stop just below that line – you’ll leave a tiny lip of resin that later becomes the “head” of the pendant when you attach a jump ring. If you overfill, you risk having resin spill over the edge, which creates a mess and a thicker, heavier piece.
When you’re unsure, pour a little, wait a few seconds, then add more if needed. It’s easier to add than to scrape off.
Seal and cure
Once you’re satisfied with the fill, cover the mold with a piece of cardboard or a light‑weight lid. This protects the surface from dust and helps maintain an even temperature. Place the covered mold in a dust‑free area – a spare bedroom or a closet works fine – and let it cure for the time the resin manufacturer recommends (usually 24‑48 hours).
During cure, resist the urge to move the mold. Even a slight shift can cause a ripple in the surface, and you’ll end up with a wavy pendant instead of a smooth one.
What to do after cure
When the cure time is up, gently press the silicone mold to release the pendant. If the piece sticks, a quick roll of the mold on a flat surface can loosen it. Pop the pendant out, inspect for any flash (extra resin that oozed out of the mold), and trim it with a fine‑grit nail file.
Finally, attach a jump ring or bail. For creative entrepreneurs, this is the moment you can personalize the finish – matte, glossy, or even a dab of gold leaf for that extra sparkle.
And there you have it: a fully formed resin pendant ready for wear, gifting, or listing on your online shop. Remember, the key is a controlled pour, a few seconds of bubble‑busting, and patience during cure. Happy crafting!
Step 4: Add Color, Inclusions, and Bubbles (Comparison of Colorants)
Now that your resin is mixed and ready, it’s time to give it personality. Adding pigments, glitters, or tiny charms is the part where your piece really starts to feel like yours. But before you reach for the first bottle, let’s talk about the why and how of each option so you can avoid surprise‑cloudy results.
Pick the right colorant for the job
Not all colorants behave the same in resin. Alcohol inks, resin‑specific dyes, mica powders, and even a dab of acrylic paint each bring a different look and set of challenges. Here’s a quick cheat‑sheet you can print and keep on your bench:
| Colorant | Finish | Best Use |
|---|---|---|
| Alcohol inks | Vivid, translucent | Swirls, watercolor‑style blends – add after mixing, let bubbles rise |
| Resin‑safe dyes | Consistent, opaque or transparent | Uniform color blocks – mix into resin before any inclusions |
| Mica powders | Pearlescent, metallic shimmer | Layered sparkle – sprinkle on top of a thin pour, then cover |
| Acrylic paint (sparingly) | Matt or glossy depending on pigment | Accent spots – use a toothpick, watch for curing slowdown |
When you’re just starting out, resin‑safe dyes are the safest bet. They’re formulated to stay suspended and won’t affect cure time. If you love a dreamy, marbled effect, reach for alcohol inks, but remember they’ll pull a few extra bubbles to the surface – that’s actually helpful because you can pop them with a heat gun.
Step‑by‑step: Adding color and inclusions
1. Measure your colorant. A good rule of thumb is 1‑2% of the total resin volume for dyes, and up to 5% for mica powders. Too much pigment can cloud the piece.
2. Mix gently. Add the pigment to the clear resin before the hardener, then stir just enough to blend. Over‑stirring re‑introduces air.
3. Let the mixture sit. Give it 30 seconds so any trapped air rises. You’ll see tiny bubbles form on the surface – that’s your cue to move on.
4. Introduce inclusions. Drop glitter, dried flowers, or tiny charms in one corner of the mold. If you’re embedding a small metal charm, make sure it’s resin‑safe and doesn’t react with the hardener.
5. Pour. Slowly drizzle the colored resin into the mold, aiming for the side wall first. This reduces bubble formation compared to dumping straight down.
6. Pop bubbles. Pass a heat gun or hair dryer over the surface for 5‑10 seconds. The warmth thins the top layer, letting bubbles escape.
7. Layer if you want depth. Let the first layer cure to a tacky state (about 15‑20 minutes), then pour a second shade on top. This creates a beautiful, multi‑dimensional effect.
Real‑world examples
Emily, a mom‑preneur, loves using dried lavender buds for a rustic vibe. She mixes a tiny pinch of mica powder with a lavender‑scented essential oil, pours, and then tops with a second clear layer. The result is a pendant that looks like a tiny garden in glass. Her customers often ask how she keeps the buds from floating – the secret is letting the first layer become tacky before adding the second.
Meanwhile, Alex, a hobbyist who makes earrings for his art‑show booth, prefers alcohol inks for their bright, translucent hues. He adds a few drops after mixing, swirls with a toothpick, and then uses a small torch to pop the inevitable bubbles. The final pieces have a “wet‑paint” look that sells well because they catch the light in a way solid dyes don’t.
Tips from the pros
• Warm your resin slightly (no more than 40 °C) before adding pigments – it lowers viscosity and reduces streaks.
• Keep a pressure pot handy if you’re making larger pieces; it squeezes out bubbles that a heat gun can’t reach.
• For a polished finish, sand any flash after demolding and apply a thin clear coat.
And if you’re thinking about how to present your finished pieces, consider adding custom stickers for branding on your packaging – a tiny touch that makes a big impression for your online shop.
Need a deeper dive into color theory for resin? Check out Resin Art Tutorial: Master Essential Techniques for Stunning Creations for more ideas on mixing, layering, and finishing.
Step 5: Cure, Demold, and Finish Your Pieces
Now the resin’s been poured, the colors have settled, and you’re probably staring at a glossy surface wondering, “When does this actually become solid?” The cure is the quiet phase where chemistry does its thing, and a little patience goes a long way.
How long should you wait?
Most clear epoxy resins recommend 24–48 hours at room temperature (68‑75 °F). If you’re using a brand like Colores, the forum notes a minimum 24‑hour cure, but many artists let it sit 72 hours before a second layer or heavy sanding (see discussion). The rule of thumb? Treat the first 24 hours as “let it rest” – no moving, no touching.
So, what should you do while you wait?
Creating a cure‑friendly environment
Pick a dust‑free spot. A spare bedroom with the door closed works fine, or a closet with a small fan blowing outward to keep fumes at bay. Avoid direct sunlight; UV can speed up cure unevenly and cause yellowing.
Temperature matters. If it’s cooler than 65 °F, the resin will take longer – you might add a gentle heat source like a warm (not hot) lamp placed a foot away. Conversely, if the room feels like a sauna, you risk bubbles re‑forming. Aim for that sweet 70 °F sweet spot.
When the cure is complete – demolding
Give the mold a gentle press. Silicone is forgiving, so a light twist should release the piece. If it’s stubborn, roll the mold on a flat surface – the resin will slide off like a tiny pancake.
Jane, the Etsy seller from earlier, swears by a quick tap on the back of the mold with a wooden spoon. “It’s like coaxing a shy friend out of a booth,” she says. The result: clean edges and no extra flash.
But what if you notice a thin rim of extra resin (flash) around the edge?
Trimming and sanding
Grab a fine‑grit nail file or a 400‑grit sandpaper and gently round the edges. Work in a well‑ventilated area and wear your gloves – sanding resin can create a fine dust.
For larger pieces, start with 400 grit, then move to 800, and finish with 1500 for a glass‑like smoothness. A quick tip: dip the sandpaper in water to reduce dust and keep the surface cool.
Alex, who makes earrings for art shows, loves using a small rotary tool with a felt‑pad attachment for that final polish. He says the extra shine makes his “wet‑paint” look pop under booth lights.
Polishing and protective coats
After sanding, wipe the piece with a lint‑free cloth dampened with isopropyl alcohol. This removes any lingering grit. Then, choose a finish:
- For a high‑gloss look, spray a thin coat of clear acrylic sealant (like Krylon). Hold the can 12‑inches away and use short bursts to avoid drips.
- If you prefer a matte vibe, a light dusting of fine‑grit sanding followed by a matte spray works wonders.
Don’t over‑apply – a single, even layer is enough. Too much coating can trap moisture and lead to cloudiness later.
Adding the final hardware
Now’s the moment to attach jump rings, bail hooks, or ear wires. Use a tiny dab of clear epoxy to secure the hardware, then let it cure for another 15 minutes. This extra step ensures the piece won’t loosen when worn.
For parents working with kids, a simple split‑ring can be pressed onto the resin with a pair of tweezers – no extra glue needed, and the kids love the hands‑on feel.
Quality check checklist
Before you call it done, run through this quick list:
- Is the piece fully hardened (no tacky spots)?
- Are edges smooth and flash‑free?
- Is the surface free of dust and fingerprints?
- Has the protective coat dried without runs?
- Is the hardware securely attached?
If you answered “yes” to all, congratulations! Your resin jewelry is ready for wear, gifting, or listing in your online shop.
And remember, every batch is a learning experience. Keep a tiny notebook – note cure times, temperature, and any quirks. Over time you’ll build a personal “resin bible” that saves you countless trial‑and‑error hours.
Ready to showcase your finished pieces? A simple photo setup with natural light will highlight that glossy finish and make shoppers stop scrolling.
Conclusion
We’ve taken you from the first stir of resin to the final polish, and you now have a clear roadmap for how to make resin jewelry for beginners.
So, what’s the next step? Grab the supplies you already have, set a timer, and give yourself a 30‑minute “experiment window.” You don’t need perfection; you need progress.
Remember the little checklist we built: cure fully, sand smooth, attach hardware securely, then snap a quick photo in natural light. Those tiny habits turn a hobby into a repeatable process you can rely on.
If you’re an aspiring creative entrepreneur, think about documenting each batch in a simple notebook. Over weeks you’ll spot patterns – which pigments settle best, which molds release cleanly – and that data becomes your secret sauce.
Parents, treat the resin session as a shared adventure. Let the kids press the split‑ring with tweezers, talk about why the resin needs to “rest,” and you’ll be nurturing both craft skills and curiosity.
Finally, give yourself credit. Every glossy pendant, even the ones with a tiny bubble, is proof that you’re learning by doing. Keep experimenting, keep sharing your results, and soon your shelf will fill with pieces you’re proud to wear or sell.
Ready to dive deeper? Our library of step‑by‑step courses is just a click away – because mastering resin is a journey, not a single tutorial.
FAQ
What are the essential supplies for how to make resin jewelry for beginners?
First, you’ll need a clear epoxy resin and its matching hardener – the 1:1 mix is the heart of every piece. Add a few silicone molds (pendant or charm shapes), a set of measuring syringes, and wooden stir sticks. Safety gear is non‑negotiable: nitrile gloves, a respirator or mask, and goggles protect you from fumes and skin irritation.
Finish the basics with a heat‑gun or hair dryer for bubble‑busting, a fine‑grit sandpaper set for post‑cure polishing, and simple hardware like jump rings or bails. All of these items are inexpensive and reusable, so you won’t break the bank before you even start.
How do I measure and mix resin accurately without wasting material?
Measure in a graduated syringe or a marked cup – 30 ml of resin and the same amount of hardener for a small batch. Write the numbers on a sticky note; that tiny habit stops costly guesswork. Pour the resin first, then the hardener, and stir slowly in a figure‑8 for about 10 seconds, scraping the sides three times.
Set a timer for 45 seconds; over‑mixing injects air, under‑mixing leaves unmixed pockets that stay tacky. The mixture should look like a smooth, glossy honey before you add any pigments or inclusions.
Can I add color or glitter without ruining the cure?
Yes – but use resin‑safe pigments. A good rule is 1‑2 % dye or up to 5 % mica powder of the total resin volume. Add the colorant to the clear resin before you introduce the hardener, then stir gently. This keeps the resin’s chemistry intact and prevents cloudiness.
If you love sparkle, sprinkle glitter after the first thin pour and then cover with a clear top layer. The second layer locks the glitter in place and gives you that professional‑grade shine.
How long should I let my resin pieces cure, and can I speed it up?
Most clear epoxies need 24‑48 hours at room temperature (68‑75 °F). Warmer rooms speed the reaction, but they also create more bubbles, so keep the temperature steady. If you need a faster cure, a low‑heat lamp placed a foot away can shave a few hours, but never exceed the manufacturer’s recommended temperature.
During cure, avoid moving the mold. Even a slight shift creates ripples that look like unwanted texture on the finished pendant.
What’s the best way to remove flash and smooth edges after demolding?
Start with a 400‑grit nail file or sandpaper, working in a well‑ventilated area and wearing gloves. Wet‑sanding reduces dust and keeps the resin cool. Move to 800‑grit, then finish with 1500‑grit for a glass‑like surface. A quick dip in isopropyl alcohol wipes away any lingering particles.
If you want that ultra‑high gloss, spray a thin coat of clear acrylic sealant from about 12 inches away, using short bursts to avoid runs.
How can I keep my resin jewelry business organized as I grow?
Treat each batch like a mini‑experiment. Jot down the resin‑to‑hardener ratio, ambient temperature, pigment percentages, and cure time in a simple notebook or spreadsheet. Over weeks you’ll spot patterns – maybe a certain brand of mica works better in cooler weather, or a specific mold releases more cleanly.
This data becomes your “secret sauce” when you start scaling up, pricing pieces, or teaching workshops. It also makes troubleshooting a breeze when something doesn’t turn out as expected.
Is it safe for kids to help with resin projects?
Absolutely, as long as they wear gloves, a mask, and eye protection. Let them handle the silicone molds, press split‑rings with tweezers, or stir the mixture with a wooden stick. Keep the hardener portion out of reach and do the actual mixing yourself.
Kids love seeing the liquid turn solid, and the hands‑on experience sparks curiosity about chemistry and art. Just supervise closely and keep the workspace tidy, and you’ll have a fun, educational activity for the whole family.
Leave a Reply