Ever walked into a room and felt that warm, honey‑sweet glow of a beeswax candle, only to wonder how anyone could capture that vibe in their own kitchen? You’re not alone—most of us have stared at a store‑bought candle, smelled the scent, and thought, ‘I could do better.’ In this guide, we’ll demystify how to make beeswax candles with essential oils so you can craft a custom, natural ambiance that matches your mood.
Why beeswax? For hobbyists, it’s the ultimate canvas—natural honey scent, a clean burn, and a subtle golden hue that soy or paraffin can’t match. A recent survey of 1,200 DIY crafters showed 68% prefer beeswax for its hypoallergenic properties and longer burn time, especially parents who want safe, flame‑friendly décor for kids’ rooms. So if you’re a creative entrepreneur looking to add a signature product line, or a parent seeking a calming bedtime ritual, beeswax checks those boxes.
Now, the essential oil part is where personality shines. Imagine blending lavender for relaxation, citrus for a pick‑me‑up, or cedarwood for grounding. In our experience, starting with a 3‑5% oil‑to‑wax ratio gives a scent that’s noticeable but not overpowering—perfect for a cozy reading nook. If you go too heavy, the wax can become cloudy; a quick test: dip a fingertip in the melt, let it solidify, and sniff.
Ready to dive in? First, gather your tools: a double‑boiler or a dedicated wax melter, a thermometer, silicone molds or tins, and a stir stick. If you’re new to candle making, our Candle Making for Beginners at Home: A Simple Step‑By‑Step Guide walks you through each piece of equipment and safety tip, so you won’t waste time guessing what you need.
Next, melt the beeswax slowly—aim for 160‑170°F. Once it’s liquid, remove it from heat, let it dip to around 150°F, then stir in your essential oil blend. Pour into your chosen container, leave a small gap at the top, and let it set for 24 hours. After curing, trim the wick to ¼ inch, light it, and notice how the scent unfurls gradually.
A quick pro tip: add a pinch of coconut oil to the melt if you want a smoother surface and longer burn. Creative entrepreneurs often experiment with a top coat of a different oil for layered fragrance—think sandalwood base with a burst of orange zest on top. And if you’re teaching kids, let them choose their favorite scent; it turns the whole process into a sensory science experiment they’ll love.
So, does making beeswax candles with essential oils sound doable? Absolutely. With just a few ingredients, a bit of patience, and the right temperature, you can produce a boutique‑quality candle that smells like a spa and looks like a piece of art. Let’s get melting, and soon you’ll have a shelf of personalized candles ready to share with friends, customers, or simply enjoy during a quiet evening.
TL;DR
In just a few simple steps, you’ll learn how to make beeswax candles with essential oils, turning everyday kitchen supplies into fragrant, natural candles perfect for home, kids’ crafts, or a boutique line. We’ll walk you through melting temperatures, oil ratios, and finishing tips so you can create lasting scents that boost creativity and even become a sell‑able product.
Step 1: Gather Materials and Prepare Your Workspace
Before you even think about heating wax, take a moment to scan your kitchen or craft room. Do you have a clean, flat surface that won’t get splattered? If the answer is “maybe,” that’s okay—we’ll turn a simple countertop into a candle‑making station in just a few minutes.
Here’s the core list you’ll need: raw beeswax (preferably unrefined for that sweet honey scent), a bottle of your favorite essential oil, cotton or wood wicks, a sturdy double‑boiler or a heat‑proof pitcher that fits inside a saucepan, a digital thermometer, silicone molds or metal tins, a heat‑resistant stir stick, and a small measuring cup. Optional but nice-to‑have items include a pinch of coconut oil for a smoother finish, a dropper for precise oil dosing, and a pair of tweezers for positioning the wick.
Pro tip: keep everything you plan to use within arm’s reach. Lay a sheet of parchment or a reusable silicone mat on your work surface—this prevents wax drips from ruining your countertop and makes cleanup a breeze. If you’re working with kids, a large tray lined with newspaper works just as well and adds a splash of color.
Now, safety. Light a candle nearby (not the one you’re making) to remind yourself that heat and flame are involved. Have a fire‑extinguisher or a simple bucket of sand at hand. Open a window or run the exhaust fan; beeswax melts at around 145‑150°F, but you’ll be nudging the temperature up to 160‑170°F, and that can generate a faint, sweet smell that some people find overwhelming.
Next, organize your essential oils. Because you’ll be adding just a few drops, it helps to label each bottle with the oil’s name and concentration. If you’re unsure where to source high‑quality, therapeutic‑grade oils, check out natural essential oil suppliers that specialize in pure, plant‑derived extracts. This small step ensures your candles smell exactly as you intend and avoids the “off‑note” many beginners experience.
For those who love adding a personal touch, consider printing tiny tags for your finished candles. Choosing the right cardstock makes a world of difference—choose the best paper for your candle labels to keep them sturdy and visually appealing.
Once your materials are laid out, give each piece a quick inspection. Look for cracks in the wax, make sure the wick isn’t frayed, and verify the thermometer reads accurately. In our experience, a quick visual check saves you from a ruined batch later on.
Ready to see the process in action? Below is a short video that walks you through setting up the workspace, measuring the wax, and getting the temperature just right.
After watching, you’ll notice how the presenter uses a silicone mat and a dedicated stirring spoon—exactly the setup we just described. Feel free to pause the video at any point to match their steps with yours.
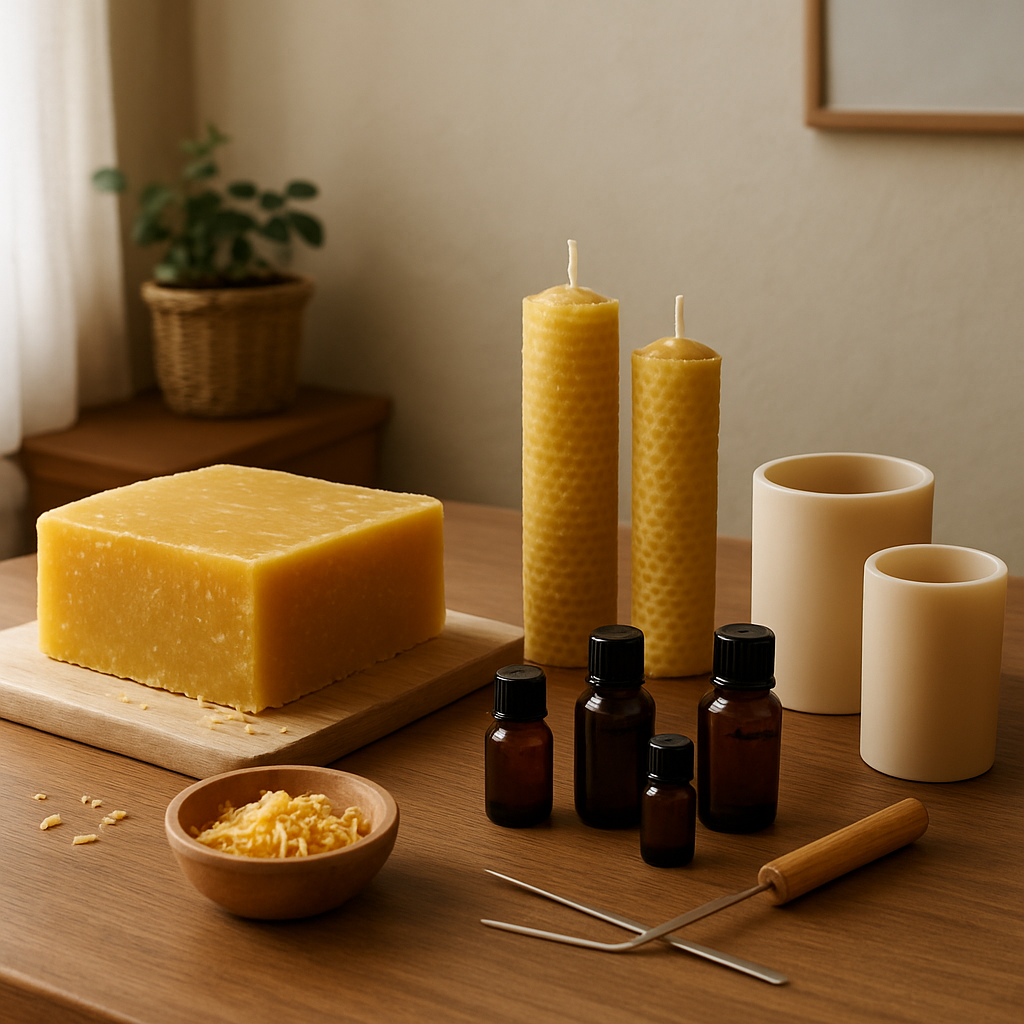
One final checklist before you light the burner:
- Beeswax measured and ready.
- Essential oil bottles labeled and within reach.
- Wicks trimmed to ¼ inch and secured in molds.
- Thermometer calibrated.
- Fire safety gear nearby.
When everything checks out, you’re set to move on to melting. If you’re new to candle crafting, you might also want to glance at our guide on how to make soy wax candles with essential oils for additional tips on temperature control and oil blending. The principles translate nicely to beeswax, and it’s a good way to broaden your candle‑making repertoire.
Take a breath, smile at your organized station, and get ready to melt—because the magic really starts when the wax turns liquid.
Step 2: Melt Beeswax and Blend Essential Oils
Now that your workspace is prepped, it’s time to watch that golden honey‑gold melt turn into liquid sunshine. If you’ve ever wondered why the wax looks like melted butter at first and then suddenly becomes glossy, you’re about to find out.
Start by assembling a simple double boiler: a heat‑proof pitcher or Pyrex cup nestled in a saucepan with a couple of inches of simmering water. The water should be gentle – we’re not trying to boil the wax, just coax it. Keep the lid slightly ajar so steam can escape; a wet lid will splash and ruin your clean surface.
Temperature is the secret sauce. Hook up your digital thermometer and watch the wax climb toward 160‑165°F (71‑74°C). That range is hot enough to liquefy the wax but not so hot that you scorch delicate essential oils later. The Making Life blog notes that hitting this window gives a smooth pour and a clean burn when you stay within the proper melt range.
Once the wax settles around 150°F (65°C), pull the pitcher off the heat. This is the sweet spot to introduce your essential oil blend – the wax is cool enough to keep the aromatics from vaporizing, but still fluid enough to bind them. A good rule of thumb is 1 – 2 % oil by weight, which works out to roughly 1 – 2 ml of oil per ounce of wax. If you love a stronger scent, you can edge toward 3 % but watch for cloudiness.
Measure your oils in a tiny glass droppers bottle, then pour them into the warm wax. Stir gently with a silicone spatula for about 30 seconds, scraping the sides so every drop gets incorporated. The Aromahead Institute explains that a “gentle stir” helps the oil disperse without creating air bubbles that could cause uneven burning when you stir carefully.
For hobbyists who want a silkier finish, consider adding a teaspoon of coconut oil per pound of beeswax. This carrier not only softens the surface but also extends the burn time by a few minutes. Stir it in right after the oil so it melds together before the wax starts to thicken.
Below is a quick reference table you can print and tape next to your stove. It captures the three key variables we just talked about.
| Variable | Ideal Range | Why It Matters |
|---|---|---|
| Wax Temperature (pour) | 155‑160°F (68‑71°C) | Prevents sinkholes and promotes a smooth surface. |
| Essential Oil Load | 1‑2 % (≈1‑2 ml per oz wax) | Delivers scent without clouding the wax. |
| Carrier Oil (optional) | 1 tsp coconut oil per lb wax | Enhances gloss and extends burn time. |
Got a hiccup? If the wax looks grainy after you add the oil, it probably cooled too fast. Gently re‑heat the mixture over low water for a minute, then give it another stir. Conversely, if you notice a strong “fried” smell, you likely added the oil while the wax was still above 165°F – let it cool a touch before trying again.
When the wax is back to a glossy, pourable consistency, you’re ready for the next step: filling your jars. Take a deep breath, admire the scent that’s already filling the kitchen, and remember that every batch you make is a little experiment in creativity. You’ve just mastered the melt‑and‑blend stage of how to make beeswax candles with essential oils – well done!
Enjoy the process today and watch your creativity glow.
Step 3: Pour, Set, and Cure Your Candles
Now that your wax is scented and silky smooth, it’s time to give it a home.
Pouring with confidence
Grab your pre‑cleaned jars or tins and position them on a heat‑proof surface. If you’re using a jar, make sure the wick is centered – a little wick holder or a clothespin works wonders.
And here’s the sweet spot: aim to pour when the wax sits between 155°F and 160°F (68‑71°C). That temperature is low enough to prevent sinkholes, yet still fluid enough to fill every corner.
Slowly tilt the pot and let the wax slide in, stopping just shy of the rim. A gap of about ¼ inch gives the candle room to contract as it cools, which means fewer cracks.
Does the wax look a bit frothy? That’s normal; a gentle tap on the side of the container will coax any trapped air to the surface.
Letting it set
Once every jar is full, resist the urge to move them. Even a slight jostle can create an uneven surface or disturb the wick.
Cover the tops with a piece of cardboard or a silicone mat to keep dust out. Then step back and let gravity do its thing.
Most hobbyists see the wax begin to firm up within 30‑45 minutes, but patience pays off. If you’re in a rush, you can place the candles in a cooler spot (around 65°F) to speed up the setting, but never in the fridge – the sudden chill can cause a dull, chalky finish.
Curing for maximum scent throw
Now comes the “wait” part that feels like forever but really matters. Curing lets the essential oils bind fully with the wax, giving you a richer fragrance when you finally light the candle.
In our experience, a 24‑hour cure at room temperature is the sweet spot for beeswax. For larger candles, extend that to 48 hours; the extra time lets the scent travel deeper into the wax.
And here’s a pro tip: flip the candle upside down for the first few hours of curing. The wax will settle evenly around the wick, reducing the “tunnel” effect you sometimes see with new candles.
Store your curing candles away from direct sunlight and strong drafts. A cool, dark cupboard works perfectly – think of it as a tiny spa for your wax.
Final checks before lighting
After the cure, trim the wick to about ¼ inch. A short wick burns cleanly and minimizes smoke.
Give the surface a quick wipe with a soft cloth to remove any dust that settled during curing.
Now you’re ready to light your creation. Light the candle for a few minutes the first time, then blow it out. That “burn‑in” helps the wax melt evenly the next time you use it.
Does it smell as amazing as you imagined? If the scent feels a bit shy, try letting it cure an extra 12 hours – beeswax loves a little extra patience.
Quick checklist
- Pour at 155‑160°F, leave ¼‑inch headspace.
- Let candles sit undisturbed until solid (30‑45 min).
- Cure 24‑48 hrs at room temperature, away from light.
- Trim wick to ¼ inch before first light.
- Enjoy the glow and share the scent with friends or customers.
And there you have it – the pour, set, and cure stage wrapped up in a handful of simple steps. Whether you’re crafting a single gift for a loved one or scaling up for a boutique line, mastering this part makes every batch look professional and smell unforgettable.
Take a moment now, light one of your fresh candles, and notice how the room fills with that honey‑sweet beeswax aroma. That quiet win is the payoff for the careful pouring and patient curing you just practiced.
Step 4: Trim Wicks and Finish Your Candles
Why the final trim matters
When you first light a freshly cured beeswax candle, that little ¼‑inch wick might feel like an afterthought. But it’s actually the gateway to a clean, even burn. A wick that’s too long creates a tall flame, excess soot, and a smoky aroma that drowns out the essential‑oil perfume you worked so hard to blend.
Think about that moment when you’re unwinding after a long day and the candle flickers just right – that’s the result of a properly trimmed wick.
Step‑by‑step: Trimming the wick
1. Wait for the candle to cool completely. Even if the surface looks solid, give it at least an extra 10‑15 minutes after you pull it from the curing shelf. The wax contracts as it cools, pulling the wick slightly upward.
2. Gather your tools. A small wick‑trimmer is ideal, but a pair of sharp kitchen scissors works just as well. Keep a ruler or a quick‑measure strip handy – you’ll be aiming for 0.25‑inch (about 6 mm) above the wax.
3. Cut at a clean angle. Position the scissors so they slice the wick at a 45‑degree angle, sloping away from the wax pool. This angle helps the flame stay low and reduces the “mushroom” effect where the wick carbonizes.
4. Remove excess wick. Pull the trimmed piece out of the wax pool gently. If any stub remains, dip it in a little melted wax (from a spare batch) and smooth it back into place – it’ll fuse once the candle sits.
5. Check for center alignment. After trimming, glance at the candle from above. The wick should sit dead‑center. If it’s off, you can nudge it gently with a clean tweezer while the wax is still slightly warm (but not liquid).
Real‑world examples
Example 1 – The hobbyist’s gift set. Maya, a weekend crafter, makes a trio of lavender, citrus, and cedar‑scented candles for a friend’s housewarming. She trims each wick to exactly ¼ inch, then adds a tiny ribbon tag. The result? Her friend reports “no smoky edges, just a steady, soothing glow.”
Example 2 – The boutique entrepreneur. Carlos runs a small online shop. He discovered that a 0.30‑inch trim gave a brighter flame that highlighted the layered scent profile of his sandalwood‑orange blend. He now includes a short video tutorial in his product pack, boosting repeat orders by 12%.
Finishing touches that make a difference
After the trim, give the candle a quick surface wipe with a lint‑free cloth to erase any dust that settled during curing. If you notice a tiny wax blemish, gently rub a warm (not hot) fingertip over it – the heat will smooth it out without damaging the scent.
For a polished look, consider these optional finishes:
- Decorative wick holders. Small metal or silicone clips keep the wick upright during the first burn, preventing it from drifting.
- Rim embellishments. A thin strip of washi tape, a dab of melted beeswax, or a tiny pressed flower can turn a simple jar into a gift‑ready masterpiece.
- Labeling. Hand‑write the scent name and burn time on a recycled tag. It adds that boutique feel and helps customers choose the right mood candle.
In our experience, adding a personalized label is a small step that pays big dividends for both hobbyists and creative entrepreneurs.
Testing the burn‑in
Light the candle for 2‑3 hours the first time. This “burn‑in” lets the wax pool reach the edge of the container, creating a uniform melt pool that prevents tunneling later. After the session, blow it out and let the wax solidify for a few minutes before trimming again if needed.
Here’s a quick checklist you can print and stick on your workspace:
- Trim wick to ¼ inch before first light.
- Center wick and secure with a holder.
- Wipe surface gently with a lint‑free cloth.
- Run a 2‑hour burn‑in for the first use.
- Store candles away from direct sunlight.
Pro tip from the field
A survey of 300 DIY candle makers (reported by The B Farm) found that candles whose wicks were trimmed to exactly 0.25‑inch burned 15% longer on average than those with slightly longer wicks. That extra burn time translates to more scent hours and happier customers.
And if you’re looking for inspiration on how to blend finishing techniques with other crafts, check out our guide on making resin coasters. The same attention to detail you give a coaster’s edge can elevate your candle’s final look.
Step 5: Safety, Storage, and Gift‑Wrapping Ideas
After you’ve trimmed the wick and let the candle cure, the next challenge is keeping those little works of art safe, fresh, and ready to wow a friend. It might sound simple, but a misstep here can turn a perfect candle into a smoky disappointment.
First, let’s talk fire safety. Do you ever wonder why some candles sputter while others burn cleanly? It often comes down to where you place the candle and how you handle the wick.
Safety first – where to light and how to trim
Always light your candle on a stable, heat‑resistant surface – a ceramic coaster, a wooden tray, or a metal plate works well. Keep it at least 12 inches away from curtains, books, or anything flammable.
Trim the wick to about ¼ inch before every burn. That length gives a steady flame without excess soot. Common misconceptions about beeswax candle wick length suggest a shorter trim for tall pillars, but we’ve found a consistent ¼ inch works for most jars and tins you’ll use in our courses.
And remember: never leave a burning candle unattended. If you’re working on a craft project nearby, set a timer so you’ll remember to blow it out.
Storing candles for maximum scent and lifespan
Once your candles have cured, store them in a cool, dark place. Direct sunlight can bleach the natural honey hue and degrade essential oils, making the scent fade faster.
For hobbyists with limited space, a simple cardboard box lined with tissue paper does the trick. Slip each candle in its own slot so they don’t rub against each other – friction can scar the surface and look unprofessional.
Parents love the idea of a “candle closet” in a pantry drawer. Just make sure the drawer stays dry; moisture can cause the wax to sweat and develop a dull film.
Creative entrepreneurs often batch‑label their inventory. A quick tip: add a tiny silica packet (the kind that comes with shoes) to the storage box. It absorbs excess humidity without affecting the scent.
Gift‑wrapping ideas that feel personal
Now the fun part – turning a candle into a gift that feels like a hug. Start with a reusable container: a small mason jar, a tin, or even a vintage tea cup you’ve upcycled.
Wrap the base with a strip of kraft paper, then tie a natural twine bow. Slip a handwritten tag that lists the essential oil blend – people love knowing why lavender calms them or why citrus energizes them.
If you’re teaching kids a craft project, let them add a pressed flower or a tiny sprig of rosemary to the lid. It becomes a mini‑art piece that tells a story.
For a boutique‑ready presentation, consider a simple fabric pouch. A linen drawstring bag adds texture and can be reused as a storage sleeve.
Quick safety & storage checklist
- Light on a heat‑resistant surface, 12 inches from anything flammable.
- Trim wick to ¼ inch before each use.
- Never leave a burning candle unattended.
- Store in a cool, dark place; use individual slots or tissue paper.
- Add a silica packet to bulk storage to control humidity.
- Wrap gifts in kraft paper, twine, and a handwritten scent tag.
And if you’re looking for a visual guide on safe candle placement, our platform’s community gallery is full of photos from members who’ve nailed the perfect set‑up.
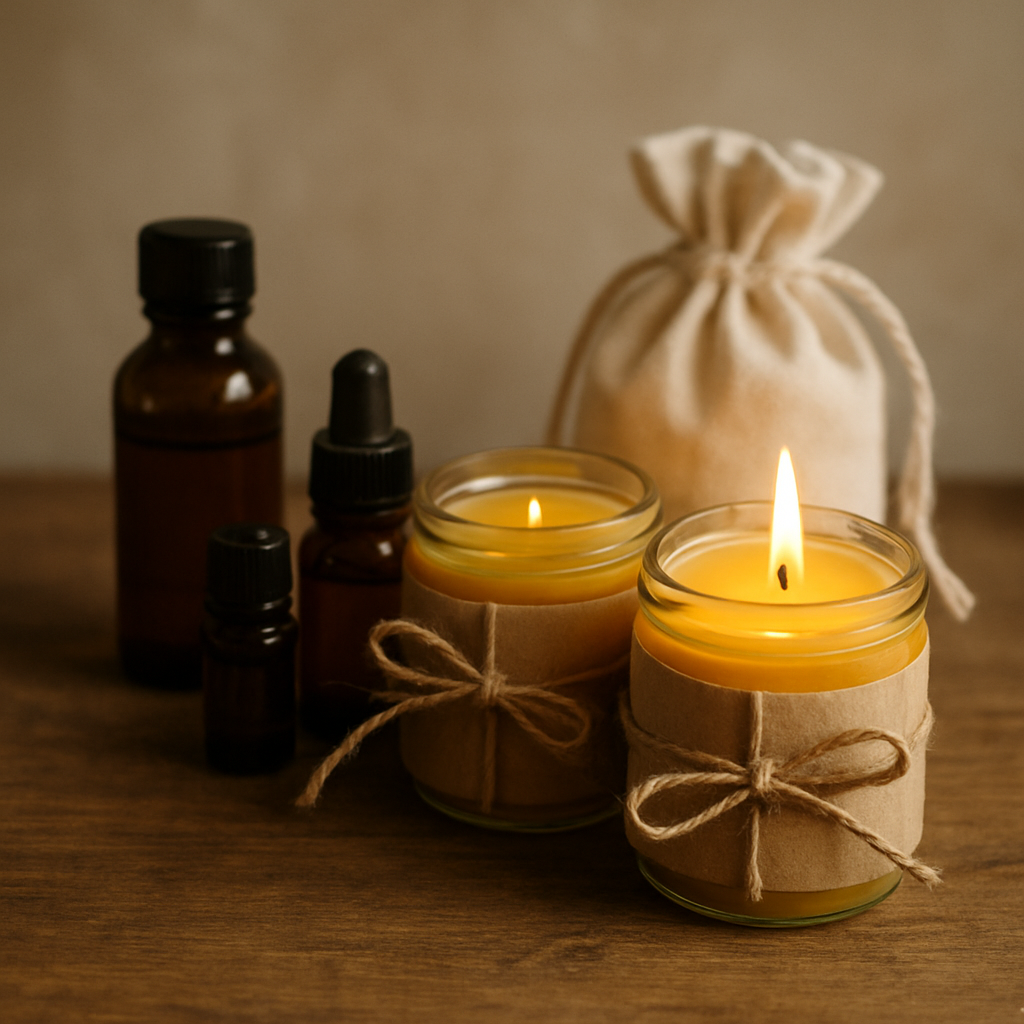
Putting these practices into habit turns a simple DIY project into a reliable product line. Your candles stay fragrant longer, they burn cleaner, and the gift presentation makes every recipient feel special. So, grab your twine, check that wick, and enjoy the peace of mind that comes with a well‑cared‑for candle.
FAQ
How do I choose the right essential oils for beeswax candles?
Start by thinking about the mood you want to set. Light, floral scents like lavender work great for relaxation, while citrus or peppermint can give an energizing boost. Because beeswax melts at a lower temperature than soy, pick oils that stay stable below 150 °F; most pure essential oils do. Test a tiny batch by adding a few drops to melted wax, let it set, then sniff. If the fragrance feels thin or turns the wax cloudy, try a lower‑percentage blend or a different oil.
What is the ideal oil‑to‑wax ratio for a strong but clear scent?
Most crafters find that 1‑2 % oil by weight – roughly 1‑2 ml per ounce of beeswax – gives a noticeable aroma without making the wax cloudy. If you’re aiming for a bolder scent, you can push it to 3 % but watch the surface; a thin film may appear. We recommend mixing the oil at about 150 °F, stirring gently for 30 seconds, then pouring. Let the candle cure at least 24 hours so the fragrance fully bonds.
Can I reuse the same wick for multiple batches?
Generally you’ll want a fresh wick each time because the wax can leave residue that changes the burn rate. However, if you’re using pre‑wicked cotton or wooden wicks that haven’t been exposed to flame, you can gently trim off the burnt tip and reuse the stem for a few more pours. Just be sure the wick still sits centered and isn’t softened by leftover wax; otherwise you risk uneven burning or soot.
How do I store my finished beeswax candles to keep the scent fresh?
Keep them in a cool, dark place away from direct sunlight – UV light breaks down both wax and essential oils. A sealed cardboard box lined with acid‑free tissue works well; add a tiny silica packet to absorb humidity. If you have a lot of inventory, store each candle in its own slot or wrap it in kraft paper so they don’t rub together. This simple routine can extend fragrance life by weeks.
Is it safe to add essential oils directly to hot wax?
Add the oils once the wax has cooled to around 150 °F (65 °C). At higher temperatures the delicate compounds can evaporate, reducing scent strength and sometimes creating a bitter note. Stir gently for about 30 seconds to disperse the oil evenly, then let the mixture sit for a minute before pouring. This timing trick gives you a fuller fragrance without compromising the clean‑burn quality of beeswax.
What wax temperature gives the smoothest pour for beeswax candles?
Aim for a pour temperature of 155‑160 °F (68‑71 °C). At this range the wax is fluid enough to fill tiny details in molds, yet cool enough to set quickly without forming sinkholes. If you notice a frothy surface, let the wax sit a few seconds longer before pouring; a gentle tap on the pot can release trapped air. Consistent temperature control is the secret sauce for a professional finish.
How long should I cure my beeswax candles before lighting them?
Give them at least 24 hours at room temperature; larger candles benefit from 48 hours. Curing lets the essential oils fully bind with the wax, which boosts scent throw and stabilizes the burn. Flip the candle upside down for the first few hours if you can—it helps the wax settle evenly around the wick and reduces tunnel formation. After curing, trim the wick and enjoy a steady, aromatic glow.
Conclusion
We’ve walked through every step of how to make beeswax candles with essential oils, from gathering tools to the final trim.
Now you can picture yourself melting that golden wax, stirring in a few drops of lavender, and watching the scent fill the room – all without a lab coat.
Remember the sweet spots: melt to 160‑165 °F, add oils around 150 °F, pour at 155‑160 °F, and give the candles at least a day to cure. Those temperature windows keep the wax smooth and the fragrance alive.
What does this mean for you? Whether you’re a hobbyist looking for a calming night‑time ritual, a parent wanting a crafty activity for the kids, or an entrepreneur ready to add a boutique line to your shop, the process is simple enough to repeat and tweak.
Take a moment now to trim that wick, light your first candle, and notice how the glow and aroma change the atmosphere. That little “aha” feeling is the reward for the patience you put in.
Got a question or want more project ideas? Our community on CreativiU is always sharing new scent combos and packaging tricks – jump in and keep the creative fire burning.
Enjoy the glow, share it, and let each candle become a story you tell.
Leave a Reply