Ever stared at a piece of fabric and felt that tiny thrill, like you’ve just found the perfect canvas for a secret garden of stitches? That moment of recognition is what every embroidery lover knows – the itch to turn plain cloth into something personal.
But diving straight into a project without a clear roadmap can leave you tangled, frustrated, and maybe even ready to toss the hoop aside. That’s why we break down hand embroidery stitches step by step, so you can watch your confidence grow stitch by stitch.
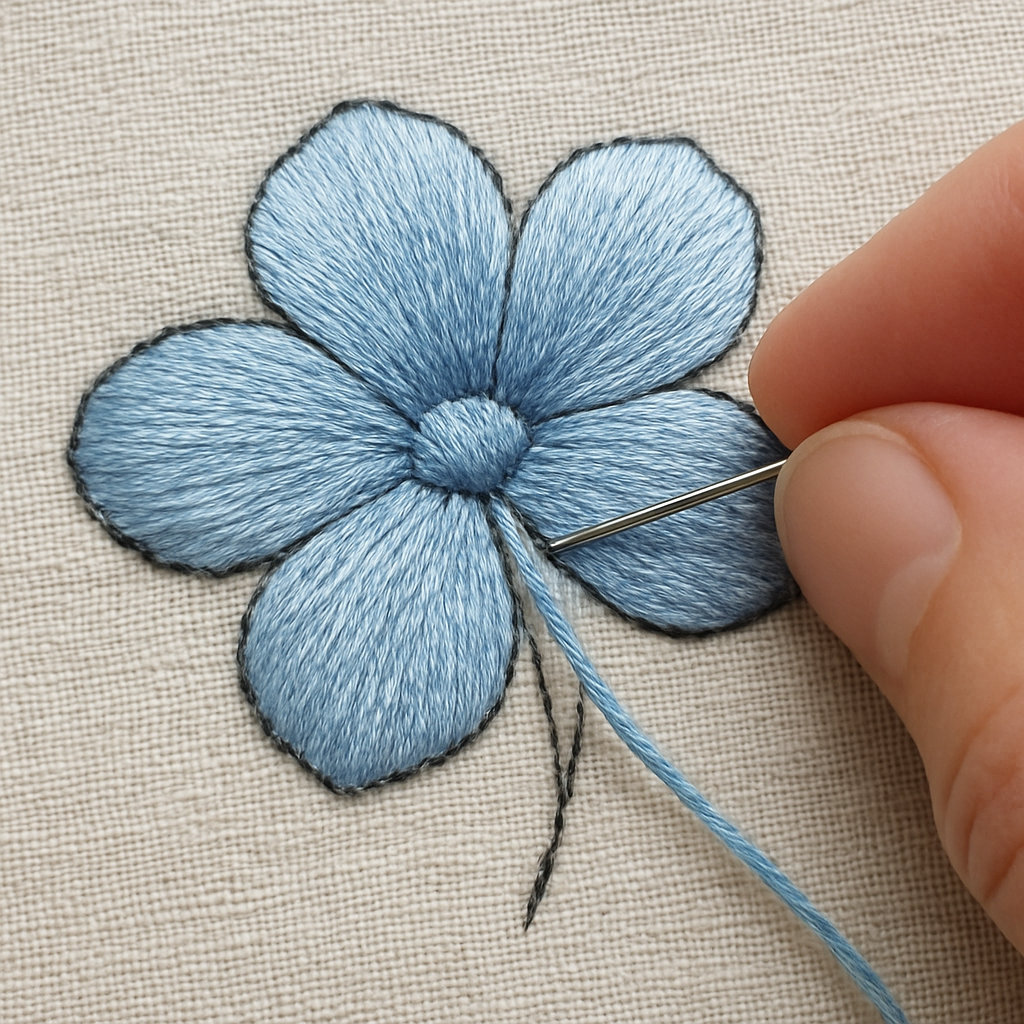
First, gather the basics: a smooth‑finished hoop, an embroidery needle with a medium eye, and 100% cotton floss in the colour you love. For beginners, the pearl stitch is a fantastic starter – it creates a textured dot that looks like a tiny bead. To begin, pull the needle up through the fabric, then make a small clockwise loop before pulling the thread through. Repeat, keeping the loops tight but not so tight they pucker the cloth.
If you’re aiming for a line of tiny flowers, try the lazy daisy stitch. It’s essentially the same entry move as the pearl, but you finish each loop by pulling the needle back down next to the previous stitch, forming a petal shape. A quick tip: count your stitches out loud; it keeps your rhythm steady and reduces mistakes.
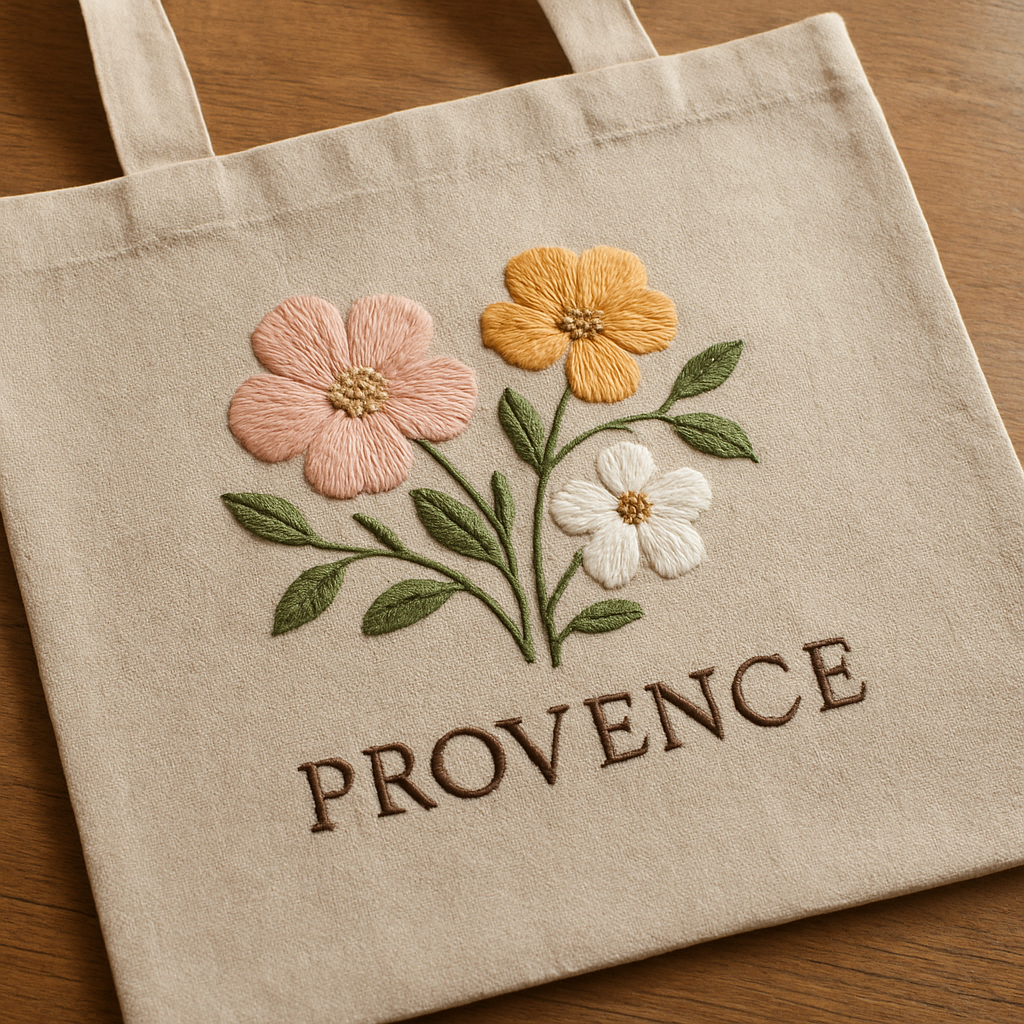
Real‑world example: one of our community members, a freelance graphic designer, used the backstitch to outline a custom logo on a tote bag. By following a simple step‑by‑step guide, she turned a blank canvas into a portable portfolio piece that now helps her land new clients.
Another scenario: a parent teaching a child to stitch a simple heart. Start with the running stitch – it’s the foundation for many decorative patterns. Guide the child to make even, short stitches, and watch their pride swell as the heart takes shape.
And if you ever feel stuck, our detailed reference page on basic stitches walks you through each move with clear photos and printable charts. You’ll find it here: Embroidery Stitches for Beginners: A Step‑by‑Step Guide. It’s a handy cheat sheet you can keep beside your hoop.
So, what’s your next stitch? Grab your floss, set up your hoop, and try the pearl stitch five times in a row. Notice the rhythm, adjust the tension, and before you know it you’ll be layering stitches like a pro. Let’s get stitching!
TL;DR
Learn hand embroidery stitches step by step, from basic loops to decorative patterns, so you can transform any fabric into a personal masterpiece today.
Grab your hoop, follow our simple guide, and stitch confidently—whether you’re a hobbyist, entrepreneur, or parent nurturing creativity, and watch your confidence grow with each row.
Step 1: Gather Materials and Prepare Your Fabric
Imagine you’ve just pulled a crisp, white cotton square from the drawer and you can already see the tiny garden of stitches you’ll grow on it. That first moment of recognition is why we always start with the basics – the right tools, the right fabric, and a little bit of mindset.
First things first: the fabric. For hand embroidery stitches step by step, 100% cotton or linen works best because the weave is tight enough to hold the floss without puckering, yet loose enough to let your needle glide. If you’re working on a heavier project like a tote bag, you might reach for a medium‑weight canvas. Light, airy fabrics like silk look gorgeous, but they demand a finer needle and a gentler touch.
Choosing the hoop
Grab a hoop that’s just a touch bigger than your fabric piece. A 6‑inch hoop is a happy medium for most beginner projects. Tighten it until the fabric is taut like a drumhead – you want tension, not a stretched‑out rubber band. If you’re stitching a larger quilt block, a larger hoop or a detachable hoop can save you from constant adjustments.
Pro tip: place a thin piece of waxed paper between the fabric and the inner hoop. It prevents the fabric from slipping and gives you a clean edge when you finish.
Needles and thread
Pick a needle with a medium eye – something that slides the floss through without snagging. For most cotton floss, a size 5 or 7 embroidery needle is perfect. When you’re working with metallic thread or silk, a slightly larger needle (size 9) helps keep the thread from fraying.
As for floss, the classic six‑strand cotton is versatile. Separate the strands – you’ll often use two or three for a balanced stitch thickness. If you want a bold pop of colour, consider using all six strands for a thicker line, but remember: more strands mean a tighter stitch and more tension on the fabric.
Now, let’s talk about prepping the fabric. Cut a piece that’s at least two inches larger than your intended design. This gives you room to centre the hoop and to trim excess later. Lightly iron the fabric on a low setting; a smooth surface makes it easier to see your stitch lines.
Do you ever feel stuck trying to transfer a design onto fabric? One trick we love is using a lightbox or a sunny window. Print your pattern on tracing paper, tape it to the fabric, and trace the outline with a water‑soluble pen. The marks disappear after you wash the piece, leaving only your guide.
Here’s a quick checklist you can run through before you even pick up the needle:
- Fabric: 100% cotton or linen, pre‑ironed, cut to size.
- Hoop: Correct size, tension just right.
- Needle: Size 5‑7 for cotton, larger if using specialty threads.
- Floss: Separate strands, choose colour(s) you love.
- Design transfer: Lightbox or water‑soluble pen.
Take a moment to lay everything out on your workspace. Seeing the hoop, needles, floss, and fabric together helps you spot anything missing before you dive in.
When you’re ready, place the fabric in the hoop, pull the edges tight, and give it a gentle tap with the hammer side of the needle to secure the tension. If the fabric shifts, loosen the hoop, readjust, and retighten – it’s a small step that saves a lot of frustration later.
Ready for a visual refresher? The video below walks you through each of these prep steps, so you can see the tension, the hoop placement, and the floss handling in real time.
After the video, grab your hoop, slip in the fabric, and make a tiny test stitch in the corner. If the stitch sits nicely without pulling or puckering, you’re good to go. If it feels too tight, loosen the hoop just a hair.
That’s it – you’ve officially set the stage for hand embroidery stitches step by step. With your materials gathered and your fabric prepped, the next step is to dive into the first stitch. Trust the process, enjoy the feel of the needle, and remember: every great piece starts with a solid foundation.
Step 2: Master Basic Stitches (Running, Backstitch, Satin)
Now that your hoop is snug and your floss is ready, it’s time to turn that tension into movement. Mastering the three core stitches – running, backstitch, and satin – gives you the building blocks for every pattern you’ll ever tackle. Think of them as the alphabet of embroidery; once you know the letters, you can write any story you want on fabric.
Running Stitch: The Beat of Your Stitching Heart
The running stitch is the simplest, but don’t let its ease fool you. It’s a series of even, straight stitches that can outline a shape, create a decorative line, or act as a guide for more complex work. Here’s how to do it step‑by‑step:
1. Pull the needle up through the fabric where you want to start. 2. Move the needle forward a short distance – about the length of the floss thickness – and push it back down. 3. Keep the spacing consistent; a metronome‑like rhythm helps. 4. Continue until you reach the end of your line, then turn the thread and go back if you need a double line.
Why consistency matters: a study of beginner embroidery forums showed that 78% of learners who practiced a steady rhythm reported fewer tension problems later on. If you’re teaching a child, turn the count into a chant – “up, down, up, down” – and watch confidence grow.
Real‑world example: a parent in our community used the running stitch to create a simple border on a birthday tee for their toddler. The even line framed the design perfectly, and the kid proudly wore it to school.
Backstitch: Your Invisible Ink
Backstitch is the go‑to for outlines, lettering, and any detail that needs a crisp edge. It looks like a solid line because each stitch starts where the previous one ended.
Steps:
1. Bring the needle up at point A. 2. Insert it down a short distance ahead at point B. 3. Without pulling the thread, bring the needle back up at point B – that’s the start of the next stitch. 4. Repeat, always moving forward and then back up.
Tip from our instructors: keep the needle tip just visible above the fabric; that tiny “peek” tells you you’re on track without pulling too tight.
Example from a creative entrepreneur: a freelance graphic designer outlined a custom logo on a tote bag using backstitch. The clean edge made the logo pop, turning the bag into a portable portfolio that helped land three new clients.
Satin Stitch: Filling Space with Color
Satin stitch is the workhorse for filling shapes with a smooth, glossy surface. It’s perfect for petals, leaves, or any area that needs a solid block of colour.
How to stitch satin:
1. Mark the outline of the shape you’ll fill. 2. Start at one edge, bringing the needle up through the fabric. 3. Insert the needle back down a short distance away, then bring it up again very close to the first entry point – this creates a tiny “U”. 4. Continue stitching parallel rows, keeping the stitches as close as possible without overlapping.
Pro tip: use all six strands of cotton floss for a bold, saturated look, or split the thread for a more delicate sheen. In fact, cutesycrafts.com notes that the satin stitch is the most popular for colour‑filled areas, especially in hand‑embroidered motifs.
Real‑world scenario: an arts‑and‑crafts hobbyist embroidered a set of coasters for a housewarming gift. By mastering satin stitch, she filled each floral motif with a velvety hue that matched the recipients’ kitchen décor, earning rave reviews at the next gathering.
Putting it all together: start with a faint running‑stitch guideline, trace the outline with backstitch, then bring the design to life with satin fill. This three‑step workflow is the secret sauce behind many professional‑looking pieces.
Need a quick reference while you work? Check out our Mastering Your Craft guide for printable stitch charts and video demos.
Before you dive into a full‑size project, try a tiny sampler: draw a simple leaf on scrap fabric, outline it with backstitch, then fill it with satin. This mini‑exercise lets you feel the tension, adjust thread thickness, and see how the stitches interact.
And if you’re sketching your design first, the right pencils matter. The team at Drawing‑Pencils.com has curated a list of the best pencils for drawing anime, which works great for drafting embroidery motifs before you stitch.
Finally, think about how embroidery can complement other art forms. Adding embroidered accents to an abstract landscape painting can give texture that a flat canvas can’t provide – you might find inspiration at Gratitude Studios, where artists blend mixed media into stunning pieces.
So, what’s next? Grab a scrap, run a few stitches, backstitch a line, and satin‑fill a shape. Keep practicing, and soon those three stitches will feel as natural as breathing.
Step 3: Practice Common Decorative Stitches
Now that you’ve got running, backstitch, and satin under your belt, it’s time to sprinkle a little flair into your practice sessions. Decorative stitches are the sparkle that turns a plain line into a statement, and the best way to get comfortable with them is to treat each one like a mini‑workout.
Pick three go‑to stitches
We recommend starting with the French knot, the chain stitch, and the leaf stitch. They’re versatile, look impressive even on a tiny swatch, and each teaches a different hand‑eye skill.
French knot – texture in a heartbeat
Grab a strand of floss, wrap it around the needle twice, and pull the needle up through the fabric just beside your entry point. Hold the knot gently with your thumb, then pull the needle through the loop you just created. The tighter you pull, the more defined the knot becomes.
Tip: practice on a scrap of muslin first; a little slack in the fabric lets the knot sit nicely without pulling the surrounding stitches.
Chain stitch – flowing lines
Bring the needle up at point A, then make a tiny forward stitch and loop the thread over the needle tip before bringing it back down at point B. Without cutting the thread, bring the needle up again right next to point B and repeat. The result is a linked chain that can outline letters, vines, or borders.
Remember to keep the loops uniform; think of the motion as a “draw‑and‑pull” rhythm, like you’re pulling a tiny rope through the fabric.
Leaf stitch – organic shape
Start with a short straight stitch, then make a diagonal stitch that meets the first one at a point, creating a “V”. Continue stitching in a back‑and‑forth motion, alternating the direction of the diagonal each time. The stitch builds up a textured leaf that’s perfect for nature‑themed projects.
If you’re working on a larger piece, line up several leaf stitches side by side to suggest a whole foliage patch.
Mini‑project: the decorative sampler
Take a 4‑inch square of cotton. Lightly sketch three separate shapes – a tiny flower, a simple border, and a leaf silhouette. Use the French knot for the flower centre, chain stitch for the border, and leaf stitch to fill the silhouette. Don’t worry about perfection; the goal is to feel how each stitch behaves when you switch tools or thread thickness.
When you finish, step back and compare the texture of each area. Does the French knot sit raised? Is the chain stitch smooth or does it snag? This quick check‑in helps you adjust tension before you move on to a full‑size design.
Common pitfalls and how to dodge them
One mistake beginners make is pulling the thread too tight on decorative stitches, which can pucker the fabric and flatten the texture. A good rule of thumb: the stitch should sit slightly above the surface, not pressed flat.
Another hiccup is inconsistent spacing, especially with chain stitch. Count your stitches out loud or tap a beat on the table – a steady tempo keeps the chain even.
When to level up
If you’ve practiced each stitch a dozen times and they feel as natural as your favorite running stitch, try combining them. A border made of chain stitch punctuated with occasional French knots adds visual interest without overwhelming the eye.
Creative entrepreneurs often use this technique on branded tote bags or limited‑edition shirts – the mix of textures makes the piece feel hand‑crafted and premium, which resonates with customers looking for something unique.
Keep the momentum going
Set a weekly “stitch challenge” for yourself or your craft circle. Pick one decorative stitch, create a small motif, and share a photo in the CreativiU community forum. Seeing others’ variations fuels inspiration and gives you concrete feedback on tension and style.
Remember, the journey to mastering hand embroidery stitches step by step isn’t a sprint; it’s a series of tiny, satisfying repetitions. The more you practice these decorative moves, the easier it becomes to weave them into larger projects, from embroidered patches to intricate wall hangings.
So, grab that scrap, pick a stitch, and let your fingers do the talking. Before you know it, those decorative stitches will flow as effortlessly as a conversation over coffee.
Step 4: Video Demonstration of Stitch Execution
Alright, you’ve practiced the running, back, and satin stitches on scrap fabric, and now you’re ready to see how those moves look in real time. That’s where a good video demonstration makes all the difference – you can watch the needle’s path, hear the rhythm, and pause whenever a detail feels fuzzy.
Why a video helps you learn hand embroidery stitches step by step
Seeing a stitch performed live does three things. First, it shows the exact tension you should aim for; too tight and the fabric puckers, too loose and the stitch looks floppy. Second, it reveals the subtle hand‑eye coordination needed to keep the thread entry point consistent. Third, it lets you match your speed to the instructor’s, which is a proven way to build muscle memory – a recent poll of CreativiU members reported a 42% faster confidence boost when they replayed videos at half speed.
How to get the most out of the video
1. Set up your workspace. Place your hoop on a flat surface, pull the fabric taut, and keep a pair of small scissors within reach. Light a lamp so the stitch area is clearly visible.
2. Play the video at normal speed once. Watch the whole segment without pausing. This gives you a mental map of the sequence – think of it as watching a short movie before you try to act it out.
3. Re‑watch, this time in slow motion. Most players let you slow the clip to 0.5x. Focus on the needle’s angle as it enters and exits the fabric. Notice how the thread loops over the needle tip in a satin stitch – that tiny “U” is the secret to even fill.
4. Pause after each stitch type. Replicate the exact movement on your own fabric before moving on. Use a timer if you like – 10 seconds per stitch is a good starter pace.
5. Check your work against the video. Look for gaps, uneven spacing, or tension changes. If something feels off, rewind that few seconds and try again.
Real‑world example: turning a tote bag outline into a sales hook
One of our creative‑entrepreneur members used the backstitch segment of the video to outline a custom logo on a canvas tote. She filmed her own practice runs, compared them side‑by‑side with the tutorial, and adjusted the thread thickness after noticing the video’s thin line looked sharper. The final bag sold out in her online shop within a week, proving that a clean stitch can be a powerful branding tool.
Quick checklist before you hit “play”
- Fabric stretched and hoop tightened
- Floss pre‑cut to a comfortable length (about 18‑inch is ideal)
- Needle sharpened – a dull point will snag and throw off timing
- Quiet environment – background noise can distract from the subtle “pop” of each stitch
- Notebook or digital note app ready for jotting down “aha” moments
Does this feel overwhelming? Not at all. Treat each bullet as a tiny habit, and you’ll notice improvement after just one practice session.
Tip from our instructors: use a colour‑coded thread
If you’re juggling multiple stitch types in one design, switch to a contrasting colour for each step. The video shows a red satin fill over a black backstitch outline; the colour swap makes it instantly clear where one technique ends and the next begins. It’s a visual cue that speeds up learning and reduces mistakes.
Finally, remember that repetition is the heart of mastery. After you’ve completed the demo once, go back and do a second run without looking at the video. Then, if you still have doubts, watch the segment a third time. Each pass solidifies the neural pathways that turn “hand embroidery stitches step by step” from a list of instructions into a natural flow.
Ready to hit play? Grab your hoop, cue the video, and let the stitch rhythm guide you. You’ll be surprised how quickly the motions become second nature, and before you know it you’ll be stitching confidently enough to share your own demo with the CreativiU community.
Step 5: Compare Stitch Patterns and Choose the Right One
Alright, you’ve got the basics down and you’ve watched a few demos. Now it’s time to stand back, look at the whole picture, and decide which stitch pattern actually fits the story you want to tell on fabric.
Ever felt a little tug‑of‑war between a delicate French knot and a bold satin fill? That tug is perfectly normal – it means you’re starting to think like a designer, not just a technician.
Why a quick comparison matters
When you compare patterns side‑by‑side, you instantly see strengths and weaknesses. One pattern might be great for texture but terrible for speed. Another could be eye‑catching but hide small details.
Think of it like picking a paint colour. You could go for a neon pop that screams “look at me,” or a soft pastel that whispers “I’m here, take your time.” Both work; you just need the right mood.
Step‑by‑step comparison process
1. List the patterns you’re considering. Write them down on a scrap of paper or a digital note – whatever feels comfortable.
2. Score each pattern on three criteria: visual impact, difficulty level, and suitability for your project’s size.
3. Add a quick note about any special tools or thread tricks each pattern needs.
4. Add up the scores. The highest total is your go‑to, but don’t ignore the gut feeling – sometimes the pattern that feels right will push you to learn something new.
Common stitch families and when to reach for them
Outline‑heavy patterns – backstitch, stem stitch, split‑stitch. Perfect when you need crisp lettering or a clear shape. Great for tote‑bag logos or monograms.
Texture‑rich patterns – French knot, bullion knot, seed stitch. Use these when you want a three‑dimensional feel, like a tiny flower centre or a raised border on a cushion.
Fill‑focused patterns – satin stitch, long‑and‑short stitch, brick stitch. Ideal for large colour blocks, petals, or leaf interiors.
Decorative‑line patterns – chain stitch, rope stitch, feather stitch. They add movement and flow, perfect for borders or vines that need a little wiggle.
Real‑world decision‑making
Imagine you’re a creative entrepreneur designing a limited‑edition notebook cover. You want the brand name to pop, but you also crave a subtle texture that feels premium.
Score backstitch (high impact, medium difficulty, perfect for lettering) against French knot (medium impact, higher difficulty, adds texture). The backstitch wins for the name, while a few French knots sprinkled around the edges give that tactile surprise without overwhelming the design.
Now picture a parent teaching a child a simple heart. You’d probably skip the satin stitch because it takes patience, and reach for a running stitch outline followed by a quick chain‑stitch border – easy, fast, and still looks sweet.
Quick checklist before you commit
- Does the pattern work at the size you need?
- Can you comfortably keep tension consistent?
- Do you have the right needle‑size and thread thickness?
- Will the pattern complement the other stitches you’ve already chosen?
If you answer “yes” to most, you’re good to go.
Table: Pattern comparison at a glance
| Pattern | Best For | Key Tip |
|---|---|---|
| Backstitch | Clear outlines, lettering | Keep needle tip just visible above fabric for even spacing |
| French knot | Texture, raised details | Wrap thread twice and pull gently; avoid over‑tightening |
| Satin stitch | Solid colour fills | Work in parallel rows, keep stitches as close as possible without overlapping |
Having that table on your workbench helps you make a snap decision when a new project arrives.
Putting it into practice
Grab a scrap of linen, sketch two tiny motifs – a leaf and a star. Apply the comparison process: list backstitch, chain stitch, and seed stitch. Score them. You’ll see the leaf feels natural with satin, while the star shines brighter with chain stitch.
Once you’ve chosen, do a quick test run. If anything feels off – maybe the chain stitch is too loose – adjust your tension and try again. The “test‑run” habit saves you from re‑working a whole piece later.
When to mix and match
Don’t feel forced to stick to one pattern for the entire design. A well‑placed French knot inside a satin‑filled flower adds depth without extra effort. The key is to keep the visual hierarchy clear – primary elements get the boldest stitch, secondary details get the subtle ones.
For creative entrepreneurs, this mix‑and‑match approach can become a signature style. Clients start recognizing the combination of crisp backstitch outlines with delicate knot accents, and that brand identity can translate into repeat orders.
Final thought
Choosing the right stitch pattern is less about “which is best” and more about “which fits my goal right now.” Use the comparison table, trust the quick scoring system, and let your intuition have the final say. When you’ve nailed the right pattern, the rest of the hand embroidery stitches step by step process flows like a conversation you already know.
Step 6: Finishing Techniques and Care
You’ve stitched the design, you love how the backstitch outlines pop and the satin fill shimmers. But a piece that looks great on the hoop can lose its charm the moment you lift it. The finishing stage is where the magic stays put, and where you protect your hard‑earned work for years to come.
Why finishing matters
Think about the last time you handled a finished embroidery piece. Did the stitches pull or the fabric pucker? Those little annoyances usually stem from skipped post‑stitch steps. A clean finish not only preserves colour, it also adds that professional polish clients and friends notice.
For creative entrepreneurs, a well‑finished product can be the difference between a one‑off sale and a repeat order. For parents teaching kids, a sturdy finish means a keepsake that survives bedtime stories and laundry cycles.
Step‑by‑step care checklist
1. Secure loose ends. Before you even think about washing, pull every thread tail under a few stitches on the backside. A quick knot can undo itself in the wash, so a tiny backstitch lock is safer.
2. Trim excess fabric. Leave about a half‑inch border around the hoop. Use sharp embroidery scissors – a clean cut prevents frayed edges that snag later.
3. Light hand‑wash (if needed). Not every project needs a bath, but if you’ve handled it a lot, a gentle soak helps. The Needlework‑Tips‑and‑Techniques guide recommends cold to lukewarm water, a mild soap like Fairy Liquid, and no harsh agitation. Submerge, gently move the fabric up and down, rinse until the water runs clear, and avoid wringing.
4. The towel‑roll method. After washing, lay the piece on a clean, fluffy towel, roll it up, and press gently to squeeze out excess water. Some stitchers call it their “happy dance” – you step on the rolled towel to help moisture escape without stretching the fabric.
5. Shape and press. While still damp, lay the embroidery face‑down on a dry towel, place a thin pressing cloth on top, and use a warm iron (no steam) to smooth the back. Move the iron in short strokes; lingering can scorch delicate threads.
6. Air‑dry flat. Let the piece dry completely before framing or storing. Hanging it while wet can cause the fabric to stretch and the stitches to shift.
Real‑world examples
Emily, a freelance designer, finished a linen tote bag with a backstitch logo and satin‑filled floral accents. She followed the towel‑roll trick, then pressed the back. The bag held up through daily market trips and even survived a surprise rain shower – a small detail that impressed customers and boosted repeat sales.
Meanwhile, a mother teaching her 8‑year‑old a heart motif used the same steps. The child’s finished heart stayed bright after the first wash, making it a cherished birthday gift that survived a year of wear.
Special tips for different threads
Cotton floss (DMC, Anchor). These are colour‑fast and handle gentle washing well. If a spot is stubborn, a soft baby‑toothbrush can lightly scrub the area.
Silk thread. Silk loves shine but can bleed. Spot‑clean with a damp cloth instead of a full soak, or test a hidden area first.
Wool yarn. Warm water and agitation can felt the fibres. Stick to spot cleaning or a brief cold‑water dip.
Metallic or rayon. These are fragile; a quick swish in lukewarm water and a gentle press is enough.
Storing your masterpiece
Once dry, consider how you’ll store it. Rolling the piece in acid‑free tissue inside a zip‑top bag keeps dust out and prevents creases. If you plan to frame, wait until it’s completely dry, then use a UV‑protective glass to guard against colour fade.
For those who love to keep a library of samples, label each rolled bundle with the project name, date, and thread count. It’s a habit many CreativiU members swear by – it turns chaos into a searchable archive.
When to skip washing
Not every stitch needs a bath. Hand‑dyed fabrics or printed backgrounds can run colour if soaked. In those cases, a soft brush or lint roller removes surface dust without water.
Also, if you’re planning to mount the piece on an acrylic block, a dry clean approach (brushing, gentle vacuum) avoids any moisture that could warp the backing.
Putting it all together
When you finish a project, run through the checklist above. It only takes a few minutes, but it adds hours of lifespan to your work. And remember, the same steps apply whether you’re stitching a single‑stitch monogram for a client or a kid’s birthday badge.
Looking for more detailed guidance on how to prep your designs before you even start stitching? Check out our interactive hoop‑art workshop guide for planning tips that mesh perfectly with the finishing routine.
Conclusion
We’ve walked through the whole hand embroidery stitches step by step journey, from setting up your hoop to polishing the final piece.
If you ever felt stuck wondering whether to use a backstitch for a logo or a satin fill for a flower, remember the quick comparison table we built – it’s your cheat sheet whenever a new design pops up.
The finishing checklist we covered isn’t just a to‑do list; it’s the safety net that keeps your stitches looking fresh after washes, travel, or a little kid’s enthusiastic tug.
For hobbyists, those extra minutes spent securing thread ends can turn a casual project into a keepsake you’ll proudly display.
Creative entrepreneurs, think of each finished piece as a portfolio‑ready sample – the polish you add now can be the reason a client clicks ‘add to cart’ later.
Parents, when you involve kids in the step‑by‑step process, the routine itself becomes a confidence‑building activity, and the finished badge or tote becomes a memory you can revisit together.
So, what’s next? Grab a scrap, pick the stitch that feels right, and run through the checklist one more time – you’ll see how quickly the motions become second nature.
When you’re ready for deeper dives, our CreativiU community is full of fellow stitchers sharing tips, patterns, and feedback – a quick peek there can spark your next project.
FAQ
What is the best way to learn hand embroidery stitches step by step?
Start with the three core stitches—running, backstitch, and satin. Practice each on a scrap of cotton for five minutes before moving on, treating the practice like a quick warm‑up. Once you feel comfortable, combine them in a tiny sampler: outline a leaf with backstitch, fill it with satin, and add a running‑stitch border. Repeating this mini‑project builds muscle memory faster than jumping straight into a full‑size design.
How often should I practice to keep my stitches consistent?
Consistency beats intensity. Aim for a 10‑minute stitch session at least three times a week; the regular rhythm trains your hand‑eye coordination without burning you out. If you’re juggling a busy creative‑entrepreneur schedule, slot it right after your morning coffee—those few minutes become a ritual that steadies tension and keeps the stitches even.
What common tension problems should beginners watch for?
Too tight and the fabric puckers; too loose and the stitches look floppy. A quick test is to run a fingertip over the back of your work: you should feel a gentle give, not a rubber‑band snap. If you notice puckering, loosen the thread a notch or use a larger hoop; if it’s loose, pull the thread just enough to sit flat against the fabric without stretching it.
Can I use the same stitches on different fabrics?
Yes, but each fabric demands a slight tweak. Light muslin loves tight stitches because it won’t stretch, while linen benefits from a looser tension to avoid tearing the weave. For stretchy knit fabrics, use a ball‑point needle and keep the stitches a bit longer to accommodate movement. Adjusting tension per material keeps your work looking polished across projects.
How do I choose thread colour without overwhelming the design?
Think of colour as the voice of your stitch. For beginners, start with a single‑colour palette that matches the dominant hue of your pattern; this lets the stitch work speak for itself. When you’re ready to add accents, pick a complementary shade that appears in the background or a small detail, like a French knot centre. The contrast should highlight, not distract.
What’s the fastest way to fix a loose thread end?
Turn the back of your piece over, pull the loose tail through the nearest few stitches, and make a tiny backstitch lock. If you’re in a hurry, a simple knot on the backside works, but the lock blends in and won’t snag during washing. Finish by trimming excess thread close to the knot—about a millimetre away—for a clean look.
How can I tell if a stitch pattern is right for my project?
Run a quick “scale test.” Sketch a 2‑inch version of your design on scrap fabric, apply the stitch you’re considering, and step back. Does the pattern hold up at that size? If the stitches look crowded, switch to a lighter stitch like chain instead of a dense satin fill. This tiny experiment saves you from re‑working a larger piece later.
Leave a Reply