Polymer clay keychains look like pro‑level jewelry, but you can make them at home in under an hour. The secret? A short list of tools, a 20‑minute bake, and a few design tricks. In this guide you’ll walk through every step, from gathering supplies to attaching the final hardware, so you end up with a sturdy, eye‑catching keychain you can gift or sell.
Step 1: Gather Materials and Tools
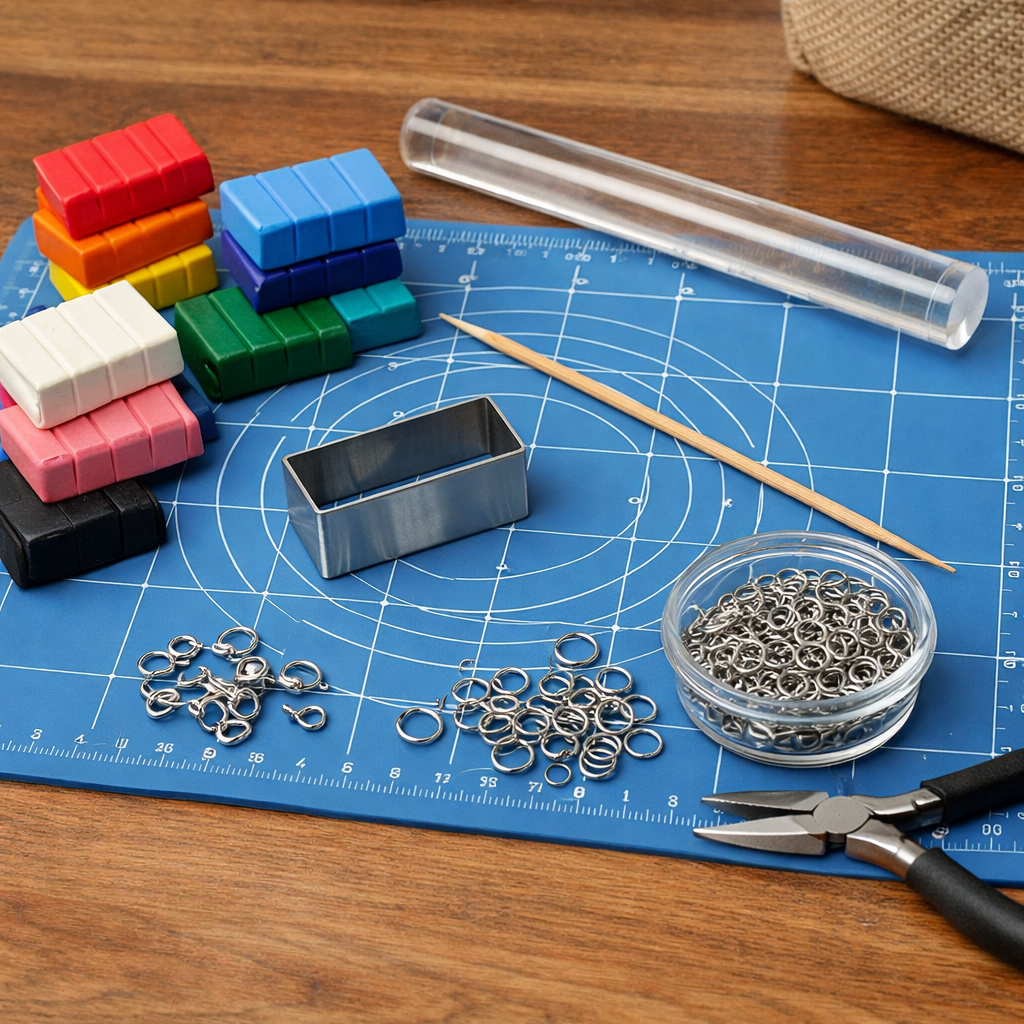
Before you start, set up a tidy workspace. A clean surface protects the clay and makes cleanup easier. Lay down a silicone mat, a sheet of parchment paper, or a metal baking tray covered with a non‑stick mat. This barrier keeps the clay from sticking and saves you from a mess later.
The core supplies you’ll need are simple. Pick a soft, easy‑to‑condition polymer clay such as Premo or Sculpey Soufflé. Both brands stay pliable and bake hard, which is why they’re popular with beginners. You’ll also want a rolling pin or acrylic roller, a sharp knife or clay cutter, a skewer or needle‑tool for making the keyhole, jump rings and a pair of needle‑nose pliers. A kitchen oven works fine; just have an oven thermometer on hand to keep the temperature spot‑on.
Here’s a quick checklist you can print out:
- Polymer clay (Premo, Soufflé, or a mix)
- Acrylic roller or rolling pin
- Clay cutter or cookie cutter (round, 1, 2 inches)
- Skewer or needle‑tool
- Jump rings (7 mm works for most keys)
- Needle‑nose pliers
- Parchment paper or silicone mat
- Oven thermometer
Choosing the right clay matters. The polymer‑clay brand guide explains that soft “good stuff” clays like Premo and Soufflé give the best mix of strength and ease of conditioning, while harder options such as Cernit are overkill for tiny charms.
Hardware also comes in a few varieties. The latvia hardware catalog lists affordable jump rings, split rings, and clasp options. Pick a nickel‑free jump ring if you plan to sell the keychains , it avoids skin irritation.
Step 2: Condition and Color the Clay
Conditioning warms the clay, moves the plasticizers, and wipes out cracks. Even a soft block benefits from a quick knead. Grab a handful, roll it into a ball, then press it flat with your hands. For tougher brands, give it a few firm pats with a rolling pin. The goal is a smooth, pliable sheet that bends without snapping.
Many creators use a pasta machine to speed the process. Feed the clay through the thickest setting a few times, then fold it in half and run it again. Repeat 20‑30 passes. If you don’t own a machine, an acrylic roller works just as well , just keep the pressure even.
Now comes the color work. Decide on a base hue for the keychain body and pick a few accent colors for decoration. You can blend two shades together to get a custom tone. For example, mix a tiny amount of white into a deep blue to soften the shade. Remember that most clays darken a few shades when baked; Premo is known for a 2‑6 shade shift, so you may want to start a notch lighter.
When you’re happy with the color, roll each batch into a flat slab about ¼ inch thick. Use a ruler to keep the thickness even , a uniform slab bakes more predictably and reduces the risk of warping.
For a quick reference, see the condition‑polymer‑clay guide. It breaks down the steps for Premo, Kato, and Fimo Professional, noting that hand‑conditioning works fine for softer clays.
If you’re new to polymer clay, the step‑by‑step polymer clay guide for beginners provides additional tips on conditioning and coloring.
“Conditioned clay feels like soft play‑dough and never cracks when you fold it.”
Step 3: Shape the Keychain Base
With a conditioned slab ready, it’s time to cut the base shape. Most keychains are round or rectangular, about 1, 2 inches across. Use a cookie cutter or a sharp X‑Acto knife to trace the outline onto the clay. Press down firmly and cut cleanly; a jagged edge will need sanding later.
If you prefer a custom silhouette, draw the shape on a piece of paper, tape it to the clay, and trace around it with a needle‑tool. Then cut along the line. Remember to leave a small lip around the edge , this gives the piece extra strength once baked.
Next, make the keyhole. Insert a skewer or a thin needle‑tool at the center of the base and twist gently to create a clean hole just big enough for a 7 mm jump ring. A hole that’s too tight will stress the clay during use; too large and the ring will wobble.
Before you bake, give the piece a quick visual check. The surface should be smooth, the edges even, and the hole centered. If you spot any bumps, smooth them with a fingertip or a silicone tool.
Here’s a short video that shows the cutting and hole‑poking process in action:
After the cut, set the piece aside while you work on decorative elements. The base will hold its shape as long as you keep handling it gently.
Step 4: Add Decorative Elements
Decoration is where the keychain becomes personal. You can layer colors, roll tiny beads, or press patterns into the surface. Below is a quick comparison of three popular methods.
For a simple yet striking look, try the bead roll‑and‑slice technique. Roll a small amount of clay into a thin rope, then slice it into 1‑mm pieces with a plastic cutter. Press each slice onto the base, overlapping slightly for a marbled effect.
If you like crisp lines, cut tiny shapes from a contrasting color and press them onto the base with a dotting tool. You can also use a toothbrush or a piece of lace as a texture tool , just roll the clay thin, lay the texture over it, then press gently.
When you’re done adding details, smooth the surface with a soft fingertip or a silicone roller. This removes fingerprints and blends the edges of your decorations.
Remember that white or translucent clays can scorch easily, so keep the bake temperature in check. Sculpey’s official rolling guide notes that a smooth, even sheet reduces the chance of hot spots that cause burns.
Step 5: Bake, Finish and Attach Hardware
The bake is the only time‑heavy step, but it’s straightforward. Preheat your oven to 130 °C (266 °F). Use the oven thermometer to verify the temperature , ovens often run hot or cold.
Place the keychain slab on a piece of plain parchment paper on a baking tray. Avoid foil or direct contact with a tile, as that can cause shiny spots on the underside. Bake for 20 minutes per ¼ inch of thickness. Since most keychain bases are about ¼ inch thick, a single 20‑minute bake works.
After the timer dings, turn the oven off and let the piece cool inside the oven for a few minutes. This gradual cooling helps prevent cracking.
Once cool, inspect the piece. If you see any sharp edges, sand them with 400‑grit sandpaper, then move to 800‑grit for a smooth finish. A final polish with a soft cloth gives a subtle sheen.
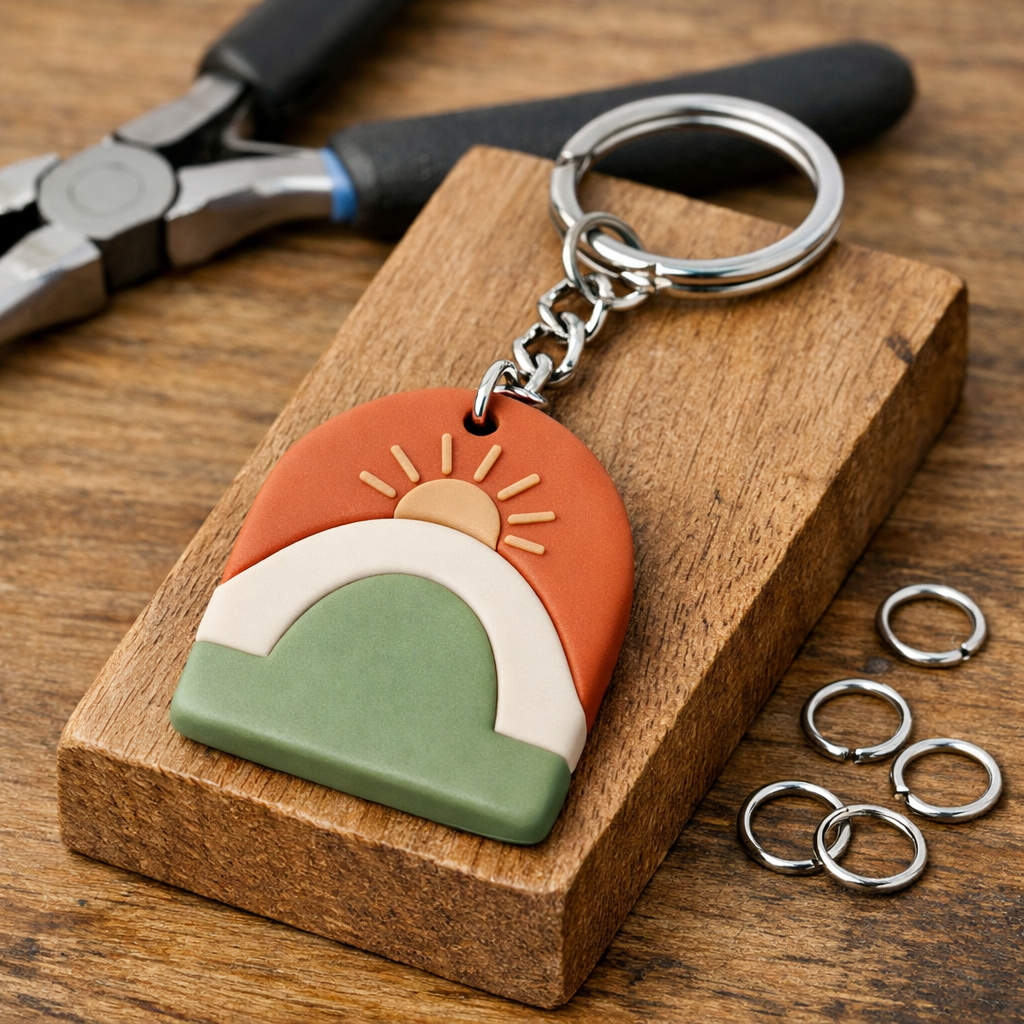
Now attach the hardware. Use the needle‑nose pliers to open the jump ring, slide it through the hole you made, and then close it with a firm twist. If you want a more secure attachment, you can apply a dab of clear epoxy glue on the underside of the ring before closing. For more ideas on creating decorative metal accents, see the custom stamped metal jewelry tutorial.
For a final protective coat, brush a thin layer of clear varnish or UV resin over the baked piece. This seals the surface, adds extra shine, and guards against wear.
Tips & Troubleshooting
Even with careful steps, issues can pop up. Air bubbles are a common culprit. They form when air gets trapped during conditioning or when you press decorations too hard. To pop a bubble, use a sharp needle‑tool to gently pierce it, then smooth the area with a fingertip.
If your keychain cracks after baking, it may be under‑baked or too thick. Test the bake by inserting a small test chip on the tray; bend it after cooling. If it snaps, give the piece another 10‑minute bake.
Color shift is another surprise. Premo and Cernit tend to darken more than other clays. To compensate, mix a lighter shade or bake at the lower end of the recommended temperature range.
Sticking to the work surface can be frustrating. A silicone mat or a sheet of tempered glass works well as a barrier. If the clay still clings, dust the surface lightly with cornstarch before rolling.
When you run into a problem, pause and check the basics: is the clay fully conditioned? Is the oven temperature accurate? Is the thickness within the recommended range? Most errors trace back to one of these three factors.
Frequently Asked Questions
Can I use air‑dry clay instead of polymer clay?
You can, but air‑dry clay is more fragile once it hardens. It tends to crack under the stress of daily key‑chain use, especially around the hole where the jump ring sits. If you do use air‑dry clay, keep the pieces thin and reinforce the hole with a metal ring before attaching hardware.
What temperature should I bake the keychain at?
Most polymer clays bake best at 130 °C (266 °F). Check the brand’s packaging for exact numbers, then use an oven thermometer to confirm. Baking too hot can scorch the clay, while too low a temperature leaves it soft and prone to breakage.
How do I keep the colors from darkening too much?
Start with a shade that’s one or two tones lighter than your final goal. Premo and Soufflé darken the least, so they’re good choices for light colors. Mixing a small amount of a darker clay can also balance the shift.
Can I add a resin coating for extra shine?
Yes. After the keychain has cooled, apply a thin coat of clear UV resin or a matte acrylic varnish. Let it cure according to the product instructions. This adds a glossy finish and protects the surface from scratches.
What if the hole I made is too tight for the jump ring?
Gently widen the hole with a needle‑tool or a fine‑point drill. Work slowly to avoid cracking the surrounding clay. If the clay cracks, sand the edges smooth, then re‑bake for an extra five minutes to harden the repaired area.
How can I store leftover polymer clay?
Wrap each color tightly in plastic wrap, then place it in a zip‑lock bag with a slice of fresh bread. Store the bag in a cool, dark drawer. The bread releases a tiny amount of moisture that keeps the clay from drying out.
Is it okay to mix different brands of clay?
Mixing brands is fine and often improves workability. For example, blend a little Premo with Sculpey Soufflé to get a softer feel without losing strength. Just condition the mixed batch thoroughly before shaping.
Do I need a special oven for polymer clay?
No special oven is required. A regular kitchen oven works well as long as you monitor the temperature with an oven thermometer and avoid using the convection setting unless the clay brand says it’s safe.
Conclusion
Making a polymer‑clay keychain is a rewarding craft that blends simple tools with a dash of creativity. You start by gathering the right supplies, condition the clay, shape a sturdy base, add personal décor, bake for a precise 20 minutes, and finish with hardware that turns a piece of clay into a functional accessory. The research shows that most makers finish the whole workflow in under an hour, thanks to a focused material list and a single bake.
CreativiU offers a library of short courses that can help you brainstorm fresh designs before you even touch the clay. By pairing those ideas with the step‑by‑step method above, you’ll be able to produce keychains that look store‑bought, whether you’re gifting friends or building a small shop.
Grab your clay, fire up the oven, and let your imagination shape the next keychain you’ll carry every day.
Leave a Reply