Ever wanted to make a bouquet that never wilts? Felt flowers are soft, colorful, and last forever. With an online class, you can learn the whole process from your kitchen table. This guide walks you through seven steps, from gathering supplies to displaying your finished arrangement.
Step 1: Gather Your Essential Materials and Tools
Before you start, get the right supplies. You’ll need felt sheets in various colors, wool roving for wet felting, a hot glue gun, sharp scissors, a cutting mat, floral wire, and wire cutters. For wet felting, grab a bar of soap (olive oil soap works best), a spray bottle with water, a piece of bubble wrap, and a nylon netting.
If you have a cutting machine like a Cricut, you can cut precise felt pieces. But hand-cutting works too. Look for an online class that provides a detailed supply list , many include it in the first lesson. CreativiU‘s online felt flower class offers a downloadable checklist so you know exactly what to buy.
One tip from experienced felters: keep a lint roller handy to clean up loose fibers. Also, consider setting up a solar-powered LED lamp for your workspace , it’s eco-friendly and reduces eye strain.
Step 2: Choose Your Flower Patterns and Templates
Now pick what flowers you want to make. Beginners should start with simple roses or daisies. Many online classes, including CreativiU’s, include printable PDF templates you can download, and for a deeper dive into textile crafts, master fiber art with these inspiring online classes. You can also find free patterns on sites like online craft blogs, which often show five different felt flower styles.
If you’re using a cutting machine, import SVG templates into your design software. Adjust blade settings for felt , typically a depth of 2-3 with a rotary blade works well. The right pattern makes all the difference, so pick one that matches your skill level.
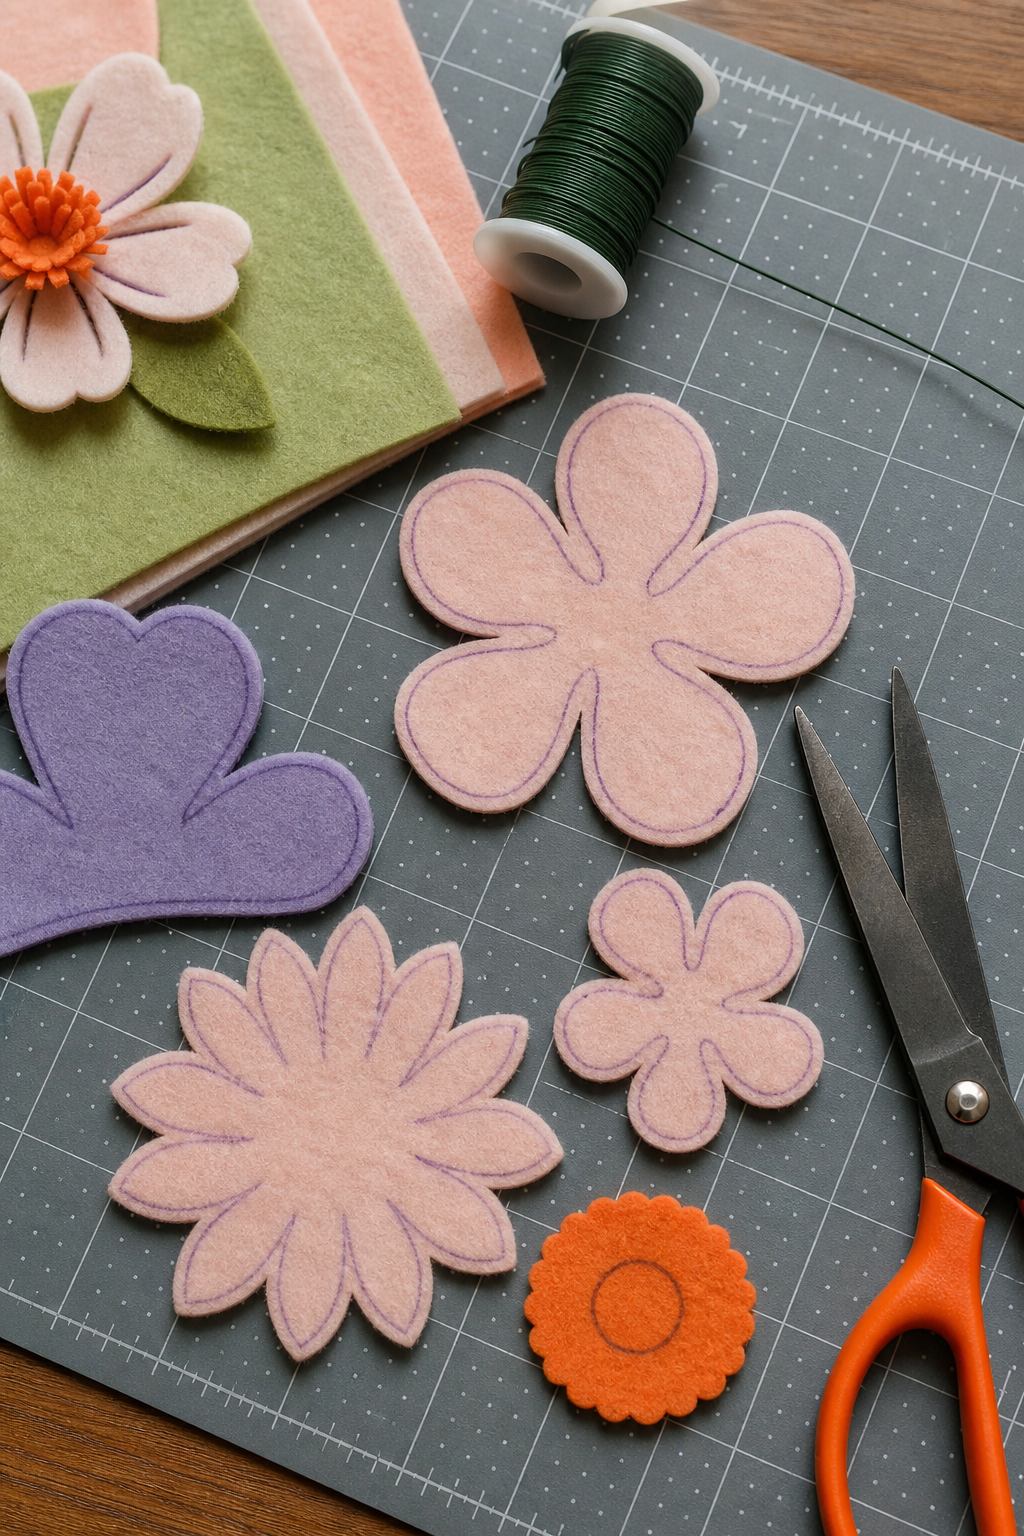
Step 3: Cut and Shape Your Felt Pieces with Precision
Lay your felt flat on a cutting mat. Use a rotary cutter for long straight cuts, and fine-tip scissors for small curves. If using a Cricut, load the felt onto a strong-tack mat and set the machine to “felt” or “fabric” mode. For hand-cutting, trace your template with a water-soluble pen first.
After cutting, shape each petal by gently stretching or curling the edges. For roses, cut small rectangles and trim the corners into ovals , no need to be perfect. The technique is forgiving. Watch a YouTube tutorial for visual guidance, or better yet, enroll in CreativiU’s class where each cut is demonstrated in high-definition video.
One common mistake is cutting too fast , improve your time. A tiny snip can change the whole flower shape. If a piece doesn’t look right, cut another. Felt is cheap, so practice makes perfect.
Step 4: Master the Wet Felting Method for Lifelike Flowers
Wet felting is what gives felt flowers their soft, realistic texture. Start by pulling thin layers of wool roving , only the last centimeter off the top. Lay five petal shapes on bubble wrap (bubbles facing up), then add contrasting colors and silk tops for shine. Cover with nylon netting and wet it with soapy water.
Roll the bubble wrap around the flower and roll it back and forth about 30 times. Unroll, turn the flower, and repeat from all four sides , about 120 rolls total. This friction makes the wool fibers lock together. Rinse out the soap with cool water and blot dry. The result is a durable, natural-looking petal.
For stems, tear a long piece of wool roving, wrap it around a floral wire, and felt it by rubbing with soapy water. Experiment with different soap types: according to Wikipedia’s entry on wet felting, alkaline soaps can speed up the process but may weaken the fibers. A mild vegetable-based soap is safest.
Step 5: Assemble Your Flowers with the Right Adhesive
Now it’s time to put the pieces together. If you used wet felting, your petals are already felted together at the center. For cut felt flowers, use a hot glue gun. Apply a small dab at the base of each petal and press it onto the center. Work in layers , five petals for a rose, more for a full bloom.
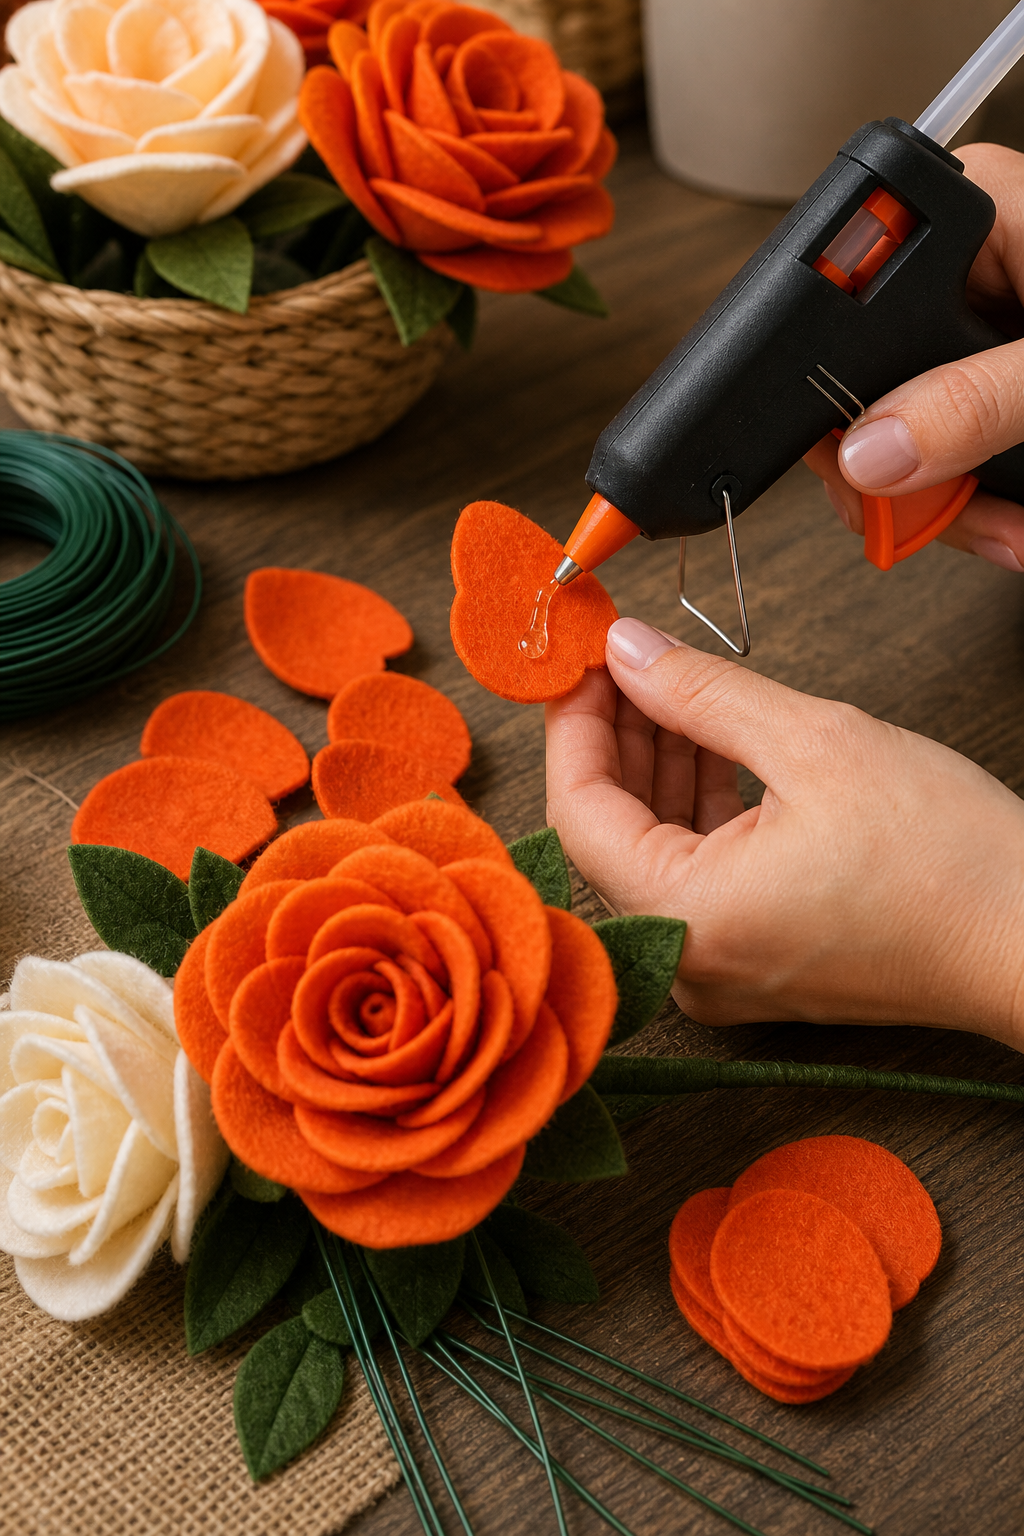
For stems, twist floral wire around the flower base and cover with a strip of felt. If you prefer a no-sew method, glue the wire directly. Compare adhesives: craft glue dries clear but takes longer; fabric glue is flexible but can be messy; hot glue gives instant hold and is easiest for beginners.
A quick test: glue two scrap felt pieces together and let them dry. Pull them apart , hot glue should hold firmly. If the glue seeps through, you’re using too much. Less is more.
Step 6: Arrange Your Bouquet like a Pro
Once you have a dozen or more flowers, arrange them into a bouquet. Start with a focal flower in the center, then add smaller blooms around it. Mix colors and sizes for depth. Use floral tape to bind the stems together. Wrap a ribbon around the base for a finished look.
For a unique display, consider placing your arrangement in a vase or using it as a centerpiece. Some crafters even incorporate felt flowers into wedding decor. If you’re planning a special event, event venues often feature custom floral arrangements; you could create your own felt flowers to match the theme, or even learn how to make realistic gumpaste sugar flowers for cakes.
Don’t forget leaves! Cut green felt into leaf shapes and attach them to the stems. They add realism and cover the taped areas. Stand back and adjust until the arrangement looks balanced from all angles.
Step 7: Display and Care for Your Felt Flower Arrangement
Felt flowers are low-maintenance. Dust them gently with a soft brush or use a lint roller. Keep them out of direct sunlight to prevent fading. If they get squished, reshape the petals by hand or use a steamer on low heat.
Display your bouquet in a dry spot , moisture can cause mold on the felt backing. A glass vase works great. If you’re selling your creations, consider photographing them on a clean background and creating a website. A professional online presence helps you reach more customers. For that, a professional website development service can help you build a brand and showcase your handmade items.
Share your work on social media with hashtags like #feltflowers #DIYfeltflowers. Join online communities to get feedback and inspiration. Many online classes, including CreativiU’s, have private Facebook groups where students share their progress.
Frequently Asked Questions
How long does it take to make a felt flower arrangement?
It depends on the size. A small bouquet of five flowers takes about 2-3 hours. A larger arrangement like a teddy bear bouquet can take 10-15 hours. Plan to spread it over a few days.
What is the best felt for flower making?
Acrylic felt is budget-friendly and cuts cleanly. Wool blend felt is softer and feels more natural. For wet felting, use pure wool roving. Each type gives a different look, so experiment.
Do I need a cutting machine for felt flowers?
No. Hand-cutting with sharp scissors works fine. A cutting machine speeds up production if you’re making many flowers, but beginners can start without one.
Can I wash felt flowers?
Spot clean only. Submerging felt in water can cause shrinking or distortion. Use a damp cloth and mild soap for stains, then air dry.
Where can I find an online class for felt flower arrangements?
CreativiU offers a complete online class with step-by-step video lessons, printable patterns, and community support. You can start anytime and learn at your own pace.
Now you have all the steps to create a beautiful, everlasting felt flower arrangement. Pick a pattern, gather your supplies, and start crafting. Consider joining an online class like CreativiU to learn advanced techniques and connect with other crafters. Your first bloom is just a few cuts away.
Leave a Reply