Ever stared at a blank canvas, feeling that mix of excitement and dread because you have no clue how to start a fluid masterpiece?
We’ve all been there – the paint tubes stare back, the brushes feel heavy, and the idea of “pouring” sounds both magical and intimidating. That’s why mastering acrylic pouring techniques for beginners is the perfect low‑pressure entry point into the world of abstract art.
In this guide, I’m going to walk you through the basics, share the little tricks that make the difference, and show how you can turn a simple kitchen table into a mini‑studio without spending a fortune.
First, think about why you picked up a brush in the first place. Maybe you wanted a calming ritual after a hectic day, or perhaps you’re a creative entrepreneur looking for fresh content to showcase on social media. Whatever your motive, the beauty of acrylic pouring is that it lets you relax while the paint does most of the work.
So, what do you need? At the core, it’s just a few acrylic paints, a pouring medium, and a container for mixing. You’ll also need a surface you don’t mind getting a little messy – a canvas, a wooden board, or even a sturdy piece of cardboard works great. The real secret? The ratios. Too much medium and the colors drift apart; too little and the paint clogs the flow.
Here’s a quick mental checklist: choose a color palette that makes you smile, mix each hue with the right amount of medium, and then let gravity take over. It sounds simple, but the first pour often feels like a tiny experiment, and that’s exactly the point.
Does it sound a bit chaotic? Maybe. But in our experience, that controlled chaos is what fuels creativity and helps beginners build confidence fast. You’ll start seeing patterns, learning how to tilt the surface, and discovering that every “mistake” is just a new texture to explore.
Ready to dive in? Grab your supplies, clear a space, and let’s start pouring. By the end of this article you’ll have a handful of reliable techniques, a few pro‑level tips, and the confidence to create vibrant, flowing artworks that feel uniquely yours.
TL;DR
Discover how acrylic pouring techniques for beginners let you create vibrant, fluid art with just a few paints, a pouring medium, and simple tilting tricks.
We break down the essential supplies, mixing ratios, and step‑by‑step pours so you can confidently start experimenting and turn every ‘mistake’ into a unique texture.
Step 1: Gather Your Materials
Alright, before the colors start dancing on the canvas, you’ve got to make sure you’ve got everything you need within arm’s reach. It’s kind of like setting up a coffee station before a big meeting – you don’t want to scramble halfway through.
Basic Supplies
Here’s the core list for acrylic pouring techniques for beginners:
- Acrylic paints – pick a palette that makes you smile.
- Pouring medium – the magic glue that keeps the paint fluid.
- Mixing cups and stir sticks – disposable ones work fine.
- Silicone oil (optional) – for those cool cells you see online.
- Protective gloves and a drop cloth – because spills are inevitable.
And don’t forget to wear something you won’t mind getting a little splatter on. I like to throw on a tee from IGZ Clothing – the graphics are art‑inspired, so if a paint droplet lands on it, it just becomes part of the design.
Choosing Your Surface
Canvas, wooden board, even sturdy cardboard will do. If you’re a parent looking for a low‑mess option for kids, a thick poster board works surprisingly well. The key is a surface that can handle a bit of weight and won’t warp when the paint settles.
Need more guidance on picking the right canvas size or board type? Our Getting Started with Online Acrylic Pour Painting Classes for Beginners breaks down the choices in plain language.
Mixing Your Medium
Now the fun part: combining paint and medium. A common ratio is 1 part paint to 2 parts medium, but you’ll tweak it based on how thick or runny you want the flow. Grab a cup, pour in the paint, add the medium, then stir slowly – you don’t want to introduce bubbles unless you’re chasing that cellular effect.
While you’re stirring, consider keeping a mug of fresh brew nearby. A smooth cup of Chilled Iguana Coffee can keep your hands steady and your mind focused. Trust me, the aroma alone can make the whole process feel like a mini‑ritual.
Once your colors are mixed, set them out in a row. This visual lineup helps you plan the pour sequence and avoid accidental color clashes.
Watch the short video above for a live demo of the mixing step – notice how the artist tilts the cup to keep the mixture smooth.
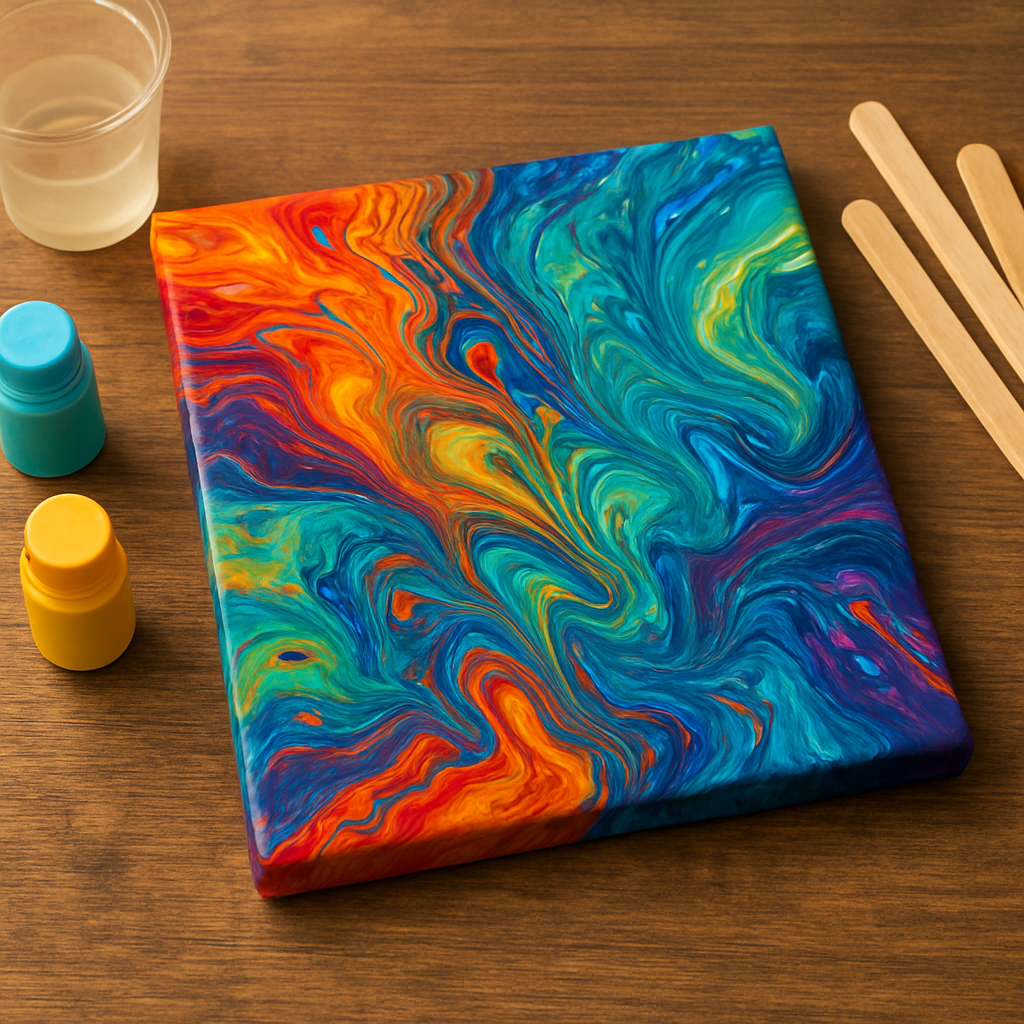
After the mix, it’s time to prep your workspace. Lay down a drop cloth, tape the edges of your canvas if you want clean borders, and keep a spray bottle of water handy to control drying time.
One tip we’ve seen work wonders for creative entrepreneurs is to set a timer for each pour phase. It adds a rhythm to the process and makes it easier to capture short clips for social media – a quick win for building an audience while you create.
Finally, double‑check that you’ve got everything: paints, medium, silicone (if using), gloves, cloth, coffee, and your favorite art‑themed shirt. When you’ve got the full kit, you’re ready to let gravity do the heavy lifting.
Step 2: Prepare Your Workspace
Okay, you’ve got the paints, the medium, the gloves – now it’s time to turn a corner of your home into a low‑mess, high‑fun studio. Think of it like setting up a kitchen for a new recipe: you want everything within arm’s reach, the floor protected, and the air fresh enough that you don’t start coughing mid‑pour.
First thing’s first: choose a flat, sturdy surface. A sturdy table or a sturdy piece of plywood works great. If you’re working on a wooden board, give it a quick wipe with a damp cloth to get rid of dust – that way the paint won’t cling to unwanted particles.
Cover the Floor and Surroundings
Drop cloths are the unsung heroes of acrylic pouring. A cheap canvas drop cloth (the cheap kind, not the artist’s) or a few layers of old newspapers will catch drips and protect your rug or hardwood. Lay it out with a little overlap so any stray splash has nowhere to escape.
Pro tip for creative entrepreneurs: if you’re filming a tutorial, a neutral‑colored backdrop (think white or light gray) doubles as a floor cover and a clean background for the camera. It keeps the focus on the colors, not the clutter.
Ventilation & Safety
Even though most pouring mediums are low‑odor, a quick air exchange helps keep the space comfortable, especially if you’re in a small apartment. Open a window, turn on a fan, or set up a small portable air purifier if you have one. And don’t forget the nitrile gloves – they’re cheap, disposable, and keep your hands from feeling like they’ve been in a paint factory.
Parents, a quick note: keep the workspace out of reach of curious kids and pets. A low table with a clear perimeter works well, and a simple “studio zone” sign can turn the area into a fun, designated art corner.
Arrange Your Tools Like a Chef
Lay out each cup, stir stick, silicone oil dropper, and any other tool in the order you’ll use them. I like to line them up on the drop cloth from left to right, so I can move from one color to the next without reaching over wet paint. This also reduces the chance of accidental spills on your hands or the floor.
For hobbyists who love a tidy aesthetic, a small tray or shallow box can act as a “tool station.” Slip the cups into the slots, keep the sticks upright, and you’ll have a portable pour‑station you can store away when you’re done.
Lighting Matters
Good lighting helps you see the subtle flow of the paint and the formation of cells. Natural daylight is ideal, but a bright desk lamp with a daylight‑balanced bulb works just as well. Position the light so it doesn’t create harsh glare on the canvas – you want to see the colors, not a white‑washed blur.
And if you’re filming, a softbox or ring light can double‑duty as both illumination and a nice visual cue for viewers.
Now that the space is set, let’s talk about the little “extras” that make a big difference.
Grab a small spray bottle of water – a quick mist can help the paint move smoother if it starts to thicken. Keep a paper towel or two nearby for any accidental drips; a quick dab saves a lot of cleanup later.
Finally, give yourself a mental “ready, set, go” moment. Take a breath, sip that coffee (or tea), and glance around your prepared zone. If everything feels within reach and the floor is covered, you’re good to go.
Here’s a quick visual recap of a well‑prepped workspace:
Notice the tidy layout, the drop cloth extending beyond the table edges, and the bright, even lighting. Replicate that vibe, add your own personality, and you’ll have a studio that feels both professional and welcoming.
Before you dive into mixing, do a quick “dry run”: fill each cup with a splash of water, swirl it with a stick, and watch how the liquid moves. If it splashes too far, adjust the distance between cups or add a small barrier of cardboard. This simple test saves you from a surprise flood when the real paint hits the canvas.
With the workspace set, you’re ready for the next step – mixing your colors to the perfect consistency. Trust the process, enjoy the set‑up, and remember: a well‑organized space is half the fun of acrylic pouring.
Step 3: Mix Your Paints and Mediums
Now that your studio looks like a sleek coffee shop and every tool is within arm’s reach, it’s time to get messy—in a good way. Mixing is where the chemistry meets the art, and trust me, a tiny tweak in consistency can turn a bland swirl into a vibrant river of color.
First, grab a clean plastic cup for each hue you plan to use. I like to line them up left‑to‑right, just like a chef arranges ingredients before a mise en place. It keeps the workflow smooth and stops you from reaching over wet paint, which—let’s be honest—usually ends in a splatter on the floor.
Pour a measured amount of acrylic paint into the cup. For beginners, a good rule of thumb is about one tablespoon of paint per color. Too much paint makes the mixture heavy, and the pour will clump; too little leaves you with a watery mess that never really sticks.
Next, add your pouring medium. If you’re using Floetrol, start with a 1:1 ratio—one part paint, one part medium. You can always adjust later; it’s easier to thin than to thicken. Give the cup a quick stir with a wooden stick. No need for a perfect vortex; just a gentle swirl until the paint and medium look like honey.
Here’s a little secret most beginners miss: a drop of silicone oil can create those coveted “cells” that make your piece look like a marble slab. Add 2‑3 drops per cup, then give it a light stir. Too much oil will make the paint separate, so keep it subtle.
Now, test the consistency. Dip a stir stick into the mixture and lift it. If the paint drips slowly like syrup, you’re golden. If it slides off the stick in a thin film, add a splash more medium. If it’s still too thick, a few drops of water can rescue it—just don’t go overboard, or you’ll lose the vibrancy.
For creative entrepreneurs, this is also a great moment to experiment with texture. Toss in a pinch of fine sand or a dab of modeling paste for a tactile surface. Kids love watching the sand swirl, and parents appreciate the extra sensory element.
Once each cup feels right, cover the tops with a small piece of plastic wrap. This keeps the mixture from drying out while you line up your canvas. If you’re working on multiple canvases, label each cup with a sticky note—trust me, you’ll thank yourself when the colors start looking alike.
Wondering where to go from here? If you’d like a structured walkthrough of these ratios and some video demos, check out Getting Started with Online Acrylic Pour Painting Classes for Beginners. The course breaks down the math in bite‑size lessons, perfect for hobbyists and busy parents alike.
When you feel confident with your mixes, give the cups a final shake—just a gentle tap on the table—to release any trapped air bubbles. Air bubbles can cause unwanted pinholes, and nobody wants a surprise crater in their masterpiece.
Finally, think about the end game. If your goal is to sell the finished pieces, consider the marketability of your color palette. Warm, cohesive tones often appeal to home‑decor shoppers, while bold, contrasting shades catch the eye on social media. After you’ve poured, a quick photo session can turn a single artwork into a whole line of products.
And if you’re serious about turning those pours into profit, you might want to explore some business basics. Lisa Nartey’s digital business webinars give you a step‑by‑step roadmap for building an online art shop, from pricing to promotion. It’s a handy complement to the creative side of things.
Take a breath, give each cup a final stir, and get ready to pour. The magic happens when the paint meets gravity, but the quality of that magic starts right here, in the mixing stage.
Step 4: Master Basic Pouring Methods
Alright, you’ve mixed your colors, covered the floor, and taken a deep breath. Now it’s time to let gravity do the heavy lifting.
There are three go‑to methods that work for most beginners: the flip cup, the dirty pour, and the swipe. Each one gives a different vibe, so you can pick the mood you’re feeling today.
First up, the flip cup. It’s the classic “let‑it‑fall” move that most people see on Instagram reels. Grab a cup of your mixed paint, lift it a few inches above the canvas, then give it a quick, confident flip.
Do you ever worry the paint will splash everywhere? Keep the cup close to the surface—no more than an inch or two—and let the paint hit the canvas in a smooth, controlled arc. The paint will spread outward, creating a natural, radial flow.
Tip: after the initial splash, tilt the canvas gently from side to side. That nudges the colors together and helps the cells form without over‑mixing.
Next, the dirty pour. If you want a more structured, stripey look, this technique is your friend. Start by arranging your cups in a line, each holding a different hue.
Then, using a spoon or a small spatula, drizzle a thin stream of each color across the canvas in a single motion. The result is a series of parallel ribbons that mingle as you tilt the board.
Don’t let the “dirty” name scare you—this method can be surprisingly elegant, especially with a limited palette of blues and greens. As the acrylicpouring.com article points out, a thoughtful color gradient can turn those stripes into a cohesive, calming wave on the page.
Feel the urge to over‑tilt? Resist it. A slow, steady tilt lets the paint flow naturally; a sudden jerky motion can break the cells you’ve been coaxing.
Finally, the swipe (sometimes called the “hand‑drag”). This one is perfect when you want bold, sweeping gestures. Pour a generous amount of paint in the center of the canvas, then use the back of a flat brush, a palette knife, or even a clean paint‑stir stick to drag the colors outward.
Think about it this way: you’re shaping the paint the same way you’d shape dough—press, pull, and let it stretch. The swipe works great for parents who want to involve kids because the motion is easy to explain and safe.
Pro tip: add a few drops of silicone oil to one or two colors before you swipe. The oil will create those coveted “cells” that look like tiny bubbles or marble veins.
Now, here’s a quick checklist you can keep by your side while you pour:
- Flip cup: cup, confident flip, tilt gently.
- Dirty pour: line up cups, drizzle in one motion, tilt slowly.
- Swipe: pour center pool, drag with tool, add silicone oil for cells.
Which method feels right for your current project? Maybe you’re after a calm ocean vibe—go dirty pour with blues and greens. Want an explosive burst of color? Flip cup will give you that radial drama.
Remember, acrylic pouring is part science, part happy accident. If a run looks messy, that’s often where the magic lives. In our experience, beginners who embrace the “oops” moments end up with the most interesting pieces.
Need a visual refresher? A short video walk‑through of these basics can be a handy reference while you work on YouTube. Pause, replay, and try the moves in real time.
When you finish, give the canvas a few minutes to settle before you tilt it any further. Let the paint find its final resting place, then step back and admire the flow.
And there you have it—three foundational pouring methods you can master in a single session. Play with each, note what you love, and soon you’ll have a toolbox of techniques that feel as natural as a conversation over coffee.
Step 5: Advanced Techniques and Effects
You’ve nailed the basics, so now it’s time to push the envelope. Advanced acrylic pouring feels a bit like discovering secret shortcuts in a video game – you already know the controls, but these moves let you level up quickly.
One of the first questions beginners ask is, “How do I get those crazy cells without ruining the whole piece?” The answer lives in two places: the tool you use and the consistency of the paint you feed it. A tiny drop of silicone oil in a slightly thinner mix will coax the paint to form bubbles that look like marble veins. Too much oil, though, makes the whole canvas look like a soap bubble disaster.
Strainer (Colander) Pour
Grab a metal strainer with large holes, set it on your canvas, and pour a dirty‑pour mixture through it. The paint streams out of each hole, creating a kaleidoscopic pattern that’s perfect for bold, graphic pieces. We’ve seen hobbyists use a kitchen colander to turn a simple blue‑green palette into a stunning ocean‑wave effect.
Pro tip: line the bottom of the strainer with a dab of hot‑glue. It forces the paint out the sides, giving you a cleaner, more defined cell structure.
Multi‑Canvas Stack
Stack three canvases, largest at the bottom, smallest on top. Pour a puddle onto the top canvas; gravity does the rest, letting the paint cascade down through each layer. When you separate the canvases, each one has a unique flow but shares a common color story. This technique works wonders for creative entrepreneurs who want a cohesive series for a shop display.
Remember to calculate paint volume – a quick rule is 1 ml of paint per square inch of canvas surface. Too little and the lower canvases stay mostly blank; too much and you get a soggy mess.
Bottle Pour
Cut the bottom off a plastic soda bottle, flip it upside‑down on the canvas, and pour a single color into the hollow. The ridges on the bottle create petal‑like ribs that fan out as the paint drips. Kids love the “paint flower” look, and parents appreciate the low‑mess, high‑wow factor.
After the paint settles (about two minutes), gently lift the bottle using a spoon to avoid drips. You’ll see a radial pattern that can serve as a base for a later web pour.
Web (Injection) Pour
Start with a base pour – any of the methods above works. Then, using a squeeze bottle, inject thin paint underneath the existing layer. The squeezed paint pushes through, forming delicate webbing. The key is a slightly thicker consistency for the injected paint; it will stay where you want it instead of diffusing immediately.
If you’re a parent guiding a child, let them control the squeeze bottle. The tactile action keeps them engaged and the result is often surprisingly sophisticated.
Negative Space Pour
Paint the entire canvas a solid background (black or white works best). Then, using a tiny cup, pour a small amount of vibrant color in one corner. Tilt gently – the bright paint spreads, but large sections of the background stay untouched, creating striking contrast.
This is a favorite among artists who sell prints; the bold negative space makes the artwork pop on digital marketplaces.
Below is a quick reference table to help you decide which advanced technique to try next.
| Technique | Key Effect | Best For |
|---|---|---|
| Strainer Pour | Kaleidoscopic, cell‑rich patterns | Graphic series, bold statements |
| Multi‑Canvas Stack | Unified color story across sizes | Art entrepreneurs, wall‑gallery sets |
| Bottle Pour | Petal‑like ribs, radial flow | Kids projects, quick focal points |
| Web Pour | Delicate webbing, layered depth | Complex compositions, mixed media |
| Negative Space | High contrast, minimalism | Print sales, modern décor |
Want a deeper dive into how these techniques fit into a broader learning path? Check out How to Get Started with Online Acrylic Painting Classes for Beginners – the guide walks you through each method with video demos and community feedback.
Finally, keep a simple checklist handy while you experiment:
- Test paint consistency on a scrap piece of cardboard.
- Measure silicone oil drops (2‑3 per cup).
- Set a timer for each step – 30 seconds for base pour, 10 seconds for web injection.
- Document the color ratios you used; a quick photo helps you replicate a winning combo.
In our experience, the most successful artists treat each new technique like a science experiment: hypothesis, test, observe, tweak. Embrace the “oops” moments – they often turn into the most interesting texture. Keep the curiosity alive, and soon you’ll have a toolbox of advanced acrylic pouring techniques that feel as natural as a coffee chat.
Step 6: Finishing Touches and Curing
Now that the paint has settled into those happy cells and swirls, you’re probably wondering: “Do I just walk away and call it done?” Not quite. The final minutes are where your pour transforms from a fun experiment into a piece you can actually hang.
First, give the canvas a gentle shake to release any stray air bubbles that might have lodged under the surface. You’ve probably seen those tiny pinholes appear on other artists’ works – a quick tap on the back of the canvas does the trick.
Next, it’s time to tidy up the edges. Grab a clean, damp brush or a soft paper towel and lightly swipe any paint that has crept onto the drop cloth. This isn’t about perfection; it’s about keeping the focus on the vibrant flow you just created.
Now, let’s talk about the actual curing process. Here’s a simple, step‑by‑step checklist you can keep on your studio wall:
- Leave the canvas flat in a dust‑free area for at least 30 minutes. The paint will continue to level out on its own.
- After the initial set, flip the canvas onto a clean rack or a piece of parchment paper. This helps the underside dry evenly and prevents unwanted sticking.
- Maintain a stable temperature between 68‑75 °F (20‑24 °C). Too cold and the paint stays tacky; too hot and it can crack.
- Avoid direct sunlight for the first 24 hours – UV can cause premature fading of the pigments.
- Give the piece a full 24‑48 hour cure before handling it heavily. The acrylic resin needs this time to reach its maximum hardness.
Does the idea of waiting feel frustrating? Think of it like baking a cake – you wouldn’t yank it out of the oven halfway through, right? Patience pays off with a glossy, durable finish that won’t peel off when you hang it.
For hobbyists who love a matte look, you can lightly sand the surface with 400‑grit sandpaper after the 48‑hour cure, then dust off the powder. For those who prefer a high‑shine finish, a quick swipe of a water‑based acrylic varnish adds depth and protects the cells from moisture.
Creative entrepreneurs, listen up: sealing your pour not only safeguards the artwork but also makes it look more “gallery‑ready” for online listings. A clear gloss coat catches the camera’s eye and can even boost perceived value when you sell prints or originals.
Parents, you’ll appreciate this tip: let the drying canvas sit on a low table that’s out of reach of curious hands. A simple sheet of cardboard underneath catches any drips and gives you a sturdy base, so you don’t have to chase runaway paint later.
One final detail many beginners overlook is the “curing environment.” A small humidifier in a dry room can prevent the paint from drying too fast on the surface, which sometimes leads to cracking. Conversely, a dehumidifier helps in overly damp climates. A quick glance at the humidity meter on your phone can guide you.
When the cure is complete, give the piece a gentle dust‑off and step back. You’ll notice the colors have settled into a richer, more cohesive whole – that’s the magic of proper curing.
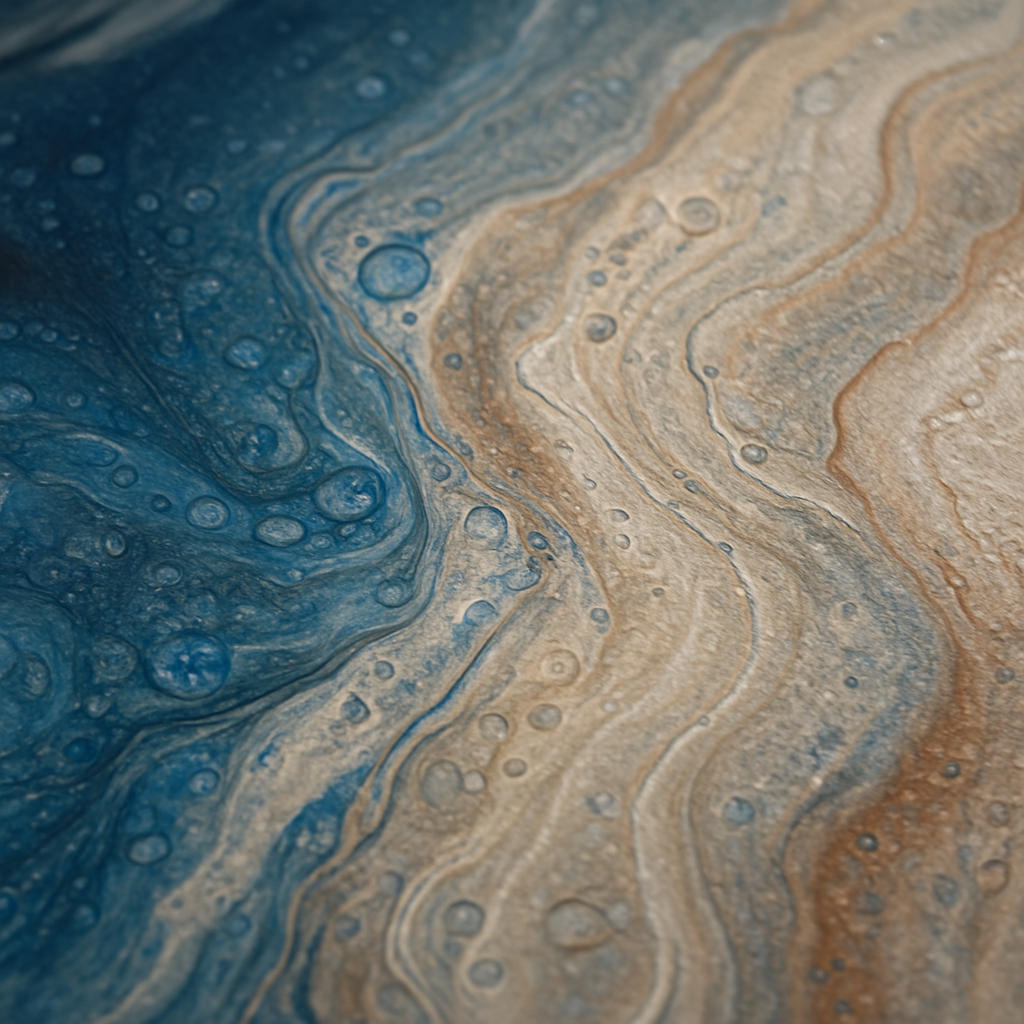
Actionable take‑away: set a timer for each curing stage, write down the temperature and humidity, and snap a photo before and after sealing. Over time you’ll build a personal “finish log” that makes every new pour faster, cleaner, and more confident.
Conclusion
We’ve walked through everything from gathering supplies to the final seal, and if you’ve stuck with it, you now have a solid toolbox of acrylic pouring techniques for beginners.
Think back to that first flip‑cup pour – did the paint spread the way you imagined? If not, remember our tip about keeping the cup close and tilting gently. Those tiny adjustments make the difference between a happy accident and a happy masterpiece.
And what about the curing stage? Leaving the canvas flat for half an hour, then flipping it onto a clean rack, isn’t just a habit; it’s how the colors settle into that deep, glossy finish we all love.
For hobbyists, those simple steps give you confidence to experiment with new colors. Creative entrepreneurs can now capture consistent results for product photos, while parents have a repeatable, mess‑controlled activity for kids.
In our experience at CreativiU, members who log their temperature, humidity, and timing see faster improvement and fewer cracked pieces. A quick “finish log” turns trial‑and‑error into a repeatable process.
So, what’s the next move? Grab your favorite palette, set a timer for each stage, and let the flow teach you. And whenever you’re ready for deeper dives or community feedback, the CreativiU platform is there to support your next pour.
FAQ
What are the essential acrylic pouring techniques for beginners?
Most newcomers start with three core methods: the flip‑cup pour, the dirty‑pour (or line pour), and the swipe/drag technique. The flip‑cup gives you a radial burst of color, perfect for quick experiments. The dirty‑pour creates soft, layered ribbons that blend as you tilt the canvas. The swipe lets you shape the paint with a brush or palette knife, adding bold, intentional lines. Mastering these three gives you a solid foundation to explore more complex effects.
How do I choose the right pouring medium?
Choosing a medium depends on the flow you want. Floetrol is a popular, low‑odor option that creates a smooth, honey‑like consistency, ideal for beginners who don’t want the paint to clump. If you prefer a thicker mix that holds cells better, a silicone‑based medium works well—but use it sparingly, about two to three drops per cup. Test the consistency on a scrap piece; it should drizzle slowly without running off the edge.
Why does my paint crack after it dries?
Cracking usually means the mixture was too thick or the canvas cured in a drafty, low‑humidity environment. When the paint dries unevenly, the surface contracts and creates tiny fissures. To avoid this, keep the room temperature between 68‑75 °F and aim for 40‑55 % humidity. Thin the mix a bit more if you notice it’s gummy, and let the piece cure flat for at least 30 minutes before flipping it.
Can I involve kids in acrylic pouring safely?
Absolutely—just set a few ground rules. Use nitrile gloves to keep hands clean, and cover the floor with a drop cloth or old newspapers. Choose non‑toxic paints labeled “acrylic” and avoid excessive silicone oil, which can be slippery. Give kids small disposable cups and let them pour under close supervision; the tactile experience is great for their creativity and fine‑motor skills.
How often should I log my pouring experiments?
We’ve seen hobbyists make big strides by recording a quick “finish log” after each piece. Note the paint‑to‑medium ratio, temperature, humidity, and any adjustments you made (like extra silicone drops). A simple spreadsheet or notebook works, and snapping a before‑and‑after photo helps you spot patterns. Over time you’ll spot the sweet spot for your studio conditions and repeat successful results.
What’s the best way to protect my finished pour?
Once the canvas has cured for 24‑48 hours, apply a thin coat of water‑based acrylic varnish. A gloss finish will deepen the colors and seal the cells, while a matte varnish softens the shine for a more subtle look. Use a clean, soft brush and work in a dust‑free area. Let the varnish dry completely before handling or hanging the artwork to avoid smudges.
Leave a Reply