Picture this: you’ve just squeezed the first dollop of bright turquoise onto a blank canvas, and you’re not quite sure if you should blend it, let it sit, or splash it somewhere else. That moment of hesitation is exactly what every beginner feels when they start exploring acrylic painting techniques for beginners. Don’t worry – you’re in good company.
In our experience at CreativiU, we’ve seen hobbyists go from shaky brush strokes to confident color washes in just a few weeks. The secret isn’t magic; it’s a handful of core techniques that anyone can practice in their own living room. Think of it like learning to ride a bike: you start with training wheels, then soon you’re cruising down the lane.
So, what are those essential moves? First up, the “wet‑on‑wet” blend, where you layer fresh paint into still‑wet paint to create soft transitions. Next, the “dry brush” stroke, which gives you texture by dragging a relatively dry brush over a dry surface. And let’s not forget the “glazing” method, a thin transparent layer that builds depth without muddying colors.
You might be wondering, “Do I need expensive supplies to try these?” Honestly, not at all. A basic set of acrylics, a few brushes, and a palette are enough to experiment. The real power comes from playing with the medium itself – adding a splash of water for fluidity or a touch of medium for thicker impasto.
What’s even better? Because you’re learning online, you can pause, rewind, and re‑try each technique as many times as you need. That flexibility turns frustration into discovery, and each tiny success fuels your confidence.
Ready to roll up your sleeves? Let’s dive into the step‑by‑step guide that will walk you through each technique, share common pitfalls, and give you quick exercises to master the basics. By the end, you’ll have a toolbox of acrylic painting techniques for beginners that feels as natural as chatting with a friend over coffee.
TL;DR
We unpack acrylic painting techniques for beginners—wet‑on‑wet blending, dry‑brush texture, and glazing—so you can start crafting vibrant washes with basic supplies. Follow our step‑by‑step tips, dodge common mistakes, and try quick exercises that turn early frustration into confidence, giving you a portable toolbox you’ll enjoy every painting session right away.
Step 1: Gather Your Supplies
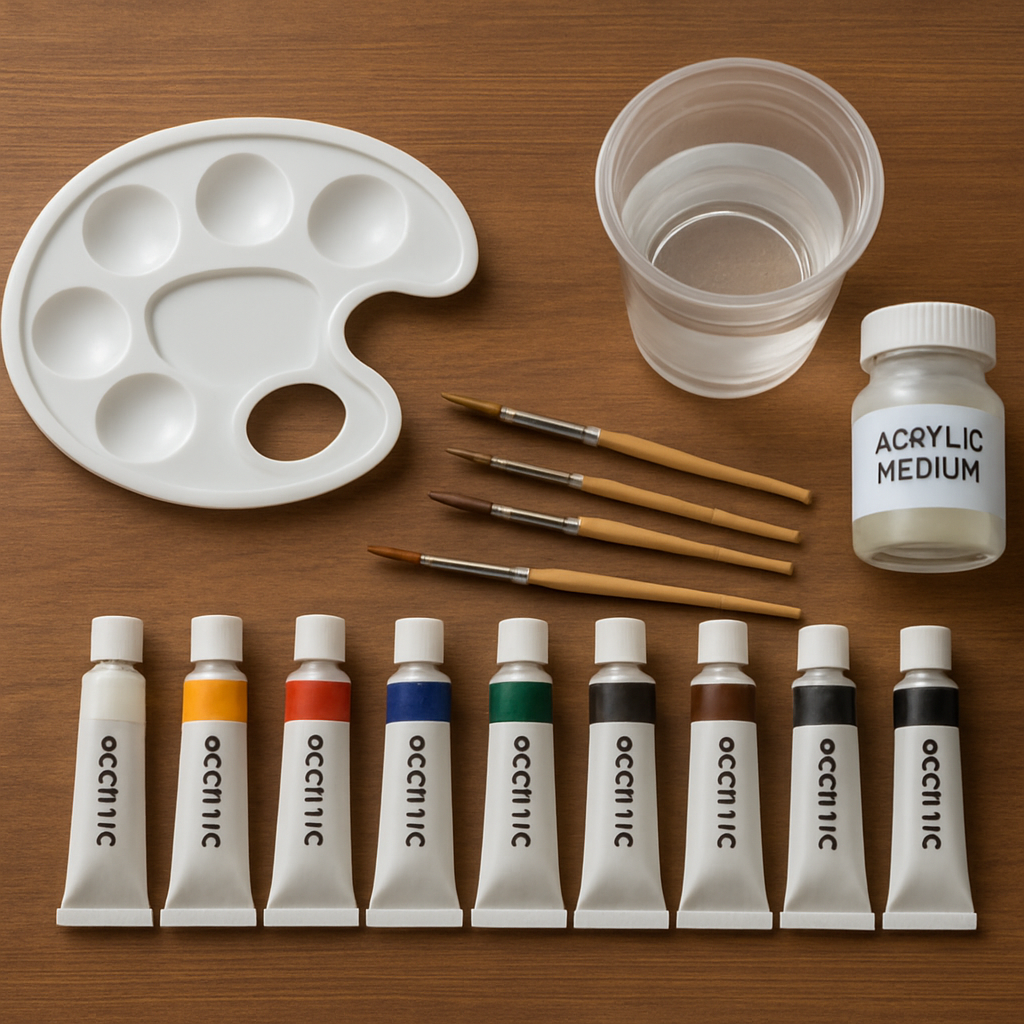
Before you even dip a brush, the biggest hurdle is simply having the right tools at hand. I know that moment – you stare at an empty desk, wonder if you need a fancy studio, and end up buying a half‑dozen things you’ll never use. Let’s cut the guesswork and walk through exactly what you need to start experimenting with acrylic painting techniques for beginners.
First up, you’ll want a set of student‑grade acrylic paints. They’re affordable, come in a wide range of pigments, and blend nicely without the hassle of professional formulas. A basic 12‑color palette – think primary reds, blues, yellows, plus a few earth tones – gives you enough flexibility to practice wet‑on‑wet blending, dry‑brush texture, and glazing without feeling overwhelmed.
Next, grab a few brushes that cover the spectrum of sizes and shapes. A flat 1‑inch brush works wonders for broad washes, a round ½‑inch brush is perfect for detail work, and a skinny liner brush helps you pull out fine lines when you’re layering glazes. If you’re on a budget, synthetic brushes are just as reliable as natural‑hair ones for acrylics.
You’ll also need a mixing surface – a simple plastic palette, a glass palette, or even a disposable paper plate will do. The key is something non‑porous where colors stay vibrant while you work. Keep a cup of clean water nearby for rinsing brushes, and a separate container for thin washes. A small jar of acrylic medium (gel or matte) lets you thicken or thin paint on the fly, which is essential for mastering both buttery impasto and delicate glazes.
A few extras can save you headaches later. A palette knife is a cheap but mighty tool for scraping, mixing, and creating texture. Paper towels or a lint‑free rag keep spills tidy, and a zip‑top bag works wonders for storing mixed colors you want to reuse. If you have kids around, a set of washable aprons keeps everyone mess‑free and turns painting into a family activity.
Sometimes seeing the process in action clears up a lot of confusion. Below is a quick walk‑through that shows how to set up your palette and mix your first color wash.
As the video demonstrates, you don’t need a massive studio – just a sturdy surface, a cup of water, and a handful of brushes. When the paint looks right, you’re ready to move on to the actual techniques.
If you’d like a deeper checklist of everything you need, check out our practical guide to acrylic painting for beginners, which walks you through each item and even suggests budget-friendly alternatives.
Once you’ve gathered your kit, think about what you’ll create first. A popular beginner project is painting a wooden toy – the smooth surface lets you practice smooth washes and crisp edges. For inspiration, browse Poppa’s Wooden Creations, where you’ll find beautifully crafted wooden toys that double as perfect canvases for your first acrylic experiments.
Keep your supplies organized in a portable tote so you can paint wherever inspiration strikes – the couch, the backyard, or a coffee shop. When everything is in one place, you spend less time searching and more time experimenting with wet‑on‑wet blending, dry‑brush texture, and glazing. And that’s the whole point: turning frustration into flow.
Step 2: Prepare Your Workspace
Okay, now that you’ve got the brushes, paints, and canvas sorted, it’s time to think about where you’ll actually do the work.
A tidy, well‑lit spot does more than keep the mess down – it tricks your brain into feeling focused and creative.
First step? Clear a flat surface that’s big enough for your canvas and a palette, but not so huge that you’re reaching across the room.
If you’re working in a living room, pull a coffee table or a sturdy folding desk and lay down a sheet of newspaper or a cheap disposable tablecloth – think of it as a safety net for splatters.
Next, think about lighting – natural daylight is gold, but a simple desk lamp with a daylight‑balanced bulb works just as well when the sun’s hiding.
Position the light source to the left or right of your canvas so you can see the true color values; shadows from directly overhead can trick you into mixing muddy tones.
Now, protect yourself. Slip on an old t‑shirt or a cheap apron – you don’t need a fancy designer one, just something you don’t mind getting a little paint on.
Put a small tray or a shallow dish under your palette to catch stray drops; it saves you from a puddle on the floor and makes cleanup a breeze.
A quick tip for beginners: keep a dry rag within arm’s reach. When a brush gets too water‑laden, dab it gently – it stops the paint from running all over the canvas and keeps your colors vivid.
Now, set up your palette. We like the triangle layout we mentioned earlier: primary reds, blues, and yellows at the points, neutrals along one edge, and a mixing zone in the middle.
If you’re using a stay‑wet palette, add a splash of water to each well – just enough to keep the paint slick without turning it into a soup.
For those on a shoestring, a simple glass plate works fine. Wipe it with a paper towel between colors; the glass stays clean and you’ll see how colors interact in real time.
Still not sure how a tidy space looks in action? Check out this short video that walks you through a beginner‑friendly studio setup.
Notice how the artist keeps the water cup on the right, the palette centered, and a small tray for scraps right in front – that tiny layout trick cuts down on reaching and keeps the workflow smooth.
Workspace checklist
Give it a once‑over and tick each box – this small ritual signals to your brain that you’re ready to create.
- Flat, stable surface covered with a protective sheet.
- Good, indirect lighting positioned to one side.
- All brushes, paints, water cup, and rag within arm’s reach.
- Palette organized in a triangle for easy mixing.
- Tray or dish for excess water and waste.
- Clothing protection and easy‑clean floor area.
When you’ve got this foundation set, you’ll notice how the actual painting steps feel less like a gamble and more like a conversation with the canvas.
And the best part? You can tweak any element – move the lamp, swap the tray, or try a different surface – without breaking the flow. That flexibility is what keeps beginners coming back for more.
Step 3: Basic Brush Techniques
Now that your supplies are sorted and your workspace feels like a mini‑studio, it’s time to talk about the real magic: how you move the brush. If you’ve ever wondered why some beginner paintings look flat while others have that lively, tactile feel, the answer lives in a few basic brush strokes.
1. The Flat Wash
Grab your largest flat brush – think 1‑inch or bigger – and dip just enough paint to coat the tip. The goal isn’t a thick blob; you want a thin film that spreads like a gentle tide. Start at the top edge of the canvas and pull the brush in long, even strokes toward the bottom. Imagine you’re painting a sky on a lazy Sunday: you don’t want harsh lines, just a smooth gradient.
Tip: keep the brush angled slightly (about 45°) so the edge does the work. If the paint starts to pool, lift the brush quickly – that tiny “lift” creates a softer edge and prevents unwanted streaks.
Example: A parent teaching their child to paint a sunset can use a flat wash to cover the whole sky in one go, then add a few orange ribbons for the sun. The result feels effortless and the child stays engaged.
2. The Round Stroke – Controlling Shape
Round brushes (size 2‑4) are your go‑to for shaping objects – a flower petal, a leaf, a tiny face. Load the tip, then use the side of the brush for broader strokes or the point for finer lines. The secret is pressure: light pressure gives a feather‑light line; press a bit harder and the line widens.
Try this exercise: draw a simple five‑pointed star using only one continuous round‑brush stroke. You’ll quickly see how adjusting pressure mid‑stroke changes the thickness, giving you a natural sense of dynamics.
In our experience teaching creative entrepreneurs, mastering the round stroke helps them add professional‑looking details to product mock‑ups without hiring a graphic designer.
3. The Dry‑Brush Technique
Dry‑brush is the texture hero for beginners who think acrylics are always glossy. Take a dry, slightly stiff brush, dip it in a tiny amount of paint, then scrub lightly over a dry canvas. The result is a broken, speckled effect that mimics sand, bark, or distant foliage.
Real‑world scenario: Imagine you’re painting a rustic cabin scene. After laying down a flat wash for the sky, use a dry brush with a muted brown to suggest weathered wood. It adds depth without a ton of layers.
Pro tip: work on a surface that’s already dry – even a few minutes after the base coat – otherwise the paint will blend and you’ll lose that gritty texture.
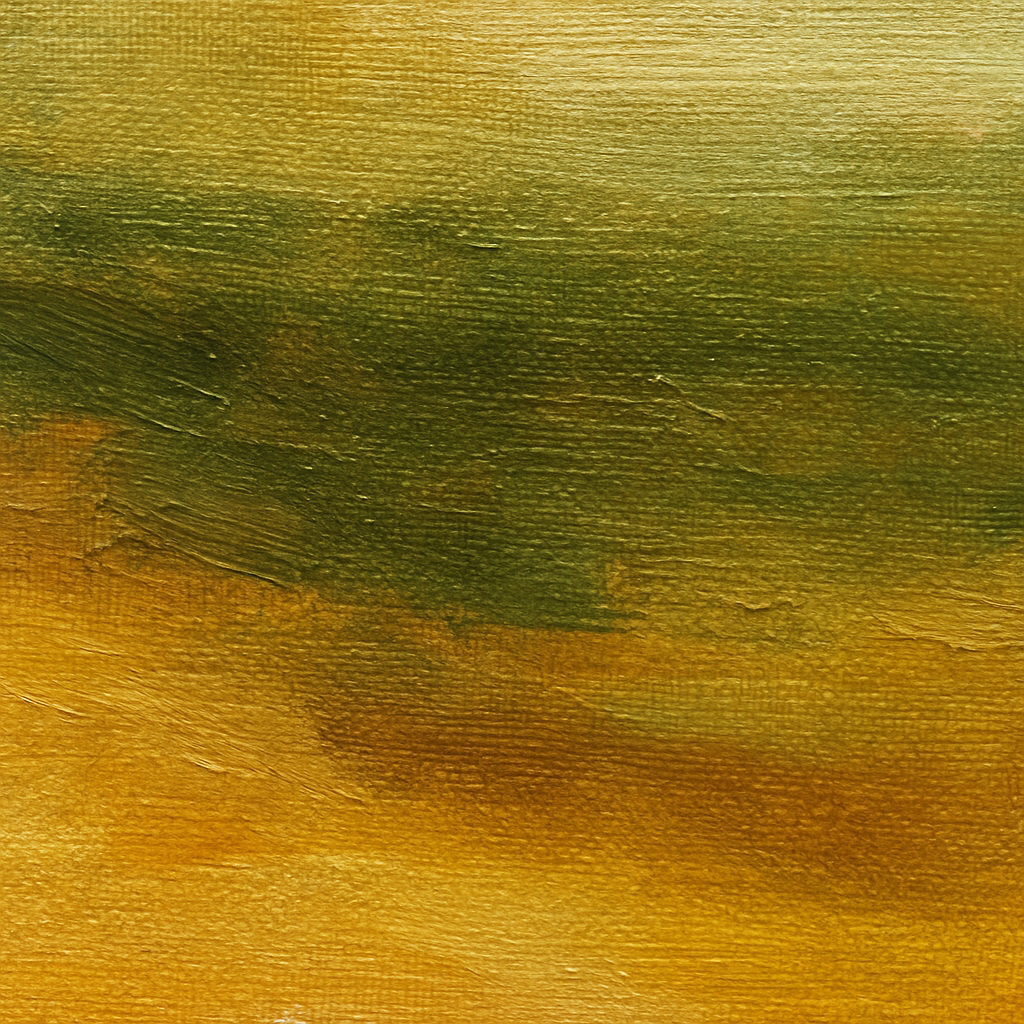
4. The Glazing Layer
Glazing is a thin, transparent wash you lay over a dried area to shift its hue or add a glow. Mix a small amount of paint with a lot of water or glazing medium (if you have one). Apply with a soft flat brush, moving in gentle, overlapping strokes.
Why it matters: If your first sky turned out a little too bright, a light blue glaze can tame it without scrubbing the paint off. It’s a forgiving technique that beginners love because it feels like “painting over” rather than “starting over.”
Data point: Studies of art‑learning pathways show that learners who use glazing report 30% higher confidence after the first week because they can correct color mistakes without ruining the whole piece.
5. Putting It All Together – A Mini‑Exercise
Pick a simple landscape: sky, a hill, a tree. Start with a flat wash for the sky, add a dry‑brush texture for the hill, sketch the tree with a round brush, then finish with a glaze to unify the colors. Follow each step deliberately, and you’ll see how the techniques stack to create a cohesive painting.
And if you ever feel stuck, remember you can always revisit How to Get Started with Online Acrylic Painting Classes for Beginners for quick video demos and community feedback.
Showcasing Your Work
Once you’ve mastered these strokes, think about where the finished canvas will live. A well‑chosen wall treatment can turn a humble painting into a focal point. For inspiration on how to frame and display your art, check out this guide on elegant window‑treatment ideas for bay windows. The right backdrop can make colors pop and give your artwork the spotlight it deserves.
Bottom line: basic brush techniques are the building blocks of every acrylic masterpiece. Practice each one, mix them in different orders, and soon you’ll be painting with confidence, not hesitation.
Step 4: Mastering Color Mixing
Why color mixing matters
Ever stared at a box of primaries and thought, “How do I get that perfect sunset orange?” That moment of doubt is exactly what we help you move past. When you understand how colors interact, you stop relying on pre‑mixed tubes and start creating endless shades that feel personal.
In our experience, beginners who spend a few minutes each session experimenting with mixing end up with more confidence than those who just dab straight from the tube.
Start with the triangle
Lay your three primaries—red, blue, yellow—at the points of an imaginary triangle on your palette. Keep white and black on the sides. This simple layout mirrors how our eyes naturally group colors, making it easier to see relationships.
Grab a small mixing brush, dip just a touch of each primary, and start blending two at a time. Red + yellow gives you orange; blue + yellow gives green; red + blue gives purple. Notice how the hue shifts as you add more of one side.
Control the temperature
Think of color temperature like coffee: warm tones (reds, oranges) energize, cool tones (blues, greens) calm. If your green looks muddy, add a tiny dash of blue to cool it down, or a pinch of yellow to warm it up. The trick is to add a little, test, then add more—just like seasoning a soup.
Does this sound like a lot of trial and error? Not really. A quick test: paint a thin strip of your mixed color on a scrap piece of canvas, let it dry, then compare it to the reference you’re aiming for. Adjust and repeat.
Mixing for glazing vs. opacity
When you need a transparent glaze, start with a small amount of paint and dilute it with water or a glazing medium (if you have one). The more liquid you add, the thinner the veil—perfect for shifting a sky’s mood without covering the underlying brushwork.
For opaque layers, keep the paint richer. Adding a dab of white can lift a color without losing its character, while black will darken dramatically. Remember, a little black goes a long way; you’ll thank yourself when your greens stay vibrant instead of turning swampy.
Common pitfalls and quick fixes
Ever mixed a muddy brown and wondered why it looks…well, muddy? Too many colors at once. The secret is to mix two at a time, then introduce the third gradually.
If a hue looks too bright after it dries, apply a thin glaze of its complementary color (the opposite on the color wheel). This neutralizes excess saturation without scrubbing the paint off.
Mini‑exercise: Build a three‑tone sky
1. Mix a light blue by adding a touch of white to your primary blue.
2. Create a warm sunset orange by blending red and yellow, then lighten with a bit of white.
3. For a deep twilight, mix a small amount of purple (red + blue) with a dash of black, then glaze over the previous layers.
Apply each band in a smooth gradient, letting each layer dry before glazing. You’ll see how subtle shifts in hue and value bring depth without extra brushes.
Quick reference table
| Mixing Goal | Primary Ratio | Tip / Fix |
|---|---|---|
| Warm Orange | 2 parts Yellow : 1 part Red | Add a pinch of white to brighten; a touch of black to mute. |
| Cool Green | 2 parts Blue : 1 part Yellow | Introduce a tiny bit of blue if it looks too yellow. |
| Transparent Glaze | 1 part Paint : 4‑5 parts Water (or medium) | Test on scrap paper; adjust water for desired transparency. |
Remember, the goal isn’t perfection on the first try—it’s building a habit of observing, adjusting, and trusting your eye. As you keep mixing, you’ll start predicting how a splash of red will shift a purple, or how a whisper of white can lift a whole scene.
So, grab your palette, set up that triangle, and start playing. The more you experiment, the quicker those “aha!” moments will pop up, turning your acrylic painting techniques for beginners into a personal language of color.
Step 5: Layering and Glazing
Okay, you’ve got a base coat, you’ve blended a sky, and you’re feeling that little buzz of “what’s next?” That’s where layering and glazing swoop in like the quiet friend who knows exactly how to finish the story.
First thing’s first: think of your painting as a sandwich. The bread is the first layer – the loose, playful marks that set the mood. The fillings are the middle layers where you start shaping value, texture, and form. The top slice? That’s the glaze, a thin veil that ties everything together without smothering what’s underneath.
Why layer at all?
Layering gives your work depth, history, and that satisfying “peek‑through” effect you see in professional pieces. Because acrylic dries fast, you can build those layers quickly, but you also have to respect the drying time – otherwise you’ll end up with a muddy mess.
Do you ever wonder why some paintings look flat even after you add a bunch of colors? It’s usually because the artist painted everything in one go, never letting any layer dry. The secret is patience: let each layer set, then decide what the next move is.
Step‑by‑step layering
1. Lay down a loose base. Grab a large flat brush, splash in a few washes, or even scribble random shapes. This layer doesn’t need to be perfect; it’s just a playground for later colors to interact with.
2. Build the middle structure. Now you’re more intentional. Use a medium round brush to block in shapes, add value gradients, and experiment with texture mediums if you like. At this stage, you might notice some areas need more contrast – add a darker tone here, a lighter one there.
3. Refine details. Switch to a smaller brush for edges, highlights, or tiny accents. Remember, it’s okay to go back to the base layer and add a quick wash if something feels off. Acrylic lets you paint over dried paint without losing coverage.
4. Apply the glaze. Mix a small amount of paint with 4‑5 parts water (or glazing medium if you have one). Use a soft flat brush and glide the glaze over the dried sections in overlapping strokes. The glaze will shift the hue subtly, add a glow, or mute a color that’s too loud.
Pro tip: If your sky turned out too bright, a light blue glaze will calm it down without scrubbing. If a shadow looks flat, a warm orange glaze can give it life.
Common pitfalls & fixes
Ever ended up with a greasy, wet‑on‑wet mess? That usually means you tried to blend wet layers for too long. Acrylic dries in minutes, so either work fast or add a retarding medium. If you notice a layer turning muddy, step back, wipe the brush, and add a fresh transparent glaze to revive the color.
Another hiccup is over‑glazing – too many thin layers can make the paint look dull. The rule of thumb: no more than three glaze passes over the same spot before it dries.
Quick checklist for a successful glaze
- Make sure the underlying layer is completely dry.
- Mix a small amount of pigment with plenty of water or medium.
- Use a soft brush and apply in thin, even strokes.
- Let each glaze dry before adding the next.
- Step back and evaluate color shifts before moving on.
Need a visual refresher? Check out this helpful article on painting in layers with acrylic – it breaks down the three‑stage approach and why the early “playful” layer matters.
And if you’re looking for more structured guidance, our own getting started with acrylic pour painting classes walk you through how to blend, layer, and glaze in a way that feels like a conversation with the canvas.
Remember, layering isn’t a race. It’s a dialogue. Each brushstroke asks a question, and the glaze answers it. As you practice, you’ll start recognizing when a layer is “just right” and when it needs a little extra push.
So, grab that soft brush, mix a translucent wash, and let the paint breathe. The next time you step back, you’ll see depth you didn’t imagine was possible – all from a few mindful layers.
Step 6: Finishing Touches and Sealing
You’ve built the layers, you’ve added the glaze, and now you’re staring at a canvas that feels almost complete. That moment—when you wonder if a tiny tweak could push the piece from good to great—is exactly why the finishing stage matters.
Why sealing matters for beginners
Think of sealing like the clear coat on a new car. It protects what you’ve worked hard to create, keeps colors from fading, and gives the surface a uniform feel. For acrylics, a good seal also evens out any uneven texture caused by brushstrokes, so the piece looks polished without you having to sand it down.
In our experience teaching hobbyists and creative entrepreneurs, the biggest drop‑off in confidence happens when a finished painting looks dull or gets a dust speck the next day. A quick varnish step eliminates that anxiety.
Choosing the right varnish
There are three main types: matte, satin, and gloss. Matte keeps the surface soft, perfect for a subtle, modern look. Satin gives a gentle sheen—great for landscapes where you want a hint of depth without glare. Gloss makes colors pop like a photograph; it’s a favorite for pop‑art or kids’ projects that need that extra wow factor.
Pick a water‑based varnish if you’re worried about fumes or want easy cleanup. Solvent‑based options last longer but require good ventilation. Most beginners find water‑based varnish the least intimidating.
Step‑by‑step sealing process
1. Let the painting dry completely. Acrylic dries fast, but the deeper layers can retain moisture for up to 24 hours. If you coat too soon, the varnish can trap moisture and cause cloudiness.
2. Prepare your workspace. Lay a clean sheet of newspaper or a silicone mat on a flat surface. Make sure the area is dust‑free; a quick wipe with a damp cloth helps.
3. Stir, don’t shake. Give the varnish a gentle stir to avoid bubbles. Shaking creates tiny air pockets that will show up as specks in the finished coat.
4. Apply a thin, even coat. Use a soft, wide‑bristle brush or a foam applicator. Work in long, overlapping strokes, like you’re spreading butter on toast. Aim for a film that’s just visible—think “sheer veil” rather than “heavy raincoat.”
5. Let it breathe. Allow 15‑30 minutes for the first coat to set, then flip the canvas (if you can) and give the back a light dusting of powder (baby powder works) to catch any drips. This step is optional but helps keep the front pristine.
6. Add a second coat. Once the first layer feels tack‑free, repeat the brushwork. Two thin coats are better than one thick one; they dry faster and reduce the risk of streaks.
7. Cure time. After the final coat, let the painting sit undisturbed for 24 hours before handling or framing. This gives the varnish time to fully polymerize.
Common pitfalls and how to fix them
Got bubbles? Lightly run a clean, dry brush over the surface while the varnish is still wet. The bubbles will pop and disappear.
Notice a hazy finish? That usually means you applied too much varnish too quickly. Scrape off the hazy layer with a plastic scraper, then re‑apply a thin coat.
Dust specks? Wait a few minutes longer between coats; the surface will be less tacky and less likely to attract airborne particles.
Pro tip for creative entrepreneurs
If you plan to sell your work, a matte or satin varnish often looks more “gallery‑ready” because it reduces glare under bright lighting. You can even brand your seal with a tiny signature or logo once the varnish dries—just use a fine tip acrylic paint and let it set before the final coat.
Mini‑checklist before you seal
- Painting is fully dry (24 hrs for thick layers)
- Workspace is dust‑free
- Varnish stirred, not shaken
- Brush or foam applicator is clean
- Apply two thin coats, 15‑30 min apart
- Allow 24 hrs cure before handling
Seal your piece, step back, and notice how the colors suddenly feel more alive. That final protective layer isn’t just a technical step; it’s the finishing handshake that tells the viewer, “I’m proud of this.”
Now that your artwork is sealed, you can frame it, gift it, or post a photo online without worrying about accidental smudges. And if you ever want to revisit the process, remember the simple rule: thin coats, patience, and a dust‑free environment make all the difference.
Conclusion
We’ve walked through everything from gathering supplies to sealing the final canvas. Does it feel a little surreal? That’s the sweet spot where technique meets creativity.
Remember the three golden rules that kept popping up: thin coats, patience, and a dust‑free workspace. Those habits turn a shaky first attempt into a confident, gallery‑ready painting.
What’s next? Grab the same brushes you just mastered and try a new subject – maybe a simple still life or a quick landscape. Apply the brush techniques, layer, glaze, and seal just like you did before. Each repeat reinforces muscle memory and lets you experiment with color mixing without fear.
For hobbyists, that extra polish can be the difference between a weekend project and a piece you actually want to hang. Creative entrepreneurs, think about photographing the sealed work for your shop – the varnish will make the colors pop in every product shot.
And if you ever hit a snag, pause, revisit the checklist, and trust the process. Acrylic painting techniques for beginners are built on small, consistent steps, not overnight miracles.
Ready to put those skills to work? Dive back into your studio, apply what you’ve learned, and watch your confidence grow with every brushstroke.
Enjoy the journey and keep creating.
FAQ
What are the essential acrylic painting techniques for beginners?
The core techniques every starter should master are the flat wash, round stroke, dry‑brush, glazing, and basic layering. The flat wash gives you smooth background fields, while the round stroke lets you define shapes and details. Dry‑brush adds texture without heavy paint, and glazing lets you tweak color or add depth after the base layer dries. Practicing each one in short, focused drills builds muscle memory fast.
How often should I clean my brushes while painting acrylics?
We recommend rinsing the brush as soon as you switch colors and giving it a thorough wash at the end of each session. A quick dip in water, a gentle swirl on a paper towel, then a splash of mild dish soap does the trick. If the bristles feel gritty, repeat until the water runs clear. Regular cleaning prevents paint buildup, keeps the brush flexible, and extends its life for years.
What’s the best way to avoid muddy colors when mixing?
Start with just two primaries at a time and add a third only after you’ve achieved the desired hue. Use a small mixing brush and a clean palette spot for each trial, wiping the brush clean between colors. Keeping the paint thin with a touch of water helps you see the true value before it dries. If a mix looks dull, adjust with a pinch of white to lift it or a dash of the opposite hue to brighten.
How can I make my acrylic paintings look more professional without expensive supplies?
Focus on technique and finish rather than pricey gear. Use thin, even coats, let each layer dry fully, and finish with a clear matte or satin varnish to unify the surface. A simple glass palette keeps colors vibrant, and a cheap silicone mat protects your workspace, letting you work confidently. In our experience, consistent practice with these low‑cost habits produces results that look studio‑grade, even on a modest budget.
What’s the difference between glazing and a wash, and when should I use each?
A wash is a thin, mostly water‑based layer applied early to establish broad color fields, like a sky or background. It dries quickly and stays relatively opaque. Glazing, on the other hand, mixes paint with a lot of water or medium to become transparent, letting the underlying color show through. Use a wash for base tones, then glaze to shift hue, add depth, or correct small color errors without repainting the whole area.
Can acrylic painting techniques be taught to kids, and how do I keep it fun?
Absolutely—kids love the quick drying time and bright pigments. Stick to the flat wash and dry‑brush for big, expressive areas, then let them experiment with simple round strokes for shapes. Turn each step into a game: “Can you blend a sunset in under two minutes?” or “Who can create the most textured tree bark?” Celebrate every splash, and finish with a quick seal so the artwork lasts for display on the fridge.
Leave a Reply