TL;DR: Free online watercolor classes open the door to mastering the art without breaking the bank. Dive deep into techniques, supplies, and expert tips crafted for beginners and beyond.
Everybody knows watercolor is a uniquely challenging—but incredibly rewarding—medium.
But what exactly should you learn first, and where can you find the best guidance for free?
This guide is your one-stop cheatsheet for everything related to free online watercolor classes.
Some are packed with expert tips on essential supplies and their perfect usage.
Some reveal the magic of watercolor techniques like wet-on-wet and wet-on-dry.
Some walk you through comprehensive color theory for confident color mixing and balance.
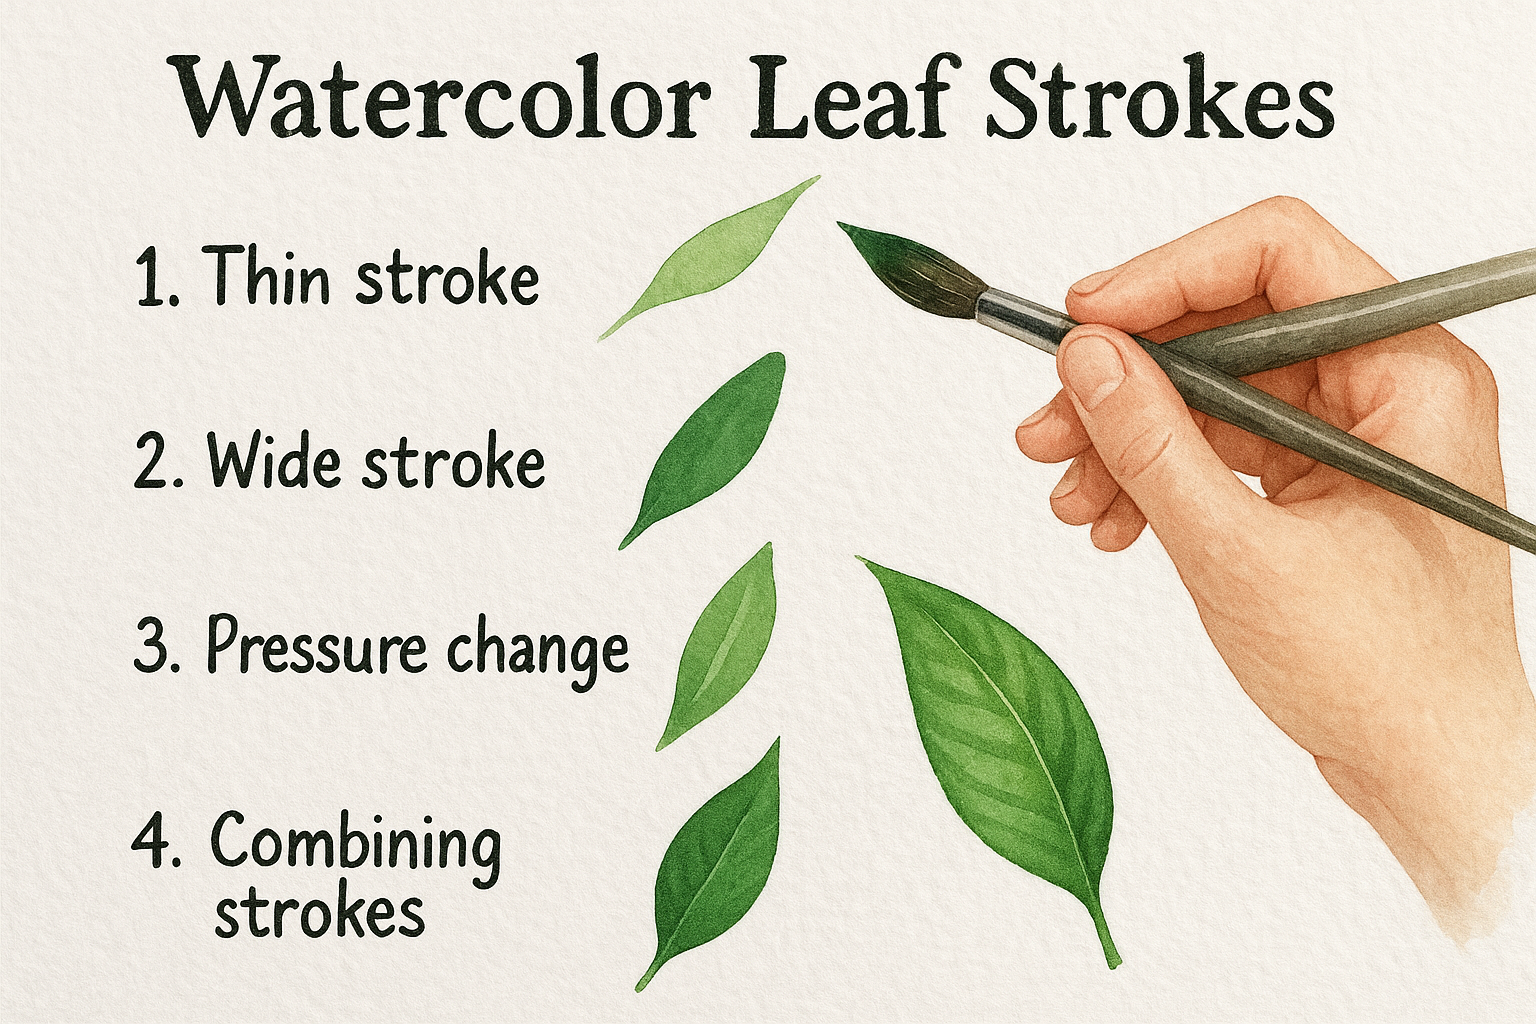
Some explain brush holds and strokes that create flowers, leaves, and delicate details.
Some share encouraging lessons from seasoned artists about persevering through those ugly beginner stages.
Let’s dive right in.
Why Choose a Free Online Watercolor Class?
Diving into watercolor painting can be intimidating, but free online watercolor classes make it accessible and practical. They break down complex concepts into bite-sized lessons you can revisit anytime. Plus, they’re excellent for pacing yourself and practicing as you go.
Many of these free classes come from experienced artists who share the knowledge they wish they’d had as beginners. For instance, one comprehensive beginner’s guide covers everything from budget-friendly supplies to nuanced brush techniques and even blends in color theory and composition insights, crafted from years of teaching experience source.
What You’ll Learn
- Understanding the right supplies, including why watercolor paper is non-negotiable.
- The difference between wet-on-wet and wet-on-dry and when to use each.
- Color theory fundamentals and how to mix colors to get vibrant, harmonious results.
- Brush strokes and holds needed for fine lines, broad washes, and compound strokes.
- Strategies for managing watercolor’s unique transparent layering.
- How to practice and embrace the learning curve in watercolor painting.
Ready to see what’s involved? Let’s break down these essentials.
Essential Supplies for Watercolor Success
Before your brush even hits the paper, the right supplies set the stage for success.
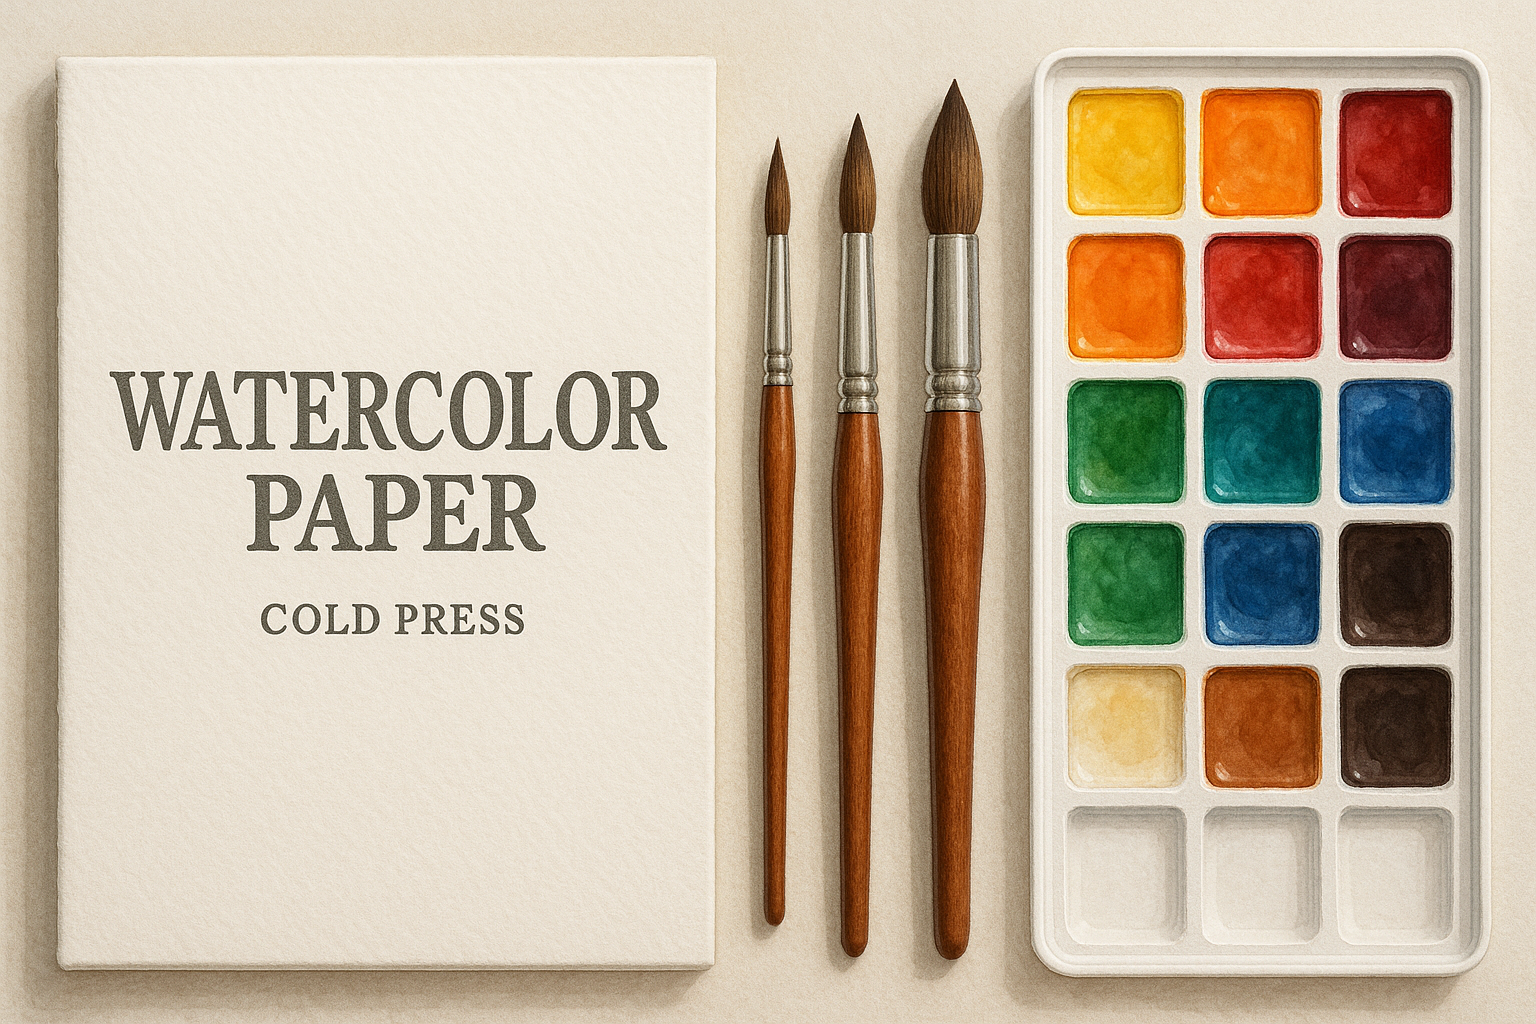
Many beginners make the costly mistake of using printer paper or cardstock, which simply don’t absorb water and pigment like quality watercolor paper. Watercolor paper, especially 100% cotton and cold press (which has a textured surface), holds pigment beautifully and prevents paper warping when taped down properly source.
Here’s a basic starter kit breakdown:
- Watercolor paper: 140 lb (300gsm) cold press is the sweet spot—textured but manageable.
- Professional-grade watercolor paints: While student-level paints are budget-friendly, professional paints offer richer pigments. Artists often prep dry pans of paint, moistening them before use for vibrant color release.
- Brushes: Three sizes of round synthetic sable brushes (sizes 2, 6, and 16) cover most painting needs, from fine details to broad washes.
- Palette: A portable plastic palette with separate wells for mixing makes painting on the go easy and organized.
- Tape & drying tools: Blue artist tape to secure paper edges and a hairdryer or heat tool for speeding drying times.
Proper care for your materials extends their life. Let your brushes dry flat and never leave them with wet paint. Also, tape your paper down until fully dry to avoid warping.
Mastering Watercolor Techniques: Wet-on-Wet vs Wet-on-Dry
Watercolor’s beauty lies in its fluid unpredictability and transparency, largely dictated by two essential techniques: wet-on-wet and wet-on-dry.
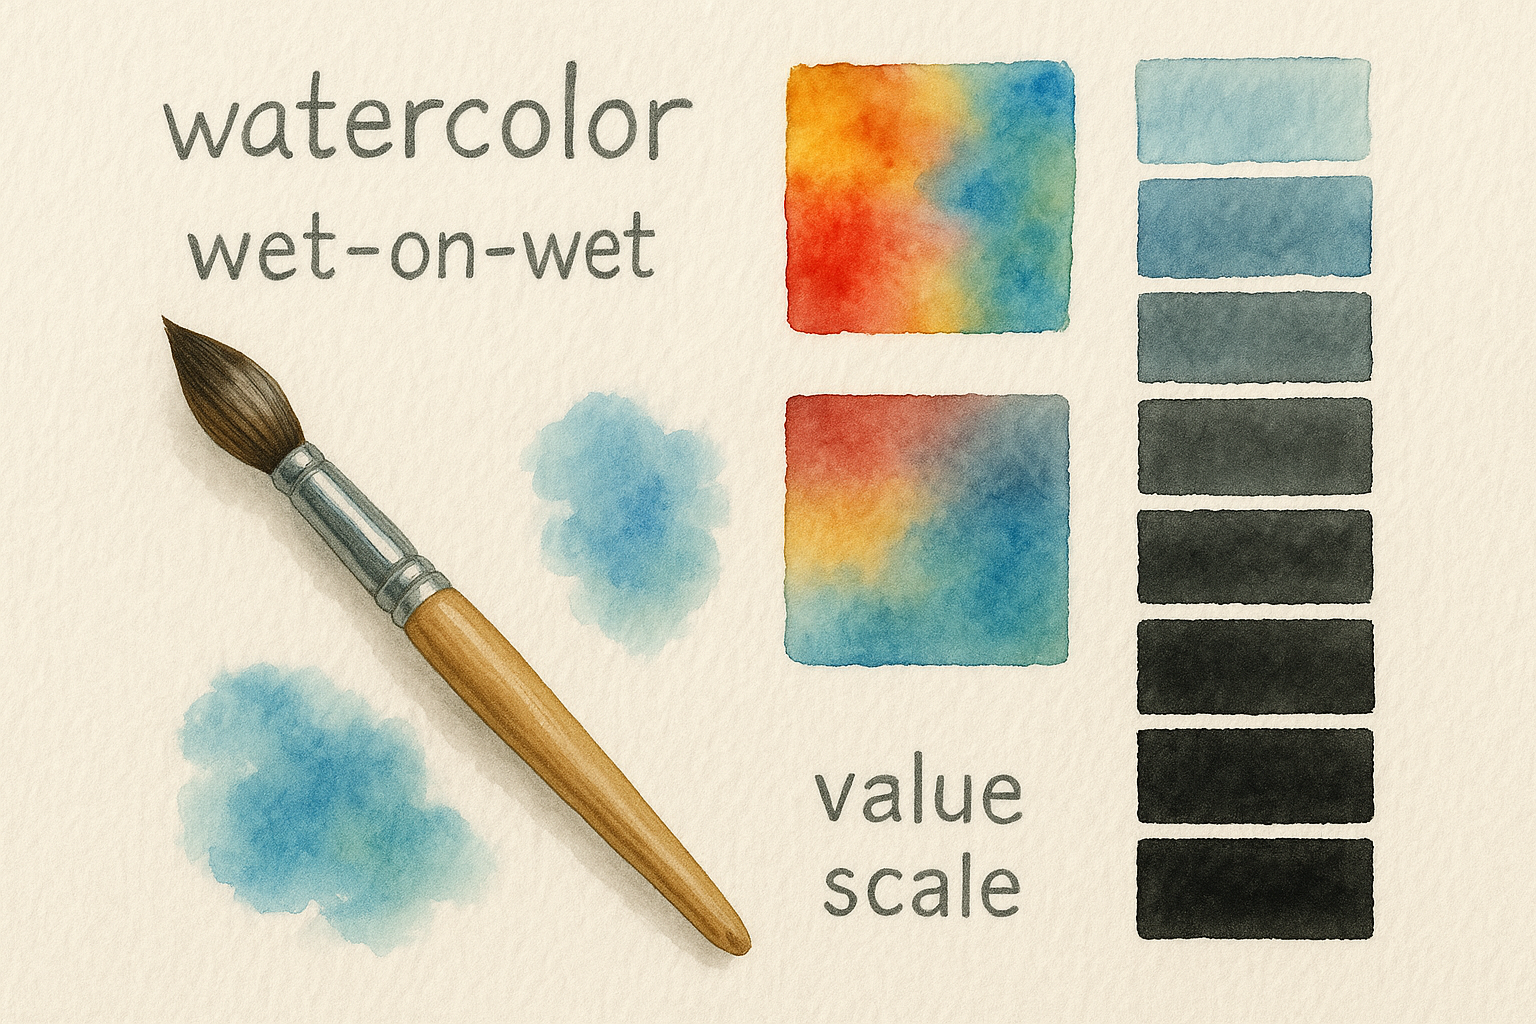
Wet-on-wet means applying wet paint onto wet paper or another wet paint layer. This method creates soft, flowing color bleeds and gentle gradients perfect for skies, water, or loose floral shapes. It involves three main ways to control the effect: pulling, pushing, and poking paint to blend and burst colors naturally.
For example, pulling involves gently extending a color’s edge with water to create a gradient, while poking can add delicate texture or spots where denser pigment blooms within wet areas.
Wet-on-dry entails adding wet paint onto dry paper or a dried layer of paint. This technique offers more control, helping build detailed lines, crisp edges, and layered colors without bleeding. It’s the go-to for defining floral petals, leaves, and intricate natural textures.
Switching between these techniques shapes your painting style. Experimenting with wet-on-wet for atmospheric effects and wet-on-dry for precision will give you versatility.
One expert’s advice: “Learning when to use wet-on-wet versus wet-on-dry is key to mastering depth and detail in your watercolor work” source.
Brush Holds That Change Your Strokes
How you hold your brush also impacts your strokes:
- Vertical hold: Offers precision with fine lines or varying widths by changing pressure on the tip.
- Slanted hold: Uses more of the brush belly for quicker coverage or softer blends.
Practicing these holds while making simple shapes—like circles or leaves—builds muscle memory essential to natural, flowing painting.
Ever wondered why layering is so important? The answer lies in how watercolor builds up from light to dark. Each transparent layer adds color depth while preserving underlying luminosity.
How Color Theory Helps Watercolorists Paint with Confidence
Color theory might sound complex, but it’s really about relationships between colors that create harmony or contrast in your artwork.
Watercolor artists benefit immensely by understanding primary colors (red, blue, yellow), secondary colors (orange, green, violet), and tertiary colors (like red-orange or blue-green). These basics guide mixing vibrant hues instead of muddy blends.
Warm colors (reds, oranges, yellows) suggest fire, energy, and light, while cool colors (blues, greens, violets) evoke calm, water, or shadow.
For best results:
- Use complementary colors (opposites on the color wheel, like red and green) sparingly for pops of contrast.
- Use analogous colors (neighboring colors) for soft harmony.
- Mix shadows with muted complementary mixes instead of just black for natural depth.
One technique: painting a watercolor color wheel yourself and experimenting with blending teaches these relationships visually—an invaluable guide you can keep at your easel.
Understanding color temperature and value scales (light to dark) empowers you to add form, light, and movement in your paintings with purpose.
Are you feeling overwhelmed by these color choices? Remember, many artists start hesitant but grow confident with study and practice.
Overcoming Beginner Challenges in Watercolor Painting
The journey of learning watercolor is filled with “ugly stages.” Those flat, dull early layers aren’t failures but building blocks for your final masterpiece.
Watercolor demands patience because we paint light to dark, preserving whites of the paper to create brightness.
Many beginners mistakenly try to lighten colors with white or darken them with black, which disrupts watercolor’s transparency and brilliance. Instead, adding water lightens colors; using less water or thicker paint darkens them naturally.
To master water control:
- Practice value scales—gradually going from watery light to thick pigment-rich strokes.
- Test consistency on scrap paper before applying it to your work.
- Allow layers to dry before adding details with wet-on-dry strokes.
Equally important: embrace mishaps. Every artist, professional or amateur, has a trash bin full of discarded attempts. Growth happens by keeping your brushes wet, your mind open, and your tolerance for wobbly early layers high.
Hidden Tip:
Using two cups of water—one for warm color rinse and one for cool—keeps your colors crisp and avoids muddy mixes. Try it next time you paint!
Where to Find the Best Free Online Watercolor Classes
Ready to get painting? The internet offers a treasure trove of free watercolor courses, tutorials, and community workshops.
Some Reddit communities, like r/Watercolor’s free course listing, curate excellent free resources for all skill levels. You’ll find everything from beginner fundamentals to advanced techniques taught by experienced artists.
Many YouTube creators provide all-in-one series breaking down watercolor basics, supplies, brush strokes, color theory, and even full projects like wreaths or floral paintings—you can practice alongside them repeatedly at your own pace.
Be sure to check platforms offering detailed tutorials combined with downloadable guides and ebooks. Source
Whichever route you choose, look for:
- Step-by-step lessons tailored to your skill level.
- Practice exercises like brush holds, compound strokes, and value painting.
- Community support or forums to share work and get feedback.
Try exploring free courses that guide you through mastering watercolor tools, formal techniques, and creative expression in tandem.
Can I Learn Watercolor Entirely Online for Free?
Absolutely. Plenty of artists have successfully built their watercolor skills through patient study and repeated practice using free online courses and tutorials.
The real secret? Consistency and deliberate practice, focusing on fundamental skills like water control, brushwork, color mixing, and composition.
Think of it like learning music or language—you start with scales and basic grammar before composing a symphony. Watercolor mastery follows the same ladder, and free online classes help you climb it one step at a time.
Plus, many of these courses sprinkle encouragement and mindset tips, helping beginners overcome frustrations and maintain motivation.
Just like learning to crack complex puzzles requires strategy and patience source, mastering watercolor is a journey that grows with your passion and practice.
How to Choose the Right Free Online Watercolor Class for You
With so many options available, choosing the right class can feel overwhelming. Here’s a checklist to guide you:
- Skill level match: Beginner classes cover basics, whereas advanced ones dive deeper into technique and composition.
- Teaching style: Do you prefer detailed step-by-step guidance or inspirational demonstrations?
- Course content breadth: Look for courses covering a wide range of skills from supplies, brush strokes, washes, to color theory.
- Resource accessibility: Can you access recorded lessons anytime? Is there downloadable material?
- Community aspect: Some classes have forums or social media groups for questions and support.
Don’t hesitate to sample a few lessons or watch previews before committing your time. The right fit fuels motivation and growth.
Getting Started with Practice Exercises
Practice is where theory meets magic. Here are some beginner-friendly exercises popular among free online watercolor classes:
- Value scales: Practice creating smooth gradients from light to dark (using more water to less water).
- Color wheels: Paint primary, secondary, and tertiary colors to understand mixing.
- Brush stroke drills: Circle outlines with vertical and slanted brush holds sharpen muscle memory.
- Wet and wet technique: Experiment with bleeding and blooms using pulling, pushing, and poking methods.
- Compound strokes for leaves: Practice leaves’ pressure and release strokes that thin at tips.
These foundational drills build confidence before tackling full compositions like floral wreaths or landscapes.
Practice tip: Break your sessions into manageable steps and reflect on your progress regularly. Celebrate your improvements and be patient with missteps—they’re part of the journey.
What Are Common Watercolor Mistakes and How to Avoid Them?
Beginners often get stuck due to a few well-known pitfalls. Awareness helps you avoid frustration:
- Using white paint to lighten colors: Instead, dilute with water to keep transparency alive.
- Overloading the brush or paper with water: Too much water causes blooms and hard-to-control puddles.
- Rushing dries between layers: Waiting or using heat tools ensures clean layering.
- Skipping practice of basic strokes: Brush control is the secret to beautiful edges and shapes.
- Ignoring paper quality: Cheap paper dents and hampers colors—invest wisely here.
Embracing mistakes as learning steps creates resilience. Many professional watercolorists still critique and rework their pieces repeatedly.
How to Keep Learning and Growing After Free Classes
Once you master the basics with free resources, continuing your growth means deepening skills and exploring your personal style.
Options include:
- Paid courses and workshops: Look for offerings that provide detailed feedback and project reviews.
- Joining art communities: Online groups provide critiques, inspiration, and friendships.
- Experimenting with new techniques: Try mixed media, gouache accents, or limited palettes.
- Studying art fundamentals: Composition, lighting, and design principles elevate your painting quality.
Consider integrating learning with other creative disciplines. For instance, exploring educational arts and crafts can unlock new ideas and boost creative development source.
Frequently Asked Questions
How do I join a free online watercolor class?
Many platforms like YouTube, Reddit art communities, and art websites offer free beginner courses. Search for structured playlists or step-by-step series with downloadable guides.
What supplies do I need for a free online watercolor class?
Start with 140 lb cold press watercolor paper, a palette of professional or student-grade paints, and a set of round brushes in small, medium, and large sizes, plus basic tools like tape and paper towels.
Can I really learn watercolor without paying for classes?
Yes! Many artists build foundational skills through free classes and tutorials. However, dedicated practice and quality supplies are critical to your success.
How important is color theory in watercolor painting?
Very important. Understanding the interaction between colors helps create harmony and depth that make your paintings come alive.
How do I control water in watercolor painting?
Mastering water control comes with practice. Begin by experimenting with varying paint-to-water ratios, swatching value scales, and observing how your brush and paper respond to different moisture levels.
What’s Your Next Step?
Tell us in the comments: How will you apply this to your watercolor journey? For deeper learning, explore our guide on Mastering Watercolor Techniques for Beginners and start painting stronger today!
Leave a Reply