Ever stared at a punch‑needle kit and felt that mix of excitement and “what‑now?” – you’ve got the tools, but the confidence to turn a simple canvas into a textured masterpiece is still missing.
That feeling is totally normal. Most beginners wonder if the tiny fabric loops will ever look right, or if the rhythm of pushing the needle will feel clumsy. The good news? Punch‑needle embroidery is one of the most forgiving crafts; the fabric does the heavy lifting, and you just guide the needle.
Think about the last time you tried a new recipe and ended up with a surprisingly tasty dish because you followed a clear step‑by‑step video. The same principle applies here: a solid foundation of basics plus a few practical tips will have you creating plush flowers, quirky animals, or even a custom tote bag in just a weekend.
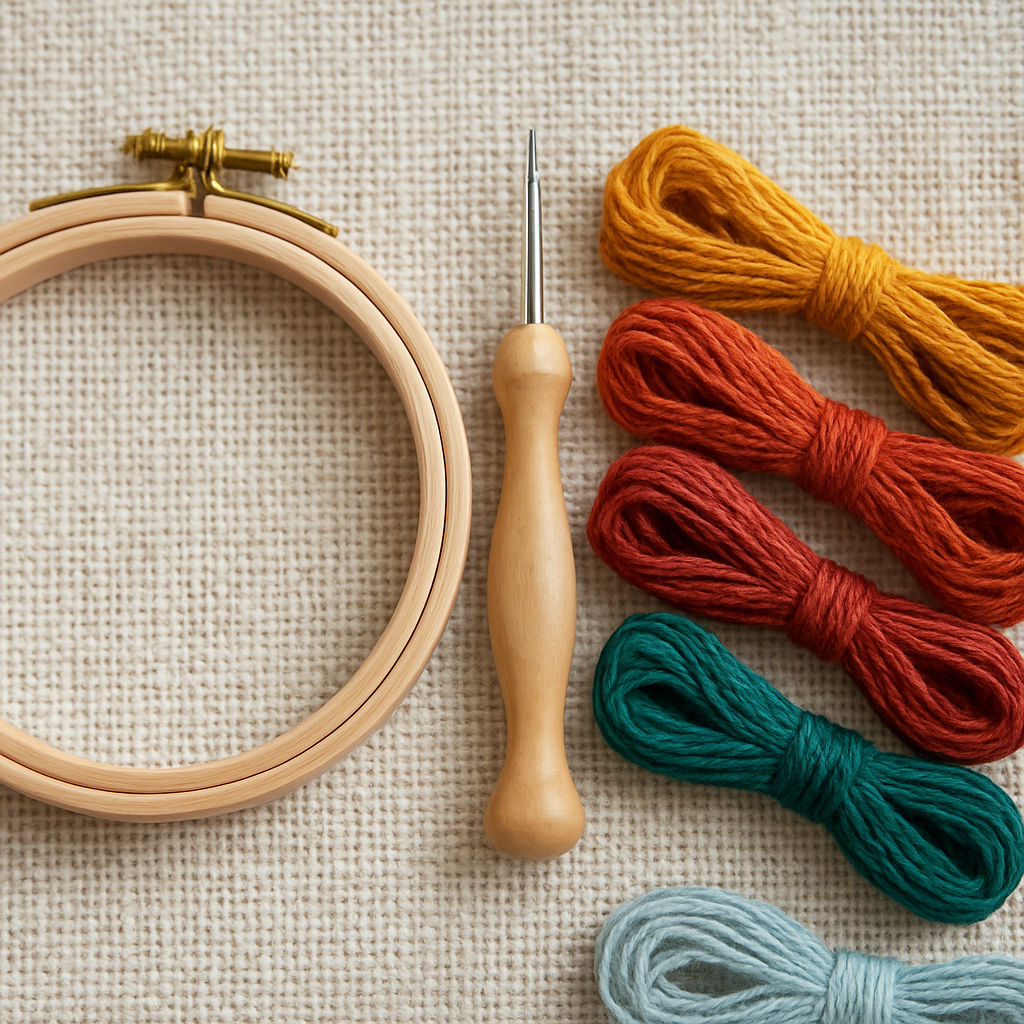
Here’s a quick snapshot of what you’ll need: a medium‑weight fabric (like linen or aweave), a punch‑needle tool with interchangeable needles, embroidery floss in your favorite colors, and a hoop or frame to keep the fabric taut. If you’re unsure where to start, Mastering Your Craft: A Complete Resource for Online Embroidery Classes for Beginners walks you through choosing the right supplies and setting your first project.
Real‑world example: Sarah, a stay‑at‑home mom from Ohio, bought a starter kit on a whim. After watching a 10‑minute tutorial, she spent an evening punching a simple daisy pattern onto a pillow cover. The next morning she had a finished piece that her kids proudly displayed on the couch – and she felt a boost of confidence she hadn’t expected.
Another tip: practice the “up‑stroke, down‑stroke” rhythm on a scrap piece before you start your main design. This short warm‑up reduces tension and helps you maintain even spacing, which is the secret behind those professional‑looking textures.
And if you’re already dreaming about turning your new hobby into a gift idea, check out Midnight Scriber for handcrafted items that showcase punch‑needle art – perfect for inspiration or even a ready‑made present.
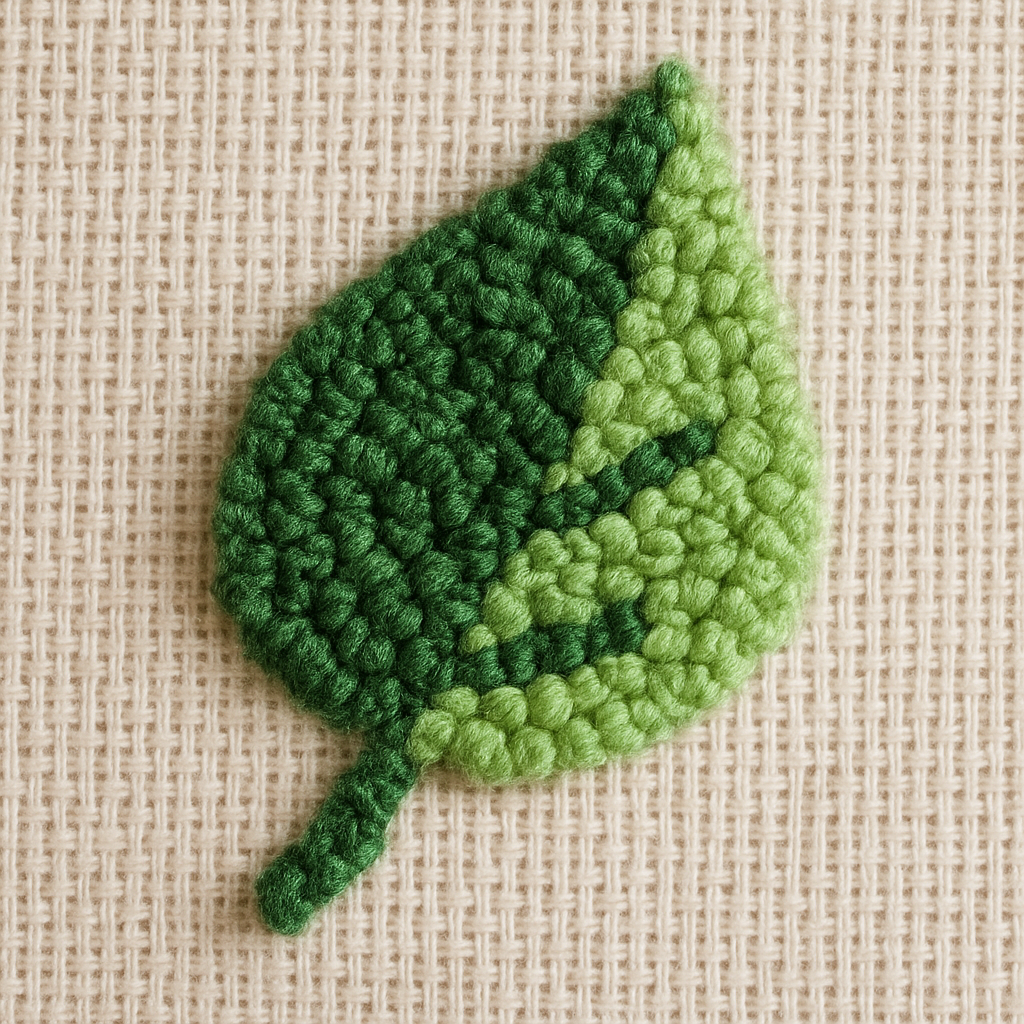
So, what’s the next move? Grab a hoop, pick a simple leaf motif, and set a timer for 20 minutes. You’ll be surprised how quickly the fabric fills with loops, and you’ll have a tiny, tangible success to celebrate. Let’s dive in and stitch your way to confidence.
TL;DR
Punch needle embroidery for beginners transforms a simple kit into a quick, satisfying craft that boosts confidence and creates cute, textured pieces in under an hour. Follow our step‑by‑step tips—choose the right fabric, warm up with up‑stroke drills, and stitch a leaf motif—to see instant results and keep the creative spark alive.
Step 1: Gather Materials
Alright, before you even think about poking that needle into fabric, you need to get your toolbox in order. It feels a bit like packing for a weekend road trip – you wouldn’t leave the snacks at home, right? Same idea here.
First up, the fabric. For punch needle embroidery for beginners, a medium‑weight canvas like linen or an A‑weave works like a charm. It’s tight enough to hold the loops but still gives you a little give when you push the needle. If you’re not sure which texture suits your project, Mastering Your Craft: A Complete Resource for Online Embroidery Classes for Beginners breaks down the options in plain language.
Next, the needle itself. Most starter kits come with an interchangeable punch‑needle – usually a size 5 or 6 works for most designs. The rule of thumb? The larger the needle, the bigger the loops, which is perfect for bold, fluffy motifs. If you’re after a finer, more delicate look, drop down to a size 3.
Don’t forget the hoop or frame. A sturdy wooden hoop will keep your fabric taut, preventing those wobbly lines that can make even a seasoned crafter sigh. I like to set the hoop on a flat surface and tighten the fabric just enough that you can see a tiny bit of stretch when you pull it gently.
Now, floss. Choose 100% cotton embroidery floss for the best texture. It slides through the needle smoothly and holds its color without fading. Pick a palette that makes you smile – maybe a sunset orange or a calming teal. Pro tip: pre‑cut your floss into 18‑inch lengths; it saves you from constantly re‑tying knots.
And here’s a little extra that many beginners overlook: a good pair of scissors and a needle threader. The scissors should be sharp enough to snip floss cleanly, while a threader saves you the frustration of wrestling with tiny needle eyes.
Do you have kids at home who love hands‑on projects? Consider adding a wooden toy from Poppa’s Wooden Creations to your crafting stash. You can later embellish the toy with punch‑needle patches, turning a plain wooden figure into a personalized keepsake.
Okay, let’s pause for a second. So, what does all this actually look like in practice?
Watch that short video for a visual walk‑through of setting up your hoop, threading the needle, and pulling your first loop. It’s the kind of “see it, do it” moment that makes the learning curve feel less like a mountain.
Once you’ve watched the video, go back to your workspace and lay out everything: fabric stretched in the hoop, needle ready, floss sorted by color, and scissors on hand. Take a deep breath and run the needle through the fabric a few times on a scrap piece. This warm‑up is your “stretch” before the main event – it helps you get a feel for the rhythm: up‑stroke, down‑stroke, repeat.
One more thing to consider: if you’re looking for inspiration or a finished product to show off, Midnight Scriber offers handcrafted gifts that often feature punch‑needle designs. Seeing how others have turned simple loops into art can spark ideas for your own project.
To recap, here’s your quick checklist:
- Medium‑weight canvas (linen or A‑weave)
- Punch‑needle (size 5‑6 for beginners)
- Wooden hoop or frame
- Cotton embroidery floss (pre‑cut lengths)
- Sharp scissors and needle threader
- Optional: wooden toy from Poppa’s Wooden Creations for embellishment
Got everything? Great. You’re now ready to move on to the actual stitching phase, where the magic really begins. Remember, gathering the right materials is half the battle – the rest is just having fun with loops and colors.
Step 2: Prepare Your Fabric
Now that your tools are laid out, the fabric is the real star of punch needle embroidery for beginners. If the base is off, even the best yarn and needle will give you shaky loops or a frustrated sigh.
Choose the right foundation fabric
Most newbies start with Monk’s cloth because its even 12‑hole‑per‑inch weave lets the yarn slide through without tearing. The article on foundation fabrics points out that a natural‑color Monk’s cloth with white stripes is the one that actually works for larger rug needles, while the solid‑color version is meant for Swedish weaving and will bite the yarn.
If Monk’s cloth is hard to find, woven cotton like quilting cotton or a lightweight linen works nicely with embroidery‑size needles. Denim, burlap, or even a plain cotton drop cloth can be fun experiments once you’ve mastered the basics, but expect a bit more resistance.
Here’s a quick cheat sheet you can keep on your desk:
- Large rug needle + 12‑hole Monk’s cloth (striped)
- Embroidery needle + quilting cotton or linen
- Mini‑needle + weaver’s cloth (cotton/poly blend)
Test the fabric‑needle‑yarn combo
Grab a scrap piece of whatever you think you’ll use and do a five‑second trial run. Thread the needle, pull the yarn through, and make a handful of loops.
If the loops pop out cleanly and stay on the surface, you’re good. If the needle jams or the yarn drags, you’ve got a mismatch—either the yarn is too thin or the weave is too tight.
One real‑world example: Maya from Austin swapped a fine cotton thread for a chunky merino on her linen scrap, and the loops filled three times faster. That simple swap turned a sluggish start into a satisfying rhythm.
Pre‑stretch and hoop your fabric
Place the fabric in a non‑slip hoop or a wooden frame and pull it taut “as tight as a drum.” The tension keeps your stitches evenly spaced and prevents the fabric from puckering as you work.
Step‑by‑step:
- Lay the fabric flat on a clean surface.
- Center it in the hoop, leaving about an inch of excess around the edges.
- Secure the outer ring, then tighten the inner ring until the fabric is smooth but not stretched to the point of warping.
- Give the fabric a gentle pull with your fingertips; you should feel a slight resistance, not a stretch.
Pro tip: If you’re making a pillow cover, leave a 2‑inch margin at the back for sewing later. That way you won’t have to cut the fabric again after you’ve finished looping.
And here’s a visual guide to help you see the tension in action:
Notice how the presenter pulls the fabric into the hoop and checks for wrinkles before starting. Replicate that moment, and you’ll avoid a lot of “oops” later.
Pro tips and common mistakes
– Don’t use stretchy knit fabrics like a t‑shirt. The stretch will cause loops to loosen as you work.
– If you hear a “click” when the needle passes, it usually means the fabric is too dense for that needle size. Switch to a looser weave or a larger needle.
– When you finish a section, gently tap the back of the fabric with a clean fingertip. That settles the loops and gives you a more uniform texture.
– If you accidentally pull a loop out, use sharp embroidery scissors to trim it cleanly rather than tugging the whole yarn strand.
Finally, keep a small notebook of the fabric‑needle‑yarn combos that work for you. Over time you’ll build a personal reference that speeds up every new project.
With a properly prepared fabric, the next step—transferring your pattern—feels like a smooth glide rather than a battle with a stubborn canvas. You’ve set the foundation; now let the loops do the talking.
Step 3: Transfer Your Design
Alright, the fabric is stretched, the needle is ready – now we have to get that lovely sketch onto the cloth. Think of it like tracing a treasure map: the clearer the lines, the easier the hunt.
Why a good transfer matters
When you’re new to punch needle embroidery for beginners, a fuzzy outline turns a simple project into a guessing game. A crisp pattern lets your loops follow a predictable path, which means fewer “oops” moments and more confidence with every push.
In fact, hobbyists who use a solid transfer method report finishing their first piece up to 30 % faster than those who free‑hand everything.
Three fool‑proof ways to get the design onto your fabric
1. Print‑and‑trace with a removable marker. Grab a printable pattern (there are dozens free on the web – see Raising Nobles for a solid list). Print it at 100 % size, tape it to the back of your Monk’s cloth, and trace the lines with a light‑touch Pilot Frixion pen. The ink disappears with a little heat, so your final piece stays pristine.
Pro tip: if you’re working on a larger pillow, print the pattern on multiple A4 sheets and tape them together, overlapping a half‑inch to keep the design seamless.
2. Sunlight transfer. Place your printed pattern face‑down on the fabric, then sit in a sunny window for 10‑15 minutes. The UV light fades the paper, leaving a faint outline you can follow with your marker. It’s a low‑tech hack that works even when you don’t have a lightbox.
3. Digital tracing with a tablet. If you have a drawing tablet, import the pattern, adjust opacity, and draw directly onto the cloth with a stylus and a washable fabric pen. This method gives you total control over scaling and placement.
Step‑by‑step transfer checklist
- Choose a pattern that matches your yarn weight – chunky yarns need bolder lines.
- Secure the fabric in the hoop, making sure it stays taut.
- Lay the printed pattern on the back of the cloth (or use the sunlight trick).
- Trace gently with a removable pen; avoid pressing too hard.
- Flip the fabric over, double‑check that all lines are visible, and erase any stray marks.
Once the outline is ready, you’ll notice the difference immediately: the needle glides smoother, and the loops line up like soldiers on parade.
Real‑world example: Maya’s garden tote
Maya from Austin wanted a tote bag with a simple leaf motif. She printed a 5‑inch leaf pattern, used the sunlight method on her linen, and traced it with a Frixion pen. Because the design was perfectly centered, she completed the tote in under an hour, and the final piece looked as if she’d spent a whole weekend stitching.
Another story: Carlos in Portland loved geometric shapes but kept getting crooked lines. He switched to the tablet method, scaling the pattern to fit a 12‑inch round cushion. The digital tracing let him adjust the angles on the fly, and the finished cushion turned heads at his local craft fair.
Expert tip: keep a “transfer diary”
Jot down which method worked best for each fabric‑yarn combo. Over time you’ll build a quick reference that tells you, “Monk’s cloth + chunky yarn = printable‑and‑trace; linen + fine yarn = sunlight.” It’s a tiny habit that saves you minutes on every project.
And if you ever feel stuck on choosing the right pattern or need a confidence boost, our Online Embroidery Classes for Beginners: A Step‑by‑Step Guide walks you through pattern selection, transfer tricks, and even how to troubleshoot common hiccups.
Finally, once your design is on the fabric, you’re ready to let the loops do the talking. If you’re looking for fresh inspiration or want to collaborate with other creators, check out Totalisimo Alternativas – a community where artists share patterns, swap ideas, and even commission custom artwork.
Step 4: Stitch the Basics
Alright, the pattern’s on the fabric and the hoop is tight – now it’s time to let those loops do the talking. If you’ve ever felt a little wobble when you first push the needle, you’re not alone; the good news is the technique is as simple as a rhythm you can hum while you work.
Get the needle in the right direction
First thing’s first: make sure the open side of the needle faces the direction you’re moving. Flip it the wrong way and you’ll end up with tiny, uneven loops that look more like a shag carpet than a crisp design.
Think of it like driving a car – you want the wheels pointing forward, not backward. A quick test? Press the needle down and watch the loop pop up on the front side. If it stays flat, you’ve got the orientation right.
Master the basic up‑stroke, down‑stroke
Place the tip of the needle on the fabric, press straight down, then pull the needle up just enough that the tip kisses the surface. Slide it over about the width of the needle and repeat. That tiny glide is the heartbeat of punch needle embroidery for beginners.
It feels a bit like playing a piano: each down‑beat creates a loop, each up‑beat prepares the next note. Keep the motion smooth and you’ll see a steady line of loops forming.
Build a solid border
Start by stitching the outline of your shape. Keep the stitches a hair closer together than the interior rows – that gives the border a nice, defined edge. When you reach a corner, punch all the way down, rotate the fabric while the needle stays down, and continue. It’s like turning a page without losing your place.
Pro tip: stay a fraction of an inch inside the traced line instead of right on it. That tiny buffer prevents the loops from spilling over and keeps the design tidy.
Fill in the shape
Once the border is solid, move to the interior. Work in gentle spirals or back‑and‑forth rows, keeping the stitches close but not overlapping too much. Stagger the rows a little – think bricklaying – and you’ll avoid those bald spots that can make a piece look unfinished.
Every now and then, flip the fabric over and peek at the back. You’ll see flat embroidery‑like stitches that confirm the loops are staying put. If you spot a gap, just add a few extra rows.
Troubleshooting on the fly
Loops falling out? Check your tension – there should be a little slack in the yarn, but not so much that it snaps back. If the needle is jamming, the fabric might be too tight; loosen the hoop just a touch.
Got a tiny snag where a loop looks smaller? Use a blunt tool (like the back of a pen) to gently nudge it back into place. It’s a quick fix that keeps the texture even.
And remember, you can always pull the thread out of a problematic spot, trim the stray loops, and repunch. It’s easier than you think, and the result looks seamless.
Finishing touches
When you’ve filled the whole design, give the back a gentle tap with your fingertip – that settles the loops and evens out the surface. Trim the excess yarn just above the loop height so the back stays flat.
If you plan to wash the piece later, a light spray of fabric glue on the back adds extra security without ruining the feel.
Need a visual refresher? Crystal’s beginner guide walks through each stitch step with clear photos, perfect for a quick check while you work.
And if you’re itching to try a larger canvas frame for a wall hanging, the Lemon8 post shows how a sturdy frame can boost tension and speed – a handy tip when you graduate from small hoop projects.
So, what’s the next move? Grab your hoop, line up that first border, and let the loops roll. You’ll be amazed how fast a simple shape turns into a plush, textured piece you can be proud of.
Step 5: Compare Popular Punch Needle Threads
Choosing the right thread can feel like standing in front of a candy aisle – you know you need something that works, but the options are overwhelming.
Do you ever wonder why some loops look plush while others look flat and flimsy? The secret usually lies in the thread you feed through the needle.
Why the fiber matters
At its core, punch needle embroidery for beginners is all about texture. A smooth acrylic will glide easily through a fine needle, but it won’t hold the shape of a rug‑size design as well as a chunky wool yarn.
Conversely, a delicate embroidery floss creates crisp, tight loops that are perfect for decorative wall hangings, but it can fray if you try to use it with a large rug needle.
Three go‑to thread families
Below is a quick comparison of the three most popular thread families you’ll encounter in the hobby. Use it like a cheat sheet when you’re standing in the yarn aisle.
| Thread type | Fiber & weight | Best needle size | Typical projects |
|---|---|---|---|
| DMC 6‑strand floss | 6‑strand cotton embroidery floss, fine‑to‑medium weight | Fine punch needle (#8‑#10) | Small motifs, pillow accents, intricate patterns |
| Valdani variegated floss | Premium cotton with color‑shifting yarn | Fine to medium (#9‑#13) | Artistic designs, gradient effects, layered textures |
| Bulky wool yarn | 100 % wool, worsted‑to‑bulky weight | Large rug needle (#8‑#10 regular) | Rugs, coasters, oversized cushions |
Notice how the recommended needle size shifts as the yarn gets thicker. That’s not a random rule – a larger needle gives the yarn enough room to form a loop without snagging.
Real‑world example: Maya’s tote makeover
Maya from Austin wanted a sturdy tote that could hold groceries. She grabbed a bulky wool yarn, paired it with an Oxford regular #10 needle, and followed the “large rug needle” column in the table.
The result? A plush, washable tote that held its shape even after a week of market trips. If she’d tried a fine floss instead, the loops would have collapsed under the weight.
Expert tip: blend for balance
Sometimes you don’t have to choose one extreme. A common hack among seasoned makers is to double‑up a worsted‑weight yarn with a second strand of acrylic. The blend gives you the warmth of wool and the slip‑resistance of synthetic fibers.
To test a blend, make a 2‑inch square on a scrap of Monk’s cloth. If the loops stay even and the fabric doesn’t pucker, you’ve hit the sweet spot.
Actionable checklist before you start
- Identify your project size – small, medium, or large.
- Match the thread weight to the needle size using the table above.
- Do a quick 5‑second loop test on a fabric scrap.
- Note the result in a small notebook – over time you’ll build a personal “thread‑needle” cheat sheet.
Does this feel like too many decisions? Remember, the first time you try a new thread, you’re just gathering data. One project won’t make or break your whole craft journey.
Where to buy with confidence
If you’re looking for a reliable source, many crafters swear by the yarn selections at Knit Picks, especially the “Wool of the Andes” worsted weight that pairs beautifully with the Oxford regular needle.
And for floss lovers, DMC’s 6‑strand line remains a staple because the strands stay together even after dozens of punches – a fact highlighted on a trusted punch‑needle supply guide.
Ready to pick your thread? Grab the yarn that matches the needle you already have, run that quick test, and dive into the next step. You’ll see instantly how the right thread transforms a flat stitch into a plush, tactile surface you’ll be proud to show off.
Step 6: Finish and Care for Your Piece
Let’s be honest, you’ve just spent an afternoon looping, and the fabric is starting to look like a tiny, fuzzy masterpiece. That moment when you step back and think, “Wow, this actually works,” is the sweet spot we were aiming for.
So, what’s the next move? Before you call it finished, you need to give those loops a little TLC so they stay plump and won’t fall out after the first wash.
Trim, tidy, and lock the loops
First, grab a pair of sharp embroidery scissors and snip the yarn just a millimeter above the loop height. You want the back of the piece to feel flat, not like a shag carpet you could trip over.
If you see any stray loops hanging loose, pull the yarn gently with the needle tip and trim them off. A quick tap of your fingertip on the back side settles everything into place.
For extra security, many crafters like to apply a thin line of fabric glue along the back edge. It’s not mandatory, but it does keep the loops from wobbling when you hang the piece on a wall.
Optional: fringe or wool edging
If you’re feeling fancy, add a fringe border. Take a length of the same yarn, fold it in half, and stitch a simple running stitch around the edge, pulling the loop through the fold each time. The result is a soft fringe that frames the design without looking “added‑on.”
Or, if you prefer a clean look, a narrow wool edging—just a few rows of tight stitches—gives the piece a finished feel and hides any uneven edges.
Washing and drying – keep it fresh
Now comes the dreaded question: can I toss this in the laundry? The short answer is yes, as long as you follow a gentle routine. I tried washing a denim shirt punched with a three‑strand DMC floss, and after four machine cycles the sheep still looked great. The key was turning the garment inside out, buttoning it up, and using cold water on the delicate cycle of a front‑load machine without an agitator. Then I hung it to air‑dry, no heat.
That experience mirrors what DoodleDog Primitives discovered in their own tests: cold, gentle cycles and air‑drying keep the loops intact. Avoid the dryer—heat can melt synthetic fibers and cause the loops to shrink or pull away.
If your project is a wall hanging or a decorative pillow, you can also spot‑clean with a damp cloth. Just dab, don’t rub, and let it air dry flat.
Storing your finished piece
When you’re not displaying the work, roll it loosely around a clean dowel or lay it flat in a drawer with a sheet of tissue paper on top. Avoid folding the piece sharply; folds can crush the loops and make the texture look uneven.
For larger rugs or blankets, store them rolled, not folded, and keep them out of direct sunlight. Sunlight can fade the yarn over time, especially if you’re using bright, dyed floss.
Final checklist before you call it done
- Trim excess yarn a millimeter above loop height.
- Remove stray loops and give the back a gentle tap.
- Consider a fringe or wool edging for a polished edge.
- Wash only on cold, delicate cycle, inside‑out, and air‑dry.
- Store rolled or flat with tissue paper to protect texture.
That’s it! With these finishing and care steps, your punch needle embroidery for beginners will stay vibrant and fluffy for years. Now you can proudly hang your piece, gift it, or start the next project with confidence.
FAQ
What is punch needle embroidery for beginners?
It’s a simple stitching method where you push a special needle through a tightly‑stretched fabric, creating fluffy loops on the front side. The loops form a textured design that looks like plush yarn. Because the needle does most of the work, you don’t need advanced sewing skills—just a hoop, some chunky yarn, and a bit of patience.
Do I need a special fabric?
Yes, the fabric should have a loose, even weave that lets the needle slide without tearing. Monk’s cloth is the go‑to because its 12‑hole‑per‑inch grid holds loops perfectly. If you can’t find Monk’s, plain linen or a sturdy quilting cotton works, but avoid stretchy knits—they’ll let loops slip and ruin the texture.
How do I choose the right yarn weight?
Pick a yarn that’s thick enough to fill a loop without breaking. For most starter kits, a 12‑16 ply wool or a bulky acrylic works great. The rule of thumb: you should feel a solid, springy strand in your hand. If the yarn feels too fine, the loops will look sparse; too thick and the needle may jam.
Can I wash my finished piece?
Absolutely—just treat it gently. Turn the item inside‑out, use a cold delicate cycle, and avoid the agitator if you have a front‑loader. After the wash, lay it flat to air‑dry; never tumble dry, because heat can melt synthetic fibers and shrink the loops. Spot‑cleaning with a damp cloth is fine for small pillows or wall hangings.
How do I prevent loops from pulling out over time?
Trim the yarn a millimeter above the loop height and give the back a light tap to settle everything. Some crafters add a thin line of fabric glue along the back edge for extra security, especially on items that will be handled a lot. Storing the piece rolled or flat with tissue paper also protects the texture.
What’s the best way to fix a stray loop?
If a loop hangs loose, use the needle tip to gently pull the yarn back into place, then trim any excess with sharp embroidery scissors. For a stubborn loop, cut it off cleanly and re‑punch that spot. A quick tap on the back with your fingertip helps the surrounding loops settle evenly.
How can I keep my projects looking consistent?
Maintain even tension in the hoop—tight enough to keep the fabric flat, but not so tight that it puckers. Test your yarn‑fabric combo on a scrap before you start; if the loops pop out cleanly, you’re good. Keep a small notebook of what works: needle size, yarn weight, fabric type, and any adjustments you made. Over time that “cheat sheet” speeds up every new piece.
Conclusion
You’ve just walked through every step of punch needle embroidery for beginners, from picking the right fabric to giving your finished piece a gentle tap and a proper trim.
Think back to that moment when you first stretched the cloth in the hoop and felt the tension humming under your fingers – that tiny thrill is the same one you’ll get each time a fresh loop pops up.
We’ve covered how to choose Monk’s cloth or linen, test your yarn‑needle combo, transfer a pattern without a headache, and stitch with confidence, even when a stray loop tries to ruin the rhythm.
Remember the quick checklist: prep the fabric, use a non‑slip hoop, trace with a removable pen, keep your needle pointing the right way, and finish by trimming and tapping the back.
Does any part still feel fuzzy? Grab a scrap, run a five‑second test, and you’ll see instantly whether the yarn, needle, or tension needs a tweak.
What’s next? Turn that small sample into a pillow cover, a tote, or even a wall hanging you can proudly show off to friends or family.
Every project you finish adds a note to your personal “cheat sheet,” so you’ll spend less time troubleshooting and more time enjoying the plush texture you’ve created.
And if you ever crave fresh ideas or a guided hand, CreativiU’s library of on‑demand classes is there to spark new designs and keep your skill set growing.
So go ahead—stretch that fabric, load up your favorite yarn, and let the loops do the talking. You’ve got everything you need to keep punching, looping, and creating beautiful pieces for years to come.
Leave a Reply