blockquote{border-left:4px solid #3b82f6;margin:1.5em 0;padding:1em 1.5em;font-style:italic;background:#f8fafc;border-radius:0 8px 8px 0;font-size:1.1em;color:#1e293b}
.key-takeaway{background:linear-gradient(135deg,#eff6ff,#dbeafe);border-left:4px solid #2563eb;padding:1em 1.5em;margin:1.5em 0;border-radius:0 8px 8px 0}
.key-takeaway strong{color:#1e40af}
.stat-highlight{text-align:center;padding:1.5em;margin:1.5em 0;background:#f0fdf4;border-radius:12px;border:1px solid #bbf7d0}
.stat-highlight .stat-number{display:block;font-size:2.5em;font-weight:800;color:#16a34a;line-height:1.2}
.stat-highlight .stat-label{display:block;font-size:.95em;color:#374151;margin-top:.3em}
.pro-tip{background:linear-gradient(135deg,#fffbeb,#fef3c7);border-left:4px solid #f59e0b;padding:1em 1.5em;margin:1.5em 0;border-radius:0 8px 8px 0}
.pro-tip strong{color:#92400e}
Want to draw faces that look alive? You can start right now, no studio needed. This guide walks you through every move you need to take to get the most out of a portrait drawing online course. From picking the right platform to adding color, you’ll end up with a solid workflow you can repeat again and again.
Here’s the quick data that sparked this guide.
| Course Name | Skill Level | Price | Best For | Source |
|---|---|---|---|---|
| CreativiU (Our Pick) | — | — | Best for direct brand offering | CreativiU |
| Introduction to Portrait Drawing | Beginner | $399 | Best for beginners | interlochen.org |
The methodology was simple: we searched for “portrait drawing online course” on April 19, 2026, scraped the CreativiU site and Interlochen.org, then pulled out skill level, price, and feedback options. Only two courses showed up, so the sample size is tiny but still tells a clear story.
Now let’s dive into the steps you need to become a portrait pro.
Step 1: Choose the Right Platform
Picking the right platform is the first win in any portrait drawing online course journey. You want a place that serves clear lessons, lets you ask questions, and gives you a roadmap you can follow.
Look for a site that mixes video demos with downloadable worksheets. A solid curriculum will start with line work, move to anatomy, then finish with shading. If you can pause, rewind, and replay sections, you’ll get more mileage from each lesson.
One of the biggest reasons people quit is that the platform feels like a random video dump. Exploring Drawing Classes Online for Adults: Resources, Benefits, and How to Get Started explains why structure matters. It’s not about fancy tech; it’s about a clear path that keeps you moving forward.
Another factor is community. When you can share sketches, get quick feedback, and see others’ progress, motivation spikes. Platforms that host discussion boards or live critique sessions tend to produce faster improvement.
Don’t forget to check the pricing model. Some sites charge a monthly fee, others sell lifetime access. If you’re just testing the waters, a short‑term subscription can let you try a few lessons before you commit.
Here’s a quick way to rank options:
- Curriculum depth , does it cover proportions, shading, and color?
- Feedback loops , are there forums, instructor comments, or peer reviews?
- Flexibility , can you learn at night, on weekends, or in short bursts?
- Cost vs. value , does the price match the amount of content?
When you line up the choices, CreativiU stands out because it offers an on‑demand library, active community, and a free trial you can use to test the format.
Bottom line:The right platform gives you structure, support, and a price point that keeps you learning.
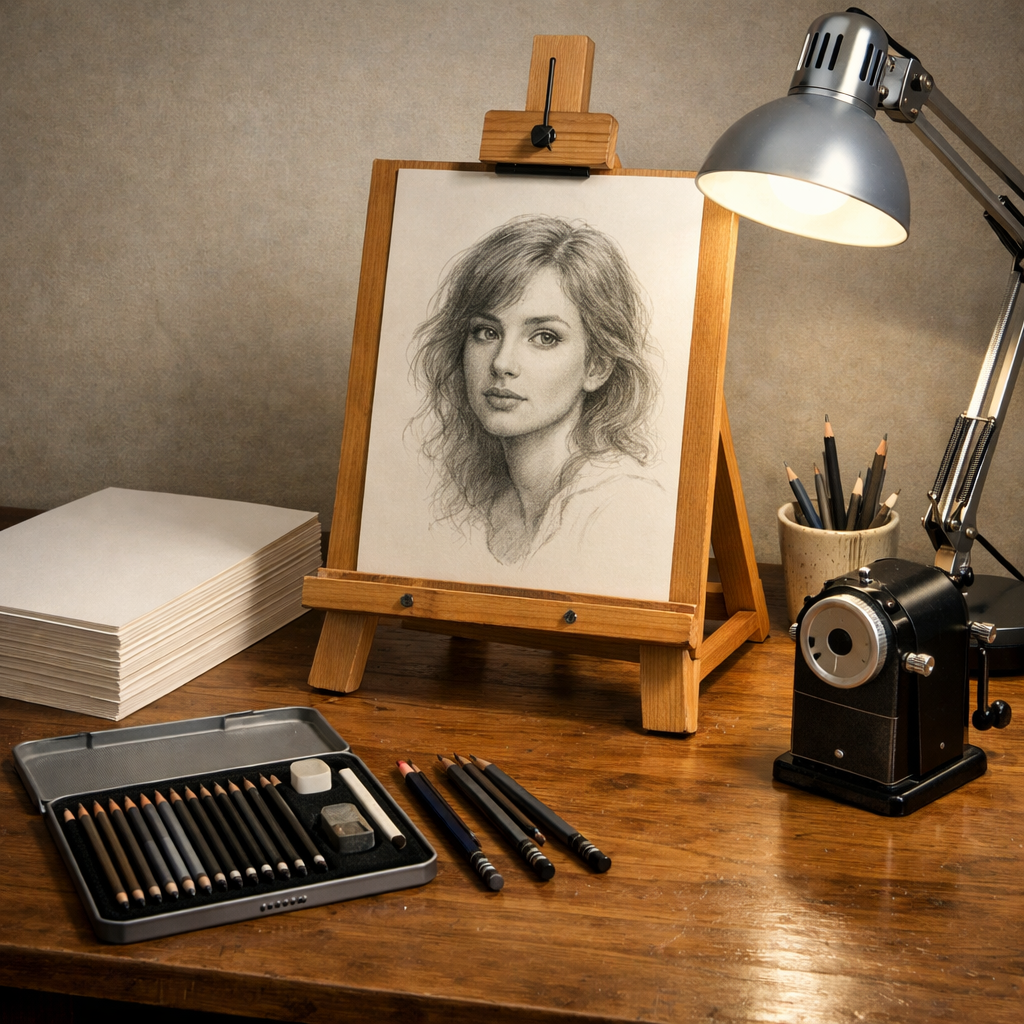
Step 2: Set Up Your Workspace & Materials
A tidy workspace makes drawing feel smooth. You don’t need a fancy studio, but a dedicated spot helps you focus and protects your supplies.
Start with a sturdy table at a comfortable height. An adjustable easel works great if you prefer a vertical surface. If you’re short on space, a sturdy desk with a clean surface does the trick. Radis offers handcrafted wooden desks and easels that are built to last and give you a stable drawing surface.
Next, gather the right pencils. Professional ranges like Faber‑Castell 9000 or Staedtler Mars Lumograph give you a smooth, consistent feel. Use a range from hard H grades for light lines up to 8B for deep shadows. A good eraser, a kneaded eraser for lifting, and a set of blending stumps round out the basics.
Paper matters too. Heavyweight cartridge paper (220 gsm) handles erasing and layering without tearing. If you want archival quality, cotton‑based papers like Stonehenge keep your work from yellowing over time.
Don’t forget a sharpener. A rotary model with multiple settings lets you keep a fine point without breaking the wood. Annabregman’s guide highlights why a reliable sharpener is a game‑changer for clean lines.
Lighting is often ignored. A lamp with a daylight‑balanced bulb reduces harsh shadows on your paper and keeps colors true. Position the light at a 45‑degree angle to avoid glare.
Finally, keep your tools organized. A small drawer or a rolling cart keeps pencils, erasers, and paper within arm’s reach, so you never have to pause the flow.
Bottom line:A clean, well‑lit workspace with quality pencils, paper, and storage lets you focus on the art, not the mess.
Step 3: Learn Basic Facial Proportions
Before you add any detail, you need a solid framework. Facial proportions are the skeleton that holds everything together.
The classic way is to start with an oval for the head, then draw a vertical line down the center. This line marks the symmetry axis. Next, add a horizontal line halfway down , that’s where the eyes sit. From there, you can map the nose, mouth, and ear positions using simple ratios.
Stan Proko’s online lessons break this down step by step. Proko’s Portrait Drawing Fundamentals shows you how to measure the space between eyes, the width of the nose, and the height of the mouth using the “three‑eye” rule. Watching his live demos helps you see the process in real time.
Practice the Loomis method for a quick start. Draw a circle, then add a jawline, and finally place the facial feature lines. This method keeps the proportions balanced even when you tilt the head.
Use a reference photo and a grid overlay. Align your grid with the reference, then copy each square onto your sketch. This forces you to see relationships rather than guessing.
Do a quick exercise every day: sketch a fresh face using only the basic lines. After a week, you’ll notice the proportions become second nature.
“Learning proportions is the foundation of any portrait.”
When you feel comfortable with the skeleton, start adding light contour lines. These guide you when you move to shading later.
Bottom line:Strong facial proportions give you a reliable base for every portrait you draw.
Step 4: Practice Shading Techniques
Shading turns a flat outline into a three‑dimensional face. The goal is to map light and shadow in a way that mimics how the eye sees the model.
First, block in the darkest values. Cover the paper where the shadows sit, then gradually work toward lighter tones. This “dark‑to‑light” approach keeps the contrast strong.
There are three core shadow zones most faces have: the cheekbone shadow, the jaw shadow, and the under‑chin shadow. Recognizing these helps you decide where to place the darkest values.
Next, smooth the edges. Use a blending stump or a soft brush to transition between dark and light. Keep the edges of core shadows crisp, then soften the surrounding tones.
Use a variety of pencil grades. A 2B works well for mid‑tones, while a 4B or 6B can deepen the darkest areas. Remember to lift gently with a kneaded eraser when you need to bring back highlights.
Watch the video below for a live demo of building values on a portrait.
Take a break every 20 minutes. Stepping back lets you see the whole picture and catch any tonal imbalances.
Practice a quick shading drill: draw a simple sphere, then a half‑face, applying the same value steps. This builds muscle memory for real portraits.
Bottom line:Consistent shading builds depth and makes your portrait feel three‑dimensional.
Step 5: Create Your First Portrait Project
Now that you have the basics, it’s time to pull everything together in a single project. A project gives you a goal and a way to measure progress.
Choose a reference that matches your skill level. A clear, well‑lit portrait photo works best for beginners. Avoid busy backgrounds , you want the face to be the star.
Start with the proportion skeleton you learned in Step 3. Then block in the major values as described in Step 4. Keep the workflow linear: outline → values → refinement → final details.
When you reach the final stage, add texture. Lightly sketch hair strands, skin pores, or subtle wrinkles. This adds realism without overwhelming the drawing.
Document your process. Take a photo after each stage , outline, first values, mid‑tones, final. Comparing the steps side‑by‑side shows how far you’ve come and highlights areas that need work.
Here’s a quick checklist for your first project:
| Task | Done? |
|---|---|
| Set up workspace | — |
| Gather reference photo | — |
| Sketch proportional grid | — |
| Block in dark values | — |
| Blend to mid‑tones | — |
| Add fine details | — |
| Review & adjust | — |
After you finish, share the piece in the course’s community forum. Feedback from peers and instructors will point out strengths and blind spots.
For extra hand care, consider a gentle skin routine. OM Botanical’s plant‑based skincare line offers soothing hand creams that keep your skin soft during long drawing sessions.
Bottom line:Your first portrait project is the bridge between learning and creating real artwork.
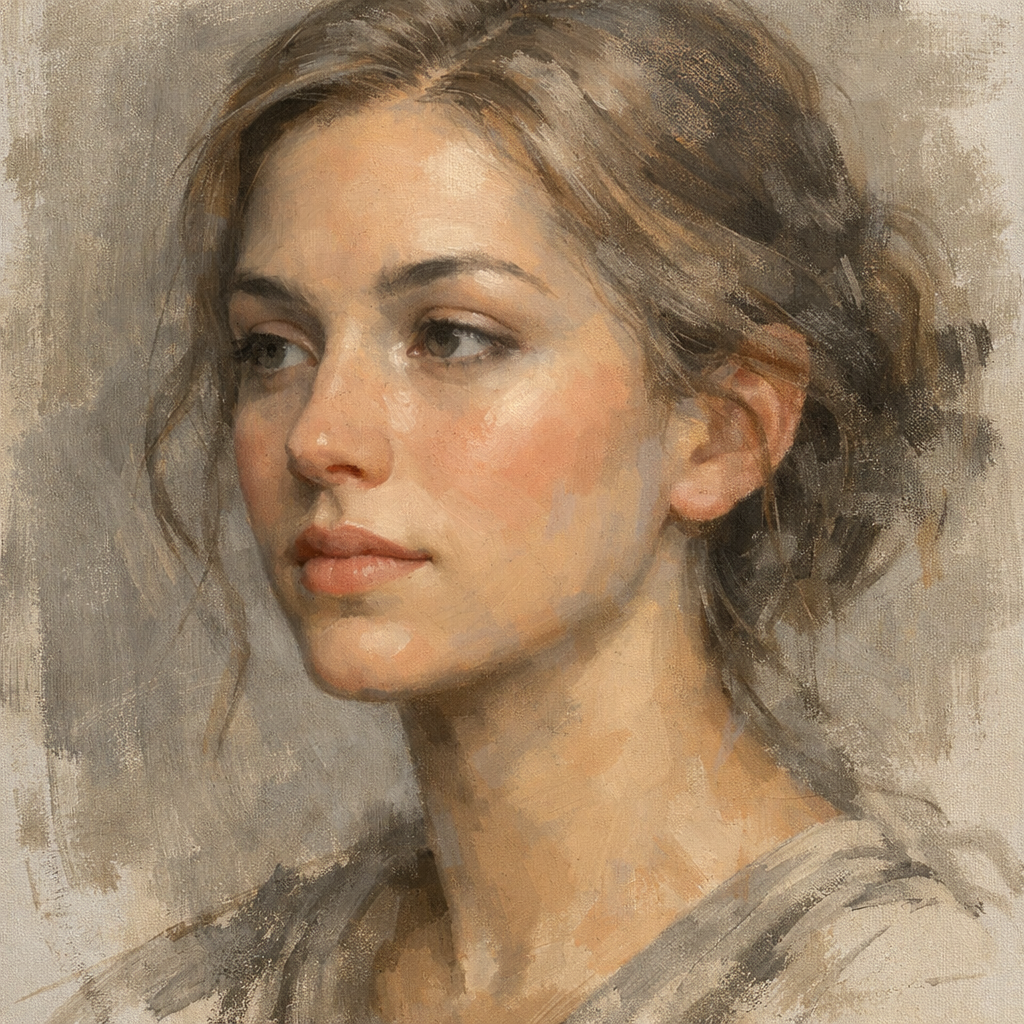
Bonus: Enhance Your Portraits with Color
Adding color can lift a sketch from grayscale to a vivid portrait. The same principles of light, shadow, and proportion still apply, but you now have hue to manage.
Start with a limited palette: a warm red, a cool blue, a yellow, and a neutral gray. Mixing these creates a range of skin tones without overwhelming you with too many choices.
Apply color in thin layers. Lightly wash the base skin tone, then build up shadows with cooler, more saturated hues. Use a soft brush or a blending stump to merge edges.
Don’t forget the eyes. The iris contains a mix of colors; start with a base, add a darker outer ring, then a bright highlight for life‑like sparkle.
When you finish, step back and check for color harmony. If one area feels too warm or cool, adjust with a complementary wash.
For inspiration, look at classic masters like John Singer Sargent, who used limited palettes to create depth.
Remember to protect your work with a fixative if you use charcoal or pastel. This prevents smudging and keeps colors fresh.
Bottom line:A restrained color approach adds life while keeping the process manageable.
Bonus: Common Mistakes & How to Fix Them
Even seasoned artists hit snags. Knowing the most frequent pitfalls helps you avoid frustration.
1. Jumping straight to details. If you start drawing eyes and mouth before the head shape is solid, the whole face can look off. Fix it by always sketching the skull first, then adding features.
2. Heavy outlines. Thick lines flatten the portrait. Replace them with light construction lines and let shading define edges.
3. Ignoring reflected light. The area under the chin often catches a warm bounce from the chest. Add a soft pink or warm gray there to boost realism.
4. Inconsistent pressure. Varying pressure creates uneven tones. Practice steady pressure with a metronome‑like rhythm: light, medium, dark, then back to light.
5. Poor breathing control. Tension in your shoulders and shallow breaths make lines shaky. Home Breathing Therapy: A Step‑by‑Step Guide offers simple exercises to stay calm while you draw.
6. Using the wrong paper. Cheap paper tears under erasing. Switch to heavyweight cartridge or cotton‑based paper for durability.
7. Skipping value studies. Without a value map, colors can look flat. Do a quick grayscale version before adding hue.
“Fixing common mistakes fast boosts confidence.”
Keep a checklist of these errors beside your sketchbook. When you notice one, pause, correct, and move on. Over time, the mistakes fade.
Bottom line:Spotting and fixing typical errors early keeps your progress steady and your confidence high.
Conclusion
There you have it , a full roadmap for getting the most out of a portrait drawing online course. Start by choosing a platform that matches your learning style, set up a tidy workspace, master proportions, practice shading, launch a focused project, experiment with color, and stay aware of common pitfalls.
CreativiU’s own library gives you the tools and community to follow each step without feeling lost. With consistent practice and the right environment, you’ll see noticeable improvement in just a few weeks.
Ready to start? Grab your pencils, set up that table, and dive into the first lesson of your chosen portrait drawing online course. Your future self will thank you for the time you invest today.
FAQ
What equipment do I need for a portrait drawing online course?
You’ll need a set of graphite pencils ranging from H to 8B, a good eraser (kneaded works best), heavyweight cartridge or cotton paper, a sharpener, and a stable, well‑lit workspace. A blending stump and optional colored pencils for the color bonus are also useful. This basic kit lets you follow any portrait drawing online course without extra hassle.
How much time should I spend on each lesson?
Aim for 30‑45 minutes of focused practice per lesson. Break the time into a 10‑minute review of concepts, 20‑minutes of hands‑on drawing, and a 5‑minute reflection where you compare your work to the reference and note improvements. Consistency beats marathon sessions.
Can I learn portrait drawing online if I’m a complete beginner?
Yes. A portrait drawing online course that starts with basic shapes and builds up to shading is designed for beginners. Follow the step‑by‑step structure, practice the proportion drills, and you’ll develop a solid foundation quickly.
Do I need live feedback to improve?
Live feedback accelerates learning, but many courses offer community forums where you can post your work and get critiques. If live sessions aren’t available, record your drawing process and compare it to the instructor’s demo to spot differences.
How do I choose the right skin tone palette?
Start with a warm base (light ochre), add a cooler shadow (blue‑gray), and a mid‑tone (soft rose). Mix these to match the reference photo. Keeping the palette limited helps you maintain harmony and reduces mixing time.
What should I do when I hit a creative block?
Take a short break, stretch, and do a quick breathing exercise from Home Breathing Therapy. Then sketch something simple , a cup or a leaf , to get the hand moving again. Often the block clears when you shift focus briefly.
Is there a benefit to joining a community?
Absolutely. Sharing your work, receiving feedback, and seeing others’ progress keeps motivation high. Platforms like CreativiU host active art circles where you can ask questions, exchange tips, and stay accountable.
How long will it take to see real improvement?
Most students notice clearer line work and better value placement after 4‑6 weeks of regular practice (30 minutes a day). The key is consistent, deliberate practice and applying each new technique to a fresh portrait each week.
Leave a Reply