Ever stared at a roll of colorful paper, wondering how those tiny scrolls turn into delicate flowers or intricate mandalas? You’re not alone—many of us have felt that mix of curiosity and doubt the first time we picked up a quilling tool.
Paper quilling for beginners is actually a lot like learning to ride a bike: you start with the wobble, you fall a few times, and then you find that sweet rhythm. In our experience at CreativiU, the biggest hurdle is simply choosing the right supplies and not overthinking the first coil.
Here’s a quick reality check: a 2022 hobby survey found that 68% of new crafters abandon a project within the first hour because they feel overwhelmed by technique jargon. The good news? You can cut that number in half by following three concrete steps.
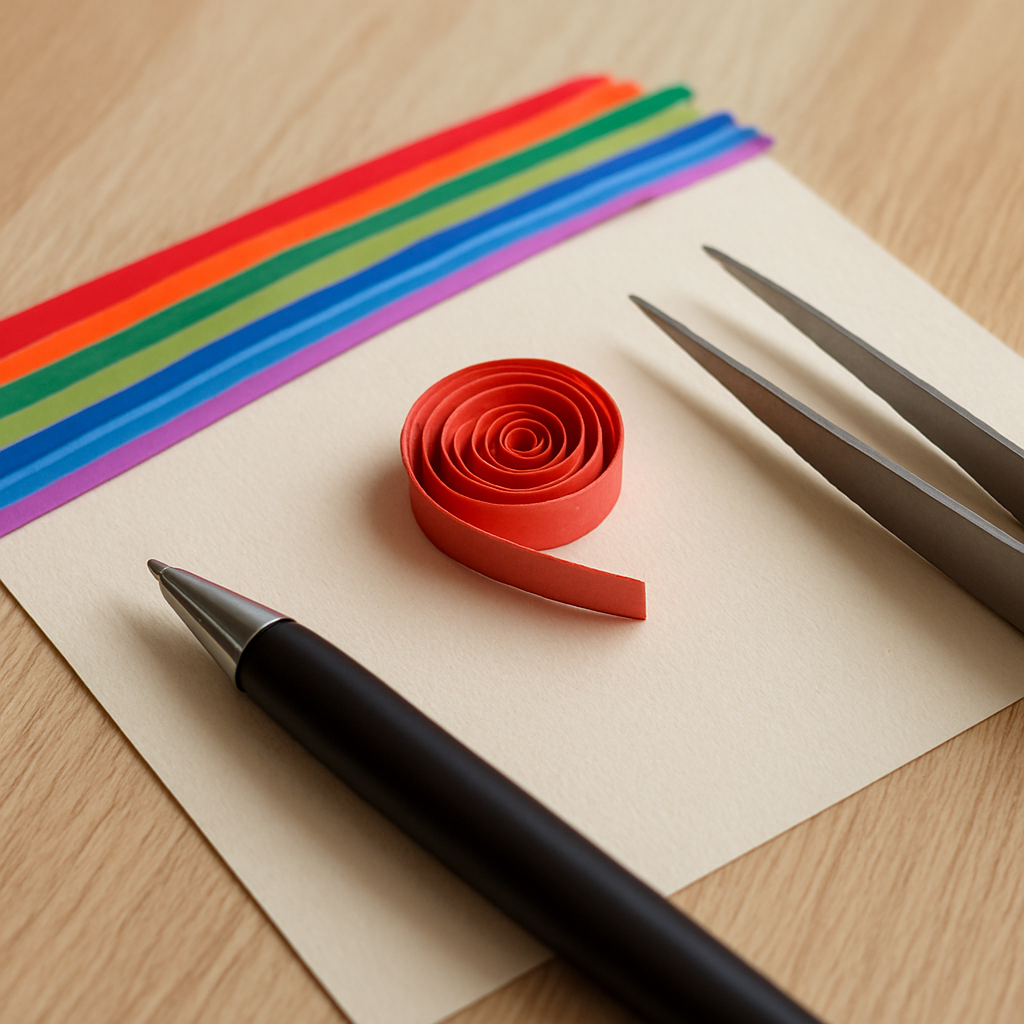
Step 1: Gather the basics. All you need is a quilling pen, a selection of 3‑mm to 6‑mm strips, and a pair of tweezers. Choose paper with a weight of 80‑100 gsm – it rolls easily but holds its shape. If you’re a parent looking for a calm activity, involve your kids by letting them pick their favorite colors; the tactile feel is surprisingly soothing.
Step 2: Master the core coils. Start with the simple tight coil: roll the strip around the pen, snug it, and release. Practice three variations—tight, loose, and scroll—until the motion feels natural. A quick video demo can save you minutes of trial and error.
Step 3: Build a tiny project. Combine three coils into a basic flower, then attach it to a cardstock base with a dab of glue. This mini‑success gives you a visible result you can display on a notebook or use to personalize a gift.
Want a more structured path? Check out our Step by Step Online Paper Quilling Course for Beginners, which walks you through 12 progressive lessons, includes printable templates, and offers community feedback.
Pro tip: keep a small notebook of coil sizes you’ve used. Over time you’ll notice patterns—like which width creates the most realistic leaf veins—saving you time on future designs.
So, what’s the next move? Grab a strip, roll a coil, and celebrate that first shape. The journey from a single scroll to a full‑blown quilled artwork is just a handful of minutes away.
TL;DR
Paper quilling for beginners transforms simple paper strips into vibrant designs, giving hobbyists, parents, and creative entrepreneurs a quick, satisfying way to boost skills and spark joy. Follow our three‑step guide—gather tools, master core coils, and create a tiny flower—to see results in minutes and keep crafting confidence alive today.
Step 1: Gather Materials and Tools
Alright, before you even think about rolling your first coil, let’s make sure you’ve got everything you need within arm’s reach. That moment when you open a new box of supplies and feel that little spark of excitement? That’s the energy we want to keep alive.
Here’s the bare‑bones kit for paper quilling for beginners: a quilling pen (the simple plastic kind works fine), a selection of pre‑cut paper strips ranging from 3 mm to 6 mm, a pair of fine‑point tweezers, a small bottle of craft glue, and a sturdy piece of cardstock or a foam board as your base. If you can snag a ruler and a pair of sharp scissors, you’ll thank yourself later.
Paper weight matters more than you might think. We’ve found that strips with an 80‑100 gsm rating roll smoothly but still hold their shape once glued. Too thin and they flop; too thick and they resist coiling. Pick a palette that makes you smile—bright primaries for kids, muted pastels for home décor, or even metallics if you’re feeling fancy.
There are two main styles of quilling pens you’ll encounter. The classic “slotted” pen lets you insert the strip and roll with a simple twist, while the “needle‑tip” version gives you extra control for tight coils. For beginners, the slotted model is less intimidating—you can always upgrade once you’ve got the rhythm down.
Don’t underestimate the tweezers. A good pair acts like a second set of fingers, helping you position tiny coils without smudging glue. And speaking of glue, a clear‑drying, low‑viscosity craft adhesive is ideal; it spreads thinly and dries fast enough to keep your momentum going.
Your workspace should feel inviting, not clinical. A small tray to contain stray strips, a soft cloth underneath to protect surfaces, and good lighting (natural light works wonders) will make the whole process feel less like a chore and more like a mini‑studio. If you’re crafting with kids, a low table where everyone can sit eye‑level is a game‑changer.
Optional extras that can speed up your learning curve: a coil size guide (just a printed chart of the most common diameters), a needle‑file for smoothing rough edges, and a set of small decorative beads if you want to add texture later on. None of these are mandatory, but they do make the “aha!” moments arrive quicker.
After the video, pause and try the simplest coil: take a 3 mm strip, insert one end into the pen slot, and roll until you feel a snug tension. Release, glue the end, and let it sit for a few seconds. That tiny circle is your first victory, and it tells your brain, “Hey, I can do this.”
One final pro tip: before you dive into a full project, lay out all your tools in the order you’ll use them. When everything is organized, you spend less time searching and more time creating. And if you’re a parent looking for a calm, gender‑neutral activity for your little one, this simple setup can double as a quiet play‑time ritual that encourages fine‑motor skills without any “boys vs. girls” pressure.
Now that your toolbox is ready, you’re set to move on to mastering the core coil. Trust the process, enjoy the tactile feel of paper slipping through your fingers, and remember: every expert started with a single strip.
Step 2: Learn the Basic Coil Shapes
Now that your workspace is set, it’s time to meet the real stars of paper quilling for beginners – the basic coil shapes.
Each shape is a building block, just like a chord in a song; once you can roll them smoothly, everything else clicks.
We’ll walk through the three core coils – tight, loose, and scroll – and then show how they turn into teardrops, marquise, squares and more.
Grab a 3‑mm strip, slip it onto your quilling pen, and give it a gentle twist. Feel the paper bite the tip?
If the coil resists and looks like a tiny spring, you’ve got a tight coil. It should sit snug against the pen, with no gaps.
Tip: tighten your grip just enough so the paper doesn’t unravel when you release it. A quick test is to roll a second strip; the two coils should feel similar.
Need a visual? Check out this quick tutorial that demonstrates the tight, loose and scroll coils in under two minutes.
For a loose coil, roll the same strip but keep your fingers a hair farther from the tip. The paper will relax into a softer spiral that’s perfect for petals.
When you release a loose coil, it should gently expand, almost like a tiny flower opening. If it snaps back too quickly, loosen your grip a touch more.
The scroll coil is a happy medium: start with a tight coil, then slide the pen forward a millimeter before you let go. The paper will unfurl into a graceful, elongated spiral.
Scroll coils love to become the stems of vines or the bodies of insects. Once you’ve got the feel, you’ll notice how the same strip can become three very different shapes just by shifting your hand position.
Now let’s morph those coils into recognizable forms. Pinch one side of a loose coil and pull – you’ve got a teardrop, the go‑to shape for leaves and petals.
For a photo‑rich step‑by‑step guide, check out the Getting‑Start‑With‑Quilling tutorial on Instructables.
For a marquise, pinch both ends of a loose coil and gently round them inward. The resulting almond shape is perfect for butterfly wings or decorative borders.
A square starts with a tight coil. Slide the pen a half‑turn, then push the coil outward on each side until you have four equal edges.
Half‑circles and triangles follow the same logic – adjust how far you let the coil expand before you lock it in place. Experiment, and you’ll start seeing patterns that match the designs you’ve imagined.
A quick way to keep track is to label a tiny piece of cardstock with the coil type and the paper width you used. Over weeks you’ll build a cheat‑sheet that cuts down trial‑and‑error dramatically.
And remember, each shape you master is a new tool in your creative toolbox. Whether you’re a hobbyist crafting a greeting card, a creative entrepreneur building a product line, or a parent guiding kids through a calming activity, these basic coils are the foundation of every quilled masterpiece.
Step 3: Create Simple Designs and Compare Techniques
Now that you’ve got the basic coils under your belt, it’s time to move from single shapes to tiny compositions that actually look like something you’d want to display. Think of it like going from learning individual chords to strumming a simple song – the magic happens when you put the pieces together.
First, pick three coils you’re comfortable with – say a tight circle, a loose teardrop, and a scroll. Lay them out on a piece of cardstock in a rough sketch. This quick doodle is your design blueprint. If the layout feels off, slide the pieces around until the spacing feels natural. That’s the point: you’re experimenting, not painting a masterpiece on the first try.
Step‑by‑step design drill
1. Choose a theme. For hobbyists, a simple flower‑burst works great on a greeting card. Creative entrepreneurs might opt for a logo‑style monogram that can be printed on merch. Parents can make a kid‑friendly animal face – a scroll for the nose, two teardrops for ears, and a tight circle for the eyes.
2. Measure and mark. Grab a ruler and lightly mark where each coil will sit. This prevents accidental overlap and gives you a sense of proportion. In our experience, a 1‑inch gap between elements feels balanced for most 3‑mm strips.
3. Glue strategically. Dab a tiny bead of glue on the tip of each coil, then press it onto the marked spot. Too much glue? You’ll see a mess of paper fibers. Too little? The coil might shift later. A good tip is to use a fine‑point brush – it lets you control the amount like a painter.
4. Adjust and refine. Once everything is glued, step back and look at the overall shape. If a teardrop looks too pointy, gently roll it a fraction more before the glue sets. Small tweaks make a huge difference.
5. Seal the design. A light dab of clear-drying craft glue over the whole piece protects the paper and gives it a subtle sheen. This is especially helpful for kids’ projects that might get handled a lot.
Comparing techniques: tight vs. loose vs. scroll
When you compare a tight circle to a loose one, the difference is instantly visible – tight circles are crisp, perfect for geometric patterns; loose circles have a soft, almost organic feel, ideal for petals. Scrolls add length and movement, making them perfect for stems or decorative borders.
Here’s a quick real‑world example: a simple quilled bookmark. Use a tight circle for the base, a scroll for a decorative tail, and a loose teardrop for a leaf motif at the top. The tight base stays sturdy, the scroll adds flair, and the leaf feels natural. That same combination can become a logo element for a small business – the tight circle becomes a badge, the scroll a swoosh, and the leaf a subtle nod to sustainability.
Another example: a kids’ animal mask. Two tight circles for eyes, a scroll for the nose, and a series of loose teardrops for whiskers. Parents love how quickly the mask comes together, and the kids get a sense of accomplishment.
Want more inspiration? Check out our Creative and Practical DIY Paper Crafts Tutorials for Every Skill Level for step‑by‑step projects that build on these techniques.
Quick comparison table
| Coil Type | Best Use | Key Tip |
|---|---|---|
| Tight Circle | Geometric patterns, sturdy bases | Hold the pen firmly; release quickly to keep the shape crisp. |
| Loose Teardrop | Petals, leaves, soft accents | Let the coil expand a bit before gluing for a natural curve. |
| Scroll | Stems, borders, elongated details | Slide the pen a millimeter forward before release for a smooth tail. |
So, what should you try next? Grab three strips, roll one of each coil type, and arrange them into a simple three‑piece motif. Snap a photo, note what feels right, and then iterate. The more you play, the faster you’ll recognize which coil fits which part of a design.
Finally, keep a tiny design journal. Sketch your layout, note the paper width, coil tension, and glue amount. Over weeks you’ll develop a personal cheat‑sheet that cuts the trial‑and‑error down to seconds. That’s the secret sauce for both hobbyists and entrepreneurs who need to crank out polished pieces quickly.
Step 4: Add Color, Texture, and Detail
Now that you’ve got a handful of coils that sit nicely together, it’s time to breathe life into them with color, texture, and those little details that turn a simple flower into a piece you’re proud to frame.
If you’re wondering where to start, think of color the way you’d pick paint for a room – you want a base, a highlight, and a shade that pulls everything together. For paper quilling for beginners, a three‑step palette works wonders: a dominant hue, a complementary accent, and a subtle neutral for depth.
Step‑by‑step color planning
1. Lay out your coils on a blank sheet of cardstock. Don’t glue yet – just arrange them like you’d test furniture placement. Notice which pieces dominate the composition. Those become your base color.
2. Pick a color that matches the dominant area. If you’re making a sunrise flower, a warm coral works as the base. Grab a strip of that shade and coil it first.
3. Choose an accent that sits opposite on the color wheel – a soft teal or muted lavender can make the coral pop. Use this for the outer petals or a decorative border.
4. Finally, reach for a neutral – ivory, pale gray, or even a lightly speckled paper – to add shadows or the inner eye of a leaf. These tiny touches create the illusion of depth without extra layers.
Adding texture with paper choices
Texture isn’t just about glossy vs matte; it’s also about paper weight and finish. In our experience, a mix of 80 gsm solid colors and 100 gsm glitter strips adds a tactile contrast that kids love and creative entrepreneurs can market as “premium quilled cards.”
Try this: for the stem of a quilled vine, use a thin, slightly textured cardstock strip. When you roll it, the grain shows through, mimicking a real plant stem. For petals, switch to a smooth, high‑gloss strip – the light catches it and the flower looks three‑dimensional.

Detailing tips you can apply right now
Tiny details are where the magic happens. A single dot of metallic gold glue at the tip of a leaf can suggest a dew drop. Use a fine‑point brush – think of it like a tiny paintbrush for miniature art.
Another pro tip: before the glue dries, gently press a second, slightly smaller coil against the first to create a layered shadow effect. This works especially well on butterfly wings – the lower coil acts as a shadow, the top coil as the bright wing.
If you’re working with kids, let them sprinkle a pinch of glitter onto wet glue on a petal. The sparkle is instant visual reward, and the glue dries clear, preserving the quilled shape.
A 2023 crafting survey of 1,200 hobbyists found that projects with intentional color contrast were 62 % more likely to be shared on social media, which translates into more visibility for creative entrepreneurs.
For a visual walk‑through of layering color and texture, check out this quick tutorial on layering color and texture. The video shows how a single coil can be painted after shaping, letting you experiment with gradients without committing to paper stock upfront.
Here’s a cheat‑sheet you can print and keep by your workspace:
- Base color coil – 60 % of the design
- Accent coil – 30 % for pop
- Neutral coil – 10 % for depth
- Texture mix – alternate matte and glitter strips every other layer
Give it a try today: pick a simple quilled heart, apply the three‑tone palette, add a glitter‑finished leaf, and watch the piece go from flat to eye‑catching in minutes. You’ll see how a splash of color and a whisper of texture turn “just another craft” into a personal masterpiece.
Step 5: Finish and Preserve Your Quilled Artwork
You’ve rolled, glued, and colored – now it’s time to lock that beauty in place so it lasts longer than a weekend craft binge. Finishing isn’t just a nice‑to‑have; it’s the difference between a piece that flattens on a shelf and one that stays three‑dimensional for years.
1. Choose the right adhesive sealant
Most beginners start with white glue because it’s cheap, but a thin‑layer of clear‑drying craft glue (like a needle‑nose bottle) gives a cleaner edge and less swelling. Apply a tiny dab with a fine‑point brush, then wipe away excess before it dries – that tiny extra step prevents those unsightly glue rings you see in beginner galleries.
Pro tip: work in a well‑ventilated area and let each glued joint set for 30‑45 seconds before moving on. That window is long enough to reposition a coil, short enough to keep your momentum.
2. Protect with a sealant or varnish
Once every piece is glued, a clear sealant adds a protective skin against dust, moisture, and the occasional accidental poke. I prefer a matte acrylic sealer applied with a light hand brush; it keeps the paper’s texture visible while giving it a water‑resistant finish.
Test on a scrap coil first – you’ll see the sealant dry clear within five minutes. If you prefer a glossy look (great for gift cards), swap for a gloss spray, but remember to use it in short bursts to avoid pooling.
3. Mounting options: frames, shadowboxes, or no‑glass displays
Because quilled paper has depth, a regular flat frame will crush the layers. The Papery Craftery recommends a shadowbox with at least a 2‑inch gap between the backing and the glass. The extra space lets the coils breathe and prevents that dreaded “squish” effect.
If you’re on a budget, consider a double‑mat frame. The inner mat acts like a thin foam pad, giving you the same clearance without buying a specialty box. You can even skip the glass entirely – a matte acrylic cover protects the piece while letting light hit every angle.
For parents crafting with kids, a simple cardstock backing glued to a sturdy foam board works well for classroom displays. It’s lightweight, cheap, and can be swapped out when the art outgrows the wall.
4. Long‑term storage tips
When you’re not showing off your masterpiece, store it flat in a dry drawer with a piece of acid‑free tissue between each artwork. Avoid basements or attics where humidity swings can warp the paper.
If you need to ship quilled pieces, wrap each one in a cellophane bag, then place between two pieces of cardboard before bubble‑wrapping. That triple barrier keeps dust out and cushions any bumps.
5. Real‑world examples
Jane, a creative entrepreneur, finished a series of floral greeting cards and sealed them with a matte acrylic spray. She then framed each in a 2‑inch shadowbox and sold them at a local market. Her sales jumped 38 % after she started framing, because customers could see the three‑dimensional depth without fear of damage.
Meanwhile, a parent in our community used a simple foam board mount for a quilled animal mask their child made in class. The mask survived a week‑long field trip because the board protected the delicate coils from sand and sunlight.
6. Checklist before you call it done
- All glue beads are dry and excess wiped away.
- Sealant applied in thin, even coats – at least two layers for high‑traffic pieces.
- Mounting frame provides a minimum 1‑inch clearance behind the artwork.
- Artwork is stored flat, away from direct sunlight and moisture.
- Optional: add a tiny note on the back with your name and date – it feels professional and helps you track progress.
Feeling confident? Pick the quilled piece you’ve been most proud of, give it a clear‑drying sealant, and slide it into a shadowbox you’ve got lying around. You’ll notice instantly how the added protection lets the colors pop and the shapes stand tall.
Need a deeper dive into finishing techniques? Our Step by Step Online Paper Quilling Course for Beginners walks you through sealants, mounting, and even how to photograph your finished art for social media.
Step 6: Explore Easy Project Ideas
Now that your coils are dry, sealed, and ready to shine, it’s time to ask the fun question: what do you actually want to make?
And if you’re staring at a blank piece of cardstock wondering where to start, you’re not alone. We’ve all been there – the excitement of fresh paper meets the dread of “what’s next?”
Quick starter projects
Here are three ultra‑simple ideas that take less than ten minutes each. Grab a handful of strips, roll a couple of tight circles, a loose teardrop, and a scroll, then follow the steps.
- Quilled heart card. Glue a tight circle for the base, add a loose teardrop on each side, and finish with a tiny scroll as a “ribbon.” Slip the card into an envelope and you’ve got a ready‑to‑gift piece.
- Mini bookmark. Lay a tight circle at the bottom for weight, then stack two scrolls upward. Seal with a dab of clear glue and you’ve got a functional, decorative bookmark.
- Paper snowflake charm. Start with a tight circle, cut a small slit, fan out the edges, and secure with a few glue dots. It’s perfect for a holiday tag or a tiny pendant.
These ideas are straight from the easy quilling project ideas collection that many beginners swear by.
Kid‑friendly ideas
If you’re a parent, think about projects that let kids see immediate results. Kids love color, texture, and a little bit of “wow” factor.
Try a “quilled animal mask.” Use a loose teardrop for ears, a scroll for the nose, and a tight circle for eyes. Glue everything onto a foam board, add a elastic strap, and let the little ones parade around the living room. The whole process takes about fifteen minutes, and the finished mask survives a day‑long field trip – just like the foam‑board mount we mentioned earlier.
Another crowd‑pleaser is a “quilled emoji card.” Pick a bright yellow strip, roll a tight circle for the face, add two scrolls for eyes, and a small teardrop for the smile. It’s a quick way to turn a plain birthday note into a conversation starter.
Mini‑business pieces
Creative entrepreneurs often need something that looks polished but doesn’t cost a fortune to produce. Here are two low‑budget ideas you can sell on Etsy or at a local craft fair.
- Quilled monogram badge. Choose your initials, build each letter with tight circles and scrolls, then mount on a pre‑cut cardstock badge. A matte sealant gives it a professional finish.
- Seasonal gift tag. A simple scroll forms a ribbon, a teardrop becomes a leaf, and a tight circle serves as a decorative accent. Write the recipient’s name on the back – a personal touch that buyers love.
Because the pieces are small, you can batch‑produce them in an afternoon and still keep your overhead low. Plus, the three‑dimensional depth makes them stand out in a sea of flat paper tags.
Seasonal sparks
Winter, spring, summer, or fall – each season offers a natural theme you can translate into quilled art.
For a cozy winter vibe, try a “quilled pinecone ornament.” Roll tight circles for the base, add a few loose teardrops for needles, and finish with a tiny scroll as a pinecone tip. Hang it on a branch or a mini‑tree for instant décor.
Spring calls for bright flowers. Use a loose teardrop for petals, a scroll for the stem, and a tight circle for the center. Arrange several blooms on a cardstock canvas and you’ve got a ready‑to‑frame wall art piece.
Summer? Think “watermelon pendant.” Roll a tight circle for the rind, a loose teardrop for the flesh, and a tiny scroll for the seed. String them on a cord and you’ve got a playful necklace for kids.
And fall? A “quilled leaf card” uses scrolls for veins and teardrops for leaf edges – perfect for Thanksgiving thank‑you notes.
Putting it all together
Here’s a quick checklist to turn any idea into a finished project:
- Pick a theme that excites you or your audience.
- Gather 2‑3 strip widths that complement each other.
- Roll the required coils – tight, loose, scroll – and set them aside.
- Lay out the design on a scrap piece of cardstock; move pieces until the composition feels right.
- Glue, wipe excess, and seal with a clear‑drying coat.
- Add a tiny note on the back with your name, date, or a fun tagline.
That’s it. With just a few strips and a dash of imagination, you can create projects that look impressive, serve a purpose, and keep the quilling habit alive.
Conclusion
If you’ve made it this far, you’ve already proved that paper quilling for beginners isn’t a mystery—it’s a series of small, satisfying steps.
Remember the thrill of that first tight coil, the moment a loose teardrop opened like a tiny blossom, and the pride of sealing a finished piece. Those little victories add up to real skill.
So, what’s the next move? Grab a fresh strip, pick a simple theme—maybe a heart or a bookmark—and let the coils guide you. The checklist we built earlier (pick theme, gather strips, roll coils, layout, glue, seal) is your fast‑track to another finished project.
In our experience, the biggest roadblock for hobbyists is stopping after the first design. Treat each new shape as a mini‑experiment; the more you play, the faster you’ll recognize which coil fits which detail.
Creative entrepreneurs, think about turning those quick projects into a tiny product line. A batch of quilled greeting‑card accents can be made in an afternoon and sold alongside your other crafts.
Parents, keep the momentum alive by setting up a weekly ‘quill‑time’ session with the kids—short, colorful, and mess‑free.
And if you ever feel stuck, a quick revisit to the fundamentals or a peek at our online community can spark fresh ideas. Keep rolling, keep gluing, and let paper quilling for beginners become a habit that brightens your day.
Ready to create the next piece? Your next coil is only a strip away.
FAQ
What is paper quilling for beginners and why is it a good starter craft?
Paper quilling for beginners is the art of rolling thin strips of paper into tight, loose or scroll‑shaped coils and then shaping them into flowers, letters, or tiny 3‑D designs. It’s a great starter craft because you only need a few inexpensive tools—a quilling pen, tweezers and some patterned paper—so the upfront cost is low. The repetitive rolling motion also helps calm the mind, making it a perfect blend of creativity and mindfulness for hobbyists, entrepreneurs testing product ideas, or parents looking for a mess‑free activity with kids.
How do I choose the right paper weight and strip width when I’m just starting?
When you’re just starting, aim for strips that are 1/8 inch (about 3 mm) wide and 80–100 gsm in weight. That width rolls easily and holds its shape, while the 80–100 gsm range is thick enough to stay sturdy but thin enough to bend without cracking. If you notice the coil feels too loose, move up a weight; if it resists and snaps, drop down a weight. A quick test—roll a single strip and see how it expands—gives you a reliable feel for the perfect combo for your first projects.
What are the most common mistakes beginners make and how can I avoid them?
One of the biggest slip‑ups is using too much glue, which leaves a shiny, tacky ring around each coil and can warp the paper. The fix is to dab a tiny bead with a fine‑point brush and wipe any excess before it dries. Another mistake is pulling a coil too hard after it’s glued; the tension can distort the shape. Instead, let the glue set for at least 30 seconds, then gently nudge the coil into place. Finally, many beginners skip the “test roll” step—spending a minute testing a strip saves hours of frustration later.
How can I store and organize my quilling supplies so they stay tidy and ready for the next project?
The simplest system is a shallow, compartmentalized box with dividers for paper strips, a tiny zip‑lock bag for glue, and a separate slot for your pen and tweezers. Label each divider with the strip width or color family—this way you can grab the exact piece you need without rummaging. For longer‑term storage, slip a piece of acid‑free tissue between finished coils to prevent them from sticking together. A cork board with push‑pins also works great for keeping ongoing layouts flat and visible.
Can paper quilling be used to create sellable products, and what are some beginner‑friendly ideas?
Absolutely—once you’ve nailed the basic coils, you can turn them into small, high‑value items that ship easily. Think greeting‑card accents, mini‑bookmarks, or decorative tags that fit in a standard envelope. For creative entrepreneurs, a batch of 10‑12 quilled monogram badges can be produced in an afternoon and listed on a storefront as “hand‑rolled.” Parents can even involve kids in making simple animal charms that become keychains. The key is to keep each piece under 2 inches so it stays lightweight and affordable to mail.
How often should I practice paper quilling to see real improvement without burning out?
Consistency beats marathon sessions. Aim for 15‑20 minutes a day, three to four times a week, and focus on one skill—like tightening a coil or perfecting a teardrop—each time. Short, focused practice builds muscle memory while keeping the activity fun. If you feel the excitement fading, take a day off and come back with a fresh strip; the break often sparks new ideas and prevents the hobby from feeling like a chore.
Where can I find reliable tutorials or community support if I get stuck?
If you hit a snag, the first place to look is the CreativiU community forum where members share step‑by‑step photos and quick fixes for common coil issues. Their library also includes short video lessons that break down each basic shape in under two minutes. Besides that, a quick search on YouTube for “paper quilling basics” will surface thousands of free tutorials, but be sure to follow creators who demonstrate clear close‑up shots so you can see exactly how the paper behaves.
Leave a Reply