Here’s the thing about origami flowers step by step: it isn’t magic, it’s a quiet dialogue between you and a square sheet. You don’t need perfect talent, just a reliable sequence you can trust, one fold at a time. And yes, you can do this in 2026, even on busy days.
You’ve probably chased a bloom that collapsed into a blob, and the frustration sticks. Maybe you muttered, ‘I’ll just give up,’ but you didn’t. What if the secret isn’t genius but a simple plan you can follow any day?
In this guide to origami flowers step by step, we’re going to break the process into manageable bites: paper choice, crisp folds, petal shaping, layering, and a finishing touch. You’ll see how each tiny move builds toward a bloom you can be proud of.
Starting with the right paper makes everything else easier. We’ll test square sheets, thickness, and how to press folds so they stay sharp instead of puffing.
Next comes the folding rhythm. We use a few core folds: valley folds to flatten, mountain folds to define petals, and practice them until they feel automatic.
Petal shaping is where the magic happens. It’s the moment you decide how wide each petal should be and how they curve. We’ll show you quick tweaks that turn a flat flap into a delicate blossom.
Layering adds depth. By stacking a couple of petals and curling edges, you create dimension that makes the flower feel alive rather than flat. It’s all about balance and patience.
Finishing touches, the stem, a tiny leaf, maybe a gentle crease for a natural bend, pull the whole piece together. These small details matter and make the difference between a souvenir and something elegant.
In our experience, keeping practice sessions short and frequent works best for artists and crafter moms alike. It builds confidence without burning out.
CreativiU hosts a vast library of on-demand crafts courses, and we’ve seen learners thrive when they follow structured, step-by-step guidance. You’ll get community support, feedback, and a path to level up your skills.
So, what should you do next? Gather a couple of square sheets, a clean workspace, and a bit of patience. We’ll move together through five key steps in the next section.
Let’s dive in and start turning plain paper into a blooming beginner-friendly origami flower.
As you try, notice tiny improvements, a crisper fold here, a smoother curve there. These little wins compound, and soon you’ll notice the flower taking on character instead of looking stiff.
And if you get stuck, remember that steady practice beats last-minute genius every time.
If you want more practice, try different paper colors or textures to keep blooms fresh and fun.
TL;DR
In this quick recap, you’ll learn how to pick the right paper, master valley and mountain folds, shape petals, layer for depth, and add a stem and leaf. Follow the simple step‑by‑step flow to turn a flat square into a blooming origami flower.
Keep the process short, practice daily, and enjoy the tiny victories—each crisp fold brings your flower closer to life.
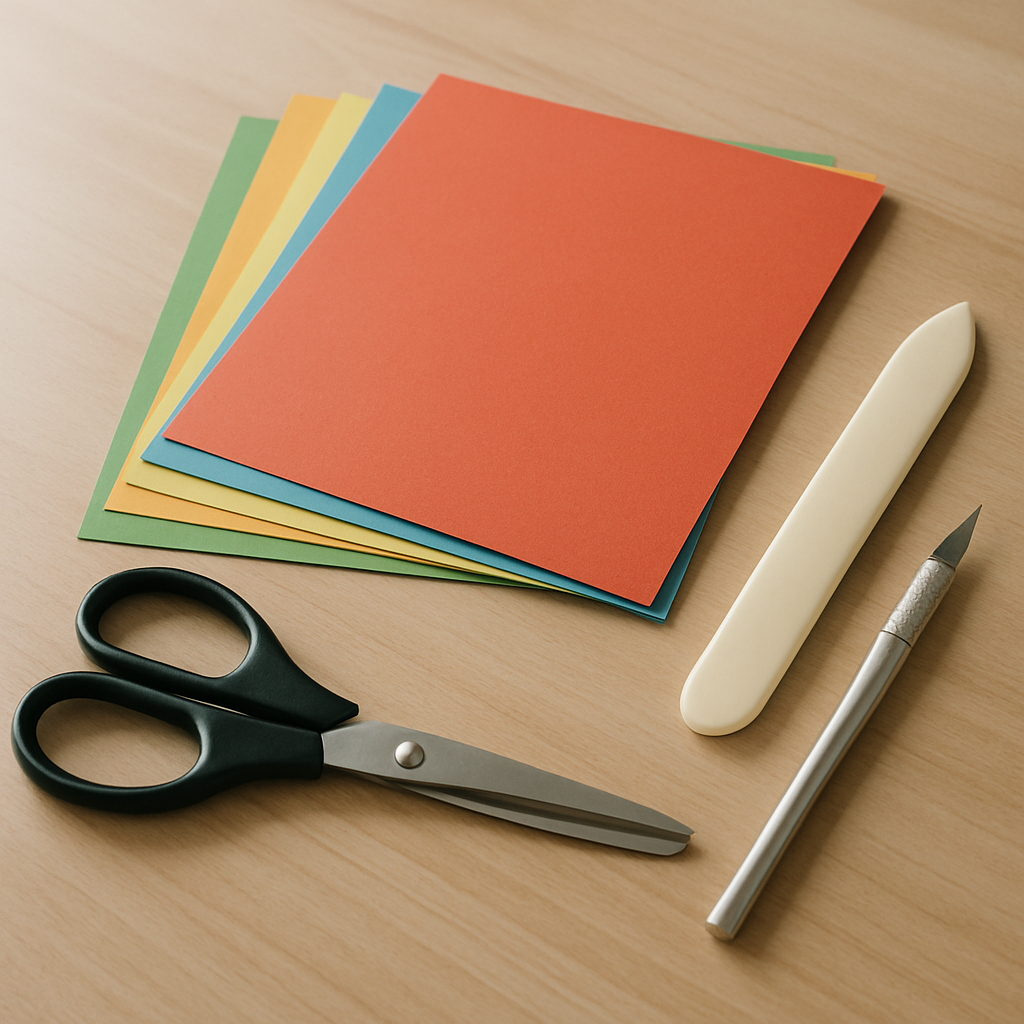
Step 1: Choosing the Right Paper and Tools
Before we start folding, let’s talk paper. Think about the kind of flower you want to make—soft, bright, or muted.
Choose a sheet about 60‑70 gsm. Too light and it will buckle; too heavy and each fold feels like a tiny battle. Kids love the sturdier cardstock because it’s less likely to tear.
Paper texture matters. A smooth, uncoated stock gives petals a gentle sheen; a slightly textured sheet adds depth—perfect for a rustic bouquet.
Quick test: fold a corner. If it creases cleanly and holds its shape, you’re good to go. If it puffs, switch to a firmer stock.
Tools next. A sharp pair of scissors or a precision rotary cutter keeps edges clean. For larger projects, a rotary cutter gives straight, repeatable cuts.
A bone folder is a game‑changer. It’s cheap, feels great, and lets you press folds without smudging the paper.
Lighting matters, too. A bright, diffuse light source keeps you from misreading a subtle crease. Clip‑on LED lights or natural window light work wonders.
Do you have a tablet? Some designers use an overlay app that shows the template on screen, letting you see exactly where to fold. Handy for new shapes.
Keep a clean, flat surface. A smooth table or origami mat prevents the paper from sliding during the delicate folds.
With the right paper and tools, the rest feels almost effortless. It’s like having a well‑tuned kitchen—everything just clicks.
Ready to try a quick bouquet? Our community has a full guide that walks you through turning those squares into a stunning bouquet. How to Create an Origami Flower Bouquet Step by Step.
Let’s keep the momentum. Next up, we’ll dive into valley and mountain folds that build the foundation of your petals.
The video above shows a quick run‑through of the paper selection and basic tools you’ll need. It’s short, so you can watch it while you’re setting up your workspace.
While gathering your supplies, think about where the finished piece will live. A child’s room, a gallery wall, or a handcrafted gift—each setting influences paper color and finish.
Curious about how paper texture influences petal movement? Sample different stocks at a local art supply store; the tactile feel can spark new design ideas.
For a creative twist, pair your paper flowers with a hand‑drawn watercolor backdrop. That mix elevates a simple project into gallery‑ready art.
We’ve seen parents combine storytime with origami. After reading a children’s book, they fold flowers inspired by the story’s setting. Lyndsey Crawford Publishing offers a wonderful selection of children’s books that spark creative play.
If you ever want to display finished paper flowers, consider pairing them with a landscape painting. Gratitude Studios offers stunning pieces that complement handmade art.
Remember, the right paper and tools set the stage for all the amazing folds you’re about to create.
Step 2: Folding the Base Petal Shape
So you’ve got your square ready and the edges crisp. Folding the base petal shape is where the bloom starts to gain volume and life. It’s not about one perfect move; it’s about building a sturdy foundation you can trust, fold by fold.
Start with a clean, flat sheet. If the paper curls or puckers, you’ll fight the next steps. Align the edges carefully, press along every crease, and let the square lie perfectly flat before you move on.
Next, create symmetry with a simple cross crease. Fold the square in half to make a rectangle, then unfold. Do the same with the other direction. You’re not aiming for a showpiece crease yet, just a couple of light guides that keep both sides in balance as you work.
Now it’s time for the petal folds themselves. Open the top layer along the central creases and squash it down to form a shallow cone. You’ll feel the paper take shape as you press the sides toward the center. The goal is a base that has two opposing, gently curved petals at the front—think of it as the face of the flower.
Flip the model and repeat on the opposite side. If your petals don’t align perfectly, don’t sweat it—this is where patience pays off. Small misalignments can be nudged back by re-creasing along the guides you made earlier. Consistency here yields a much more natural bloom later on.
As you refine the base, keep the pressure even. Heavy pressing can flatten the petal curves, while a light touch helps preserve graceful arcs. You’re shaping not just the sheet but also your confidence with each careful crease. And yes, you’ll notice the difference when your folds stay sharp after a few minutes of handling.
Pro tip: test this base with a few different papers. A thicker cardstock will hold its shape more rigidly, while a lighter sheet gives you a more delicate, airy bloom. Experimenting helps you understand which look you want before you tackle more complex petals. If you want a visual walkthrough of this core technique, you can check out How to Fold an Origami Lotus Flower as a reference point for similar base structures.
So, what comes next? Once the base petals feel stable and balanced, you’ll be ready to shape the petals further and layer them for depth. The base shape is the engine that powers every flower you’ll fold from here.
Step 3: Creating the Petal Layers
Now that your base petals are solid, it’s time to give your flower a sense of depth. Think of each layer as a new page of a story—adding texture, color, or a subtle curve can turn a flat bloom into something that feels alive.
First, cut out a second sheet the same size you used for the base. If you want a gradient effect, choose a paper that’s a shade lighter or darker. You’ll be folding this layer just like the first, but with a twist.
When you fold the second layer, keep the creases slightly tighter. That small tightening gives the lower petals a slight lift, making the whole flower look more 3‑dimensional. If the paper feels too stiff, press it gently with your fingertips to soften the folds before you add the next layer.
Once the second layer is ready, line it up with the first. Use the cross‑creases you made earlier as a guide; the petals should match almost perfectly. Now comes the fun part: slide the new layer over the old one and give it a quick press to lock the layers together.
If you’re aiming for a soft, misty look, try folding the new layer a bit wider at the top. That subtle expansion will let the edges curl inward naturally, mimicking how real flower petals flare. For a bold, structured bloom, keep the folds tight and the edges straight.
Now that the two layers are stacked, it’s time to add the final touch—curving the petal edges. Grab a pair of tweezers or your fingertips and gently roll each petal’s tip toward the center. This small curl creates the illusion of depth and prevents the flower from looking flat.
You might wonder why the curling matters. Think about how a real flower’s petals droop slightly to catch the light; that tiny dip adds personality. Replicating that subtle curve with paper turns a craft project into a realistic mini‑garden you can display on a desk or give as a gift.
If you’re crafting for a special occasion, consider adding a splash of glitter or a tiny ribbon loop around the center. This small flourish can elevate the entire piece without overpowering the delicate structure. Keep the additions light so the layers stay visible.
Before you finish, do a quick press test. Grab the flower, give it a gentle shake, and make sure the layers stay together. If any petals feel loose, press them again or trim a sliver of paper from the underside to secure them.
Now, take a step back and admire your layered masterpiece. The flower should have a gentle rise, a soft curve, and a hint of shadow that makes it feel three‑dimensional. You’ve just turned a simple sheet into a blooming statement piece.
For a visual reminder of how the layers fit together, watch this quick video that walks you through the process step by step. It’s a handy refresher if you get stuck mid‑fold.
If you want to explore more variations, check out this 8‑petal paper flower tutorial. The cutting technique they use adds extra detail and can inspire your own design tweaks.
Step 4: Assembling the Flower Core
Now that your base petals are stable, it’s time to assemble the flower core. The core is the engine that everything else builds from, so a gentle touch here pays off later.
Line up the front layer with the cross creases you made in Step 2. Stack the second layer on top, matching edges as closely as you can. A tiny misalignment today will show up as wobble in the bloom tomorrow.
Press along the center to fuse the layers. If you’re not using glue, a few seconds of finger pressure helps set the shape without crushing the folds.
For a secure center, you can tuck a small dab of clear glue or a narrow strip of double‑sided tape at the very heart. Use sparingly—you want to keep the petals flexible.
If the layers resist, lift the top flap slightly and re‑crease along the guides. Think of it like tightening the screws on a tiny mechanism.
As you work, test the core by gently lifting and twisting the bloom. It should feel like a compact, breathing center rather than a flat disk.
Pro tip: the paper you chose matters here. Thicker cardstock holds the core shape more rigidly, while a lightweight sheet keeps things airy and graceful.
Take a moment to pause and imagine the finished bloom. The core should feel sturdy yet responsive, like a tiny engine revving as you add the outer petals.
Want a quick reference on core assembly? A simple companion resource for origami flower models covers the basics and offers a visual guide. Origami flower models companion resources.
For a deeper dive, a short video walk‑through demonstrates how the core locks into place and how to adjust if petals drift. If you want a quick visual reference, check this origami flower models resource.

In our experience, the core is the moment you understand that precision here compounds into the final look. If the core feels loose, re‑crease along your guides and re‑center the layers before you lift to test again.
Does this really work? Yes, with patience—and a consistent routine. Practice in short bursts, then review what tightened and what loosened, and you’ll notice the core staying put as you add layers.
Incorporating this step into your practice helps you move from a simple fold to a bold, display‑worthy bloom. So, what should you do next? Set aside a dedicated 15‑minute core session, and you’ll be surprised how quickly the core becomes second nature. And if you want structured guidance, CreativiU’s on‑demand courses can help you stay consistent and motivated with origami projects that fit into real life.
Step 5: Finishing Touches and Arranging the Bouquet
You’re almost there. The bloom looks great on its own, but the finishing touches are what make a bouquet feel real.
First, give the petal edges a gentle curl. Use fine tweezers or your fingertips to roll the tips inward a touch. This creates depth and catches light the way real petals do. Don’t overdo it—the goal is a natural, photographed-in-sunrise look, not a frilly crown.
Next, check the core. If it feels wobbly, re-crease along your guides and tuck the layers a touch closer at the center. A secure core stays pristine as you add more petals and any finishing drama.
Balance is your best friend here. Lift the bloom by the stem (or imagined stem) and see if it tips to one side. If so, shift a layer slightly, or crease a tiny adjustment at the base to level things out. Small shifts equal big differences in a 3D bouquet.
Now, arrange the bouquet. Gather two to five blooms, mixing sizes and directions so the arrangement looks organic. Think about asymmetry—slight off-center angles read far more natural than perfectly aligned flowers. A couple of tiny leaves tucked beneath add green life without stealing the spotlight.
Stems matter. If you’re using actual crafting stems or tubes, wrap them with floral tape from bottom to top for a clean, sturdy feel. Then wrap a ribbon around the junction, securing with a small dab of glue or tape. A bow finishes it nicely, but keep it understated so the petals stay the star.
Placement and protection. Display your bouquet in a shallow vase with a touch of water or plant-safe conditioner folded into the bottom. If you’re gifting, a single ribbon tie and a note about the origami process adds a personal touch that really lands.
Final checks. Hold the bouquet up to the light and inspect every petal edge. If you spot a puff or a crease that sticks out, re-crease gently and press from behind. The goal is a cohesive, graceful silhouette that reads as a single bloom, not a stack of papers.
Storing matters too. Keep the bouquet in a dry, shaded spot until you’re ready to display. Avoid direct sunlight that can fade the paper over time and ruin the crisp edges you just created. Store it upright in a cool place until use again.
Make finishing touches a habit. Do a 15-minute session after each practice block, tweak one petal, and notice what improves balance. It makes origami flowers step by step practical for gifts or a craft line.
Final thoughts. This routine helps. Do a 15-minute session after each practice block, tweak one petal, and notice what improves balance. It makes origami flowers step by step practical for gifts or a craft line.
For a quick, visual reminder, see Origami Way’s origami flowers step-by-step guide.
Or get layout inspiration from Gathered’s origami bouquet tutorial.
Experiment freely, friend, okay?
Comparison of Common Origami Flower Designs
When you first dip your fingers into the world of origami flowers, the sheer number of patterns can feel like a crowded garden. Let’s trim the maze down to the three most popular styles so you can pick the one that sings to your skill level and project vibe.
1. Classic Rose
The rose is the go-to for beginners and anyone who loves a soft, layered bloom. Its folds are mostly valley and mountain, with a few tricky twists at the base. Because the petals stack up, you’ll want a paper that holds creases—standard “Kami” works best, but if you’re aiming for a showroom finish, switch to Tant.
2. Cherry Blossom (Sakura)
Cherry blossoms give you that delicate, almost translucent feel. They’re a step up in difficulty because the petals need to be thinner and the folds tighter. Washi or a light tissue‑foil blend is ideal. The result is a light, airy flower that’s great for spring gift sets.
3. Lotus
Lotus petals layer in a radial pattern, demanding precise, clean folds and a bit of patience. It’s a favorite for professional portfolios. Standard paper works well, but for a polished finish, consider a slightly thicker sheet like Biotope, which balances strength and flexibility.
So, which one should you try first? If you’re still finding your fold rhythm, start with the rose. It teaches you the foundational valley/mountain interplay without overwhelming detail.
Need a paper recommendation? Taro’s Origami Studio offers a range of quality papers that fit each design: their buying guide shows you exactly which paper matches your project needs.
Quick Decision Table
| Design | Paper Preference | Fold Complexity | Typical Use |
|---|---|---|---|
| Classic Rose | Standard Kami or Tant | Low to Medium | Gifts, bouquets, beginner projects |
| Cherry Blossom | Washi or Tissue‑Foil blend | Medium | Spring décor, photo props, small gifts |
| Lotus | Standard or Biotope | High | Professional displays, portfolio pieces, event centerpieces |
Remember, the best flower isn’t the one that looks the fanciest; it’s the one that feels the most natural to you when you fold it. Keep experimenting, and you’ll find that the process itself becomes a quiet, rewarding ritual—one that keeps your creative muscles flexing, no matter how many roses or lotuses you tackle.
Frequently Asked Questions
What paper thickness should I use for a beginner-friendly rose?
Most people start with 70‑gsm cardstock because it’s sturdy enough to hold the folds while still feeling light. The key is to test a single fold: if it keeps a crisp valley and doesn’t crack, you’re good. If the sheet bends too easily, step up to 100‑gsm; if it’s too stiff, go back down. The goal is a balance that lets your petals stand but still feel like a paper flower you can handle.
Can I use colored or textured paper without messing up the folds?
Absolutely. Bright, matte sheets give a soft glow, while glossy stock can make petals pop on a dark surface. Texture matters less than weight; a slightly grainy paper will hold the crease but might feel a bit gritty. If you’re experimenting, cut a small square, fold it once, and see how the crease holds. That quick test tells you if the paper’s fine for the rest of the project.
How do I keep valley and mountain folds sharp when I’m in a hurry?
Press each crease firmly with a bone folder or the flat edge of a butter knife. The more you press, the more the fibers lock into place. When you’re short on time, set the sheet on a flat surface and tap the folds gently with a ruler to spread the pressure evenly. Remember, a clean valley or mountain fold is the skeleton of your flower; a sloppy one will ripple all the way out.
What’s the best way to add depth without overcomplicating the design?
Layering is the simplest trick. Take a second sheet slightly lighter or darker, fold it the same way, and slide it over the first. The slight tension between the two creates a subtle shadow that looks like a real bloom. You can also curve the petal edges a bit with tweezers—just a gentle roll toward the center. That small curl mimics how real petals droop, giving you a three‑dimensional feel without extra steps.
How long should I practice before I can fold a full flower?
Short bursts work best. Spend 10–15 minutes a day on a single fold: valley, mountain, petal shape, then assemble. Over time you’ll develop muscle memory, and the flower will start to feel natural. If you’re a parent or hobbyist, even a quick 5‑minute session before dinner can keep the rhythm alive without burning out.
Can I use these techniques to create a bouquet for a special occasion?
Yes! Build a few varieties—think a rose for the center, a few cherry blossoms on the edges, and a lotus for a statement piece. Arrange them in a shallow vase, add a splash of real greenery, and the paper flowers will look like a fresh, handmade gift. This approach is especially popular among creative entrepreneurs who want to add a unique touch to wedding favors or event decor.
What should I do if a petal flattens or tears during folding?
First, stop and re‑press the crease; a gentle tap can realign the fibers. If it’s tearing, switch to a paper with a bit more thickness or a slightly higher gloss, which tends to hold folds better. In some cases, adding a thin layer of clear glue at the base of the petal can reinforce the edge without ruining the look. Don’t be afraid to experiment—each paper behaves a bit differently.
Wrap-Up
Let’s be honest: origami flowers step by step can feel intimidating at first, but you stuck with it and now you’ve got a bloom you’re proud of in 2026.
In our experience at CreativiU, the magic isn’t a single perfect fold. It’s a reliable rhythm you can repeat, and that repeatability is what turns a flat sheet into something alive.
Here’s the practical finish line you can aim for:
- Choose a paper you love that holds creases but folds cleanly.
- Nail the base petal using the cross creases as quiet guides.
- Layer petals to create depth, then fuse the core with light pressure.
- Finish by curling edges just a touch and adding a simple stem or ribbon.
Think of real-world uses: a desk bouquet that lasts, a handmade wedding favor, or a kid-friendly project that sparks curiosity. These tiny blooms teach patience, and the process fits into a busy day, even for busy creatives.
So, what should you do next? Keep a small practice kit handy, set a 15-minute timer, and celebrate the small wins—crisper folds, better symmetry, less tearing.
To see a full, step-by-step bouquet project you can imitate, check this guide: How to Create an Origami Flower Bouquet Step by Step.
Leave a Reply