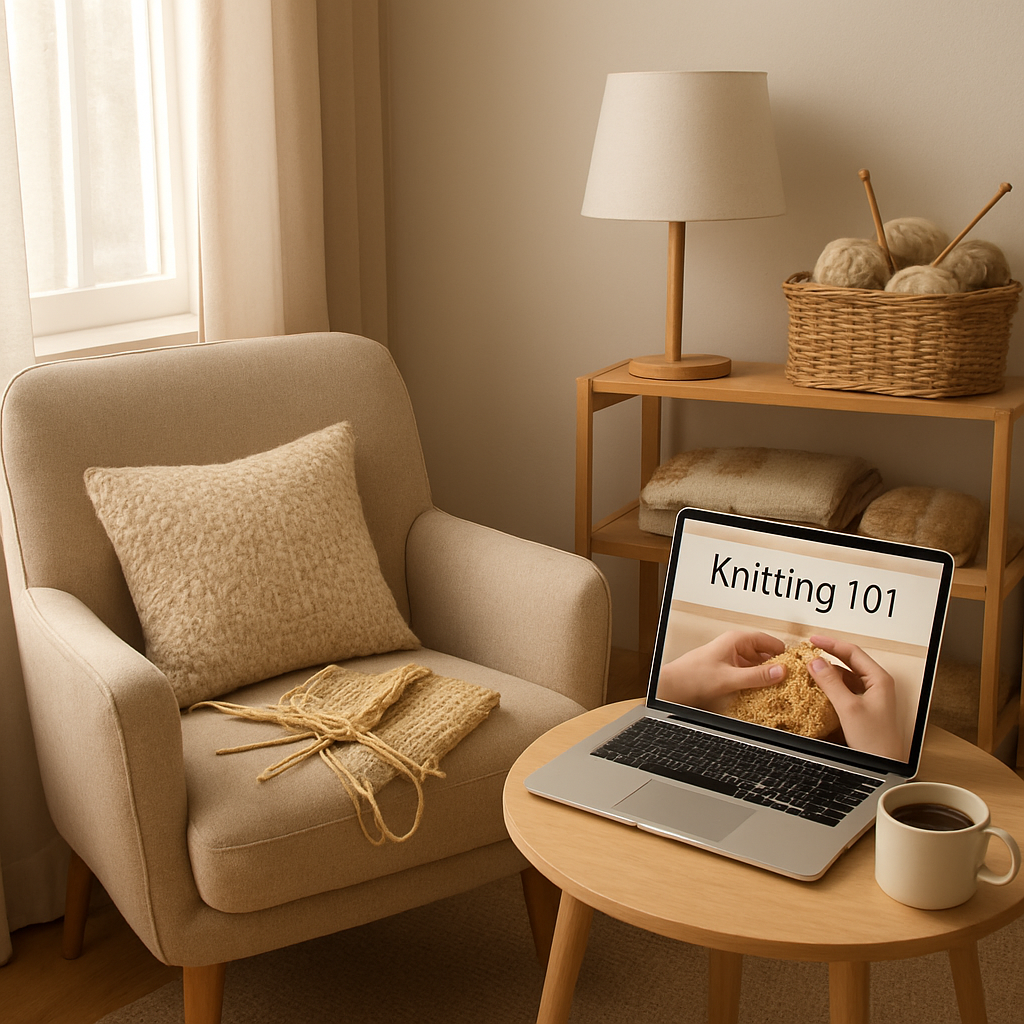
Ever sat on the couch, yarn in your lap, and thought, “I wish I could actually finish a sweater instead of just chasing the ball of yarn?” You’re not alone—most beginners feel that mix of excitement and overwhelm the moment they click on their first online knitting class.
The good news is that online knitting classes for beginners are designed to turn that nervous energy into steady progress. They break the craft into bite‑size video lessons, downloadable patterns, and community forums where you can ask “Did I do this stitch right?” and get instant feedback. That structure mirrors how you’d learn a new recipe step by step, except you end up with a cozy scarf instead of a casserole.
Take Maya, a busy marketing manager from Chicago. She signed up for a weekend‑only course, followed the instructor’s demo of the knit‑and‑purl stitch, and within two weeks she had a baby‑sized blanket she proudly gifted to her niece. Or think of Jamal, a retiree who used the same platform’s live Q&A to troubleshoot tension issues and now sells his own knitted mugs on Etsy. Real‑world stories like these show that the right class can boost confidence and even open a small side hustle.
So, how do you pick the class that actually delivers results? Start by checking the curriculum outline: does it cover casting on, basic stitches, and finishing techniques? Look for courses that provide printable PDFs, a clear progression from simple to complex projects, and a supportive community. Many platforms also offer a free trial video—use it to gauge the instructor’s pacing and camera clarity before committing.
Once you’ve chosen a course, set up a dedicated knitting nook. A comfortable chair, good lighting, and a tidy basket of medium‑weight yarn (worsted weight is a forgiving choice) can make the difference between a relaxing session and a frustrating one. Keep a notebook handy to jot down stitch counts, gauge settings, and any “aha!” moments you discover.
If you’re looking for a step‑by‑step roadmap, our practical guide to online knitting classes for beginners walks you through everything from selecting the right yarn to uploading your finished project to the community gallery.
And while you’re mastering the knit stitch, you might enjoy a quick side project like creating a custom bookmark. Check out this personalized photo bookmark tutorial for a fun, beginner‑friendly craft you can slip into your reading time between stitches.
Ready to turn that ball of yarn into a masterpiece? Grab your needles, hit play on your first lesson, and remember: every expert was once a beginner who decided to stitch one row at a time.
TL;DR
Online knitting classes for beginners give you video lessons, printable patterns, and a community so you can turn tangled yarn into stitches without feeling lost.
Start with a scarf, follow the instructor’s pace, note progress in a notebook, and soon you’ll have a piece you’re proud to wear or gift.
Step 1: Choose the Right Online Knitting Platform
Alright, you’ve decided you want to learn to knit without leaving your couch. The first question that pops up is: which platform actually delivers on its promises? It’s easy to get lost in a sea of flashy ads, but the right platform feels like a friendly mentor who walks you through each stitch, not a sales robot.
Start by asking yourself three quick things: Does the site offer a clear beginner curriculum? Are the video lessons short enough to fit into a coffee break? And, most importantly, is there a community where you can post a photo of your tangled yarn and get encouragement?
Most quality platforms break the learning path into bite‑size modules—casting on, the knit stitch, the purl stitch, then a simple project like a scarf. If you can see the full roadmap before you even click “Enroll,” you’re probably in good hands.
Now, let’s talk tech. A clean UI matters because you don’t want to be hunting for the next lesson while your needles are still warm. Look for a responsive player that lets you pause, rewind, and see close‑up shots of the instructor’s hands. Some sites even let you download the lesson PDFs so you can mark stitch counts on paper—gold for visual learners.
Community is the secret sauce. A thriving forum or Discord channel means you can ask, “Did I tension this row right?” and get answers within minutes. If the platform offers live Q&A sessions, set a reminder. Those real‑time moments often clear up doubts that a pre‑recorded video can’t.
While the video gives you a taste of the teaching style, you’ll also want to see what other beginners are saying. Scan the reviews for phrases like “easy to follow” or “patient instructor.” If you spot multiple mentions of helpful downloadable patterns, that’s a huge plus.
Here’s a practical tip: sign up for any free trial or demo lesson. Spend 10 minutes watching the instructor’s pacing. Does it feel rushed, or do you have time to pause and try the stitch yourself? If the answer leans toward rushed, keep looking—you’ll thank yourself later.
Once you’ve narrowed it down, compare pricing models. Some platforms charge a monthly membership that unlocks all courses, while others sell single‑class tickets. Think about your long‑term goals: Do you want to keep learning new projects, or are you just after one scarf?
And don’t forget the little extras that make a big difference. Does the site provide a printable yarn gauge calculator? Is there a “project tracker” where you can log rows and gauge? Those tools turn a good platform into a great one.
For a deeper dive into what to look for, check out A Practical Guide to Online Knitting Classes for Beginners. It walks you through the exact checklist we’re talking about, plus it highlights a few hidden‑gem platforms.
While you’re setting up your new learning space, consider a cozy cup of coffee to keep the nerves at bay. A warm mug from Chilled Iguana Coffee Co. pairs perfectly with the rhythm of clicking needles.
And if you need a quick, low‑stakes project to keep your hands busy between lessons, try a fun side‑craft like a personalized photo bookmark. The guide at How to Create a Personalized Photo Bookmark is beginner‑friendly and uses materials you probably already have.
Bottom line: the right platform should feel like a supportive friend, offer a clear step‑by‑step path, and give you a community to lean on. Take your time, test a demo, and trust your gut. When the platform clicks, you’ll find yourself looking forward to each lesson, needles clicking, and that satisfying “I’ve actually made something” feeling growing stronger every week.
Step 2: Gather Essential Supplies for Beginners
Alright, you’ve picked the platform, now it’s time to round up the tools that will actually let you knit without constantly pausing to Google “what’s a size 8 needle.”
First thing on the list? A pair of needles that feel comfortable in your hands. For most newbies, a medium‑weight (US size 8 / 5 mm) bamboo or wood set works wonders because the slight “give” reduces tension spikes. If you’re allergic to wood, plastic or aluminum needles are a solid backup—just make sure the tip is sharp enough to glide through the yarn.
Yarn: the heart of every project
When you’re staring at a rainbow of yarn swatches, it’s easy to overthink. The rule of thumb is to start with a worsted‑weight, 100% acrylic or a soft acrylic‑wool blend. Acrylic is budget‑friendly, machine‑washable, and less likely to split, which means fewer “oh no, my stitch fell apart” moments.
Take Maya’s first scarf: she chose a teal acrylic worsted that cost $8 at her local craft store and completed the whole piece in three evenings. Compare that to a pricey hand‑dyed merino that might cost $30 and still feel slippery for a beginner.
Essential accessories you didn’t know you needed
A stitch marker might look like a tiny plastic bead, but it’s a lifesaver when you’re counting rows or shaping shoulders. Grab a set of four–to‑six—different colors help you see patterns at a glance.
Don’t forget a tapestry needle (the big, blunt kind) for weaving in ends. It’s the difference between a tidy finish and a loose fringe that drags on the floor.
And a measuring tape or ruler? Absolutely. A quick gauge swatch (about 4 inches square) tells you whether the pattern’s gauge matches your needle size. If it’s off, you can simply switch to a size up or down before you even start the first row.
Setting up your knitting nook
We all love a cozy corner, but a functional space beats a decorative one. Place a sturdy lamp with a warm bulb next to your chair—good lighting prevents eye strain and lets you see stitch patterns clearly.
Keep a small basket or tote within arm’s reach for yarn balls, needles, and those handy accessories. When everything’s organized, you spend less time hunting and more time knitting.
Here’s a quick checklist you can print and stick on your wall:
- Medium‑weight (US 8) bamboo needles
- Acrylic worsted‑weight yarn (2‑skein starter)
- 4–6 stitch markers
- Tapestry needle
- Gauge swatch ruler or measuring tape
- Comfortable chair and lamp
- Notebook for stitch notes
Now, you might be wondering how to actually see these tools in action. The tutorial video walks you through each item, from needle selection to yarn feel, so you can compare before you buy.
Notice how the instructor emphasizes the “soft tip” on bamboo needles—that’s the cue that the needles will slide without catching. After watching, grab your own set and do a quick test stitch; you’ll instantly feel the difference.
One more pro tip: if you’re on a budget, many online knitting classes (including the ones on CreativiU) bundle a starter kit in the first module. That kit usually includes exactly the items listed above, calibrated for the course’s gauge. It’s a painless way to avoid the “I bought the wrong size” trap.
Finally, give yourself a tiny ritual before each session—maybe a cup of tea, a quick stretch, and a glance at your checklist. Those small habits turn a chaotic hobby into a relaxing routine.
Ready to stock your supplies? Head to your local craft store or browse online, and remember: you don’t need a mountain of gear, just the right basics. Once you’ve got these essentials, you’ll be set to dive into the first lesson of your online knitting classes for beginners with confidence.
Step 3: Master Basic Stitches with Guided Video
Okay, you’ve got your needles, yarn, and a cozy nook. The next hurdle? Turning that loose strand into a neat row of knit and purl stitches without pulling your hair out. That’s where a well‑structured video lesson becomes your secret weapon.
Why a video works better than a static image
Think about the last time you tried to follow a picture‑only tutorial. You probably squinted at the angle of the needle, guessed the tension, and ended up with a crooked edge. A video shows the instructor’s hands in real time, the way the yarn loops around the needle, and the subtle wrist motion that keeps tension even. It’s like having a knitting buddy sitting right next to you, whispering “slow down, that’s the right way.”
Most online knitting classes for beginners break the basic stitch lesson into three bite‑size clips: the knit stitch, the purl stitch, and a quick combine‑and‑repeat exercise. Each clip is under five minutes, so you can pause, rewind, and practice without feeling like you’re stuck in a marathon.
Step‑by‑step walk‑through
1. Set up your screen and space. Position your laptop or tablet so the instructor’s hands are clearly visible. If you can, place a small lamp behind the screen to reduce glare – it’ll make the yarn’s color easier to follow.
2. Follow the “one‑row, one‑pause” rule. Play the first 30 seconds, then pause. Replicate that exact motion with your own needles before hitting play again. It may feel slow, but that repetition builds muscle memory faster than trying to keep up.
3. Use the “mirror” technique. If the video shows the instructor’s right hand doing the knit, mirror it with your left hand (or vice versa). This keeps your perspective aligned with the camera and prevents you from getting confused about which needle holds the working yarn.
4. Check tension with a “feel test.” After a few rows, gently pull the yarn. It should glide without snapping or stretching. If it feels tight, loosen your grip a tad; if it’s floppy, try a slightly tighter hold. The video often includes a quick tip on this, so replay that segment if you’re unsure.
5. Combine knit and purl in a “rib” practice. Most beginner courses end the basic stitch module with a simple 2×2 rib (knit two, purl two). This pattern forces you to switch stitches smoothly and reinforces the hand movements you just learned.
Common pitfalls and how the video saves you
Ever found yourself accidentally purling when you meant to knit? It’s a classic slip‑up that happens when you’re still getting used to the needle orientation. The video’s close‑up shots let you see the yarn’s direction before it catches the needle, so you can correct the motion instantly.
Another trap is “tension drift” – the yarn gets tighter or looser as you go. A good instructor will pause mid‑row to remind you to check your tension, and many platforms even include a downloadable checklist you can print and keep beside your needles.
Turning the video into a habit
Here’s a quick ritual that turns a one‑off watch into a repeatable practice:
- Before you press play, brew a cup of tea and set a timer for 15 minutes.
- Start the video, pause after each movement, and do a “mini‑row” of your own.
- When the timer dings, step back, measure a 4‑inch swatch, and note the gauge in your notebook.
- Close the video, stretch your fingers, and reward yourself with a snack.
Doing this three times a week is enough to graduate from shaky “trial stitches” to a confident, even fabric that you can actually use for a scarf or a blanket.
And remember, the beauty of an online class is that you can revisit any clip whenever a stitch trips you up. No more scrolling through endless forum threads hoping someone posted a screenshot – just hit replay and watch the exact motion again.
Ready to give it a go? Grab your yarn, hit the “basic stitches” playlist on your chosen platform, and let the guided video turn those nervous loops into smooth, satisfying rows. You’ll be amazed how quickly the muscle memory kicks in, and before you know it, you’ll be stitching without even thinking about it.
Step 4: Follow a Beginner Project Blueprint
By now you’ve got the platform, the supplies, and the basic stitches under your belt. The next logical move is to pick a simple, well‑structured project that will walk you through every step – from casting on to binding off – without leaving you guessing.
Does the idea of a finished piece feel a bit fuzzy? That’s normal. The trick is to follow a blueprint that breaks the project into bite‑size milestones, each with its own mini‑goal and a quick check‑point.
Why a beginner‑friendly blueprint matters
Think of a blueprint as a GPS for your knitting journey. It tells you when to turn (change stitch), when to stop for a snack (measure gauge), and when you’ve arrived (finished product). Without it, you might wander into tension problems or lose track of stitch counts, and that quickly kills motivation.
One popular starter is the simple garter‑stitch scarf. All About Ami walks through the whole process – from yarn choice to finishing fringe – in a single, downloadable PDF that even includes a step‑by‑step photo guide. The pattern is intentionally plain, so you can focus on technique instead of design complexity.
Step‑by‑step blueprint for a garter‑stitch scarf
1. Choose your yarn and needles. Pick a worsted‑weight acrylic (budget‑friendly and easy to care for) and a pair of 8 mm bamboo needles. Large needles make the stitches visible, which is a huge confidence boost.
2. Cast on the right number of stitches. The All About Ami guide suggests 16 stitches for a standard width. Use the long‑tail cast‑on; it creates a neat edge that won’t snag.
3. Knit every row. That’s the garter stitch – knit, turn, knit, turn. The repetitive motion builds muscle memory. Set a timer for 15 minutes, knit a few rows, then pause to check gauge (7 sts × 9 rows = 4 inches). Adjust needle size if you’re off.
4. Measure as you go. Every 20 rows, lay the work flat, measure the length, and note it in your notebook. This prevents surprises when you finally hit the desired length (usually 70‑80 inches for an adult scarf).
5. Bind off and finish. When you’ve reached the length, bind off loosely to keep the edge stretchy. Slip the tail through a tapestry needle, weave it in, and you’re done. Add fringe if you like – just cut strands about 22 inches long, fold, and attach with a simple whip stitch.
That’s it. Six tiny tasks, each with a clear outcome. Follow them in order, and you’ll end up with a scarf you can actually wear or gift.
Real‑world examples
Maya, the marketing manager we mentioned earlier, tackled the same garter‑stitch scarf using the blueprint. She finished her first scarf in four evenings, and the gauge matched perfectly on the first try because she measured every 20 rows.
Jamal, the retiree, added a twist: he used two strands of yarn together (a thick & quick plus a homespun) to create a chunky texture. The All About Ami article even lists that exact combo, showing how a blueprint can be a launchpad for creative experiments.
Quick‑reference comparison table
| Feature | What the Blueprint Gives You | Why It Helps Beginners |
|---|---|---|
| Clear stitch count | Exact number of casts, rows, and bind‑off steps | Prevents lost place and frustration |
| Gauge checkpoints | Measure every 20 rows, adjust needle size | Ensures finished size matches expectations |
| Finish options | Standard bind‑off, fringe, or cowl variation | Gives a sense of accomplishment and customization |
Actionable checklist you can print
- Pick worsted‑weight acrylic yarn (2 skeins)
- Grab 8 mm bamboo needles
- Cast on 16 stitches using long‑tail method
- Knit every row, turning after each
- Measure gauge every 20 rows (7 sts × 9 rows = 4 in)
- Stop when length reaches 70‑80 inches
- Bind off loosely, weave in ends
- Add fringe or cowl finish if you want extra flair
Got a different project in mind? The same blueprint logic works for a simple dishcloth, a baby blanket, or even a beginner’s cardigan – just swap the stitch pattern and adjust the stitch count.
If you need more inspiration, check out How to Knit a Scarf for Beginners in 10 Easy Steps. It breaks down the same process with screenshots that line up nicely with the garter‑stitch blueprint.
And for families looking to keep the creative momentum going beyond yarn, you might also explore Poppa’s Wooden Creations – handcrafted wooden toys that spark imagination while you knit.
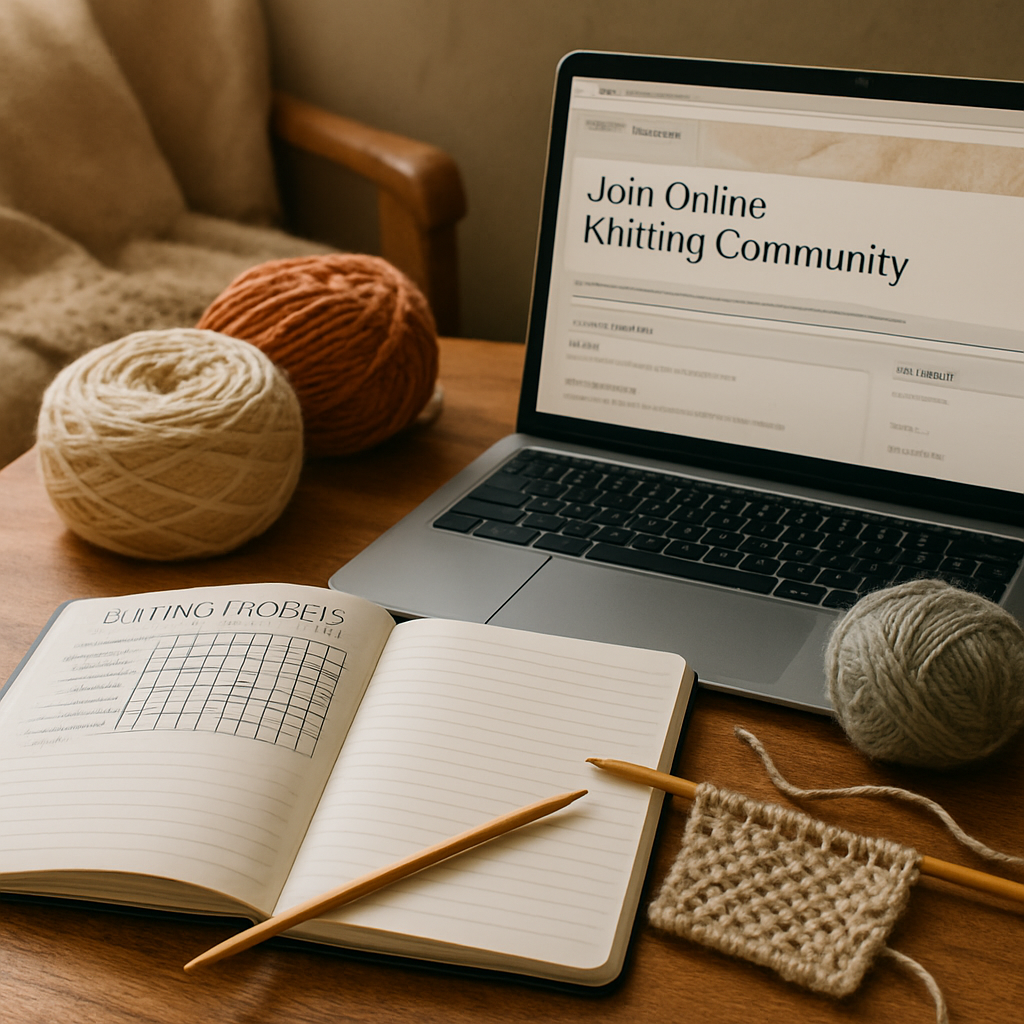
Step 5: Track Progress and Join Knitting Communities
So you’ve cast on, you’ve measured gauge, and your scarf is finally taking shape. At this point many beginners wonder, “How do I know I’m actually getting better?” The answer is simple: you need a way to see your own growth and a crew of folks who cheer you on.
Why tracking matters
When you jot down stitch counts, row numbers, and gauge measurements, you create a roadmap of your journey. A quick glance at that notebook later shows you where you tweaked needle size or changed yarn, and you can replicate the winning formula for the next project.
Plus, seeing progress on paper (or a digital note) turns those vague feelings of “I’m stuck” into concrete data – and data feels a lot less intimidating.
Simple ways to log your work
1. Notebook or journal. Keep a small spiral notebook beside your needles. Write the date, project name, yarn brand, needle size, and gauge swatch results. A tiny box for “notes” helps you capture moments like “felt tension tighten after 30 rows”.
2. Google Sheet or app. If you prefer a screen, create a simple spreadsheet with columns for project, yarn weight, needle size, gauge, and completion date. Apps like Knit Tracker (free on iOS/Android) let you snap a photo of your swatch and store it alongside the numbers.
3. Photo log. A picture says a thousand stitches. Snap a photo at each gauge checkpoint and save it in a dedicated album called “Knitting Progress”. When you scroll back months later, you’ll see the exact texture change as you refined tension.
Finding your tribe online
Even the best‑written log feels lonely if you never share it. That’s where knitting communities step in. They’re more than just forums; they’re living libraries of tips, encouragement, and pattern discoveries.
One of the biggest hubs is Ravelry’s massive pattern library. It’s free, searchable by yarn weight, skill level, and even color palette. While you’re browsing, you’ll notice thousands of members posting photos of their progress, answering questions about gauge, and suggesting yarn swaps.
Other friendly corners include Purl Soho’s pattern archive, Petite Knit for design inspiration, and Good Night, Day for modern, stylish projects. Jump into the discussion threads, ask “What needle size did you use for this gauge?” and watch the conversation flow.
Make the most of community challenges
Most online knitting groups host monthly or weekly challenges – think “20‑row scarf in 48 hours” or “Winter Warm‑up: knit a hat in a week.” These mini‑deadlines give you a reason to pull out the needles regularly and a built‑in accountability partner.
Here’s a quick checklist to turn a challenge into progress:
- Pick a challenge that matches your current skill level.
- Set a reminder on your phone for your daily knitting block.
- Log each day’s row count in your notebook or app.
- Share a photo or short update in the community thread before you go to bed.
Seeing others post their half‑finished pieces can be the nudge you need to keep stitching, even on a busy day.
Turn tracking into a habit
Try this three‑step ritual before every session: (1) glance at your last entry to remind yourself of the gauge, (2) write today’s goal – “knit 15 rows, check tension,” and (3) snap a quick photo right after you finish. When you close the notebook, you’ll feel a tiny win, and that win adds up.
And if you ever hit a snag, remember the community is just a click away. Post a “stuck” photo, describe the issue, and watch the flood of helpful replies roll in. It’s like having a knitting buddy who never sleeps.
Tracking your stitches and joining a supportive knit‑crew are the two pillars that turn a one‑off project into a lasting habit. When you can see how far you’ve come and hear cheers from fellow makers, the next scarf (or sweater) feels less like a mountain and more like a friendly walk.
Ready to start logging? Grab that notebook, fire up Ravelry, and let the community celebrate each row with you.
Happy stitching!
FAQ
What makes online knitting classes for beginners different from a random YouTube tutorial?
Because a structured class gives you a clear curriculum, progressive milestones, and a place to ask questions. You don’t have to hunt for the next video – the platform lines up casting on, knit, purl, and finishing in the order you need. Plus, most classes bundle printable PDFs and a community forum, so you can check your gauge or get feedback without scrolling endless comments.
Do I need any special equipment before I sign up for an online knitting class?
Not really. A medium‑weight (US 8) pair of bamboo needles, a skein of worsted‑weight acrylic yarn, and a notebook for stitch notes are enough to get started. The class will tell you the exact yarn weight and needle size for each project, so you can buy just what you need and avoid waste.
How much time should I set aside each week to see real progress?
Most beginners find 30 minutes to an hour a few times a week works wonders. The key is consistency – treat your knitting session like a mini‑workout. Even a quick “one‑row‑pause‑one‑row” routine keeps muscle memory sharp and prevents tension drift, which is why many courses suggest a short timer before each lesson.
What if I get stuck on a stitch or can’t read a pattern?
That’s where the community aspect shines. Drop a photo of your work in the course’s forum, describe the issue, and expect a handful of peers or the instructor to reply within a day. Most platforms also have a searchable “common problems” archive, so you can see how others solved the same snag before you even post.
Are there live sessions, or is everything pre‑recorded?
It varies by platform. Some offer live Q&A every Sunday, while others stick to on‑demand videos you can replay forever. If you thrive on real‑time feedback, look for a course that lists “live office hours” in the syllabus. If you prefer flexibility, a fully pre‑recorded library still gives you the same step‑by‑step guidance, just on your schedule.
How do I know the class I’m choosing is trustworthy?
Start by checking the curriculum outline – it should list casting on, basic stitches, gauge checks, and a finishing project. Look for student testimonials that mention concrete results, like finishing a scarf in three weeks. A free trial video is a great litmus test; if the instructor’s pacing feels right and the video quality is clear, you’re probably in good hands.
Can I turn my new knitting skills into a side hustle?
Absolutely. Once you’ve completed a few projects, you can showcase them on the platform’s gallery or on Ravelry, then offer custom pieces on Etsy or at local craft fairs. Many beginners start by selling simple accessories – scarves, dishcloths, or personalized bookmarks – before moving on to larger garments. The class’s community often shares marketing tips, so you don’t have to reinvent the wheel.
Conclusion
Look how far you’ve come – from hunting for the right platform to actually holding a finished stitch in your hand.
If you’ve followed the checklist, you now know how to spot a trustworthy course, grab the essential tools, and turn those first rows into a project you can be proud of.
Remember the feeling when a video showed the yarn slipping smoothly over the needle? That “aha” moment is exactly what online knitting classes for beginners are built to deliver: clear, bite‑size lessons that you can pause, replay, and practice at your own pace.
So, what’s the next step? Set a small, realistic goal – maybe a 12‑inch scarf or a pair of coasters – and schedule a 15‑minute knitting block this week. Log the rows, share a photo in the community, and celebrate the progress.
When doubts creep in, flip back to the lesson you loved, or ask a fellow knitter for a quick tip. The habit of tracking and community support turns a hobby into a lasting skill.
Ready to keep the momentum going? Dive back into your chosen class, experiment with a new yarn, and watch your confidence grow stitch by stitch.
You’ll be amazed how quickly the learning curve smooths out.
Leave a Reply