Ever caught yourself staring at a pile of willow reeds, wondering how on earth you could turn them into a beautiful basket without ever picking up a needle? You’re not alone—most beginners feel that mix of excitement and a pinch of dread the first time they imagine weaving something from scratch.
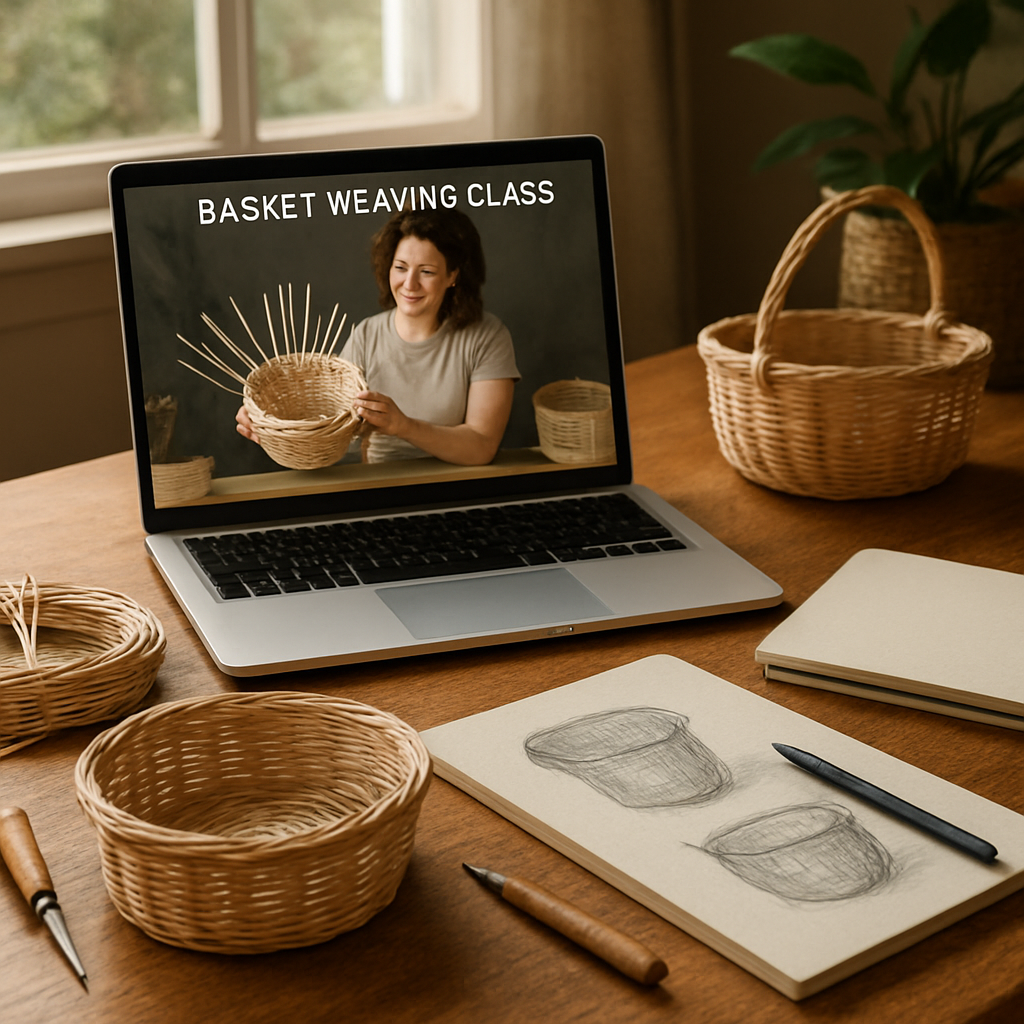
What’s amazing is that you don’t need a fancy studio or a seasoned mentor right next door. With the rise of online basket weaving classes, you can learn the fundamentals from the comfort of your living room, at a pace that fits your schedule. Whether you’re a hobbyist looking to add a new skill, a creative entrepreneur aiming to launch a handmade line, or a parent seeking a hands‑on activity for the kids, there’s a class that matches your vibe.
Take Jenna, a stay‑at‑home mom from Austin. She signed up for a beginner weaving course, started with a simple round coaster, and within weeks she was crafting sturdy market baskets to sell at the local farmer’s market. Her secret? Following clear video demos, practicing with the weekly assignments, and joining the course’s community forum to get feedback.
Another example: Luis, a freelance graphic designer, wanted to diversify his creative portfolio. He enrolled in an intermediate class that taught natural dyeing techniques for reeds. By the end of the module, he’d produced a limited‑edition collection of eco‑friendly baskets that landed a feature in a regional lifestyle magazine.
So, how do you pick the right class? Here are three quick steps you can try right now:
- Identify your goal – is it a quick project, a new income stream, or pure relaxation?
- Check the course structure – look for modular lessons, downloadable patterns, and live Q&A sessions.
- Read reviews from fellow crafters – community feedback often reveals hidden gems.
In our experience, the most comprehensive roundup is the Top 7 Basket Weaving Classes Online to Learn Crafting from Home. It highlights platforms that offer step‑by‑step video tutorials, material kits shipped to your door, and active forums where you can swap tips.
And don’t forget the tools that make sketching your designs a breeze. A good sharpener keeps your drafting pencils crisp, which is surprisingly important when you’re drawing detailed weave patterns. For a reliable guide, see the article on the best sharpener for charcoal pencils – it walks you through top picks that work great for both sketching and shading your project plans.
Ready to turn those reeds into something you’re proud of? Start by picking a class that resonates with your style, gather a few basic tools, and set aside just 15 minutes a day. Before you know it, you’ll have a finished piece you can actually use or sell. Let’s get weaving!
TL;DR
Online basket weaving classes let you master weaving techniques from home, whether you’re a hobbyist looking for a new creative outlet, an entrepreneur aiming to sell handmade pieces, or a parent seeking a fun activity for kids. Our quick guide highlights the top platforms, key features to check, and a simple three‑step plan so you can start weaving in just 15 minutes a day and see results fast.
Step 1: Choosing the Right Platform for Online Basket Weaving Classes
Ever sat on your couch, scrolling through endless course catalogs, and thought, “Which one actually lets me weave without feeling lost?” You’re not the only one. Picking a platform can feel like choosing a weaving pattern blindfolded.
First, ask yourself what you need to succeed. Are you a hobbyist who just wants a weekend project? A creative entrepreneur looking to turn baskets into a side‑hustle? Or a parent hoping the kids will stay busy and learn something tactile? Your answer will shape the features you prioritize.
Content depth and structure
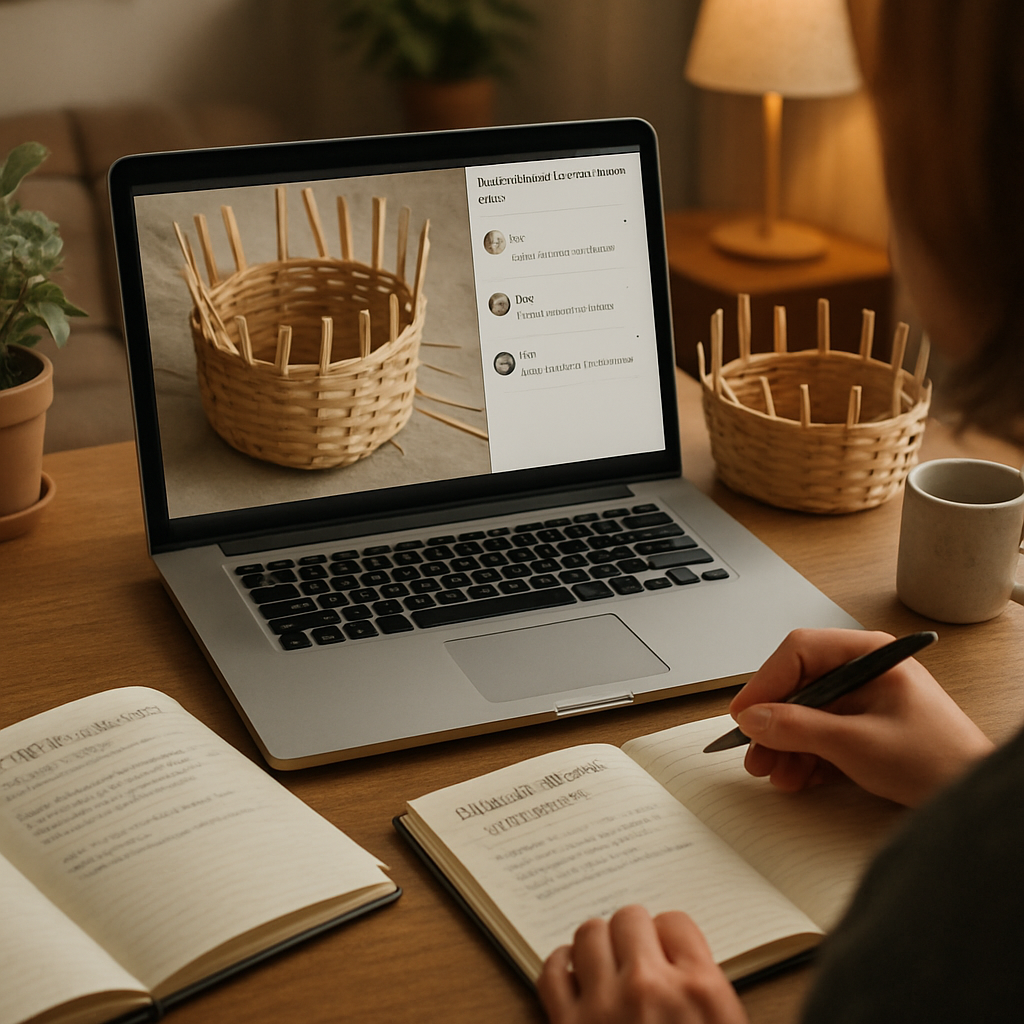
Look for courses that break the craft into bite‑size modules—think “intro to reed prep,” “basic weave stitches,” and “advanced basket forms.” Platforms that offer downloadable patterns and step‑by‑step PDFs let you practice offline, which is a lifesaver when the internet hiccups.
We’ve seen learners thrive when the curriculum mirrors a real‑world project timeline. For example, a beginner might start with a simple coaster, then graduate to a market basket. This progression keeps motivation high and skills building logical.
Community and feedback loops
One of the biggest differentiators is a thriving community. A forum or private group where you can post photos, ask “Why does my weave keep opening up?” and get quick feedback makes the difference between a stalled hobby and a flourishing craft.
In fact, many of our members tell us that the instant Q&A sessions during live workshops feel like sitting at a local studio, just without the commute.
For a quick look at some top‑rated options, check out our Top 7 Basket Weaving Classes Online to Learn Crafting from Home. It breaks down the strengths of each platform, so you can match features to your goals.
Trial periods and pricing transparency
Nothing kills excitement faster than hidden fees. Platforms that give a 7‑day free trial or a money‑back guarantee let you test video quality, instructor style, and community vibe before committing.
Pay‑per‑class works for occasional learners, while a monthly or annual subscription often unlocks the entire library and exclusive live sessions. If you’re an entrepreneur, consider whether the platform offers branding tools or a marketplace to showcase finished pieces.
Does the platform integrate with tools you already use? Some courses sync with Google Drive for pattern storage, while others have built‑in sketch pads for design brainstorming.
Tech checklist
Make sure the site works on your preferred device—desktop, tablet, or phone. A responsive video player, downloadable resources, and a stable streaming bandwidth are non‑negotiable if you plan to watch lessons while the kids nap.
And, because a good design starts on paper, you might want to keep your sketching sharp. The best sharpener for charcoal pencils guide helps you pick a tool that keeps your design pencils crisp for drawing weave patterns.
Now that you’ve got the criteria, it’s time to test a couple of platforms. Sign up for a trial, watch the first lesson, and post a photo of your first weave in the community forum. If the feedback feels supportive and the lessons click, you’ve probably found your match.
While the video walks you through setting up your workspace, remember that the right platform will also guide you on material kits—some even ship reeds straight to your door.
If you’re looking for a local venue to showcase a finished basket, consider visiting Gratitude Studios. Their community‑focused gallery often features handcrafted items from emerging artists, providing a real‑world audience for your online learning.
Bottom line: the perfect platform blends clear, modular content, an engaged community, transparent pricing, and tech that works on your device. Once you lock that down, the rest of the weaving journey becomes a lot smoother—and way more fun.
Step 2: Essential Tools & Materials for Beginners
Alright, you’ve picked a class and you’re ready to roll up your sleeves. The next question most newbies ask is, “What do I actually need to start weaving?” The answer is simpler than you think, but a few smart choices can save you hours of frustration.
First up, the basics: a sturdy base, a set of cutting tools, and the right fibers. If you’re working from a tiny apartment kitchen, a small tabletop loom (or even a makeshift frame made from a wooden cutting board and some clamps) does the trick. For larger projects, a portable floor loom gives you the space to experiment with wider baskets.
Choosing Your Fibers
Natural fibers are the bread and butter of basket weaving. According to Love Our Real Life’s guide to basket‑weaving materials, bamboo, reeds, vines, and grasses each bring a different feel:
- Bamboo – Tough, lightweight, and great for high‑weight capacity baskets. Slice thin strips with a sharp utility knife and you’ve got a durable base.
- Reeds – Wide, malleable, and perfect for beginners because they hold shape well. Soak them in hot water for a few minutes, then let them air‑dry before you start.
- Vines (honeysuckle or wild vines) – Naturally thin and flexible. Trim to size, wet briefly, and they’ll bend without snapping.
- Grasses (seagrass, sweet grass) – Ideal for decorative coasters or shallow trays. Look for blades that are 9‑12 inches long and dry enough to stay stiff.
Pick one material that’s readily available in your area – the less you have to hunt for, the quicker you’ll get to weaving.
Essential Hand Tools
Here’s a quick checklist you can print and stick on your workbench:
| Tool / Material | Recommended For | Key Tip |
|---|---|---|
| Sharp utility knife or scissors | Cutting bamboo strips, trimming reeds | Keep the blade sharp – a dull edge tears fibers. |
| Weaving needle (bamboo or metal) | Threading thin grass or vine strands | Choose a needle with a small eye for tighter weaves. |
| Clamp set or spring clips | Holding the base frame steady | Adjust the pressure so the fibers don’t slip. |
That’s really all you need to get started. If you’re feeling fancy, a small rotary cutter speeds up bamboo prep, but it’s not a must‑have.
Setting Up Your Workspace
Find a flat surface with good lighting – natural light works wonders for spotting tiny knots. Lay down a clean cloth or a silicone mat; it protects both your fibers and your table.
Next, organize your tools in a mini‑caddy: knife on one side, needles in a tiny tin, clamps in a row. When everything is within arm’s reach, you’ll stay in the flow and avoid the dreaded “where did I put that scissors?” moment.
So, what’s the first action you should take?
- Gather a small batch of your chosen fiber (about 10‑15 feet of bamboo strips or a handful of reeds).
- Cut the material into uniform lengths – consistency makes the base easier to weave.
- Set up a simple loom using a cutting board and two clamps; tighten until the board doesn’t wiggle.
- Practice a basic over‑under stitch for five minutes. Focus on maintaining even tension.
That practice round is your “warm‑up” – think of it like a quick stretch before a run. You’ll notice the difference in how the fibers sit as soon as you start the real project.
When you’re comfortable, move on to the first module of your online class. Most beginner courses, including the ones we highlight in our Crochet guide for beginners, suggest a starter kit that mirrors this list. The good news is you already have the core items, so you can focus on technique rather than hunting gear.
Remember, the tools are only the foundation; the real magic happens when you experiment with pattern variations. Try weaving a simple round base, then add a decorative edge using a contrasting fiber – that tiny twist makes a plain basket feel like a finished product you’d proudly display at a farmer’s market.
Finally, give yourself a quick “tool check” after each session. Are the blades still sharp? Do the clamps still hold? Small maintenance habits keep the workflow smooth and prevent unnecessary breaks.
With the right tools, the right fibers, and a tidy workspace, you’re set to turn those online lessons into tangible baskets you can use, sell, or gift. Happy weaving!
Step 3: Setting Up Your Learning Space (Video Walkthrough)
Let’s be real: the best online basket weaving classes won’t help if your space fights you every step of the way.
Whether you’re on a couch with a laptop or at a dedicated craft table, your environment can slow you down or help you fly through the modules. In 2026, more hobbyists are choosing dedicated corners to keep momentum. Here’s how to set up a space that actually supports your learning and your weaving practice.
Create a dedicated learning corner
Choose a quiet, stable spot with a solid table you can trust. If you can swing it, a corner away from the kitchen chaos makes focusing easier.
Keep distractions to a minimum and brand the space as your learning zone with a small plant, a mug of tea, or a tiny loom nearby—little cues that tell your brain, “this is where progress happens.”
Lighting, surface, and organization
Bright, steady light matters. Natural light is fantastic, but a daylight-balanced lamp works great for evening sessions too. Create a clean, flat weaving surface—ideally 28–30 inches high—to keep your shoulders relaxed.
- Lighting: aim for 4000K–5000K daylight bulbs to reduce eye strain and reveal fiber textures.
- Surface: use a stable desk or portable loom on a non-slip mat to prevent fibers from sliding.
- Organization: keep reeds, fibers, a sharp knife, and a weaving needle in a small rolling tray or caddy so everything is within arm’s reach.
Does this feel like extra work? It pays off when you’re midway through a weave and you don’t have to hunt for tools.
Ergonomics, rhythm, and micro-goals
Seating matters. Sit with your back supported and your wrists in a natural position. Take short breaks every 15 minutes to stretch your shoulders and wrists so you don’t lose momentum.
Set tiny daily wins. For example, commit to 15 minutes of video lessons and 10 minutes of hands-on practice. Small, consistent steps compound into real baskets much faster than sporadic marathons.
From CreativiU’s perspective, a focused learning space reduces friction and keeps you in the flow. When your environment supports your curiosity, you’ll reach those “aha” moments faster.
Personalize and optimize for lasting momentum
Your space should feel inviting. A touch of personality helps you want to come back, not dread the mess every time you sit down.
Add a small plant, a favorite mug, or a framed photo from a finished basket. These little details signal that this is your creative zone, not just a desk you use for bills.
Color cues can help you stay organized. Group similar fibers together in labeled bins or color-coded bags so you can grab what you need in seconds.
As you plan ahead for future projects, keep a spare reed bundle and a starter kit nearby; it reduces the time you waste hunting supplies between modules.
Mini checklist before you start
- Clear the desk and lay a clean mat.
- Gather fibers you plan to use this session.
- Set up your base loom and secure clamps.
- Open the online module and skim the goals.
- Silence notifications and put your phone on Do Not Disturb.
With this setup, you’re ready to dive into the video walkthrough and start turning online basket weaving classes into tangible results.
So, set up your space today and press play on your first module. If you’re craving extra practical tips, check out North Georgia Basketry’s beginner overview for a grounded, real-world view that pairs nicely with what you’ll learn in CreativiU’s online basket weaving classes. North Georgia Basketry beginner overview is a solid starting point, especially for families exploring creative projects together. For more hands-on pointers, see North Georgia Basketry practical tips.
Step 4: Curriculum Basics & Practice Projects
By the time you’ve cleared the desk and tightened the clamps, the real challenge shifts from “where do I start?” to “what will I actually create?” That’s where a solid curriculum and a handful of practice projects become your safety net. Think of the curriculum as the map and each mini‑project as a checkpoint that tells you you’re still on the right road.
Curriculum Blueprint: what the modules should cover
Most reputable online basket weaving classes break the learning journey into three logical blocks: fundamentals, technique deep‑dive, and application. Here’s a quick glance at what you’ll see in a well‑structured course:
- Module 1 – Foundations. Identify fibers, prep reeds, set up a basic loom, and practice the over‑under stitch for 10‑15 minutes a day.
- Module 2 – Shape & Structure. Learn how to raise walls, add a base, and experiment with simple patterns like the diamond weave or the spiral twist.
- Module 3 – Design & Finish. Introduce decorative edges, natural dyeing, and attaching handles or liners for functional baskets.
Notice the pattern? Each module builds on the previous one, so you never feel like you’re jumping into a skill you haven’t practiced yet. In our experience at CreativiU, this step‑by‑step layering keeps beginners from feeling overwhelmed and gives entrepreneurs a clear path to a market‑ready product.
Designing Your First Practice Project
Let’s turn that blueprint into something tangible. A great starter project is a “mini round coaster” – it’s small enough to finish in an hour, yet it uses every core technique introduced in Module 1.
Here’s how to do it:
- Gather 12‑15 inches of fresh willow reed, soak in warm water for 5 minutes, then pat dry.
- Cut the reed into 6‑inch strips; keep the length consistent so the base stays even.
- Arrange the strips in a circle on your loom, securing the ends with clamps.
- Practice the over‑under stitch around the circle for four rounds. Keep tension even – if a stitch feels loose, adjust the clamps.
- Close the weave by tucking the final strip under the previous row, then trim excess reed.
- Optional: dip the finished coaster in a natural tea‑dye (like black tea) for a rustic hue.
When you finish, you’ll have a functional piece you can actually set a cup on. That instant payoff is the secret sauce that keeps hobbyists motivated and gives creative entrepreneurs a quick prototype to photograph for a shop listing.
Progress Checkpoints – how to measure growth
Every two weeks, pause the course and run a quick self‑audit. Ask yourself:
- Can I start a new project without watching the video tutorial?
- Did I finish a project that uses at least two new stitches?
- Am I comfortable adjusting tension on the fly?
If the answer is “yes” to at least two questions, you’re ready to move to Module 2. If not, rewind the relevant video and practice the specific stitch for another 10 minutes. This loop of practice‑review‑repeat is what separates a hobbyist who quits after one basket from a creator who builds a small business.
Tip: Keep a Project Journal
Jot down the date, fiber type, stitch pattern, and any hiccups you hit. Over time you’ll spot patterns – maybe you struggle with tight tension on bamboo but glide through reed. That insight lets you pick the right material for each future product.
Real‑world example: Maya (a parent‑teacher from Asheville) followed this exact rhythm. She started with the coaster project, moved to a shallow fruit bowl in Module 2, and within a month was selling “hand‑dipped tea‑dye baskets” at her school’s craft fair. Her secret? The journal helped her streamline material orders, cutting waste by 30 %.
If you need a concrete example of how a professional structures his curriculum, check out Matt Tommey’s online basket weaving classes. He breaks each lesson into a 15‑minute video, a downloadable pattern, and a “practice‑first” assignment that mirrors the steps above.
Finally, remember that practice projects don’t have to stay small forever. Once you’re comfortable with the coaster, challenge yourself with a market‑size basket, a decorative wall hanging, or even a custom piece for a client. The curriculum gives you the scaffolding; the projects let you test the scaffolding in the real world.
Take the next 15 minutes to sketch a simple project idea, gather a handful of reeds, and run through steps 1‑4 above. You’ll see how quickly theory turns into a tactile result you can hold, share, and, if you wish, sell.
Step 5: Community, Feedback, and Progress Tracking
When you’re alone with a loom, the quiet can feel comforting…until you hit a snag and wish someone could just say, “Try loosening the tension there.” That’s why weaving isn’t meant to be a solo sport.
In our experience, the moment you plug into a supportive community, the learning curve flattens dramatically. You get fresh ideas, quick answers, and that reassuring nudge that keeps you stitching forward.
Why community matters
Research shows that crafters who belong to a forum or local club are up to 40 % more likely to finish a multi‑module course. The Weaving Tip 101 guide explains how both in‑person clubs and online boards act as a “virtual studio,” where you can post a photo of a wobbling basket wall and get instant suggestions.
Imagine you’re a creative entrepreneur trying to turn a hobby into a side‑hustle. A single comment from a fellow maker about a market‑ready shape could be the difference between a one‑off piece and a repeat‑order client.
Getting real‑world feedback
Start by sharing early drafts of your work in the class’s private forum. Keep the post focused: a clear photo, a one‑sentence description of the challenge, and a specific question (“Should I add an extra weft row for stability?”). That way peers can give targeted advice instead of generic praise.
Don’t overlook live Q&A sessions. If your online basket weaving class hosts a monthly Zoom, treat it like a mini‑critique circle. Bring a piece you’re stuck on, and watch how the group’s collective brain untangles the problem in real time.
Even the occasional “I tried this and it didn’t work” comment is gold. It tells you what not to do and validates that setbacks are normal.
Tracking your progress like a pro
Progress tracking isn’t just about ticking boxes; it’s about spotting patterns in what works for you. Grab a simple spreadsheet or a physical journal and log three things after each session:
- Fiber type and source (e.g., local willow, 2026 harvest)
- Technique practiced (over‑under, diamond weave, etc.)
- Result – did the tension hold? Did the shape stay true?
After a couple of weeks, scan the column. You might discover you breeze through reed projects but struggle with bamboo’s rigidity. That insight lets you schedule extra practice on the tougher material before moving on.
Some learners prefer visual dashboards. A quick Google Sheet with conditional formatting can turn “green” for successful attempts and “red” for trouble spots, giving you a colour‑coded snapshot at a glance.
Actionable checklist
Here’s a step‑by‑step routine you can start today:
- Join the course’s community forum (or a local weaving club if you prefer face‑to‑face).
- Post a photo of your current project with a clear, single question.
- Schedule a 10‑minute “feedback window” after each class – read replies, note any suggested tweaks.
- Update your progress log immediately after you try the advice.
- Every two weeks, review the log: highlight the technique that’s improved most, and plan a mini‑challenge that pushes the next skill.
By turning feedback into a habit and pairing it with concrete tracking, you create a feedback loop that accelerates growth. It’s the same loop that helped Maya in Asheville move from coaster to market‑size baskets in just a month.
Want to see how another instructor leverages community? Check out Matt Tommey’s basket weaving blog, where he shares regular community‑driven project showcases and how students use peer critiques to refine their work.
Remember, the community isn’t just a cheer squad – it’s a problem‑solving engine. When you combine that engine with a simple tracking system, you’ll see measurable progress week after week.
So, grab your journal, fire up the forum, and make feedback a daily habit. The next time you stare at a tangled weave, you’ll have a whole network ready to help you untangle it.
FAQ
What should I look for when choosing online basket weaving classes?
First, check the video quality – clear, close‑up shots make it easier to follow hand movements. Next, see if the platform offers a community hub where you can post questions and get quick feedback. Look for a curriculum that starts with basics and gradually adds more complex techniques, so you don’t feel thrown into a deep‑end project. Finally, verify that the course includes downloadable patterns or worksheets you can print and keep beside your loom.
Do I need a lot of expensive tools to start with online basket weaving classes?
Not at all. Most beginner courses assume you have a simple tabletop loom or even a makeshift frame made from a cutting board and clamps. A sharp utility knife, a few basic needles, and a handful of reeds or bamboo strips are enough to get rolling. As you progress, you can upgrade to specialty tools, but the initial investment should be under $30 – just enough to avoid frustration without breaking the bank.
How much time should I dedicate each week to see real progress?
Consistency beats marathon sessions. We recommend carving out 15‑20 minutes for video lessons and another 10‑15 minutes for hands‑on practice, five days a week. That adds up to roughly an hour a week, which is enough to reinforce muscle memory without feeling overwhelming. If you’re juggling kids or a side hustle, set a timer, grab a cup of tea, and focus just on the stitch you’re learning – the results add up faster than you think.
Can online basket weaving classes help me turn a hobby into a small business?
Absolutely. Look for courses that include a module on product photography, pricing strategies, and where to sell your pieces (like local markets or online craft platforms). Many classes also feature guest talks from creators who’ve built thriving shops, giving you a realistic roadmap. Pair the lessons with the community forum – you’ll get feedback on designs, branding ideas, and even marketing tips that can accelerate your launch.
What’s the best way to get feedback on my projects when learning online?
Post a clear photo of your work in the class’s private forum, and ask one specific question – for example, “Should I add an extra weft row for stability?” The more focused your query, the easier it is for peers to give actionable advice. Schedule a quick “feedback window” after each lesson to read replies and try suggested tweaks before moving on. Over time, you’ll notice patterns in the feedback that guide your skill growth.
How do I track my progress without getting overwhelmed?
Keep a simple journal or spreadsheet with three columns: fiber type, technique practiced, and outcome (e.g., “tension held,” “edge warped”). After each session, jot down a line or two. Over a couple of weeks you’ll see which materials click and which stitches need extra work. Some learners add colour‑coding – green for wins, red for challenges – which turns a plain log into a quick visual dashboard you can glance at before each practice.
Conclusion
By now you’ve seen how a well‑chosen online basket weaving class can turn a curiosity into a habit, and maybe even a side hustle.
If you’re still wondering whether the time investment will pay off, think about the last time you finished a project that felt truly yours – that rush of pride is exactly what these courses are built to deliver.
The key takeaways? Pick a platform that offers clear video, an active community, and a material kit that matches what you have at home.
Start small: a simple coaster or a mini‑basket, log your fiber, stitch and outcome, and share a photo in the forum for quick feedback.
When you notice tension holding steady and the weave staying even, you’ve crossed the first milestone – it’s proof that consistent practice works.
From there, layer on new techniques, experiment with colour or natural dyes, and let the community celebrate each win with you.
So what’s the next step? Head back to the class list, pick the starter module that speaks to your goal, and set a 15‑minute daily slot. You’ll be surprised how fast the skills stack up.
Remember, the platform is just the launchpad; the real magic happens when you weave, share, and iterate. Happy weaving!
Leave a Reply