Ever stared at a stack of unfinished projects and wondered why your creativity feels stuck behind a wall of logistics? The truth is, turning a craft into a thriving online business isn’t just a dream—it’s a roadmap you can follow.
You might think you need a fancy studio, a massive inventory, or a team of designers to make it happen. Think again. What you really need is a clear vision, the right tools, and a few smart habits.
The first step is to ask yourself: what makes your craft unique? Is it the pattern, the story behind each piece, or the feel you want your customers to experience? Pinpoint that edge and let it guide every decision.
Once you’ve nailed the ‘what’, it’s time to build the foundation. Start with a simple product line that showcases your signature style, and use the link below to dive deeper into launching a crochet business from home—you’ll find step‑by‑step guidance that turns ideas into sales. Starting a Crochet Business from Home: Step‑by‑Step Guide
With your line ready, the next hurdle is pricing. You’re not just selling fabric; you’re selling time, expertise, and the story that lives in every stitch. Use a tiered pricing strategy—basic, premium, and custom—to capture a range of customers.
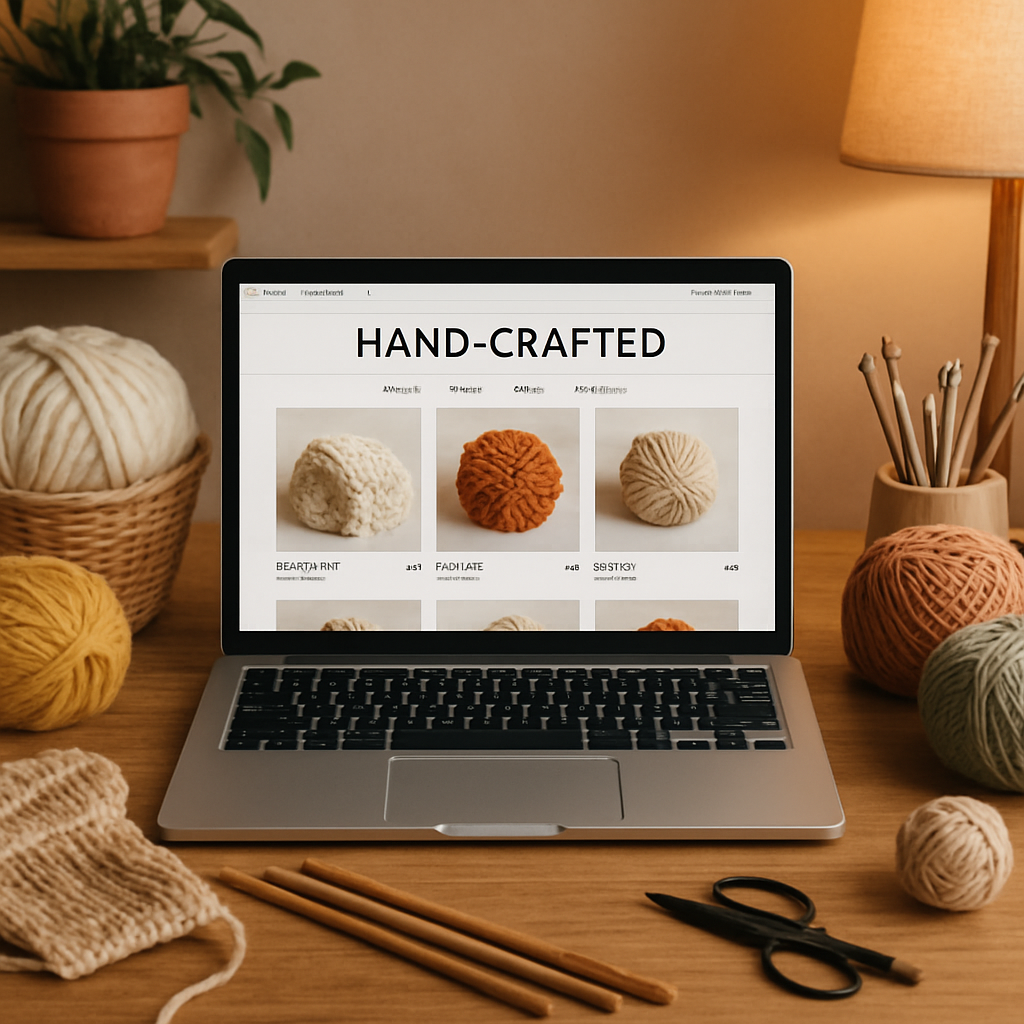
Now that you’ve set the price, it’s time to create a simple storefront. A free platform like Etsy or Shopify Lite lets you showcase your pieces without a big upfront cost, and you can plug in social media to drive traffic.
Marketing isn’t about shouting louder; it’s about connecting. Share behind‑the‑scenes videos, host live Q&A sessions, and feature user‑generated content. These tactics build trust faster than a glossy ad campaign.
But juggling design, production, and promotion can feel like a circus act. That’s where a solid time management system comes in. Check out the guide on mastering timeboxing for better productivity—it gives you a framework to keep your days on track. Mastering Timeboxing for Better Productivity
Finally, surround yourself with community. Join online groups, attend virtual trade shows, and collaborate with fellow artisans. The support you get from peers can turn setbacks into learning moments.
So, if you’re ready to turn your craft into a sustainable online venture, the roadmap is simple: clarify your niche, price wisely, set up a storefront, market authentically, and manage time smartly. Let’s dive in and start turning those handmade dreams into a steady income stream.
TL;DR
In this guide we’ll walk you through the exact steps to turn your passion into a profitable online craft shop—starting with a clear niche, pricing, and a simple storefront.
We’ll also cover authentic marketing, time-boxing tactics, and community support so you can focus on creativity, not logistics, and keep customers coming back.
Quick Action Checklist
- Define your niche and the story behind each piece.
- Set up a simple storefront—Etsy or Shopify Lite keeps costs low.
- Price with tiers: basic, premium, custom to capture all budgets.
- Build a short brand video showing a day in your studio; share it on Instagram Reels and TikTok.
- Schedule weekly time‑boxing blocks for design, production, and promotion.
- Join a local or online craft community; collaborate on a bundle launch.
- Collect early feedback—ask friends or community members to test a prototype.
- Launch a soft opening; offer a limited‑time discount to generate buzz.
- Track metrics: page views, conversion rate, average order value.
- Iterate quickly—change a design or price based on data after two weeks.
Ready to get started? Here’s a quick video that walks you through the first three steps.
When you hit launch, keep the momentum alive by posting daily craft tips, hosting a live Q&A, and offering a flash sale for early customers. Monitor your shop analytics weekly; a dip in traffic could signal a need for new keywords or a tweak in your product photos. If you notice a particular design selling faster, double‑down on that style or create variations. Finally, celebrate milestones—whether it’s your first sale or 50 followers—and thank your community with a heartfelt note. Small gestures build loyalty faster than a fancy badge.
Step 1: Conduct Market Research and Identify Your Niche
Step 1 is all about asking the right questions before you spend a dime on a shop or a marketing campaign. It starts with a simple realization: if you don’t know who cares about your product, you’ll end up chasing the wrong crowd. Let’s dig into the why behind market research and how it can save you headaches down the road.
Market research is your cheat sheet to the market’s pulse, not a vague hunch. It tells you how big the audience is, what they actually want, and who’s already selling what you’re thinking of doing. Without that data, you risk pouring time into a product that no one will notice.
There are two main flavors: primary research that you collect yourself, and secondary research that you find in reports and the internet. Primary methods include quick surveys, a few one‑to‑one chats, or focus groups that let you hear the raw voice of a potential customer. Secondary pulls data from industry reports, census data, and even competitors’ websites.
Start with secondary research to map the landscape. Search for market‑size reports on handmade goods, check Etsy’s trending lists, or look at Google Trends for keywords like “hand‑made candle” or “hand‑crafted jewelry.” The goal is to spot gaps—products that sell well but have little competition, or a niche where buyers are talking but not buying yet.
Next, test those gaps with primary research. Grab a handful of your target buyers—maybe a parent who loves DIY projects or a millennial who wants unique home décor—and ask them about pain points. You can use free tools like Google Forms or Typeform, and offer a small thank‑you gift, like a digital printable, to sweeten the deal.
Interview results are gold when you see patterns—maybe buyers complain about lack of size options or feel designs look too busy. From that insight you can refine your product idea, choose colors, and decide how to price. Keep the tone conversational; think of it as a coffee chat with a future customer.
Secondary research also gives you competitive intelligence—who’s offering similar items, how they price them, and what marketing tactics they’re using. Look at top sellers on Etsy, read their shop policies, and note the keywords they target in their listings. This data tells you where you can differentiate or where to fit in the market without being lost in the noise.

Once you’ve collected both primary and secondary data, it’s time to build a simple hypothesis: what gap will you fill, and why will people pay for it? Use a spreadsheet or a mind map to visualize customer segments, price points, and unique selling propositions. Test the hypothesis by asking a few more people or by creating a minimum viable product.
For a structured framework, the Harvard Business School Online article on market research walks you through hypothesis‑driven testing, data collection, and analysis. It’s a quick read that will keep you on track without getting lost in jargon.
If you’re wondering how to turn a hobby into a business, the Mastering the Craft: A Complete Guide to Online Crochet Classes for Beginners is a great starting point.
Planning your online store’s design budget is just as important as product pricing, and this Website Design Cost Calculator: Aussie Site Budget Guide walks you through the cost tiers and what to expect.
With this research in hand, you’ll have a clear niche, a price point that feels fair, and a roadmap to start selling. The next step is to prototype a few pieces, gather early feedback, and launch a soft opening. You’re now one step closer to turning that passion into a profitable online shop.
Step 2: Source Materials and Build Supplier Relationships
So you’ve figured out who wants what, now it’s time to grab the gear that will let you make it happen. Think of sourcing like setting up a toolbox: you need the right tools, the right prices, and the right people who can keep you supplied when the orders roll in.
First, make a materials list. Break it down into core components and finishing touches. If you’re selling yarn‑based scarves, list the yarn weight, colors, and any accessories. If you’re into jewelry, list wire, beads, clasps, and packaging. Writing everything down turns an abstract idea into a concrete inventory plan.
Next, hunt for suppliers that fit both your budget and your vibe. Start with local craft markets or regional suppliers—often they offer fresher stock and you can see it in person. If distance is a factor, look at online directories that specialize in wholesale craft supplies. Compare price points, minimum order quantities, and shipping times.
Once you’ve shortlisted a few, reach out with a friendly email. Introduce yourself, explain the niche you’re building, and ask about bulk discounts or sample kits. A brief, respectful message goes a long way—most suppliers love hearing from a budding entrepreneur who’s already figured out their target market. A quick follow‑up a week later can confirm their readiness and solidify trust, showing you’re serious and organized and ready to move forward confidently for the next steps.
When you get a response, it’s a good chance to test the waters. Order a small batch, or better yet, ask if they’ll let you try a sample kit. Use the sample to assess texture, durability, and how the materials stack up with your vision. If the sample feels off, you’re better off spending a little more now than rushing into a mass order that ends up looking cheap.
Building a relationship is less about the one‑time sale and more about long‑term partnership. Once you find a supplier that nails quality, send them a thank‑you note, share your product images, or ask for their feedback on your designs. This reciprocity keeps the dialogue open and can lead to better rates or priority shipping later.
Negotiation isn’t a battlefield. Approach it like a partnership. If you’re buying 200 units of a particular yarn, ask for a bulk discount or a free small bundle of matching accessories. If the price is non‑negotiable, ask about payment terms—can you get 30 days instead of 15? Small flexibilities add up and can keep cash flow healthy.
Keep track of every supplier interaction in a simple spreadsheet or a notes app. Log contact dates, quotes, sample results, and any agreed terms. When you’re juggling multiple vendors—yarn, packaging, shipping—having a clear log prevents confusion and keeps you organized.
Finally, think about scaling. As orders grow, you might need to shift to a different supplier or a larger order quantity. Having a “backup” supplier for each material category mitigates risk. If one source hits a snag, you still have a fallback that keeps production humming.
In short, sourcing is the bridge between your creative vision and the product that customers will love. Treat it with the same care you give your craft: choose quality, build trust, and keep an eye on the future. Once you’ve set up a reliable supply chain, you’re one step closer to turning your passion into a thriving online shop.
Step 3: Build a Professional Online Storefront
We’ve got your niche and your pricing nailed down. Now it’s time to turn that vision into a storefront that feels like a shop you’d so truly want to visit.
Choose the platform that matches your hustle
There are three main camps: marketplaces like Etsy, all‑in‑one builders like Shopify, and social‑commerce channels such as Facebook and Instagram.
Etsy is great for quick entry and a built‑in audience, but the branding feels boxed in. Shopify gives full control and a professional look, but you’ll need to drive traffic yourself. Facebook/Instagram let you sell directly inside the app, which is perfect for impulse shoppers.
To see how each fits into a long‑term strategy, check out this guide on the best sites to sell crafts online from Creative Hive — it walks through the pros, cons, and who each platform serves best.
Explore the platform comparison
Set up the basics that make buyers feel at home
Your store’s first impression starts with a domain that’s short, memorable, and easy to spell.
Pair it with a clean theme that lets the products breathe.
Next, capture the feel of your brand in a logo, color palette, and tone. Even a hand‑drawn logo can feel polished if you pair it with consistent design.
Product photography is a game‑changer. Shoot in natural light, use a plain background, and show multiple angles. Add a quick video — a 30‑second clip of you weaving a pattern adds authenticity.
Write descriptions that answer the three biggest questions: what is it, why should I buy it, and how does it feel? Keep sentences short, sprinkle a story, and end with a clear call to action.
Make sure the checkout feels seamless
Offer multiple payment methods; credit cards, PayPal, Apple Pay are essentials. Keep the checkout page to one step and ask only for the information you need.
Show trust badges—SSL, secure payment, and any certifications—right on the product page. They quiet the buyer’s second‑guessing.
Shipping: set clear rates, include estimated delivery times, and consider offering free shipping for orders over a threshold. Communicate the process in a friendly, no‑surprise tone.
After a purchase, send a heartfelt thank‑you email with a photo of the finished product in use. It turns a one‑time buyer into a repeat customer.
Below is a quick comparison of platforms.
Quick comparison of the top platforms
| Platform | Pros | Cons |
|---|---|---|
| Etsy | Instant audience, low upfront cost | Limited branding, high fees |
| Shopify | Full control, scalable, apps ecosystem | Requires traffic, monthly fee |
| Facebook/Instagram | In‑app checkout, impulse sales | Limited customization, less control over audience |
A quick comparison of the top platforms.
Remember, the right storefront isn’t just about looks; it’s about how safe and excited a customer feels when they hit “buy.” Every element—from the domain to the thank‑you email—should reinforce that vibe.
Take one step at a time: choose your platform, set up the basics, and fine‑tune the checkout. You’ll be one click closer to turning your craft into a thriving online business.
Want to test the waters before you commit? Try launching a soft opening with a handful of products and ask friends or community members to share their thoughts. Collect their feedback, tweak your copy. The faster you iterate, the faster you’ll learn what sticks and what falls flat.
And remember—your shop is an extension of you, so keep it authentic.
Your next move? Start by setting up a test order to ensure the checkout works, then gather the data, tweak the flow, and share your launch announcement on your channels.
Step 4: Develop a Brand and Marketing Strategy
Hey, you’ve got the craft, you’ve got the shop—now let’s make sure people actually notice it. Brand and marketing are your megaphone, but they’re also your invitation. The trick is to keep it real, keep it simple, and keep it useful. Let’s break it down.
Find Your Brand DNA
Think about the first time you looked at your finished piece and felt proud. What vibe did that spark? That feeling is the core of your brand. Write it down in one sentence. It’s not about “we’re the best” or “we’re quirky” unless that truly captures you.
Ask yourself: Who’s my favorite customer? What problem do I solve for them? Your DNA is the intersection of those answers.
Craft a Visual Story
Visuals are the shortcut to emotion. Pick a color palette that feels like your vibe—soft pastels for a calming line or bold primaries for a bold pattern. Use the same palette on your logo, product photos, and even your packaging. Consistency builds trust.
Remember, you don’t need a designer. Tools like Canva let you drag and drop shapes, fonts, and colors in minutes. When you’re ready to scale, you can outsource a logo tweak instead of a full branding overhaul.
Build a Content Calendar that Feels Natural
Instead of cramming a month of posts, start with two ideas a week. One could be a quick “how‑to‑knit” tip; another could be a behind‑the‑scenes look at your studio. Mix formats—photos, short videos, and even polls.
- Post the first week on Instagram and Pinterest where visuals shine.
- Share a longer story on Facebook or a newsletter once a month.
- Re‑use snippets across platforms to keep effort low.
Tools like Buffer or the built‑in scheduling on Facebook keep you on track without feeling like you’re juggling fire.
Choose the Right Mix of Platforms
Not every social network is a good fit for every craft. If you’re selling knitted scarves, Pinterest can funnel buyers straight to your shop. If your audience loves quick updates, Instagram Stories or TikTok short clips are perfect.
Don’t try to be everywhere at once. Pick two that feel natural—maybe Instagram for daily stories and Pinterest for evergreen pins. Once you’re comfortable, you can add a third platform.
Check out this social media marketing simplified guide for a deeper dive into picking the right channels for your niche.
Measure, Adjust, Repeat
After two weeks, pull your shop analytics: which posts drove clicks, what time of day had the most engagement, and which products got the most views.
Don’t get discouraged if the first batch isn’t perfect. Adjust your captions, tweak your photo lighting, or try a new hashtag. It’s all data-driven iteration.
If you’re feeling stuck, this book on online marketing offers step‑by‑step tactics for refining your brand voice and boosting conversions.
Finally, remember that your brand is an evolving conversation. Every sale, comment, or review is a new sentence in that story. Keep listening, keep refining, and let your brand grow alongside your craft.
Step 5: Manage Orders, Shipping, and Customer Service
Order Fulfillment Basics
When a customer clicks “Buy,” the real work starts. First, confirm you’ve got the right SKU, size, and color on hand. If something’s out of stock, fire a quick email with a promise of restock and a small discount to keep them happy.
We’ve seen that a clear packing checklist—box, padding, label, thank‑you card—cuts errors by 40%. Keep the list on a sticky note next to your workspace and walk through it each time you ship.
Shipping Strategies That Save Time and Money
Shipping can feel like a maze of boxes and rates. Start by grouping orders by destination: local, national, international. For local deliveries, consider a flat rate to keep surprises at bay.
For national orders, look at bulk discounts from USPS or Canada Post. A simple spreadsheet comparing a 5lb package with a 10lb one can reveal big savings. Don’t forget to ask your suppliers if they offer drop‑ship; it frees you from holding inventory and lets you ship straight from the source.
When you do ship, use a QR‑code on the label that links to a tracking page on your site. It turns a mundane shipment into a mini‑experience for the buyer.
Customer Service Hacks to Turn Buyers Into Fans
After the order leaves your studio, the relationship is still fresh. A quick “Your package is on its way” message—email or SMS—gives peace of mind. Keep the tone friendly; a simple “Thanks for your purchase! We’ll let you know when it arrives.” works wonders.
Have a default response for common questions: “When will my order ship?” “What’s the return policy?”—and tweak it with your brand voice. If a customer reaches out with a problem, respond within 24 hours. That’s the sweet spot for satisfaction.
Offer a small incentive for honest feedback—maybe a discount on the next order if they leave a review. It creates a loop of improvement and loyalty.
Tracking & Analytics: The Numbers Behind the Nurture
Every order you process is data. Log the time it takes from order to dispatch, the shipping method used, and any delays. Over weeks, you’ll see patterns: maybe a courier is slower on weekends, or a certain SKU takes longer to pick.
Use that data to refine your packing list or negotiate better rates. If you notice that most return requests stem from a mis‑described color, update your photos and copy immediately.
Keep an eye on your shipping cost as a percentage of order value. If it climbs above 15%, revisit packaging or carrier options.
Wrap‑Up: One Simple System That Scales
Think of order fulfillment as a recipe: gather ingredients, follow steps, taste, then adjust. The same goes for shipping and customer care. A single, repeatable process keeps you organized and lets you focus on what you love—creating.
Set a weekly audit: review the past week’s orders, spot any hiccups, and tweak. It’s a tiny habit that pays off as your volume grows.
And remember: the goal isn’t just to ship products—it’s to deliver a moment of delight. When the customer opens their package and smiles, that’s the real win.
FAQ
What are the first steps to start a craft business online?
Start by defining the heartbeat of your business—what makes your craft special. Sketch a quick mission statement, then map out the key pieces: a niche, target audience, and unique selling point. Next, pick a platform that matches your scale—Etsy for instant traffic or Shopify Lite for brand control. Finally, set up a simple inventory list and a basic shipping plan. These fundamentals keep the launch lean and focused and onward.
How do I choose the right platform for selling my handmade items?
Think of the platform like a stage: it should fit your style and audience. If you want instant footfall and simple listings, Etsy is a great start. For full branding, Shopify Lite gives you control over the look and feel. Consider also social‑commerce options like Instagram Shopping if your visuals speak loudly. If you’re looking to deepen craft skills, check out resources like learn more about stained glass online classes to see how a niche can boost your brand narrative.
What marketing tactics work best for new craft entrepreneurs?
Start with storytelling—show the process, the mishaps, and the joy. Post short videos or carousel posts that highlight a single stitch or a color palette. Engage by asking followers what they’d name a new pattern. Use email drip campaigns to share tutorials, then gently push a sale. And don’t forget merch: a custom drink bottle is a tangible memory, and sites like Quench Bottles let you print on demand without minimums, turning a simple gift into a revenue stream.
How do I price my handmade products competitively?
Start with a cost calculator—add material, time, and a fair profit margin. Benchmark against top sellers in your niche; notice if they use tiered pricing or bundle discounts. Don’t forget to factor in shipping; offering free shipping above a threshold can boost average order value. Finally, test prices by running a short promo—shift a few items slightly higher or lower and monitor conversion to refine the sweet spot.
What inventory management tips help avoid stockouts?
Use a simple spreadsheet to log incoming stock and sales each day. Set reorder alerts when items dip below a safety threshold—ideally 20% of your average monthly volume. Keep a backup supplier for high‑turnover pieces, and batch‑ship orders to cut packaging time. Also, run a weekly audit: look for items that sit for 60 days or more, and offer a discount to clear them before they become obsolete.
How can I scale my business without losing the handmade feel?
Scale by modularizing your process: create a signature line that can be mass‑produced, then add handcrafted add‑ons. Use batch production for the core pieces while keeping the finishing touches manual. Outsource packaging or shipping if it becomes a bottleneck, but keep the brand voice in every thank‑you note. Leverage community testimonials, but always include a photo of your own hands in action to remind buyers that a human is behind the product.
Conclusion
Let’s wrap up the journey of turning your creativity into a thriving online venture.
You’ve already scoped your niche, priced your pieces, built a storefront, and started talking to buyers. That’s the core of how to start a craft business online.
Now, the real magic happens when you keep that momentum humming. Every time you tweak a product photo or send a thank‑you note, you’re adding a layer of trust.
So what’s the next step? Make a habit of reviewing the data you collect—traffic, conversion, average order value. Pick one metric each week to optimise. A tiny change like adding a short video of the final stitch can bump conversions by a few percent.
Also, never forget the people behind the products. Share a quick behind‑the‑scenes snippet each month. It feels less like a sale and more like an invitation to your craft family.
Remember, scaling isn’t about adding more items; it’s about refining the experience you already love. Keep your brand voice consistent, your packaging personal, and your pricing transparent.
Finally, celebrate the wins—first sale, first review, or a new skill you’ve mastered. Acknowledge those moments and let them fuel the next batch of creations.
You’ve got the tools, the plan, and the community. Keep learning, keep iterating, and watch your handmade dreams grow into a steady income stream.
Leave a Reply