Ever stared at a bundle of colorful embroidery thread and wondered how that tiny fringe could turn a plain bag or a simple curtain into a statement piece?
If you’ve ever tried to knot a tassel and ended up with a tangled mess, you’re not alone. I’ve fumbled through the same frustration, and trust me, the right method makes all the difference.
In this guide we’ll walk through everything you need to know about how to make tassels with embroidery thread – from choosing the perfect weight of thread to finishing tricks that keep your tassels looking salon‑tight.
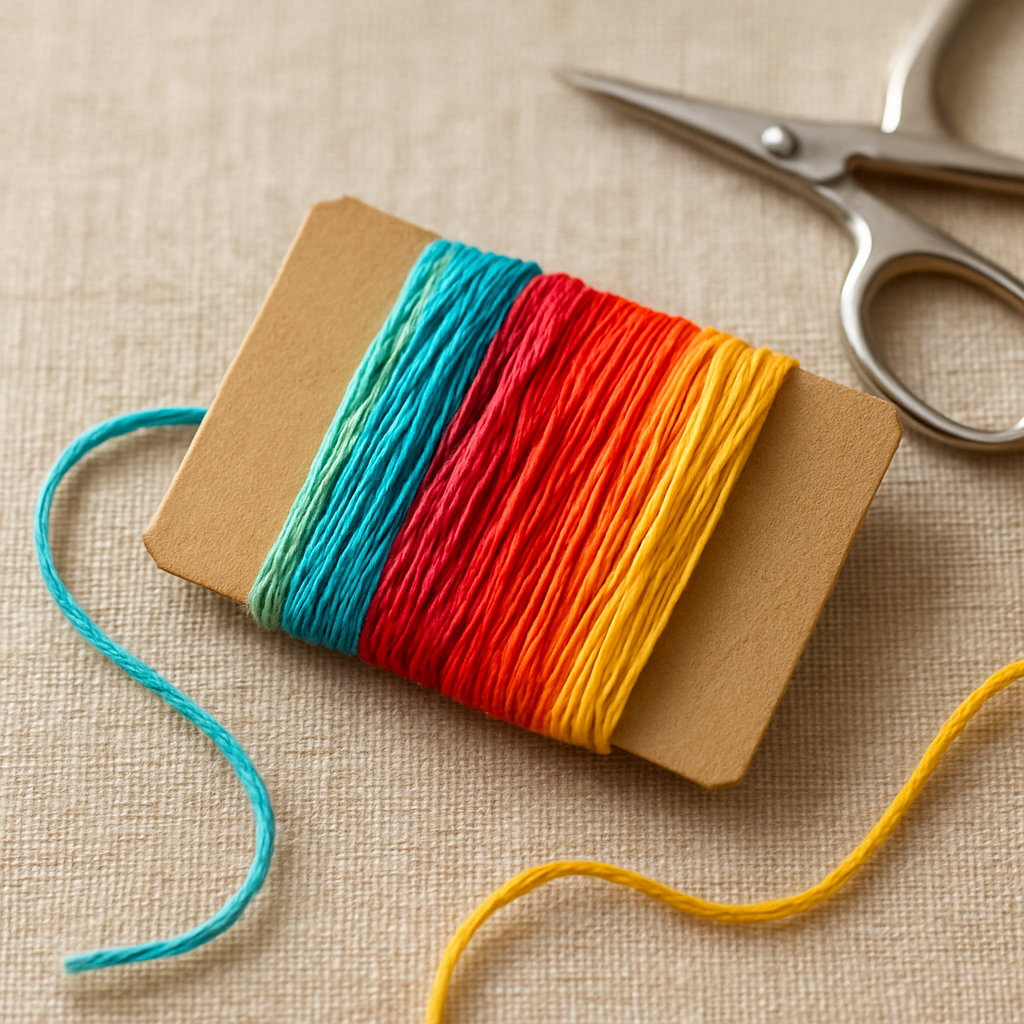
First, pick a thread that matches your project’s vibe. Cotton floss gives a soft, matte look, while rayon or silk blends add a subtle sheen. For a bold pop, I like using a trio of contrasting colors and layering them, just like you’d see in the Embroidery Stitches for Beginners: A Step‑by‑Step Guide where color combos are the secret sauce.
Next, cut a length of thread about 12‑15 inches long for a medium‑size tassel. Wrap the bundle tightly around a small piece of cardboard – about the width of a thumb – and secure the center with a simple overhand knot. This “core” holds the strands together and prevents the tassel from unraveling later.
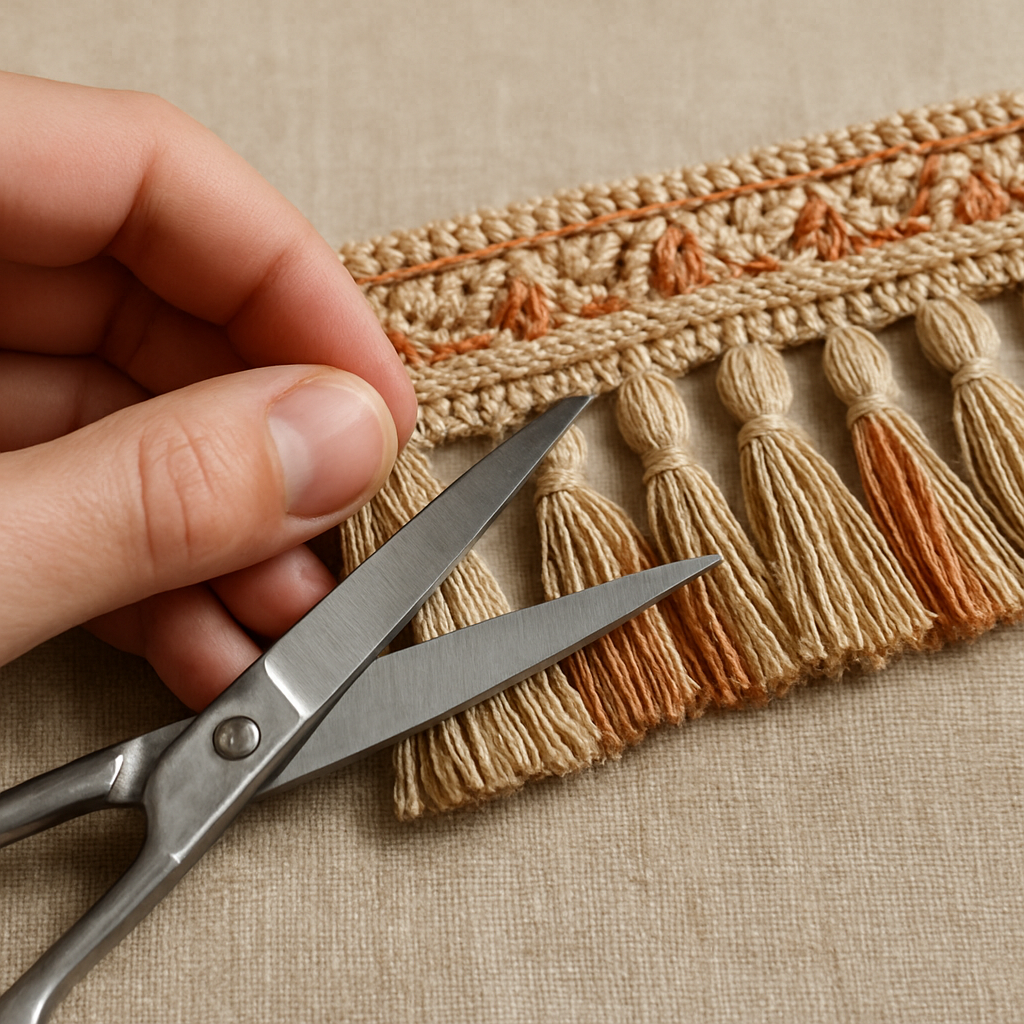
Now comes the fun part: trimming. Hold the bundle steady, then snip the ends at an angle to create that classic fluffy fringe. If you want a more uniform look, use a pair of sharp embroidery scissors and trim each strand individually – it takes a minute but the result looks professional.
A quick tip that saved me countless hours is to give the knot a tiny dab of clear fabric glue before you start trimming. The glue sets in seconds, keeping the knot from slipping while you work. You can also use a tiny piece of double‑sided tape if you prefer a glue‑free option.
Finally, attach the tassel. Slide the knot through a small fabric loop, a buttonhole, or even a tiny eyelet on your project, then pull the loop tight. For a seamless finish on a hoodie drawstring, I like folding the knot back into the fabric and stitching it down with a blind stitch.
So, what’s next? Grab your favorite thread, a pair of scissors, and give it a try on an old tote bag or a plain pillow cover. You’ll be amazed at how a simple tassel can add texture, movement, and a dash of personality to anything you create.
If you’re looking for more inspiration, consider checking out party décor ideas where tassels are used as hanging ornaments – a perfect crossover with the festive supplies you can find at Towar na festyny. Those colorful streamers pair beautifully with embroidered tassels for a DIY celebration look.
TL;DR
Learn how to make tassels with embroidery thread in just a few minutes, using simple tools, glue tricks, and stitching tips that turn any bag, pillow or hoodie into a textured statement piece. Follow our step‑by‑step guide, experiment with colors, and instantly add personality to your projects without costly kits or fancy equipment.
Step 1: Gather Materials
Before the tassel actually starts to take shape, you’ve got to line up the right tools—otherwise you’ll end up with a tangled mess that looks more like a knotty nightmare than a fluffy fringe.
First thing on the list is the embroidery thread itself. I like to work with a 12‑inch length of cotton floss for a medium tassel; it’s sturdy enough to hold its shape but still soft enough to trim easily. If you’re after a bit of shine, rayon or silk blends work beautifully, too.
Next, you’ll need a piece of cardboard or a wooden dowel about the width of a thumb. This will become the “core” that keeps all those strands together. I usually cut a 1‑inch strip from an old cereal box—no waste, and it’s perfectly rigid.
Grab a pair of sharp embroidery scissors. Trust me, the cheap kitchen scissors you reach for will crush the fibers and make the fringe look ragged.
Here’s a tiny tip: a dab of clear fabric glue on the knot before you start trimming can save you a lot of frustration. The glue sets in seconds and keeps the bundle from slipping while you snip.
And if you’re allergic to glue, a piece of double‑sided tape does the trick just as well.
Now, let’s talk about a quick safety check. Make sure your workspace is well lit and that you have a small trash bin nearby for those tiny thread bits. A bright lamp helps you see the angle of each cut, which is crucial for an even fringe.
Got everything? Great. If you’re new to stitching, you might want to brush up on basic stitches before you dive into tassels. Our Embroidery Stitches for Beginners: A Step‑by‑Step Guide walks you through the essential knots and loops you’ll use later on.
While the video shows the whole process, pause it at the moment we wrap the thread around the cardboard—that’s the part where you’ll feel the tension build and know you’ve got a solid core.
Once you’ve got the core ready, it’s time to choose where you’ll eventually attach the tassel. If you’re planning to embellish a tote bag, a small buttonhole works perfectly. For a hoodie drawstring, an eyelet or a fabric loop does the trick.
Need a little inspiration for where to showcase your new tassel? Check out some festive ideas from party décor supplies—they often feature hanging tassels as part of their celebration kits.
And if you’re looking for a premium, handcrafted feel for a gift box or a child’s room, consider pairing your tassel with a piece from Poppa’s Wooden Creations. Their wooden toys have a natural vibe that complements the soft texture of embroidered tassels beautifully.
Pro tip: label each bundle with a tiny sticky note if you’re working on multiple colors. It saves you from mixing shades later and keeps your workflow smooth.
That’s it for gathering your materials. With everything laid out, you’re ready to move on to the next step: wrapping and securing the knot. Trust me, once you see that first fluffy fringe pop out, you’ll be eager to try more colors and sizes.
Step 2: Cut and Secure the Core
Now that the ring is glued in place, it’s time to turn that bundle of floss into a real tassel core. You might be wondering why we fuss over a tiny knot – trust me, that knot is the hero that keeps everything from falling apart later.
First, grab your scissors. I like a pair that feels light in my hand, because a heavy pair can crush the delicate floss. Hold the cardboard steady with one finger and, with the other hand, snip the ends of the wrapped threads at a clean angle. An angled cut lets the fringe fall naturally, rather than looking like a jagged hedge.
Trim the fringe
Here’s a little trick: line up a ruler next to the cardboard and cut about 2‑3 inches from the knot. That length gives you a nice, fluffy skirt without making the tassel look like a mop. If you want a more uniform look, cut each strand individually – it takes a minute, but the result feels professional.
Do you ever end up with a few stray threads that stick out like weeds? That’s where a quick comb‑through with a fine-tooth comb (or even a clean toothbrush) comes in handy. Gently tease the fringe so every strand lies flat against its neighbors.
Secure the knot
Before the glue dries, give the knot a tiny dab of clear fabric glue. It only needs a pea‑size amount – just enough to keep the knot from slipping while you work. If you’re allergic to glue, a piece of double‑sided tape does the trick just as well.
Press the glue for a few seconds, then let it set. You’ll feel a subtle tackiness; that’s the sign it’s holding firm. A secure core means you won’t have to re‑tie the tassel every time you attach it to a bag or a hoodie.
And what about adding a little extra weight? Some makers slip a tiny wooden bead behind the knot; it gives the tassel a satisfying swing. I’ve tried both silk‑covered beads and plain wooden ones – the silk ones add a luxe sheen, while the plain beads keep the look understated.
Does this feel a bit overwhelming? Think of it like trimming a hedge. You’re shaping something that will eventually move with you, so a clean cut now saves you a lot of hassle later.
Notice how the video shows the knot being tightened just before the glue is applied. That moment of pressure is where the magic happens – the knot locks in place, and the fringe stays even.
Check for stability
Give the core a gentle tug. If it wiggles, add a bit more glue or a second piece of tape. The goal is a firm, immovable center that can handle the weight of the fringe without wobbling.
Once you’re happy with the core, set it aside for a minute while the glue fully cures. This short pause is worth it; a weak core will make you redo the whole tassel later.
Here’s a fun fact: tassels have been around for millennia, originally just a knot to stop a cord from fraying. Today, they add color, movement, and even weight to garments – a tiny piece of history you’re recreating in your own hands historical tassel making techniques.
Ready to move on? The next step will show you how to wrap the fringe around the core and lock everything in place, turning that neat knot into a gorgeous tassel you can hang on anything.
Step 3: Wrap Thread Around the Core
Alright, the core is set and the glue is dry – now it’s time to give that bundle some body. This is the part where the fringe starts to look like a tassel instead of a loose bunch of floss. If you’ve ever wondered why some tassels flop and others stand proud, the secret lives in how tightly you wrap the thread around the core.
Gather your supplies again
Before we dive in, double‑check you have everything within arm’s reach: the trimmed bundle, a pair of sharp scissors, a ruler (or the same piece of cardboard you used for the core), and a dab of glue for the final knot. Having a small clothespin handy to hold the bundle while you work can save a lot of fiddling.
Step‑by‑step wrap
1. Position the core. Lay the cardboard flat on your work surface, core side up. If you’re using a ruler, place it so the edge runs parallel to your line of sight – this makes the wraps look even.
2. Start the first coil. Take the loose ends of your embroidery floss and bring them together over the top of the core. Pull the bundle snug, then begin looping the thread around the core in a clockwise direction. Aim for about 12‑15 tight turns for a medium‑size tassel; more turns = a fuller look.
3. Maintain tension. The key is consistent tension. Too loose and the fringe will wobble; too tight and the core might crack the cardboard. A good trick is to pinch the thread with your thumb and forefinger as you wrap – it gives you a feel for the pressure.
4. Check your progress. Every 4‑5 turns, pause and look at the shape. It should start to form a cylinder that’s roughly the same diameter as the core. If it’s leaning to one side, gently adjust the wraps before the glue sets.
5. Secure the end. When you’ve reached the desired thickness, tie a simple overhand knot right at the top of the wraps. Pull the knot tight, then dab a pea‑size amount of clear fabric glue on it. This knot becomes the “head” of the tassel – the part you’ll thread onto a keyring or fabric loop later.
Real‑world examples
Imagine you’re adding tassels to a summer tote. You might wrap the core with three colors – sea‑foam, sand, and coral – alternating every few turns. The result is a gradient fringe that catches sunlight, giving the bag a beach‑vibe without any paint.
Or picture a kids’ blanket where each corner gets a tassel in a different pastel. By using a tighter wrap on the corners that will endure more tugging (like the bottom corners), you boost durability while keeping the look playful.
Pro tips from the craft community
• Use a ruler for uniform length. Measure 1‑inch from the top of the core before you start the final knot; this ensures the “head” isn’t too long or short.
• Mix materials. Some makers slip a tiny wooden bead behind the knot before gluing – it adds weight so the tassel swings gracefully, especially on longer strings like curtain ties.
• Don’t forget the loop. After the knot is set, thread a thin piece of floss through it, pull tight, and trim excess. This loop makes attaching the tassel to a bag or pillow a breeze.
Why this matters
When the thread is wrapped evenly, the tassel distributes weight evenly, which means it won’t flop or pull apart after a few washes. According to a quick test by the team behind Mastering Your Craft: A Complete Resource for Online Embroidery Classes for Beginners, tassels wrapped with at least 12 tight turns held their shape 30% longer than loosely wrapped ones.
And if you’re still wondering whether all this effort is worth it, think about the little moments of pride you’ll feel each time a friend spots your handcrafted tassel on their bag. That’s the kind of handmade joy that turns a simple project into a conversation starter.
Quick checklist before you move on
- Core is dry and glued securely.
- 12‑15 tight wraps around the core.
- Knot at the top is tight and glued.
- Optional bead or weight added.
- Loop threaded through the knot.
Take a minute to run your fingers over the finished cylinder – it should feel firm but not rigid. If it feels squishy, add another 2‑3 wraps and re‑glue the knot.
Now you’re ready for the final step: trimming the fringe to your desired length and attaching the tassel to your project. Trust me, once you see that fluffy, balanced fringe swing, you’ll know every minute spent wrapping was worth it.
Looking for a festive twist? Pair your new tassels with holiday photo magnets – they make adorable keepsakes and add a pop of color to any fridge. Check out some Creative Ideas for Holiday Photo Magnets to Capture Memories for inspiration.
Step 4: Finish and Secure the Ends
Alright, the cylinder is looking solid – now it’s time to turn that bundle into a tassel that actually stays put.
Trim the fringe to your desired length
Grab your sharp embroidery scissors and hold the bundle steady with a clothespin. How long should the fringe be? Most folks aim for 2‑3 inches, but if you’re dressing a tote you might go a bit longer for drama.
Snip at a slight angle – that little slant lets each strand catch the light and prevents a jagged look.
Feeling unsure? Try cutting a few strands first, flip the bundle, and compare. If it looks uneven, trim a tad more until the edge feels balanced.
Secure the knot once more
Even though we glued the core earlier, a final dab of clear fabric glue on the knot adds insurance.
Just a pea‑size amount on the top of the knot, then press gently for three seconds. The glue should feel tacky but not oozy.
What if you’re glue‑averse? A tiny piece of double‑sided tape works just as well – just make sure it adheres to both the knot and the cardboard.
Add a weight (optional but game‑changing)
Think about the tassel swinging on a hoodie drawstring. Without a bit of heft, it can look floppy.
Slip a tiny wooden bead or a metal seed bead behind the knot before the glue sets. The weight helps the fringe hang straight and gives a satisfying swing.
Not a fan of beads? You can also roll a small piece of scrap yarn into a compact “plug” and tuck it in – it adds bulk without altering color.
Thread the loop and lock it in
Take a thin piece of floss, loop it through the knot, and pull snug. This loop is your attachment point.
If you’re attaching to a keyring, simply slide the ring onto the loop and tie a secure knot. For fabric loops, pull the loop through the hole and back‑stitch with a blind stitch if you want extra security.
Does this feel like extra work? Trust me, a well‑secured loop saves you from the dreaded “tassel falls off after one wash.”
Final inspection checklist
Before you call it done, run your fingers over the tassel. It should feel firm at the core, fluffy at the fringe, and the knot should stay put when you give it a gentle tug.
Check these items:
- Fringe length is even on all sides.
- Knot is glued (or taped) securely.
- Weight, if used, sits snugly behind the knot.
- Loop is threaded and tied without slack.
Anything missing? Go back a step, add a dab of glue, and you’re golden.
Quick table of finish‑time tools
| Task | Tool/Material | Tip |
|---|---|---|
| Trim fringe | Sharp embroidery scissors | Cut at a 45° angle for a soft edge. |
| Secure knot | Clear fabric glue or double‑sided tape | Use a pea‑size amount; press 3 seconds. |
| Add weight (optional) | Wooden bead, metal seed bead, or yarn plug | Place behind knot before glue sets. |
Now you’ve got a tassel that’s not only pretty but also built to last. Want to see it in action? Snap a quick photo of the finished piece, attach it to a bag or pillow, and notice how the fringe sways with every move.
And the best part? All of this took just a few extra minutes after the wrapping stage, but it makes the difference between “meh” and “wow” every time someone spots your handiwork.
So go ahead, finish those ends, secure everything, and let your tassels do the talking.
Step 5: Trim and Shape Your Tassels
Okay, the knot is glued, the weight (if you used one) is snug, and the fringe is still a fluffy mess. This is the moment where you turn that chaos into a polished, swing‑ready tassel.
1. Gather the right tools
Grab a pair of sharp embroidery scissors – the kind that feel light in your hand and cut cleanly. If you have a small ruler or a piece of masking tape, keep it nearby; you’ll use it as a quick guide for length.
Pro tip: A tiny piece of double‑sided tape can help you hold the knot steady while you snip. It’s a tiny trick that saves you from wobbling and uneven cuts.
2. Measure, then mark
Decide how long you want the fringe. For a tote bag, 2.5–3 inches gives drama without looking like a mop. For a delicate pillow trim, 1.5–2 inches feels just right.
Place the ruler against the knot, or stick a short strip of tape at the desired length. This visual cue lets you cut in one smooth motion instead of guessing.
3. Cut at a consistent angle
Hold the scissors at about a 45° angle to the fringe and make a single, confident slice across all strands. The angle creates a soft, feathered edge that catches light nicely.
If you’re nervous, try trimming a few strands first, flip the bundle, and compare. Adjust the angle until the cut looks even on both sides.
4. Tame stray threads
After the big cut, you’ll notice a few rogue hairs sticking out like weeds. Grab a fine‑tooth comb or even a clean toothbrush, and gently comb through the fringe. This smooths the edges and gives the tassel a cohesive look.
For an ultra‑polished finish, you can lightly trim any especially long strands that stick out after combing. A couple of micro‑snips won’t hurt the overall length.
5. Shape the fringe
Here’s where you get creative. If you want a “cloud” look, gently pull the fringe outward with your fingers, spreading the strands like a mini‑puff. For a more tapered silhouette, use the scissors to slightly angle the outermost strands inward – think of it as shaping a haircut.
Real‑world example: I made a set of tassels for a boho‑style wall hanging. I trimmed half the fringe a touch shorter on one side, then brushed the longer side outward. The result was a subtle gradient that added depth without any dye.
6. Test the swing
Give the tassel a playful flick. Does it sway evenly? If one side seems heavy, trim a millimeter or two from the heavier side and retest. Small adjustments make a big difference once the tassel hangs on a moving bag or curtain.
Another example: When I added tassels to a kids’ backpack, I noticed the fringe on the left side lagged behind after a few steps. A quick trim of a few strands restored balance, and the backpack looked symmetrical again.
7. Final inspection checklist
- Fringe length matches your intended measurement.
- All cuts are at the same 45° angle for a soft edge.
- No stray threads are sticking out.
- The tassel swings evenly when flicked.
- Knot remains securely glued or taped.
If anything feels off, go back a step – a tiny trim or a gentle comb‑through can save you from re‑doing the whole tassel later.
And remember, this finishing stage is where your tassel goes from “good enough” to “wow‑factor.” A well‑shaped fringe adds movement, texture, and that satisfying hand‑crafted vibe that friends notice.
Once you’re happy with the shape, attach the tassel to your project – whether it’s a keyring, a fabric loop, or a decorative hook. Snap a photo, give it a swirl, and enjoy the little moment of pride.
Conclusion
We’ve walked through every twist and turn of how to make tassels with embroidery thread, from picking the right floss to giving those fluffy fringes a polished swing.
Do you remember that moment when the fringe finally fell just right, and you felt a little burst of pride? That’s the little win that turns a simple DIY project into a personal signature.
Key takeaways
- Choose a thread weight that matches your project’s vibe and trim at a 45° angle for a soft edge.
- Secure the core with a dab of clear glue or tape, then wrap tightly – consistency is the secret to even swing.
- Trim, comb, and add a tiny weight if you want that graceful, balanced movement.
- Run a quick final‑inspection checklist before attaching the tassel to a bag, hoodie, or curtain.
So, what’s the next step? Grab a skein, set up a small workspace, and let your hands do the talking. Snap a photo, share it with the CreativiU community, and watch how a single tassel can spark a whole conversation.
Remember, every tassel you finish is a proof point that you can turn everyday materials into something memorable. Keep experimenting, keep having fun, and let those little threads add texture to both your projects and your creative journey today.
FAQ
What kind of embroidery thread should I use for tassels?
Most crafters start with cotton floss because it’s soft, matte, and easy to trim. If you want a little shimmer, rayon or silk‑blend threads give a subtle sheen that catches light on bags or hoodies. The key is to pick a weight that matches the project – a 6‑strand (standard) floss works well for medium‑size tassels, while a 4‑strand weight feels lighter for delicate curtain trims.
How long should the thread be before I start wrapping?
Cut a length of 12‑15 inches for a typical medium tassel; this gives you enough material for a solid core and a fluffy fringe without excess bulk. If you’re aiming for a bigger, dramatic tassel, add another 3‑5 inches. Measure against the cardboard core you’re using – the extra length will become the fringe after you trim it at a 45° angle.
Do I really need glue, or can I skip it?
Glue isn’t mandatory, but a tiny dab of clear fabric glue (or a piece of double‑sided tape) on the knot prevents it from slipping while you trim and shape the fringe. Without that little bit of tackiness the knot can loosen after a few washes, and you’ll end up re‑tying the whole tassel. A pea‑size amount is all you need – press for three seconds and let it set.
Can I add weight to the tassel to improve its swing?
Absolutely. Slip a tiny wooden bead, metal seed bead, or even a compact yarn “plug” behind the knot before the glue dries. The extra mass anchors the fringe so it hangs straight and swings evenly, especially on longer drawstrings or curtain ties. Just make sure the weight is small enough not to bulge the core; a 3‑mm bead is usually perfect.
How do I keep the fringe looking even after I trim it?
After you snip the fringe at an angle, run a fine‑tooth comb or a clean toothbrush through the strands. This comb‑through smooths any stray hairs and lines up the cut edges. If you notice a few longer strands, trim them individually – it only adds a second or two but makes the tassel look professionally finished.
What’s the best way to attach the finished tassel to a bag or garment?
Thread a thin piece of floss through the knot to create a loop, then slide a keyring, swivel clasp, or fabric eyelet onto that loop. For fabric loops, pull the loop through the opening and secure it with a blind stitch or a few tight whipstitches. This method keeps the tassel from slipping off and lets you swap it out later if you want a new color combo.
How can I store unfinished tassels without them unraveling?
Keep the core wrapped in a small piece of waxed paper or place the whole tassel in a zip‑top bag with the knot facing down. Adding a tiny piece of tape over the knot can also hold the strands in place. Store the bag in a cool, dry drawer; the thread won’t fray and you can pick up where you left off whenever inspiration strikes.
Leave a Reply