Ever stared at a plain block of polymer clay and thought, “I could make something cool, but how do I actually get earrings out of this?” You’re not alone – the first step feels mysterious, and that’s why we’re here.
Imagine the moment you clip on a pair of hand‑crafted earrings and hear that little “wow” from a friend. It’s the kind of instant confidence boost that makes the whole process worth the mess of bits of clay on the countertop.
What if I told you that you don’t need a fancy studio or expensive tools to start? All you need is a bit of curiosity, some basic supplies, and a few proven tricks that we’ve seen work for hobbyists and budding entrepreneurs alike.
First, let’s talk about conditioning the clay. Warm the piece in your hands for a minute, then roll it through a pasta machine or a simple acrylic roller until it’s smooth and pliable. This step removes air bubbles and prevents cracks later – a tiny effort that saves you from a big headache.
Next comes design. Pick a simple shape—like a classic hoop or a dangling leaf—using a cookie cutter or an X‑Acto knife. If you’re feeling adventurous, layer colors or press textures with everyday objects: a leaf, a piece of lace, even a toothbrush can add unique patterns.
Once you’ve cut and textured your pieces, poke the holes for jump rings before you bake. Pre‑poking saves you from drilling a hardened piece, which can shatter or leave ugly marks.
Now for the bake. Pre‑heat your oven to 130 °C (about 265 °F) and use an oven thermometer to nail the temperature. Bake for roughly 30 minutes per ¼ inch of thickness; a 2 mm earring will need about 45 minutes. Keep an eye on them – you’ll see the color deepen just a touch, and that’s the sign they’re done.
After cooling, sand any rough edges with fine‑grit sandpaper, then buff with a nail buffer for a silky finish. Finally, attach your findings – jump rings, earring hooks, or delicate chains – using needle‑nose pliers. A quick twist and you’ve turned a slab of clay into wearable art.
Feeling stuck? Check out How to Make Polymer Clay Earrings: Step‑by‑Step Instructions for a deeper dive, complete with photos, troubleshooting tips, and a handy checklist.
So, what’s the next move? Grab your clay, follow these steps, and give yourself a deadline – maybe a weekend challenge. You’ll be surprised how quickly a simple idea turns into a pair of earrings you’re proud to wear or sell.
TL;DR
Ready to turn a plain block of polymer clay into stylish earrings? This guide walks you through conditioning, shaping, baking, and finishing—quick tips, common pitfalls, and creative twists—so you can confidently craft wear‑able art and start selling or gifting your unique pieces today, and impress friends with your handmade sparkle.
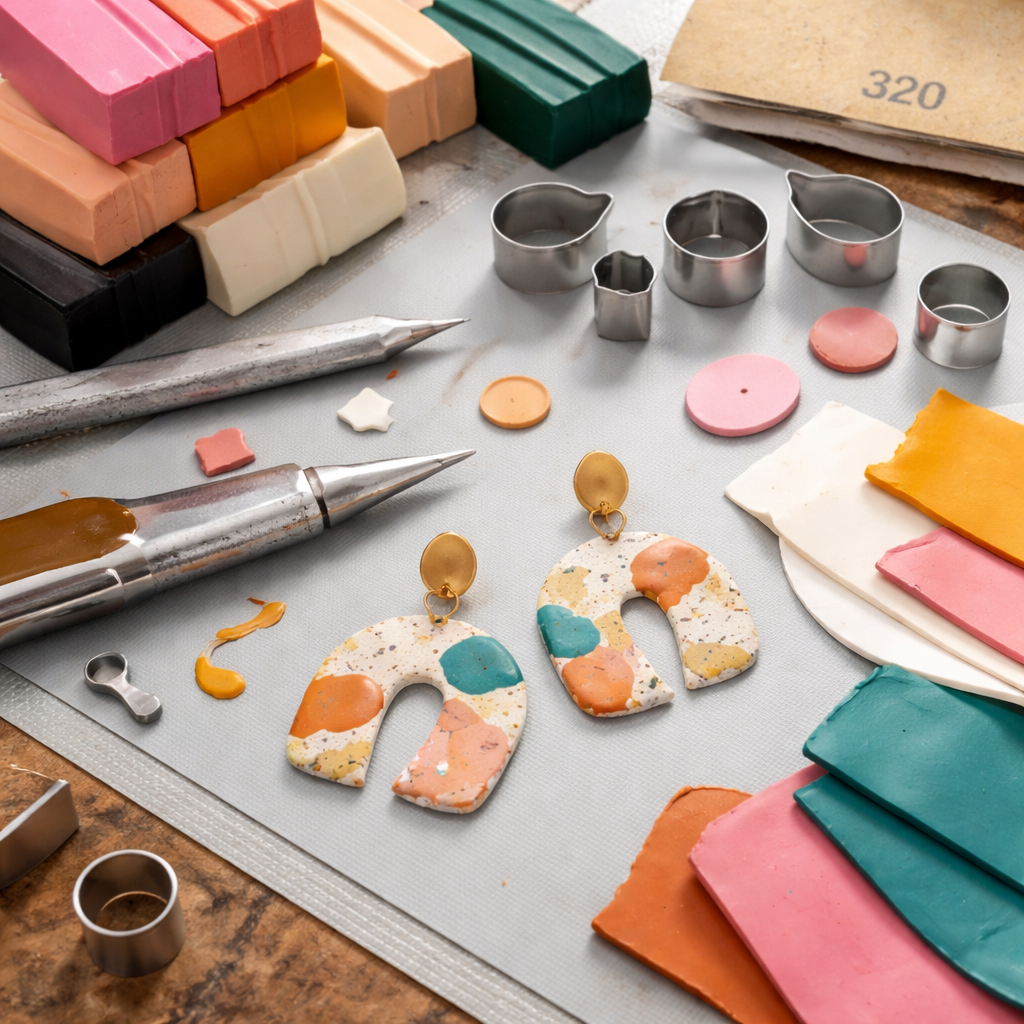
Step 1: Gather Your Materials
Before you even think about shaping a hoop or a leaf, you need to line up the right tools so the process feels smooth, not a scavenger hunt. This is the part where most beginners either over‑complicate things or end up missing that one piece that saves a lot of hassle later.
Core kit for every hobbyist
Here’s what you’ll need straight out of the box: polymer clay (any brand you trust, but a medium‑hard type works well for earrings), a clean work surface, a non‑stick silicone mat or parchment paper, a rolling pin or acrylic roller, cookie cutters or a small X‑Acto knife, fine‑grit sandpaper (400‑600), a nail‑buffer or polishing cloth, and finally the jewelry findings – jump rings, earring hooks, and round‑nose pliers.
If you’re a creative entrepreneur, you might already have a small stash of embellishments like glitter, mica powders, or tiny beads. Keep those handy; they’ll let you add personality without extra trips to the craft store.
Optional extras that make life easier
Think about a few “nice‑to‑have” items: a pasta machine for ultra‑thin sheets, a silicone baking mat for even heat distribution, and an oven thermometer – the oven dial can be off by several degrees and ruin a batch.
Parents can even involve kids by adding kid‑safe tools like a wooden rolling pin and colorful cookie cutters. It turns the material‑gathering step into a mini‑workshop that doubles as family bonding time.
Safety first: work on a stable table, keep the area well‑ventilated, and wear a pair of basic safety glasses if you’re cutting with a sharp knife. A comfortable chair and good lighting reduce neck strain, especially when you’re spending an hour or more shaping delicate pieces.
Here’s a quick checklist you can print and tape to your desk:
- Polymer clay blocks (multiple colors)
- Silicone mat or parchment paper
- Rolling pin / acrylic roller
- Cookie cutters or X‑Acto knife
- Fine‑grit sandpaper
- Nail buffer
- Jump rings, earring hooks, round‑nose pliers
Once you’ve laid everything out, give each item a quick glance. Is the clay still pliable? Does the cutter feel sharp enough to cut cleanly? A quick test cut on a scrap piece tells you if you need to condition the clay a bit longer or sharpen your tool.
A tip our CreativiU community swears by: store your clay in airtight containers or zip‑lock bags with a damp paper towel on top. This keeps it from drying out between sessions, which is a lifesaver when you’re juggling multiple projects throughout the week.
With your materials assembled and checked, you’re ready to move on to conditioning and shaping. Having everything at arm’s reach means you won’t have to pause mid‑design to hunt for a missing tool, and that flow is exactly what keeps the creative spark alive.
So, take a moment now to tidy your space, line up the kit, and maybe snap a photo of your setup. That little visual cue will become a habit you can replicate for every new earring collection you launch.
Step 2: Condition and Prepare the Polymer Clay
Okay, you’ve got your blocks of Premo or Fimo ready, but before you even think about cutting a hoop, the clay needs a little warm‑up chat. Imagine trying to roll a cold butter stick – it snaps, it crumbles, and you end up with a mess on the countertop. The same thing happens with polymer clay that hasn’t been conditioned.
Why conditioning matters
Conditioning does three things: it drives the plasticisers deeper, it evicts air bubbles, and it gives the clay that buttery pliability you need for clean cuts. Skipping this step is the quickest route to cracked earrings or those annoying little pops when you poke a hole later.
Step‑by‑step conditioning routine
1. Warm‑up in your hands. Hold a small chunk of clay for about 30‑45 seconds. Your body heat is a gentle primer – you’ll feel it soften a touch.
2. Pre‑condition firmer brands. If you’re using Kato or Fimo Professional, give the block a good whack with a rubber mallet or the back of a rolling pin. Turn it over and repeat until you hear a faint give.
3. Choose your tool. A pasta machine is the gold standard, but an acrylic roller works just as well. Set the rollers to the thickest setting (about ¼ inch) and flatten the clay in one smooth pass.
4. Fold and roll. Fold the slab in half, place the fold closest to you, and roll away from your body. This pushes trapped air toward the edges. Flip the clay, repeat the fold‑roll cycle 20‑30 times. You’ll know it’s ready when the surface feels uniformly silky and a gentle press leaves no cracks.
5. Test the texture. Pinch a corner – it should stretch like soft taffy, not snap. If it feels gritty, keep rolling a few more times. If it’s too soft and sticks to the rollers, let it sit for a minute; the heat will redistribute.
Real‑world examples
Sarah, a freelance jewelry maker from Ontario, swears by a 15‑minute conditioning marathon for her Premo blocks before each weekend batch. She says the extra time cuts her sanding by half because the clay stays crack‑free during baking.
Meanwhile, the Johnson family uses a simple kitchen rolling pin and a zip‑lock bag to condition their kids’ clay on rainy Saturdays. The kids love the “squishy” feel, and the whole family ends up with smooth, bubble‑free charms.
Pro tips from the pros
In a detailed walkthrough, Jessama Tutorials recommends alternating the direction of the rollers every few folds – left‑right, then right‑left – to chase stubborn bubbles out of the corners.
Another tip: sprinkle a tiny pinch of cornstarch on the rollers if the clay starts to stick. It creates a dry barrier without affecting colour.
Preparing for the next step
Once your clay is conditioned, lay it on a clean, non‑stick surface (a silicone mat or a piece of parchment). If you’re planning to embed pigments or mica, now’s the moment to knead them in. Evenly distributed colour means you won’t end up with one‑sided swatches after you cut your earring shapes.
Before you cut, use a sharp blade or a set of shape cutters to outline your designs. And remember to review our full DIY tutorial for extra shaping ideas – it walks you through everything from simple hoops to layered leaf motifs.
Boosting your earring business
After you’ve got a batch of perfectly conditioned, pre‑punched pieces, think about how you’ll showcase them online. Creative entrepreneurs often use social‑media schedulers to keep a steady stream of product photos. Tools like those listed in Best Social Media Automation Tools for 2026 can save you hours each week.
And if you want to add a touch of sparkle or metaphysical flair, consider incorporating pyrite beads into your designs. They’re inexpensive, add a metallic sheen, and some customers love the ‘energy‑boost’ story behind them. Check out a reliable supplier here: Exploring Pyrite Metaphysical Properties.
Bottom line: a well‑conditioned slab is the foundation of flawless earrings. Spend a few minutes on this step, and you’ll save hours later – no cracked pieces, no surprise bubbles, just smooth, ready‑to‑shape clay that behaves exactly the way you want.
Step 3: Shape the Earring Bases
Now that your clay is conditioned and pre‑punched, it’s time to give those pieces a shape that actually looks like an earring. This is where the magic of how to make polymer clay earrings really shows up – the difference between a flat slab and a wearable work of art.
Find the sweet spot in thickness
We usually aim for a 2 mm‑to‑2.5 mm thickness for most hoop or dangle styles. Grab your pasta machine or acrylic roller, set it to the second‑lightest setting, and run the slab through once. If the clay feels too flimsy, run it again; if it resists bending, roll it a touch thinner. A quick finger‑press test – press lightly with your thumb – should leave a faint impression but not crack.
Why does thickness matter? Too thin and the piece can snap during baking; too thick and it stays flexible after cooling, making it hard to attach findings. For creative entrepreneurs planning a collection, keeping a consistent 2 mm gauge also helps you price materials more accurately.
Cutting clean shapes
Sharp X‑Acto knives, rotary cutters, or silicone shape cutters are your best friends here. Place the conditioned slab on a cutting mat, line up your chosen cutter, and press down in one smooth motion. If you’re working with a custom silhouette, trace it on parchment first, then cut along the line.
Pro tip: after you cut, lift the shape and let it rest on a piece of parchment for about a minute. The clay will firm just enough that the edges don’t smear when you move it to the bake sheet. This tiny pause can save you from ragged edges that later require extra sanding.
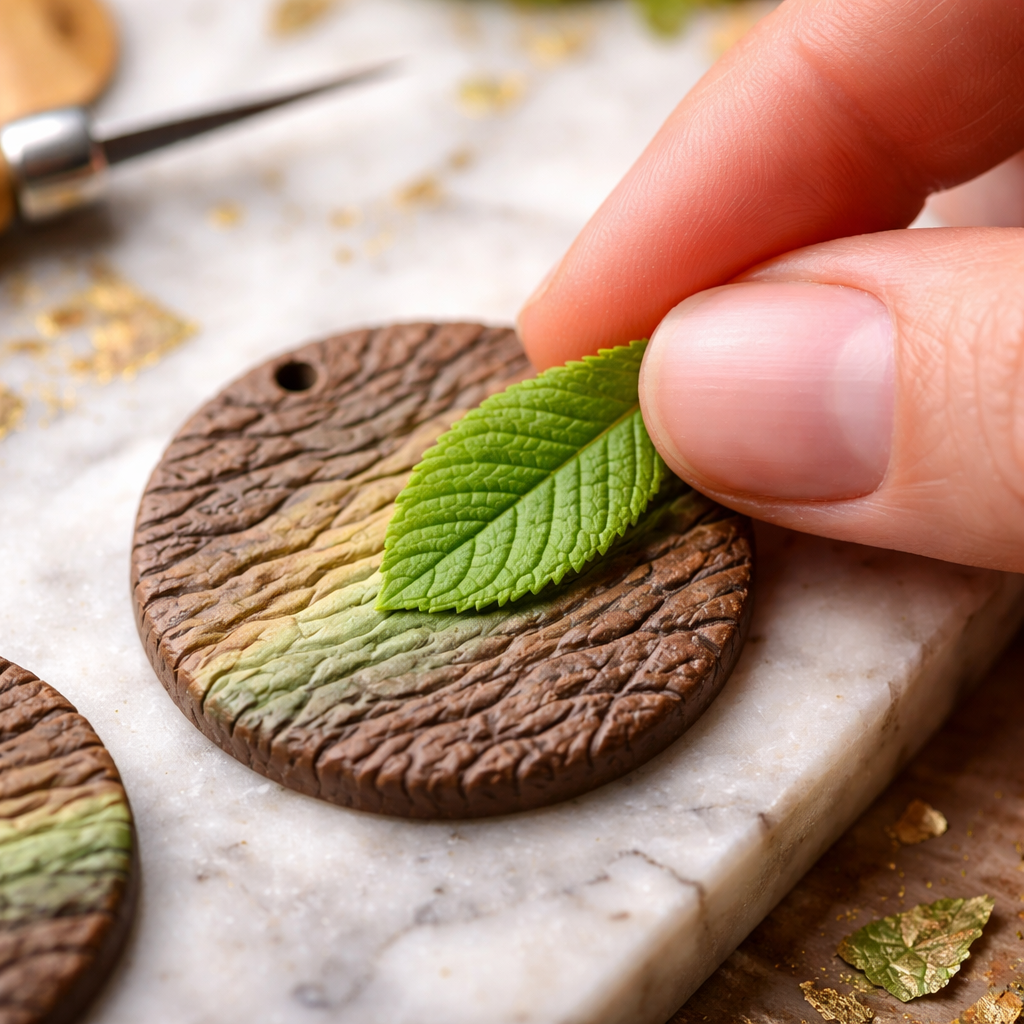
Adding texture and depth
Texture turns a plain earring into a conversation starter. Press a leaf, a piece of lace, or a textured rolling pin onto the surface and roll gently. For a three‑dimensional effect, stack two thin layers of different colours, offset them slightly, and press the edges together before baking.
Imagine a parent and child experimenting with a pine‑cone imprint – the resulting bark pattern feels personal and sells as a “hand‑made family piece.” Because the texture is pressed while the clay is still supple, the imprint stays crisp after baking.
Pre‑punch holes and final check
If you haven’t already poked the holes, now’s the moment. Use a 1 mm dotting tool or a thin skewer, position the hole where the finding will go, and apply gentle pressure. A quick tip: tilt the slab slightly so the tool exits on the opposite side – this creates a clean, round opening that won’t fray when you thread a jump ring.
Give each piece a once‑over with a fine‑grit (400‑600) sandpaper. You’re not trying to sand it flat; just smooth any jagged bits that could snag skin. Then, arrange the bases on a silicone baking mat, leaving at least 5 mm between them to avoid fusing.
If you’re looking for a deeper walkthrough of each shaping step, our step‑by‑step guide for polymer clay earrings walks you through everything from thickness tricks to advanced embossing techniques.
Take a moment to admire the shapes you’ve just created. You’ve turned a conditioned slab into a set of earring bases that are ready for the oven, and you’ve done it with tools you probably already own. The next step will be baking, sanding, and attaching findings – but for now, enjoy the satisfying snap of a perfectly cut edge and the subtle scent of fresh clay.
Step 4: Add Designs and Textures
Alright, you’ve got clean earring bases sitting on your silicone mat. Now it’s time to turn those flat pieces into something that feels like a tiny work of art. Adding designs and textures is where personality really shows up – and the good news is you don’t need a fancy studio, just a bit of curiosity and a few everyday items.
Why texture matters
Think about the last time you wore a pair of plain metal hoops versus a pair with a subtle bark‑like imprint. The textured pair instantly feels more personal, right? A little relief on the surface catches light, creates shadow, and gives the clay a tactile quality that makes people want to run their fingers over it.
For hobbyists, texture can be the difference between “nice” and “instagram‑worthy.” For creative entrepreneurs, it’s a branding hook – a signature pattern that tells customers, “this is my style.”
Everyday tools that double as texture stamps
Grab whatever you have around the house: a leaf from your garden, a piece of lace, the back of a toothbrush, or even a patterned silicone baking mat. Press the object gently onto the conditioned clay and roll or press with the heel of your hand. The imprint stays crisp because the clay is still soft.
Pro tip: if you’re working with a delicate leaf, coat it lightly with a dab of cornstarch. The powder creates a dry barrier so the clay doesn’t stick to the veins, and you get a clean, natural‑looking pattern.
Layered colour tricks
Want depth without a 3‑D sculpt? Slice two thin sheets of different colours, offset them by a millimetre, and press the edges together. When you emboss a texture on top, the colour shift adds a subtle shadow that reads as “hand‑made.”
Imagine a teal base with a thin, copper‑tone stripe underneath – the embossing catches the copper line, giving the illusion of a metallic inlay. It’s a simple trick that looks like a paid‑for finish.
Creating repeatable patterns
If you’re planning a small collection, consistency helps with branding. Use a small silicone roller or a custom‑cut rubber stamp. Roll the same pattern across each earring base, then let the clay firm for a minute before moving them to the bake sheet. This way, every piece has the same signature motif.
And if you’re teaching kids, a simple cookie‑cutter pressed onto a coloured slab can become a whole series of animal‑shaped charms – perfect for a weekend family craft session.
Adding fine details with dotting tools
Before you bake, grab a dotting tool or the tip of a needle‑nose plier. Tiny indents can become “pearl” accents once you sand and glaze them. Lightly tap a line of dots along the edge of a hoop; after baking, those dots become subtle raised beads that catch the light.
Remember, less is more. A few well‑placed details add interest without overwhelming the design.
Drying time – don’t rush it
After you’ve pressed your textures, let the pieces sit for 2‑3 minutes on the silicone mat. This short rest lets the clay firm just enough that the imprint won’t smear when you transfer them to the baking tray.
If you notice any smudging, give them a few extra seconds – the clay is forgiving, but a little patience saves a lot of sanding later.
Need a deeper dive?
When you’re ready to explore advanced embossing techniques, check out our comprehensive guide on polymer clay earring designs. It walks you through everything from layered colour effects to creating custom stamps.
Take a moment now to admire the patterns you’ve just created. You’ve turned a plain slab into a canvas of texture, and that’s the magic that makes each pair of earrings feel uniquely yours.
Step 5: Bake and Finish (Includes Temperature & Time Table)
Alright, you’ve got your textured, punched earring bases ready to go. The oven is the only thing standing between a soft slab and a durable piece of wearable art. If you’ve ever wondered why some earrings feel a little rubbery after baking while others snap like a tiny glass bead, the answer lives in temperature, timing, and a few little habits that keep the clay from misbehaving.
First things first: pre‑heat your oven to 130 °C (about 265 °F). Trust me, you’ll thank yourself for using an oven thermometer – most home ovens run hot or cold by up to 15 °F, and that variance can mean the difference between a perfect cure and a cracked piece. Pop the thermometer in the middle of the oven and wait until it steadies at the target temperature before you even think about sliding a tray in.
Now, lay your earring bases on a parchment‑lined baking sheet. Make sure they’re not touching; even a tiny bridge can fuse two pieces together and ruin the finish. If you’re working with a batch of different thicknesses, separate them by size – we’ll talk about why in a minute.
Temperature & Time Table
| Clay Type | Thickness | Bake Time (min) |
|---|---|---|
| Premo™ | 1 mm | 30 |
| Premo™ | 2 mm | 45 |
| Sculpey III | 1 mm | 15‑20 |
| Sculpey III | 2 mm | 30‑35 |
That table is a quick cheat sheet, but there’s a little science behind it. Thicker pieces need more time for the heat to penetrate to the centre. The rule of thumb we use at CreativiU is 30 minutes per ¼ inch (≈6 mm) of thickness. If you’re unsure, bake a little longer rather than shorter – you can always pop the piece back in for an extra five minutes if it feels a touch soft after cooling.
Real‑world example: Sarah, a freelance jewellery maker from Ontario, runs a weekly “tester” bake. She rolls a tiny strip of the same thickness as her earrings, bakes it alongside the batch, and checks it with the “tug test” (pull gently; it should feel firm but not brittle). That extra minute of testing saved her from a whole week’s worth of cracked earrings.
Pro tip #1: If you notice a slight shrinkage around embossed areas, give those pieces an extra minute. The extra polymer flow helps the raised texture settle without cracking.
Pro tip #2: Open the oven door only once, halfway through the bake, to rotate the tray. This evens out any hot‑spot quirks your oven might have.
When the timer dings, don’t rush to pull the tray out. Turn the oven off, leave the door ajar, and let the tray sit for five minutes. The clay continues to cure as it cools, and that gradual temperature drop prevents stress fractures.
After the five‑minute rest, move the pieces to a wire rack and let them cool completely – at least 30 minutes for thin earrings, up to an hour for heavier pendants. Trying to sand while they’re still warm will just smear the surface.
Finishing steps
Once cool, you’ll probably see a few rough edges or tiny fingerprints from handling. Grab a fine‑grit (400‑800) wet/dry sandpaper and gently sand in a circular motion. If you have a nail buffer, that’s even quicker for smoothing the very edges.
After sanding, wipe the piece with a lint‑free cloth dampened with isopropyl alcohol – this removes dust and reveals the true colour. For that professional shine, use a soft polishing cloth or a tiny piece of a buffing wheel. Many hobbyists finish with a thin coat of clear acrylic varnish (matte or satin) to protect the colour and add a subtle sheen. If you’re making earrings you’ll wear daily, a matte finish reduces fingerprints.
Here’s a quick checklist you can print and stick to your workspace:
- Pre‑heat oven to 130 °C, verify with thermometer.
- Arrange pieces on parchment, keep them separate.
- Refer to the temperature & time table for your clay and thickness.
- Rotate tray halfway through baking.
- Leave tray in oven for 5 min after timer, then cool on rack.
- Sand with 400‑800 grit, wipe with alcohol.
- Buff or apply clear sealant as desired.
If you haven’t yet explored the full workflow from conditioning to finishing, you might find our comprehensive jewellery tutorial useful – it walks you through every stage, including the same baking principles you’re using here.
And before you start sketching your next earring line, remember that a good sketch can save you a lot of trial‑and‑error on the clay. Choosing the right graphite pencils makes a difference, especially if you’re working on toned paper for colour studies. Check out this guide on how to choose graphite pencils for realistic shading on toned paper for tips on getting crisp, accurate designs before you even touch the clay.
Step 6: Attach Findings and Care Tips
Nice work getting the bases baked and textured. If you’re wondering how to make polymer clay earrings that last, this step—attaching findings and care tips—makes all the difference. The next move is to attach the findings and set your pieces up for real life wear. This is where the craft meets the everyday, where your pieces start to feel like you, not just clay.
Choosing the right findings
First, pick the right findings. For beginners, hypoallergenic nickel-free hooks or posts are best, especially if you plan to sell. For a dangle, you might choose a simple jump ring and an ear wire. If you’re testing ideas for a market, start with a familiar metal tone and a few classic shapes to gauge appeal. Whatever you pick, keep consistency across a line so your collection feels cohesive.
Careful attachment habits
If you’re unsure, bake a tiny tester piece to check strength, hole alignment, and wear before committing a full batch. That quick check saves surprises and gives you confidence to scale up. Use the tester to compare edge crispness, texture transfer, and hole wear before baking.
Attaching the hardware
Open a jump ring by twisting sideways; don’t pull apart. Slide it through the hole, then close. Use two pliers to twist and secure. For posts, dab epoxy on the back, press, and cure before wearing.
Base alignment and finish care
Remember: align the hole so findings sit flat. If the base isn’t perfectly flat, sand a touch and re-check. A smooth base prevents wobbly wear and glare under light carefully.
Daily care and storage tips
After attaching, a light wipe with a lint-free cloth keeps fingerprints to a minimum. If you used a clear coat, let it cure completely before wearing, usually 24 hours in our experience. Store pieces in a soft pouch to avoid scratching the texture. CreativiU knows this matters.
Why this matters for your business
That consistency builds trust for customers everywhere, even more. Platforms like CreativiU support finishing skills with guided courses and feedback. You’ll save time, reduce questions, and unlock repeat business over time.
Final quick checklist
- Remember to select hypoallergenic findings for each piece
- Open jump rings with proper technique
- Attach backings or posts securely and let them cure
- Ensure sealant is fully cured and surfaces are polished
- Store finished pieces in a protective pouch
Looking ahead
In 2026, steps like this keep your polymer clay jewelry line thriving. Start with secure findings, seal thoughtfully, and build a care routine customers can trust. Ready to attach and care for your batch today?
Conclusion
So there you have it—by now you’ve walked through every step of how to make polymer clay earrings, from conditioning the clay to sealing the finished piece.
Remember, the magic lives in the little habits: a quick temperature check, a gentle wipe after each wear, and a habit of testing the jump ring before you close it. Those tiny actions keep your earrings looking fresh week after week.
If you’re a hobbyist, try a weekend challenge: pick a new shape, follow the checklist, and share a photo with your CreativiU community. The feedback loop is priceless and often sparks fresh ideas you hadn’t imagined.
Creative entrepreneurs, think about turning your best designs into a small collection. A consistent care routine becomes a selling point—customers love knowing exactly how to keep their pieces pristine.
And for parents, involve the kids in the simple prep steps. Watching them condition the clay or sand a smooth edge turns the project into a confidence‑building activity you’ll both treasure.
What’s the next move? Grab your favorite clay, set a timer, and let the process unfold. You’ve got the know‑how; now it’s time to create, experiment, and enjoy the sparkle of your own handmade earrings.
And remember, every pair you finish adds confidence to your craft journey.
FAQ
What are the essential tools for how to make polymer clay earrings?
To start, you’ll need a block of polymer clay (Premo or Fimo Professional work well), a pasta machine or acrylic roller for conditioning, a sharp X‑Acto blade or circle cutters, needle‑nose pliers, jump rings, and nickel‑free earring hooks. A silicone mat, parchment paper, and an oven thermometer round out the basics. Having these items on hand keeps the workflow smooth and prevents last‑minute trips to the store.
How do I prevent bubbles when conditioning the clay?
Conditioning is all about chasing air out. Roll the clay on the thickest setting, fold it in half, and roll again—repeat 20‑30 times. Alternate the direction of the rollers every few folds; this pushes bubbles toward the edges. A quick tip we’ve seen work: sprinkle a pinch of cornstarch on the rollers if the clay starts to stick, it creates a dry barrier without affecting colour.
What baking temperature and time should I use for 2 mm thick earrings?
Set your oven to 130 °C (about 265 °F) and verify with a thermometer. For a 2 mm slab, aim for 45 minutes. If you’re unsure, add an extra five minutes; the extra heat ensures the centre cures fully. After the timer dings, turn the oven off, leave the door ajar for five minutes, then move the pieces to a wire rack to cool completely.
How can I make the finished earrings more durable?
Durability starts with a clean bake and a careful finish. Sand any rough edges with 400‑800 grit wet/dry sandpaper, then wipe with a lint‑free cloth dampened with isopropyl alcohol. Applying a thin coat of matte acrylic varnish protects the colour and reduces fingerprints. For heavier designs, add a dab of clear polymer glue inside the pre‑punched hole before closing the jump ring; this reinforces the connection.
What are some quick design ideas for beginners?
Start simple: classic circles, teardrops, or tiny leaf silhouettes. Use a leaf or lace to emboss subtle texture, or press a handful of mica powder for a shimmer effect. If you want colour variation, blend two shades of clay and roll them together for a marbled look. These easy‑to‑execute ideas let you produce polished pieces without spending hours on intricate detailing.
How often should I clean and store my polymer clay earrings?
After each wear, give the earrings a quick wipe with a damp microfiber cloth to remove oils and dust. Store them in a soft pouch or a compartmentalised jewelry box to avoid scratches. For long‑term storage, keep the pieces in an airtight container with a silica packet; this guards against humidity that can cause the clay to soften over time.
Can I involve kids in the earring‑making process?
Absolutely. Kids love the tactile feel of conditioning clay and can help cut shapes with safe plastic cutters. Let them sprinkle cornstarch on the rollers or press textured objects like leaves. Supervise the baking step, but the prep work is a great confidence‑builder and turns a weekend craft session into a family tradition.
Leave a Reply