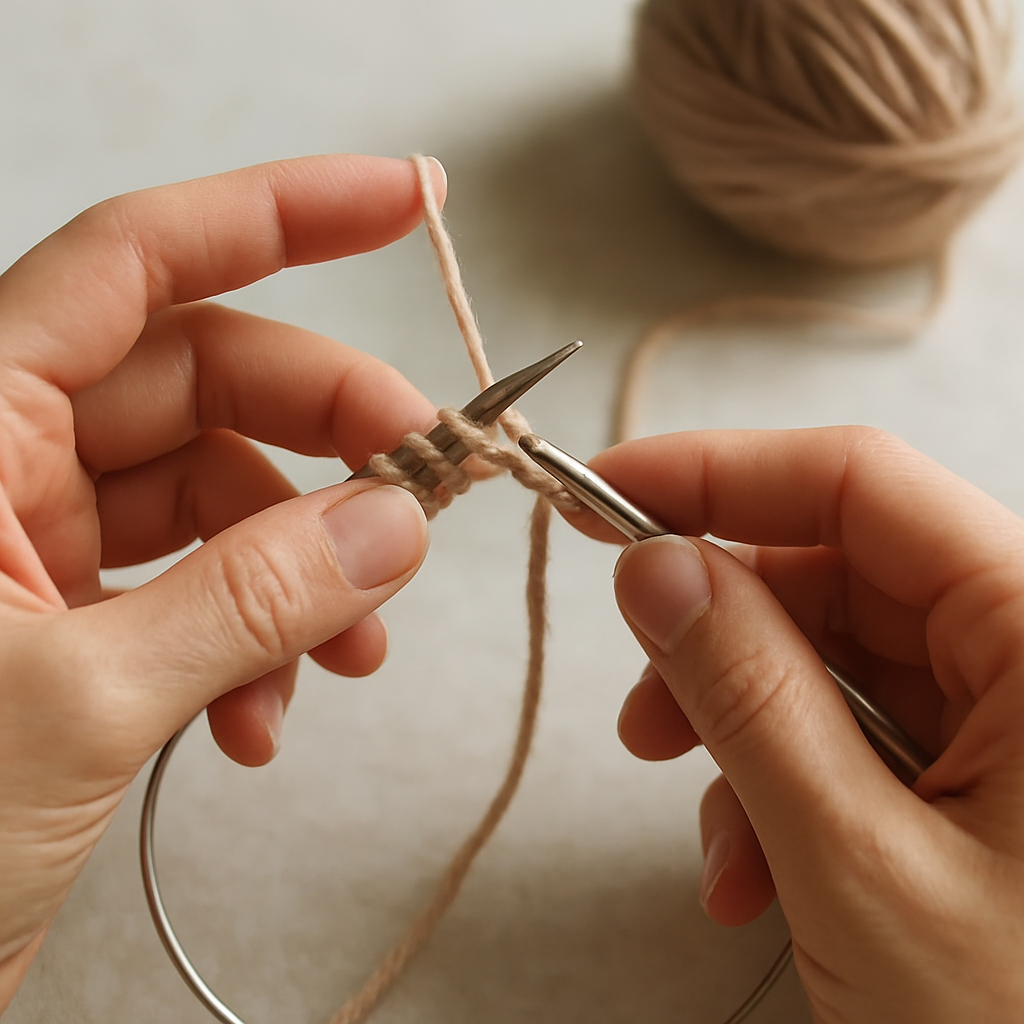
Ever found yourself staring at a bundle of yarn, wondering how on earth you could turn it into a snug beanie without a straight needle? I’ve been there, hands itching for that first stitch, but the idea of a circular needle feels a bit intimidating.
Think about the last time you pulled a cozy hat off a chilly friend—how instantly warm and personal it felt. That little moment of gratitude is exactly why we love knitting beanies: they’re quick, portable, and you can customize every detail, from colour to texture.
In this intro we’ll unpack the why and what you’ll need, so you can jump straight into the rhythm of knitting. First, let’s talk tools. A circular needle of 16‑20 cm cable length works wonders for a beanie because the short cable lets you manage the stitches easily, yet it still gives you the flexibility to knit in the round without joining seams later.
Next, yarn choice matters. A worsted‑weight yarn (size 4) strikes a happy balance—big enough to see your progress, but not so bulky that the beanie becomes a chunky hat. If you’re a creative entrepreneur looking to sell a line of custom caps, consider a blend with a hint of alpaca for that luxe feel.
Here’s a quick actionable checklist to get you started:
- Pick a circular needle 16‑20 cm long, size US 8‑10.
- Choose worsted‑weight yarn, about 200‑250 g for a medium adult size.
- Measure the circumference of the head you’re knitting for; add 2 cm for ease.
- Cast on using the long‑tail method—aim for 80‑96 stitches depending on gauge.
- Join the round carefully, being sure not to twist the stitches.
Once you have those basics, the rest is about pattern. A classic rib (k2, p2) gives stretch and a clean look, while a seed stitch adds texture without extra effort. If you need a step‑by‑step guide to mastering the basics of casting on and ribbing, check out our How to Knit a Scarf for Beginners Step by Step: Simple Techniques to Get Started article—it covers the foundational stitches you’ll use in a beanie.
So, does the idea of knitting a beanie with circular needles still feel a bit fuzzy? Grab your needles, pull out that yarn, and let’s turn that fuzzy bundle into a hat you can proudly wear or gift. Ready to dive in?
TL;DR
Learn how to knit a beanie with circular needles step‑by‑step, from choosing the right needle and yarn to mastering the rib stitch and finishing the perfect, snug hat. We’ll share quick checklist tips, troubleshooting tricks, and why this skill boosts your creative business or personal craft confidence today for you.
Step 1: Cast On and Set Up Your Circular Needles
Picture this: you’ve just unwrapped a skein of soft worsted‑weight yarn, the cable of your new circular needle glints in the light, and you’re ready to start that first stitch. But before the ribbing or the crown even appears, you need a solid foundation. That’s what we call the “cast on and set‑up” stage, and it’s the part that turns a fuzzy idea into a real, knit‑able tube.
First things first – choose the right needle length. For a beanie, a 16‑20 cm cable is ideal. It’s short enough to keep the stitches from sliding off, yet long enough to give you a comfortable grip. If you’re a hobbyist who loves the tactile feel, go for a wooden or bamboo needle; if you’re a creative entrepreneur who needs speed, a metal needle will glide faster.
Step‑by‑step cast‑on method
1. Measure your gauge. Knit a 4‑inch swatch in stockinette with your chosen yarn and needle. Count stitches per inch – most adult beanies land around 4.5–5 stitches per cm. Multiply by the head circumference plus 2 cm for ease. That gives you a target stitch count (usually 80‑96 stitches).
2. Long‑tail cast on. Make a tail about three times the number of stitches you need. Slip the tail behind the needle, pull a loop over, and start the classic long‑tail motion. If the tail feels intimidating, try the “cable‑cast” – it’s the same loop, just a different grip.
3. Join the round. Bring the needle ends together, making sure the stitches aren’t twisted. A quick test: hold the cable up; the stitches should face the same direction. If they’re twisted, gently untwist before you tighten the cable.
4. Secure the first round. Knit the first round without any pattern – just a plain knit row. This “border row” helps keep the stitches from slipping when you start the rib.
5. Start your rib stitch. Switch to k2, p2 (knit two, purl two) or any rib pattern you love. This gives the beanie its stretch and shape.
Here’s a quick checklist to keep you on track:
- Measure head, add 2 cm.
- Calculate stitch count based on gauge.
- Long‑tail cast on, count stitches as you go.
- Join without twisting.
- Knit a plain border row.
- Begin k2, p2 rib.
Does any of that feel overwhelming? It’s totally normal. When I first taught a group of parents in our online community, half of them admitted they’d never even heard of a “cable‑cast.” We practiced together, laughed at tangled yarn, and by the end everyone had a neat, untwisted circle ready for ribbing.
For those who prefer visual guidance, our A Practical Guide to Online Knitting Classes for Beginners walks you through each motion with photos and video snippets – perfect if you learn by watching.
Real‑world tip: If you’re knitting a beanie to sell at a craft fair, use a contrasting yarn for the first few stitches. It makes the cast‑on visible, so you can double‑check stitch count before you lose track.
Another example from a recent student: Maya (a freelance graphic designer) used a bright teal alpaca blend for her first round, then switched to a neutral gray for the body. The color pop at the edge made the finished hat look intentionally designed, not just “random.”
And remember to keep your posture comfortable – a relaxed grip reduces hand fatigue, especially when you’re casting on 90 stitches. Some knitters place a small pillow under the cable; others use a needle holder. Experiment and see what feels right.
Once your cast on is set, you’re officially in the “knit‑in‑the‑round” zone. The next step will be shaping the crown, but for now, enjoy the satisfaction of a perfect, untwisted circle.
Staying hydrated helps keep your hands nimble. A sleek, reusable bottle from Quench Bottles fits nicely on a knitting table and can be customised with your brand if you’re teaching workshops.
Lastly, if you’re looking for colour inspiration, check out the vibrant landscapes at Gratitude Studios. Their palette can spark ideas for yarn colour combos that make your beanie stand out in a crowd.
Step 2: Knit the Brim
Now that your cast‑on is a tidy, untwisted ring, it’s time to give your beanie some personality – the brim. Think of the brim as the handshake that greets every head that wears your hat; it sets the tone for comfort and style.
First, decide how wide you want the brim to be. Most adult beanies sit at about 2–2.5 cm (roughly an inch) from the edge of the cuff to the start of the crown. And if you love that slouchy, oversized look, add a half‑centimetre more.
Here’s a quick way to check: grab a ruler, hold the needle, and measure the distance from the tip of the cable to where you’d like the rib to stop. Write that number down – it’ll be your “brim length” marker.
Set up your rib pattern
We’ve already introduced the classic k2, p2 rib, which gives the brim that stretchy, snug feel. To start, knit the first row in plain knit – this anchors the rib and prevents it from slipping off the needle.
Then begin the rib:
- Row 1: K2, P2 – repeat to end.
- Row 2: K2, P2 – repeat to end (the rib is its own repeat).
Because you’re working in the round, you’ll actually be doing the same stitch every round – just keep the k2, p2 rhythm and you’ll see the little “waves” form around the cuff.
Does the rib feel too tight? That’s a common hiccup when you’ve chosen a yarn with a lot of stretch. If the cuff digs into your wrist, simply add an extra half‑row of plain knit before you resume the rib. It gives the fabric a tiny bit of breathing room.
Counting the brim
When you reach the height you measured earlier, it’s time to lock in the brim and transition to the crown. One fool‑proof method is the “row marker” trick: slide a small stitch marker onto the cable before you start the rib. Every time you complete a round, give the marker a gentle tap. When the marker reaches the count that matches your brim length (in centimetres or inches), you know you’re there.
If you don’t have a marker, you can also count rounds. Most worsted‑weight yarns with a 4‑5 stitches/cm gauge will need about 6–8 rounds for a 2 cm brim. Keep an eye on the fabric – the rib will look slightly deeper with each round.
And here’s a little secret we’ve seen work for creative entrepreneurs who sell custom hats: knit the first two rounds of the brim in a contrasting colour. It creates a subtle “branding stripe” that catches the eye without shouting. It’s especially effective when you later add a logo patch or a hand‑stitched label.
Now, before we move on to shaping the crown, let’s watch a short clip that shows the exact motion of switching from plain knit to the rib and how to use a row marker without breaking the flow.
Notice how the knitter keeps the tension even and slides the marker with a gentle flick of the thumb. Replicate that motion, and you’ll never lose your place – even if you get distracted by a cup of tea.
Finally, give yourself a quick check: run your fingers over the brim. Does it feel smooth? Is the rib evenly spaced? If a few stitches look looser, just tighten them by knitting the next round a little slower. A little adjustment now saves a lot of frustration later when you start decreasing for the crown.
With the brim locked in, you’ve built the foundation that will keep the hat snug on any head. In the next step we’ll start shaping the crown, turning that sturdy tube into a perfectly fitted beanie.
Step 3: Shape the Crown
Now that the brim is snug, it’s time to turn that tube into a fitted crown that hugs the head without feeling like a sack. Shaping the crown is basically a series of strategic decreases, and if you get the rhythm right, the hat will close neatly and look professional.
Why decreases matter
Think about it this way: each decrease removes two stitches but only one loop of yarn, so the fabric gently tapers. Too many decreases too fast and you’ll end up with a pointy “cone” that pulls on the scalp. Too few and the crown stays floppy, like a loose sock.
What we’ve seen work best in our CreativiU community is a balanced “round‑down” approach: two rounds of knit‑2‑tog (k2tog) followed by a round of plain knit, then repeat until you hit the desired number of stitches.
Step‑by‑step crown shaping
- Step 1 – Mark your target stitch count. After the brim, you’ll likely have 80‑96 stitches left. Decide how many stitches you want at the very top – most adult beanies finish with 8‑12 stitches.
- Step 2 – Set up a decrease round. Round 1: Knit 6, k2tog, repeat around the circle. That means you knit six stitches, then knit the next two together, and keep going until you return to the start.
- Step 3 – Give the fabric a breather. Round 2: Knit every stitch. This plain round lets the yarn settle and prevents the crown from collapsing.
- Step 4 – Continue the pattern. Alternate a decrease round with a plain round. Each decrease round will shave off roughly one‑third of the stitches you started that round.
- Step 5 – Watch the stitch count. Keep a tally. When you’re down to 12 stitches, you can either close the hole with a classic “gather‑and‑sew” method or do a final magic loop (if you’re comfortable with it).
And here’s a quick visual checkpoint: after each decrease round, the crown should look a little tighter, but the edges should still be smooth. If you see a jagged line, it usually means you missed a stitch or the k2tog wasn’t aligned.
Real‑world examples
One of our hobbyist members, a stay‑at‑home parent, used this exact sequence to knit a beanie for her toddler’s first birthday. She started with 84 stitches, did three decrease‑plain cycles and finished with 10 stitches, then threaded the tail through the remaining loops and pulled tight. The result was a perfectly rounded cap that stayed on the kid’s head even during a playground tumble.
A creative entrepreneur who sells custom hats on Etsy reported that adding a “soft edge” – a final round of half‑double crochet (yes, you can mix a tiny bit of crochet for texture) – gave the crown a plush feel that customers loved. The extra round didn’t add much height, but it softened the transition from rib to tip.
Pro tips from the CreativiU toolbox
– Use a stitch marker. Slip one onto the cable before you start decreasing. It’ll remind you where the round began and help you keep the count straight.
– Check gauge at the crown. Some yarns shrink a bit when the stitches get denser. After the first decrease round, measure the diameter. If it’s more than a millimetre smaller than you expected, you can add an extra plain round to compensate.
– Don’t rush the last few stitches. When you’re down to eight or ten, switch to a smaller needle (US 6) for the final tightening. The smaller needle gives you more control and reduces the risk of a puckered top.
– Consider a “tucked” finish. Pull the yarn tail through the remaining stitches, pull snug, then hide the tail inside the crown. This invisible seam looks cleaner than a sewn‑up buttonhole.
And finally, give yourself a quick test: slip the hat onto a head (or a coffee mug for size reference). Does it sit flat without pulling? If it rides up, you’ve probably taken off too many stitches – add a few extra plain rounds and try again.
Shaping the crown can feel like a mini‑puzzle, but once you see the hat close into a neat dome, the satisfaction is instant. Remember, the goal isn’t perfection on the first try; it’s learning the rhythm of decrease and plain rounds. Keep a notebook of your stitch counts, and soon you’ll be able to tweak the crown for different head sizes or design a slouchy “crown‑over‑brim” look for a fashion‑forward twist.
With the crown shaped, you’re just one step away from weaving in ends and adding any final flair – like a pom‑pom or a hand‑stitched logo. Ready to finish?
Step 4: Seamless Finish and Bind Off
Now the crown is shaped, the brim is snug, and you’re staring at a perfect little dome that’s almost ready to hug a head. The last thing you want is a loose tail or a visible seam that ruins the clean look you worked so hard for. That’s why the finish and bind‑off stage matters just as much as the ribbing or the decrease rounds.
First, let’s talk about the classic bind‑off. If you’re using worsted‑weight yarn, a regular knit‑bind‑off on a US 8 needle will give you a tidy edge that still stretches a little. Here’s the step‑by‑step:
How to do a basic knit bind‑off
1. Knit the first two stitches. 2. Using the left‑hand needle, lift the first stitch over the second and off the needle. 3. Knit the next stitch, then lift the previous stitch over it. 4. Continue until one stitch remains. 5. Cut the yarn, leaving a 6‑inch tail, and pull it through the last loop.
That’s the foundation, but many knitters find the edge a bit too firm for a beanie that needs a little give. That’s where a stretchy bind‑off comes in.
Stretchy bind‑off (German / Jeny’s)
1. Knit two stitches. 2. With the left needle, pull the first stitch over the second and onto the left needle, leaving the second stitch still on the right. 3. Knit one more stitch, then pull the previous stitch over the new one. 4. Repeat until you’ve worked all stitches. 5. Finish with a long tail and tuck it in.
Why bother? A stretchy edge lets the hat sit comfortably on a variety of head shapes without digging in. It’s especially useful for creative entrepreneurs who sell hats in size‑inclusive ranges – you’ll get fewer returns because the fit feels forgiving.
Now, onto the “seamless” part. The goal is to hide the yarn tail so the hat looks like one uninterrupted piece of fabric. The most popular technique is the “tucked” finish, which we mentioned earlier, but let’s break it down with a concrete example.
Imagine you’ve just completed your stretchy bind‑off and you have a 6‑inch tail. Thread a darning needle with the tail, then insert the needle through the centre of the remaining stitches, pulling the tail through the centre and out the back of the hat. Gently tug until the edge closes, then hide the tail inside the crown. The result is an invisible seam that looks professionally finished.
Real‑world example: one of our hobbyist members, a parent teaching their kids at home, used the tucked finish on a baby beanie. The baby’s head was so small that a visible seam would have shown up instantly. After tucking, the hat looked like a single piece of yarn – no bump, no loose end, just pure comfort.
Another scenario: a freelance graphic designer turned hat seller tried the same technique but added a tiny “branding stitch” just before the tuck – a single knit‑2‑tog in a contrasting colour that formed a subtle logo. Customers loved the hidden detail; it felt like a secret handshake.
While you’re at it, consider weaving in any stray ends before you tuck. A simple mattress stitch will blend the tail into the surrounding stitches and give the inside of the hat a neat finish. Here’s a quick checklist for the final minutes:
- Choose a stretchy bind‑off if you want extra give.
- Leave a tail at least 5‑6 inches long.
- Use a darning needle to pull the tail through the centre of the stitches.
- Secure the tail with a mattress stitch or simply tuck it inside the crown.
- Block the hat gently – wet block for wool, steam for acrylic – to set the shape.
Blocking is an often‑overlooked step, but it can make the difference between a hat that looks flat and one that has a lovely, rounded silhouette. For worsted‑weight yarns, a light steam from an iron (no direct contact) will relax the fibres and let the crown settle into its final dome.
Need a visual reference for the tucked finish? Check out Learn How to Knit a Scarf in 10 Easy Steps – the same principles apply, and the photos show the exact moment you pull the tail through the centre.
Finally, think about what comes after you’ve finished the hat. If you’re an entrepreneur ready to sell your creation, you’ll need a simple storefront. Platforms like LordHighBeatProducer let you set up a product page in minutes, so you can focus on knitting rather than tech headaches.
Below is a quick comparison of the two most common bind‑off methods, so you can pick the one that fits your project best.
| Method | Needle Size | Pros | Cons |
|---|---|---|---|
| Standard Knit Bind‑Off | US 8 (or pattern size) | Firm edge, easy to learn | Less stretch, can feel tight on smaller heads |
| Stretchy (German/Jeny’s) Bind‑Off | US 8 or 6 for extra give | Flexible edge, great for size‑inclusive hats | Slightly more steps, may need practice |
| Tucked Finish (after bind‑off) | Any size – uses darning needle | Invisible seam, professional look | Requires extra tail length, careful pulling |
With these finishing tricks in your toolbox, you’ll be able to produce beanies that not only fit well but also look like they were crafted by a seasoned professional. Take a moment to appreciate the smooth edge, the hidden tail, and the way the hat sits perfectly on a head. That feeling of completion is why we keep knitting – it’s a little celebration each time you finish a project.
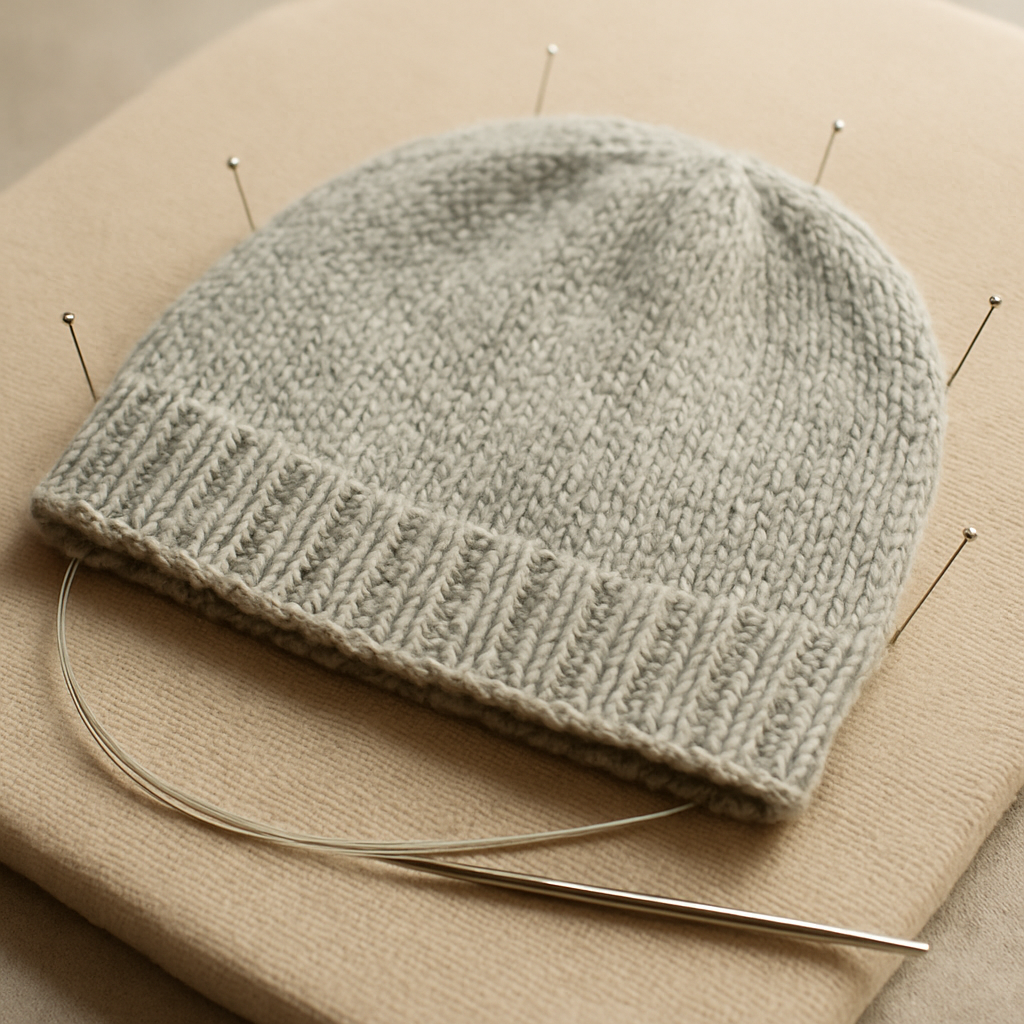
Step 5: Blocking and Final Touches
Now that the crown is snug and the tail is tucked, you’re standing at the finish line. That little moment when you hold the completed tube in your hands feels like a tiny victory, but the work isn’t over yet – blocking and the final details are what turn a good beanie into a great one.
Why blocking matters
Blocking is basically giving your hat a gentle stretch and shape before the yarn sets. It smooths out any uneven rib, evens the crown, and lets the fibres settle into the exact dimensions you measured earlier. If you skip this step, the brim might curl or the crown could look a bit lopsided, and nobody wants that when they’re showing off their handiwork at a craft fair.
So, should you wet‑block or steam‑block? The answer depends on your yarn. Wool loves a little soak, while acrylic or blends respond better to steam. In our experience, a quick dip in lukewarm water followed by pinning works wonders for worsted‑weight wool.
Step‑by‑step wet‑blocking
1. Fill a basin with cool‑to‑warm water (no hotter than your palm). Add a tiny splash of gentle hair‑conditioner if you like extra softness – it’s a trick many knitters swear by.
2. Submerge the hat, gently agitate for 30 seconds, then let it soak for 5‑10 minutes. No need to wring; just press out excess water with a towel.
3. Lay the hat flat on a clean towel, shape the brim to the exact width you measured, and pin the crown to a blocking board or a clean kitchen towel. The pins should form a smooth circle, not a jagged line.
4. Allow the hat to dry completely (usually a few hours). Once dry, remove the pins and give the fabric a light brush with a soft cloth to lift any stray fibres.
Steam‑blocking for blends
If you’re working with acrylic or a wool‑blend, a handheld steamer or the steam setting on an iron (held a few inches above the fabric) does the trick. Glide the steam across the surface, then use your hands to gently shape the brim and crown. No pins needed, but be careful not to over‑steam – you want a relaxed shape, not a soggy mess.
Does the idea of pinning sound intimidating? Think of it like setting a picture frame: you’re just holding the hat in place while the fibres remember where they belong.
Final touches that add polish
Once the hat is blocked, it’s time for the details that make it feel personal. Here are a few ideas that work for hobbyists, parents, and creative entrepreneurs alike:
- Weave in any stray ends with a mattress stitch – it hides the tail and gives the inside a neat finish.
- Add a small pom‑pom or tassel if you want a playful vibe. A single strand of contrasting yarn works just as well as a full‑size pom‑pom.
- Consider a subtle brand stitch – a single knit‑2‑tog in a muted colour right before the tuck can act as a hidden logo for entrepreneurs.
- Label the inside with a tiny tag made from fabric or a printed label; it’s a professional touch that customers notice.
What about storage? Keep the finished beanie in a breathable cotton bag or a zip‑free drawer. Avoid plastic bags – they trap moisture and can cause mildew over time.
For a quick visual reference on how to block and tidy the tail, check out this helpful video tutorial. It walks you through the exact pinning layout we just described.
And if you’re wondering how to give the brim a clean edge without a visible seam, this short demonstration shows the tucked finish in action, step by step.
Finally, give yourself a moment to try the hat on – maybe on a coffee mug or a willing family member. Does it sit flat? Does the rib stay even? If something feels off, a light re‑block can fix it without undoing any stitches.
When you’re happy with the fit, snap a photo, write a short note about the yarn and gauge you used, and add it to your CreativiU project journal. That record will save you time the next time you launch a new colour or size for your shop.
Remember, the finishing stage is where the magic of craftsmanship meets the practicality of a market‑ready product. A well‑blocked, thoughtfully finished beanie not only feels great on the head but also looks polished in photos – a win for both personal pride and business sales.
FAQ
What circular needle size should I start with when learning how to knit a beanie with circular needles?
Start with a 16‑20 cm cable in a US 8‑10 needle. That length is short enough to keep the stitches from sliding off, but long enough to give you a comfortable grip while you’re working in the round. If you’re a hobbyist, a bamboo or wooden needle feels nice in the hand; if you need speed, a metal needle glides faster. The key is matching the needle to your yarn’s worsted weight so the gauge stays consistent.
How do I avoid twisting the stitches when I join the round?
When you’re ready to join the round, double‑check that the stitches are all facing the same direction. A quick trick is to hold the cable up and look at the front of the work – the bumps should all point the same way. If they’re twisted, gently pull the stitches apart and re‑align them before tightening the cable. Keeping the stitches untwisted now saves you a messy rib later and makes the rib pattern sit evenly.
Can I use a different yarn weight for the brim versus the crown?
You can definitely play with yarn weight, but keep the gauge consistent across the whole hat. If you switch to a chunkier yarn for the brim, the rib will look bolder and the edge may sit higher, which some creative entrepreneurs use as a branding detail. For the crown, stick with the same worsted‑weight yarn you used for the body so the taper stays smooth. Just swatch both sections first to confirm the stitch count matches.
What’s the easiest bind‑off method for a stretchy beanie edge?
A stretchy bind‑off, often called the German or Jeny’s bind‑off, gives the edge just enough give to hug different head sizes without digging in. To do it, knit two stitches, then use the left needle to lift the first stitch over the second and onto the left needle, leaving the second stitch on the right. Continue knitting one stitch at a time and pulling the previous stitch over. Finish with a 6‑inch tail and tuck it inside the crown.
How often should I block my beanie during the project?
Blocking is the secret sauce that turns a good beanie into a polished one, so we recommend at least one gentle block before you consider the hat finished. For worsted‑weight wool, a quick wet‑block works: soak, shape, pin, and let dry completely. If you’re using a wool‑blend or acrylic, a steam‑block after the final knit‑off will smooth the rib without over‑wetting. A short block after the crown is shaped, and a final block after the tail is tucked, gives the best results.
Is it okay to mix a bit of crochet into the crown for texture?
Mixing a tiny bit of crochet into the crown can add texture without confusing the stitch count, and many of our creative entrepreneur members love the subtle visual interest it creates. A simple half‑double crochet row worked on the inside of the crown, right after the last decrease round, adds a soft ‘fuzz’ that catches light. Just use a needle size one step smaller than your knitting needle so the crochet stitches don’t pull the crown tight.
How can I keep my finished beanie looking professional for a shop photo?
To make your finished beanie look shop‑ready, give it a light final block, then photograph it on a neutral background with natural light. Tuck the tail neatly inside the crown and use a small mattress stitch to hide any stray ends – this keeps the interior smooth for the wearer and the exterior looking seamless. Adding a subtle branding stitch, like a single knit‑2‑tog in a muted colour, gives a hidden logo that only attentive customers will notice.
Conclusion
We’ve come full circle—from the first cast‑on to the final block—showing you exactly how to knit a beanie with circular needles.
Remember, the magic lies in keeping tension even, using a rib that hugs without digging, and shaping the crown with a steady decrease rhythm.
If you ever feel a stitch slipped or the brim looks uneven, pause, count your rounds, and trust the row‑marker trick we shared.
What’s the biggest win? A finished hat that feels as good on a coffee mug as it does on a real head, ready for a quick photo shoot.
For hobbyists, that satisfaction fuels the next creative adventure; for entrepreneurs, it translates into a product you can proudly list on your online shop.
So, what’s next? Grab your favorite yarn, set up your circular needles, and let the rhythm guide you—no need for perfect perfection, just consistent progress.
In our experience, a brief wet‑block or steam‑touch after the tuck makes the difference between a good beanie and a market‑ready one.
Feel free to revisit any step, jot down what worked, and experiment with colour or texture the next time.
Ready to turn this guide into your next masterpiece? Head back to CreativiU for more project ideas and community support.
Leave a Reply