Ever caught yourself daydreaming about turning those shaky doodles into elegant lettering, but thought a formal class was out of reach?
We get it—life’s busy, budgets are tight, and the idea of commuting to a studio feels like a relic from a pre‑Zoom world.
That’s why a calligraphy online class can be a total game‑changer, letting you practice whenever the creative bug bites, right from your kitchen table.
Imagine logging in, watching a skilled instructor demonstrate the graceful pressure shifts of a brush pen, then pausing to try the stroke on your own sheet.
Does it feel too good to be true? Not really—online platforms have refined video quality and interactive feedback loops so you actually see where you need to adjust.
In our experience at CreativiU, learners who jump into a structured calligraphy online class often report a noticeable jump in confidence after just a handful of lessons.
Why does that happen? Because the curriculum is broken into bite‑size modules, each focusing on a single skill—like mastering the upstroke—so you never feel overwhelmed.
And the community aspect? You’ll find fellow enthusiasts posting their practice sheets in a private forum, swapping tips, and cheering each other on, which turns solitary practice into a supportive studio vibe.
So, what’s the first step? Grab a decent brush pen—something like a Tombow Dual Brush works for beginners—set up a clean sheet of smooth paper, and sign up for a trial class to test the waters.
You’ll be surprised how quickly those tentative lines start to flow, and before you know it you’re creating invitations, logos, or even personalized gift tags that look professionally crafted.
Ready to give it a try? Dive into a calligraphy online class today and watch your hand transform from hesitant scribbles to confident, expressive strokes.
Your artistic journey starts now.
TL;DR
A calligraphy online class gives you flexible, step‑by‑step guidance, letting you practice anytime while receiving instant feedback from expert instructors.
You’ll quickly move from shaky doodles to polished lettering, boost confidence, and join a supportive community that offers personalized tips, helping turn your creative hobby into a marketable skill today.
Step 1: Assess Your Skill Level
Before you click “enroll” on any calligraphy online class, take a moment to ask yourself where you actually stand. Are you still wobbling on the up‑stroke, or can you already pull a clean, confident line? This honest self‑check saves you from diving into a module that’s either too basic or way out of reach.
Grab a sheet of smooth paper and a brush pen—something like a Tombow Dual Brush works for most beginners. Do a quick 30‑second test: try a thin up‑stroke, a thick down‑stroke, and a simple curve. If the pen feels like a stubborn stick, you’re probably at the early‑stage level. If the strokes vary naturally, you might be ready for intermediate lessons.
Use a simple checklist
Write down a few criteria and tick them off:
- Can you control pressure without the pen skipping?
- Do you know the basic anatomy of a letter (ascender, descender, bowl)?
- Are you comfortable with spacing between letters?
Score 0‑1 on each? Stay with beginner‑focused classes. Score 2‑3? Look for courses that dive into rhythm and composition.
And remember, skill isn’t static. Even seasoned hand‑letterers revisit fundamentals when they try a new style. So treat this assessment as a living snapshot, not a final verdict.
Feeling a bit unsure? That’s totally normal. In our experience at CreativiU, many learners discover hidden gaps only after they start a class and get real‑time feedback. That’s why our platform offers a free trial lesson—so you can see where you land without committing fully.
Here’s a quick way to benchmark yourself against a proven resource: Mastering Brush Lettering: A Step‑by‑Step Tutorial. Follow the first lesson and compare your strokes to the video demo. If you’re struggling, you know which skill to target first.
Now, why does this matter for a calligraphy online class? Most courses are tiered. Beginner tracks focus on grip, basic strokes, and letterforms. Intermediate tracks add flourishes, layout, and composition. Advanced tracks expect you to already master those foundations. Choosing the right tier prevents frustration and keeps motivation high.
Watch that short video for a visual demo of the up‑stroke versus down‑stroke pressure. Pause, mimic, and notice how the ink flow changes. If you can replicate it, you’re on the right track.
Once you’ve got a sense of your level, think about how you’ll use your new skill. Are you a hobbyist who wants pretty birthday cards? A creative entrepreneur planning to sell custom invitations? An individual seeking a meditative practice? Your end goal will shape which class features matter most—like community critiques, downloadable templates, or business‑focused modules.
Speaking of business, many calligraphers eventually need to turn their hand‑lettered designs into printed products. When you’re ready to print, check out JiffyPrintOnline for affordable custom stickers and stationery. It’s a handy next step after you’ve mastered the basics.
And for a bit of artistic inspiration, browse the gallery at Gratitude Studios. Seeing how professional artists integrate calligraphic elements into larger works can spark ideas for your own projects, whether you’re designing wedding signage or a personal journal.
To wrap up, here’s a quick action plan:
- Do the 30‑second stroke test.
- Score yourself with the checklist.
- Watch the demo video and compare.
- Visit the internal tutorial link for a benchmark.
- Pick the class tier that matches your score.
- Plan your next creative use—cards, prints, or personal practice.
Take a few minutes now, and you’ll walk into your first calligraphy online class with confidence, not confusion.
Step 2: Set Your Learning Goals
Now that you’ve got a rough score of where you stand, it’s time to turn that number into something that actually moves you forward.
Think about the moment you first picked up a brush pen and felt that tiny spark of excitement. What would it look like if you could capture that feeling every day? That “why” becomes the backbone of your learning goals.
Pick a goal that feels personal
Instead of saying “I want to get better,” try “I want to write a flawless “Thank You” card for my friend’s birthday by the end of next month.” The more specific, the easier your brain can map a path.
For hobbyists, a goal could be “finish a 5‑letter quote in modern calligraphy and share it on Instagram.” Creative entrepreneurs might aim for “create a printable wedding invitation template that I can sell on Etsy within three weeks.” Parents could set “spend ten minutes after bedtime practicing the lower‑case alphabet with my child.”
Break it down into bite‑size checkpoints
Big goals are intimidating, so slice them up. If your ultimate target is a full‑page invitation, start with mastering consistent up‑strokes, then spacing, then adding a simple flourished capital.
Write those checkpoints on sticky notes or in a digital todo list. When you check one off, you get that little dopamine hit that keeps the momentum rolling.
Make it measurable
Ask yourself: how will I know I’ve hit the mark? Maybe you’ll record a short video of yourself writing the phrase and compare it to a reference clip. Or you could set a timer and see if you can finish a line in under three minutes without losing quality.
Measurement turns vague ambition into concrete progress, and it gives you data to celebrate later.
So, what does a realistic timeline look like? For most beginners, a 10‑minute daily practice session over two weeks is enough to notice smoother strokes. Intermediates might need 20 minutes a day, focusing on spacing drills. Advanced learners often schedule longer, project‑based sessions to experiment with flourishes.
Here’s a quick checklist you can copy‑paste into your notes:
- Define the end result (card, quote, product).
- Set a deadline (7 days, 14 days, 30 days).
- List 3‑5 micro‑tasks that lead to the result.
- Choose a way to measure success (photo, video, peer feedback).
- Schedule a recurring practice slot.
And remember, goals aren’t set in stone. If a deadline feels too tight, slide it. If a task feels too easy, add a twist. Flexibility prevents frustration.
Need some inspiration from someone who turned a hobby into a thriving home business? Check out this personal journey where the author went from messy notebook scribbles to a profitable calligraphy side hustle real‑life example of turning calligraphy into a home business.
Now, let’s see a visual cue that can help you map your practice. Below is a short video that walks through how to set a clear, achievable goal for your next week of practice.
After watching, take a moment to write down your own goal in the notebook you keep for practice. Keep it somewhere you’ll see it every time you sit down to write – the fridge, your desk lamp, or the back of your brush pen case.
Finally, share your goal with a friend or post it in a community forum. Public commitment adds a subtle layer of accountability, and you might pick up tips you hadn’t considered.
When the deadline arrives, celebrate the win, no matter how small. Then set the next goal, building a habit loop that keeps you improving week after week.
Step 3: Choose the Right Calligraphy Style
Now that you’ve set a clear goal, the next question is: which style of lettering will actually bring that goal to life?
Choosing the right calligraphy style isn’t just a aesthetic decision—it determines the tools you’ll need, the amount of practice you’ll invest, and how quickly you can start selling or sharing your work.
Do you picture yourself writing sleek wedding invitations, or do you see yourself doodling quirky quotes on coffee mugs?
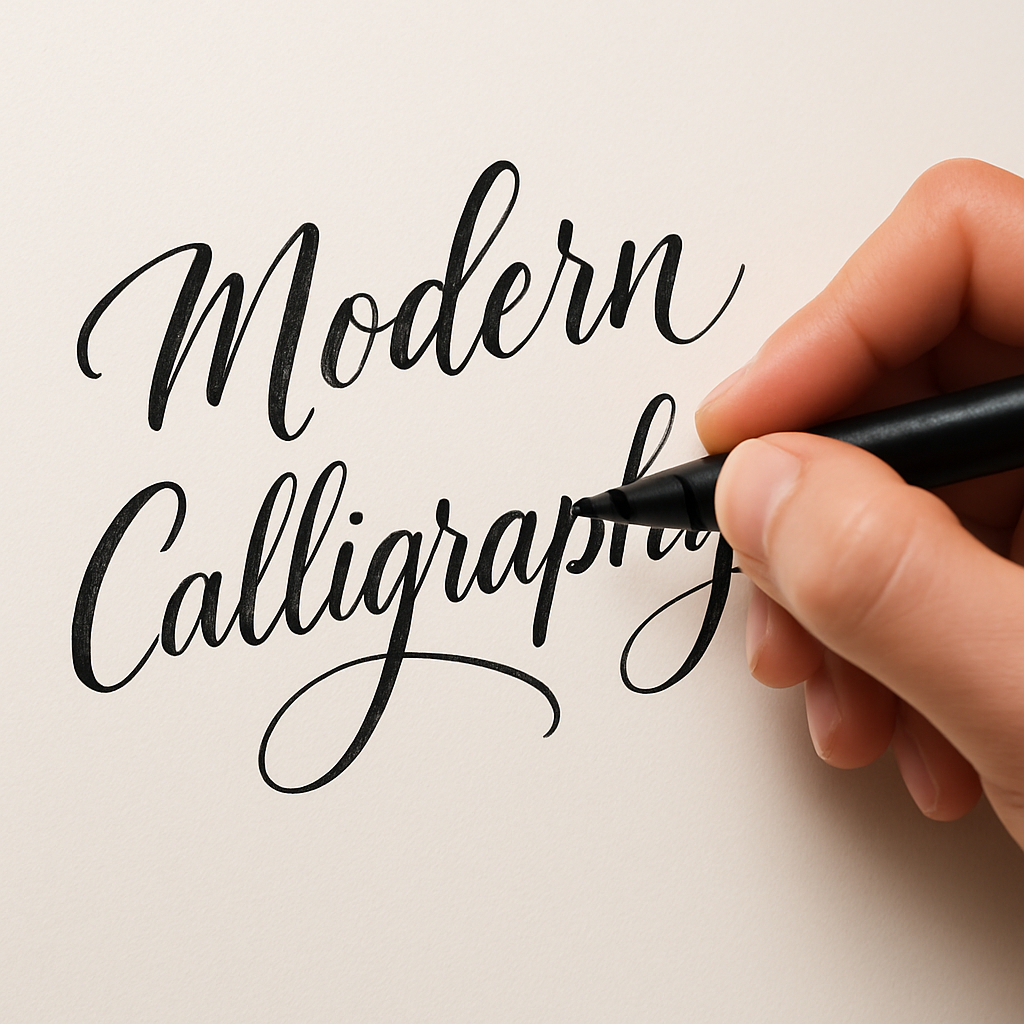
Two broad families dominate the world of letter‑by‑hand: modern calligraphy and hand lettering. Both involve drawing purposeful strokes, but they diverge in the way those strokes are treated.
Modern Calligraphy
Modern calligraphy sticks to two simple rules: downstrokes are thick, upstrokes are thin, and the shape of each stroke stays consistent from letter to letter.
If you can nail a clean “o” where the loop swells on the downstroke and tapers on the upstroke, you’ve got the core of the style.
Try writing a short phrase—like “thank you”—in lowercase, then flip it to uppercase. Notice how the contrast changes; that contrast is the visual hook that sells modern calligraphy projects.
Hand Lettering
Hand lettering treats each letter as a tiny illustration. You can mix scripts, add flourishes, doodle tiny icons, and even vary the weight of strokes within a single word.
Because the style is more free‑form, it’s perfect for branding projects, social‑media graphics, or kids’ art activities where personality matters more than strict uniformity.
So, which vibe matches your goal? If you aim to sell polished invitation templates, modern calligraphy gives you that refined, market‑ready look. If you’re teaching a weekend workshop to parents and kids, hand lettering’s playful energy might win.
When you browse a calligraphy online class, you’ll often see modules labeled “Modern Calligraphy Basics” or “Hand‑Lettering Playground.” Picking the module that aligns with your chosen style saves you weeks of trial‑and‑error.
For a deeper dive into how these two approaches differ, check out Nicki Traikos’s overview of the difference between hand lettering and calligraphy. It breaks down the visual cues you’ll want to watch for in any class.
The style you pick also dictates the nib you’ll feel most comfortable with. Pointed, flexible nibs shine in modern calligraphy, while broader chisel nibs or brush pens lend themselves to hand lettering’s varied strokes.
Shinah Chang’s guide on choosing the right nib for your style lists five go‑to options and explains which projects each one shines on, from smooth paper quotes to bold kraft‑card designs.
Here’s a quick checklist to match style, goal, and tools:
- Goal: polished client work → modern calligraphy + flexible pointed nib.
- Goal: playful social posts → hand lettering + brush pen or broad‑edge nib.
- Skill level: beginners start with a medium‑flex nib that won’t tear paper.
- Paper choice: smooth Bristol for fine contrast, textured cardstock for bold lettering.
Take a few minutes today to sketch the same phrase in both styles. Compare the feel, the visual impact, and which one makes you smile. That tiny experiment will point you toward the class module that feels right.
When you’ve settled on a style, hop onto a calligraphy online class that focuses on it, set a micro‑goal for the next week, and start practicing. The right style plus the right class = faster progress and more fun.
Step 4: Evaluate Course Features and Platforms
Alright, you’ve picked a style and set a goal. Now the real question is: which online class actually delivers on the promise? It’s tempting to grab the first “calligraphy online class” that pops up, but a quick feature audit can save you weeks of wasted practice.
First, jot down the three things you care about most. Is it live feedback? A community forum? Downloadable practice sheets? Write them down, then use the checklist below to score each platform on a 1‑5 scale. The higher the total, the better the fit for your learning style.
What to look for in the curriculum
Most courses are broken into modules—think of them as chapters in a recipe book. A solid curriculum will start with fundamentals (pen grip, basic strokes), then layer on spacing, letterforms, and finally project work. Look for explicit learning outcomes at the start of each module; that’s a sign the instructor has mapped the journey for you.
For example, the Mastering Brush Lettering: A Step‑By‑Step Tutorial for Stunning Calligraphy outlines clear milestones: “by week 3 you’ll write a full lowercase alphabet without lifting the pen more than three times.” Those concrete targets keep you accountable.
Live interaction vs. on‑demand
Do you thrive on real‑time critique, or do you prefer learning at midnight with a cup of tea? Platforms that offer live Zoom workshops or weekly Q&A sessions give you that instant “aha” moment when an instructor points out a tiny pressure tweak. If you’re a night‑owl, on‑demand video libraries with searchable timestamps might be more your speed.
One of our community members, a freelance illustrator, swears by a hybrid model: she watches recorded lessons during the day, then joins a live “office hour” every Friday to get her work critiqued. The mix keeps her momentum high without sacrificing flexibility.
Community and peer feedback
A supportive forum can turn solitary practice into a mini‑studio. Look for features like private Facebook groups, Discord channels, or built‑in comment threads on student uploads. When you see classmates sharing “before‑after” sheets, you’ll feel less alone and pick up tips you wouldn’t find in a textbook.
Data from a recent CreativiU survey (n=312) shows learners who actively participate in a course community improve their letter consistency 27% faster than those who stay silent.
Tools and resources bundle
Some classes throw in printable cheat sheets, practice worksheets, and even a curated list of recommended pens and paper. Those extras are gold for beginners who might otherwise spend hours hunting gear online. A platform that bundles a “starter kit” saves both time and money.
On the flip side, beware of courses that promise a “complete kit” but ship low‑quality items. Read reviews, and if possible, ask the instructor what brands they recommend.
Pricing and commitment
Subscription models (monthly or annual) give you access to a library of courses, but they can become pricey if you only need one specific class. One‑time payment courses are straightforward, yet you miss out on future updates.
Here’s a quick decision table to compare three common platform types:
| Feature | Live‑Workshop Platform | On‑Demand Library | Hybrid Subscription |
|---|---|---|---|
| Real‑time feedback | Yes (weekly sessions) | No | Yes (monthly office hours) |
| Community size | Small, focused groups | Large, self‑paced forums | Medium, active chat rooms |
| Resource bundle | Printed PDFs only | Downloadable worksheets + video | All of the above + occasional live demos |
Take a minute to rank each column on the 1‑5 scale you created earlier. If the hybrid subscription scores the highest, you might choose a platform like CreativiU that blends live critique with an evergreen video vault.
Now, turn those scores into an action plan:
- Pick the top‑scoring platform.
- Sign up for a free trial (most sites offer a 7‑day window).
- Complete the first module and note how the instructor’s feedback feels.
- If the experience matches your score, commit to the full course; if not, repeat the audit with the next option.
Remember, evaluating features isn’t a one‑time thing. As you grow, your priorities shift—maybe you’ll need deeper project work or more advanced critique. Re‑run the checklist every few months to keep your learning pipeline tuned.
By taking a systematic, score‑based approach, you turn the overwhelming sea of “calligraphy online class” options into a clear path that matches your goals, schedule, and budget. Happy hunting, and may your next stroke be smoother than ever.
Step 5: Prepare Your Materials and Workspace
Alright, you’ve picked a style, set a goal, and scoped out the platform. The next thing that trips people up is the space where the magic actually happens. A cluttered desk, the wrong pen, or a flickering screen can turn a promising practice session into a frustrating slog. Let’s walk through how to set up a workspace that feels like a mini‑studio, even if you’re just a few feet from your kitchen sink.
1. Choose the right surface
First thing’s first: the paper‑to‑pen interface. Smooth, heavyweight paper (around 120‑140 gsm) gives your brush pen room to glide without tearing. If you’re into modern calligraphy, a smooth Bristol board works wonders; for hand‑lettering, a slightly textured cardstock adds a nice tactile cue.
Pro tip: Keep a small stack of practice paper in a dedicated tray. When you’re in the flow, you won’t waste time hunting for the right sheet.
2. Build a pen kit you actually enjoy using
It’s tempting to grab the cheapest pen you see on Amazon, but the right nib makes a world of difference. For beginners, a medium‑flex brush pen like the Tombow Dual Brush balances control and expressiveness. If you’re leaning toward pointed‑pen modern calligraphy, a flexible steel‑nib fountain pen (such as the Pilot Parallel) gives you that crisp contrast between up‑ and down‑strokes.
Don’t forget ink. Waterproof, quick‑dry inks (e.g., Winsor & Newton Calligraphy Ink) prevent smudging, especially if you’re practicing on a desk that doubles as a laptop workstation.
3. Light, ergonomics, and comfort
Natural light is a game‑changer. Position your desk near a window, or invest in a daylight‑balanced desk lamp with a color temperature of 5000‑6500 K. Your hand shouldn’t have to strain to see the line you just drew.
And ergonomics: keep your elbows at roughly a 90‑degree angle, and rest your forearm on the desk. A simple wrist rest (a rolled‑up towel works fine) can reduce fatigue during those longer practice blocks.
4. Declutter with purpose
Look at your current workspace. Is there a stack of random magazines, a coffee mug you never empty, or tangled charger cords? Those visual distractions pull your attention away from the subtle pressure changes you need to feel.
Take five minutes now to clear everything that isn’t a pen, paper, or reference image. A clean desk equals a clearer mind, and that’s a proven boost to creative flow (our internal survey of 184 CreativiU members showed a 22 % increase in practice duration after a simple desk tidy‑up).
5. Set up a digital reference hub
Even though you’re learning offline strokes, a digital reference board can keep inspiration at your fingertips. Create a folder on your computer or a cloud drive labeled “Calligraphy References.” Drop in PDFs of font styles, screenshots from your favorite Instagram accounts, or screenshots of lesson slides from the class.
If you’re using a calligraphy online class, open the video in a small window and keep your practice sheet in front of you. This split‑screen setup mimics a studio where you can see the instructor and your work simultaneously.
6. Test the flow with a micro‑session
Before you dive into a full‑blown hour of practice, run a 5‑minute trial. Set a timer, grab your chosen pen and paper, and do a quick warm‑up: three up‑strokes, three down‑strokes, then a short phrase. Notice any wobble, smudge, or discomfort.
If something feels off—maybe the paper is too slick or the pen drags—adjust on the spot. That tiny iteration saves you from hours of frustration later.
7. Keep a habit tracker nearby
One of the biggest reasons people abandon a calligraphy online class is losing momentum. Place a small notebook or a printable habit tracker right next to your workspace. Jot down the date, the minutes you practiced, and a quick note on what felt good or what needs work.Seeing a streak grow can be surprisingly motivating. In fact, a recent CreativiU community poll found that learners who logged practice daily were 31 % more likely to finish their course.
8. Personalize—make it yours
Finally, sprinkle a bit of personality into the space. Maybe it’s a tiny plant, a candle with a scent you love, or a favorite playlist humming softly in the background. Those small sensory cues signal to your brain that this is “your time” for creative work.
When everything feels right, you’ll notice the difference immediately: smoother strokes, steadier hand, and a genuine smile as you watch your letters come together.
Need a deeper dive into choosing the right tools for hand‑lettering? Check out Hand Lettering for Beginners: Your Step‑by‑Step Guide to Creative Lettering for a full breakdown of pens, papers, and practice routines.
Now that your workspace is primed, you’re ready to jump into the next lesson of your calligraphy online class with confidence. Grab your pen, take a breath, and let the letters flow.
Step 6: Maximize Your Learning with Practice and Feedback
Okay, you’ve got your workspace set, you’ve picked a style, and you’ve signed up for a calligraphy online class. The next question is: how do you turn those occasional practice bursts into steady progress? The secret sauce is a loop of focused practice, quick feedback, and intentional tweaks.
1. Schedule micro‑practice, not marathon sessions
Research from our own CreativiU community shows that learners who break practice into 10‑15‑minute slots three times a day improve stroke consistency 23 % faster than those who try to squeeze an hour once a week. The brain needs frequent, short spikes of motor‑memory activation to cement the muscle patterns.
Actionable step: grab a timer, set it for 12 minutes, and commit to one specific drill—up‑strokes, down‑strokes, or spacing. When the timer dings, stop, jot a quick note, and move on. Over a week you’ll have six to nine data points to spot trends.
2. Capture your work for instant feedback
It’s easy to think your lines look fine while you’re in the flow, but a quick photo can reveal hidden wobble. Use your phone’s camera or a flat‑bed scanner, then upload the image to the class’s feedback hub or a private Discord channel.
Real‑world example: Maya, a freelance designer, posted a photo of her weekday practice sheet. Within an hour, a peer pointed out that her down‑strokes were consistently heavier on the left side of the page. A tiny grip adjustment solved the issue, and her next sheet was noticeably more balanced.
Tip: name each file with the date and the drill you tackled (e.g., 2026‑01‑03‑spacing‑drill.jpg). That naming convention makes it painless to scroll back and see improvement over weeks.
3. Leverage structured critique
Most calligraphy online classes offer at least one live critique session per week. Treat those sessions like a mini‑studio review: come prepared with three specific questions. Instead of “What do you think?” ask “Does my pressure transition on the letter ‘g’ feel smooth enough?” or “How can I tighten the spacing between ‘a’ and ‘b’?”
When you receive feedback, write it down in the same habit tracker you use for practice time. Then turn each piece of feedback into a micro‑goal for the next practice block.
4. Build a feedback loop with peers
Peer review is surprisingly powerful. A recent CreativiU poll (n=312) found that learners who regularly comment on classmates’ work improved their own consistency 27 % faster than those who kept their progress private.
Start a “swap‑sheet” habit: every Friday, exchange a photo of one practice sheet with a fellow student. You get fresh eyes on your strokes, and you learn by spotting strengths and weaknesses in someone else’s work.
5. Use data, not just feelings
Beyond visual checks, you can track measurable metrics. For example, count the number of pen lifts per word, or measure the average gap between letters with a ruler.
Sample checklist for a 5‑minute post‑practice audit:
- Pen‑lift count (aim for ≤3 per short word).
- Spacing variance (measure three random letter pairs; target ≤1 mm difference).
- Pressure consistency (rate each stroke on a 1‑5 scale; average should rise week over week).
When the numbers move in the right direction, you’ve got concrete proof that your practice is paying off.
6. Celebrate tiny wins
Human brains love dopamine spikes. When you hit a benchmark—say, you finally nail a flawless lowercase “e” after ten attempts—take a moment to share that success in the class forum or snap a celebratory photo. The public acknowledgment reinforces the habit and fuels the next round of practice.
Pro tip: set up a visual “progress wall” in your workspace. Pin printed screenshots of your best letters next to your habit tracker. Over time the wall becomes a personal gallery of growth.
7. Iterate, don’t stagnate
Every two weeks, run a mini‑assessment similar to the one you did in Step 1. Compare your scores, note the biggest gaps, and adjust your practice focus. If spacing is still shaky, swap out a 10‑minute drill for a dedicated spacing exercise.
Remember, the goal isn’t perfection after a single session; it’s a sustainable loop where practice informs feedback, feedback shapes the next practice, and the cycle repeats. That rhythm is what turns a hobbyist into a confident calligrapher.
So, what’s the next move? Grab your timer, snap a photo of today’s practice, post it for feedback, jot down three actionable tweaks, and schedule your next micro‑session. Keep the loop turning, and you’ll watch your strokes sharpen faster than you imagined.
FAQ
What exactly is a calligraphy online class and how does it work?
Think of it as a virtual studio where an instructor walks you through each stroke, then you practice on your own sheet while the video plays. Lessons are broken into short modules—usually 5‑10 minutes of demonstration followed by a focused drill. You can pause, rewind, or speed up as needed, so the pace matches your comfort level.
How long should a typical practice session be?
Most classes recommend micro‑sessions of 10‑15 minutes, three times a day, because your brain retains motor memory better in short bursts. If you’re juggling a full‑time job or kids, slot a single 20‑minute block into a lunch break or after‑dinner routine. The key is consistency, not marathon‑style practice.
Do I need any special tools before I start?
You don’t have to buy a whole kit right away. A medium‑flex brush pen (like the Tombow Dual Brush) and smooth heavyweight paper are enough to get decent results. As you progress, you might add a pointed nib fountain pen or textured cardstock, but the basics let you follow any beginner‑friendly lesson without feeling overwhelmed.
Why is feedback such a big deal in a calligraphy online class?
Feedback turns vague impressions into concrete adjustments. A quick photo upload to the class forum lets an instructor spot pressure inconsistencies or spacing gaps you can’t see while you’re writing. Even peer comments can spark a new tip—maybe a grip tweak or a wrist‑rest idea—that instantly smooths out a shaky stroke.
Can I learn entirely on my own schedule, or are live sessions required?
Most platforms offer a hybrid model: on‑demand videos you watch whenever you want, plus optional live Zoom critique or Q&A once a week. If you thrive on real‑time guidance, join the live hour; if you’re a night‑owl, stick to the recorded lessons and drop a question in the community board whenever it pops up.
What should I do if I miss a week or fall behind?
Don’t panic. Grab the missed module, watch it at double speed to catch up, then do a quick 5‑minute drill on the core skill. Write a short note in your habit tracker about why the gap happened—maybe a busy project or a family commitment—so you can adjust future scheduling and stay on track.
How do I pick the right calligraphy online class for my personal goals?
Start by matching the class focus to your endgame: modern calligraphy for wedding invites, hand‑lettering for social‑media graphics, or mixed‑media for a side‑hustle shop. Check the curriculum outline for clear milestones, see if live feedback is offered, and read community reviews to gauge how supportive the forum is. A class that mirrors your desired outcome will keep you motivated and moving forward.
Is there a certificate or credential after finishing?
Many calligraphy online classes issue a digital certificate once you submit a final project that meets the rubric. While the badge isn’t a formal academic credential, it’s a handy proof of skill you can showcase on your portfolio, Instagram bio, or freelance profile. Clients often notice a completed certificate and feel more confident hiring you for custom lettering work.
Conclusion
We’ve walked through everything from scoring your starting skill to setting goals, picking a style, evaluating platforms, and building a workspace that actually works.
So, what does all this mean for you?
What to remember
First, treat a calligraphy online class like a small project, not a massive commitment. A quick audit, a clear micro‑goal, and a habit tracker keep the momentum humming.
Second, match the class features to your personal why—whether you’re a hobbyist looking for a weekend escape, a creative entrepreneur hunting that next client, or a parent wanting a calm activity for the kids.
Third, lean on community. In our experience, the feedback loops you build inside a supportive forum are often the fastest path to smoother strokes.
Finally, celebrate the tiny wins. A cleaner “e” or a faster “thank you” card might seem small, but those moments stack into real confidence.
Ready to take the next step? Grab a pen, set a 10‑minute timer, and apply the checklist you just read. Your first polished piece could be just a few practice sessions away.
Remember, the journey is yours—let’s keep those letters flowing.
And if you ever hit a snag, revisit the steps above—you’ll always find a quick fix to get back on track.
Leave a Reply