Ever found yourself staring at your iPad, Procreate open, but feeling completely stuck? Like, you know the tool’s powerful, but where do you even start as a beginner? You’re not alone. That moment of overwhelm is something everyone faces when diving into digital art with Procreate — it’s like holding a paintbrush in a whole new universe.
But here’s the thing: learning Procreate doesn’t have to feel like decoding a secret language. With the right classes tailored specifically for beginners, you can skip the frustration and start creating right away. Think of it like having a friendly guide sitting next to you, showing you the ropes step by step instead of guessing on your own.
Why bother taking Procreate classes for beginners? Because the joy is just as much in the journey as in the artwork you end up with. Learning the basics — layers, brushes, and gestures — unlocks a playground of possibilities. Plus, you get to grow your skills while having fun, not feeling like you’re piecing together a puzzle blindfolded.
Wondering where to find that helpful beginner guide? It’s all about picking the right course that matches your pace and style. Whether you want quick tutorials or in-depth lessons, there’s something out there that fits. Actually, if you want a great starting point for digital art basics that complement Procreate, check out Getting Started with Digital Art: A Beginner’s Guide to Online Courses. It’s packed with tips to set you up for success before even touching your stylus.
So don’t let the fear of the unknown stop you. If you’re ready to unleash your creative side and finally make pieces that make you proud, the best first step is to dive into beginner-friendly Procreate classes. They’re made to walk you through every brush stroke, so you’re not just learning a tool but building a new way to express yourself.
Ready to get your hands dirty, digitally? Let’s dive in and sketch out your creative future.
TL;DR
Feeling stuck with Procreate? Beginners’ classes break down that wall by guiding you through essentials like brushes, layers, and gestures—step by step. With the right course, you’ll lose the overwhelm and gain confidence, turning digital sketches into art you’re truly proud of.
Start small, pick a beginner-friendly class, and watch your creativity take off. It’s not about talent here, it’s about learning the ropes together.
Understanding Procreate: Basics Every Beginner Should Know
Jumping into Procreate for the first time can feel like unlocking a brand-new world. You’re staring at a clean digital canvas and a toolkit so vast, it’s easy to freeze up. But here’s what I’ve found: getting cozy with Procreate’s basics quickly turns that awkward first meeting into a creative jam session between you and your iPad.
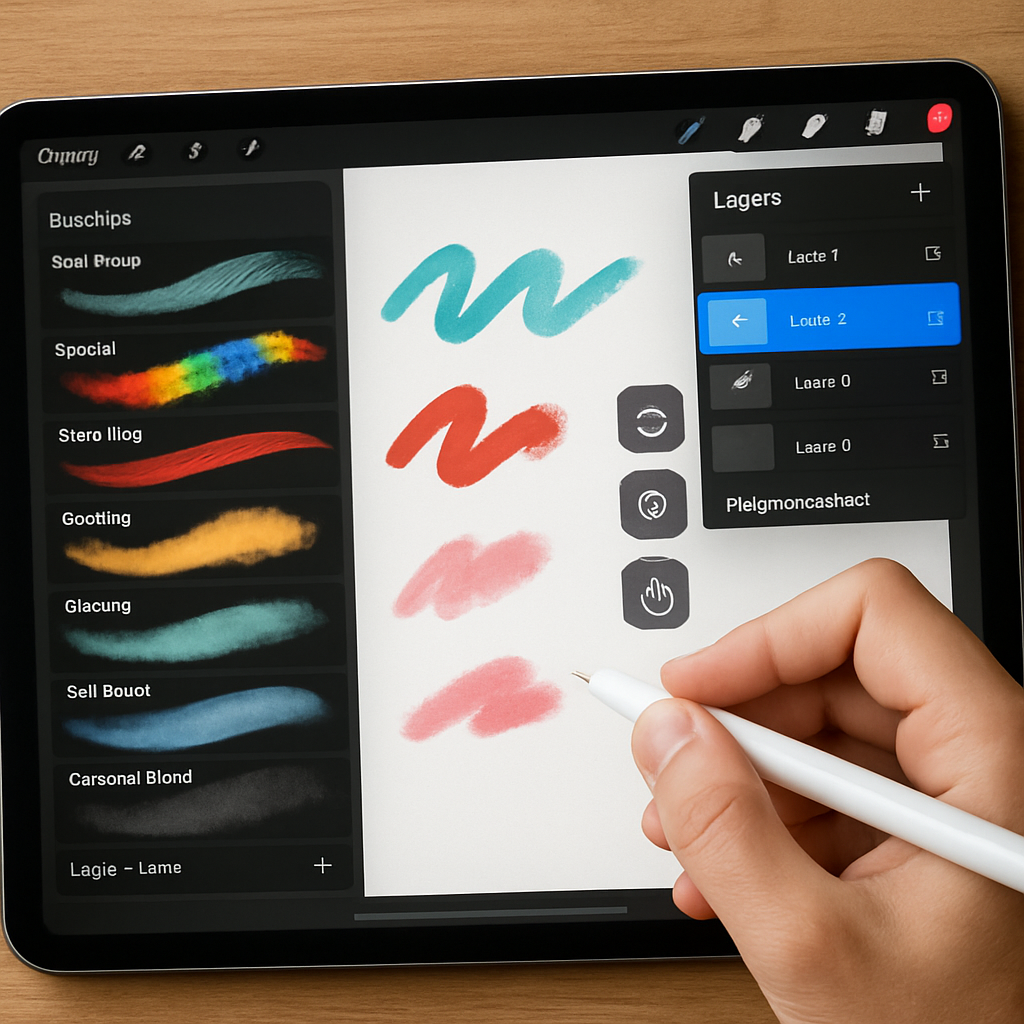
Let’s break it down. One of the first things you’ll notice—and then love—is the brush library. Think of it as your paint shelf, but way cooler. Procreate offers hundreds of brushes ranging from pencil sketches to watercolor washes and beyond. Don’t get overwhelmed. A lot of beginners start with just a handful of these, getting comfortable with how pressure and tilt affect stroke style. Play around; scribble, blend, smudge—this is your playground.
And speaking of playgrounds, layers are another gem. If you’re used to traditional drawing, layers can feel strange at first. But they’re a game changer. Imagine each part of your drawing on a separate transparent sheet stacked on top of each other. Mess up? No sweat. You just erase or tweak one layer without wrecking the whole thing. It’s like magic, giving you freedom to experiment without the fear of ruining your work.
Have you already tried toggling layers on and off? That little trick alone is a lifesaver when you need to check how each element fits into your composition. Plus, organizing layers with groups can keep your files neat, especially as your pieces get more detailed. You’ll thank yourself later.
Now, let’s talk gestures. Procreate’s user interface leans heavily on intuitive multi-touch commands that really speed things up once you get the hang of them. Two-finger tap to undo, three-finger tap to redo, pinch to zoom—it’s all designed to keep you in the flow. The first few times, you might fumble around, but then it becomes second nature. Trust me, these little shortcuts make working in Procreate feel more like a rhythm than a chore.
So, why does mastering these basics matter in your journey with procreate classes for beginners? Because learning each feature bit by bit, guided by friendly instructors, takes away the guesswork. It’s one thing to watch videos that show tools; it’s another to have a coach who explains why ordering your layers a certain way helps your workflow or demonstrates how to use brushes to create texture instead of just color. That kind of insight turns fumbling into flow.
If you’ve been wondering how to get started without feeling swamped, a great tip is to pick up classes that focus specifically on foundational skills. These usually walk you through setting up your canvas, choosing brushes, mastering layers, and using gestures effectively—no skipping ahead to advanced effects before you’re ready. This approach builds confidence. You’ll end sessions thinking, “Okay, I actually get this now.”
And honestly? That feeling, of finally understanding your tools, is priceless. It’s like turning a blank page from a source of anxiety into a launchpad for whatever you want to create next.
One thing you might not expect is how playing with these basics can ignite your style. Once you see how different brushes behave or how layering colors can add depth, new ideas start popping up. It’s hard not to get inspired when the tools suddenly feel like an extension of your own hand—and your imagination.
You don’t have to master everything overnight. Think of your early Procreate sessions like warm-up stretches before a run: easy, essential, and setting you up for the real creative sprint lies ahead. Next up, you’ll discover how those basics evolve into dynamic pieces that truly showcase your vision.
Before you dive deeper, here’s a practical nudge: try creating a simple sketch using just three layers—one for outline, one for base colors, and one for shadows or highlights. Experiment with a couple of brushes, and use undo and redo gestures like you’re playing a game. You’ll be surprised how much progress that little exercise makes.
Feeling ready to take this further? Consider enrolling in dedicated beginner-friendly digital art courses, like those offered by trusted platforms that guide you through these core Procreate skills step-by-step, helping you turn that initial curiosity into real, satisfying art.
Because at the end of the day, it’s not just about learning a tool. It’s about unlocking your creative voice—your style, your way.
Choosing the Right Procreate Classes for Beginners
Let’s be honest: picking the perfect Procreate class can feel like trying to find a needle in a haystack. There’s so much out there—from bite-sized tutorials to deep dives that could last weeks. How do you know which one won’t leave you more confused or bored halfway through?
Here’s the thing: the right Procreate classes for beginners aren’t about fancy jargon or overwhelming features. They’re about fitting where you are now, matching your learning style, and helping you build confidence one brush stroke at a time.
Start With Your Goals (And Be Real With Them)
Before clicking “enroll,” ask yourself what you really want. Do you want to casually sketch portraits? Design fun patterns for your merch? Or maybe you want to master full digital paintings someday? Your goals matter because a class focused on realistic portraiture might not be the right fit if you’re into whimsical doodles.
For example, Sarah, a hobbyist who just wanted to get comfortable with digital sketching, found an introductory course that broke lessons into 10-minute chunks. She could fit it into her busy schedule and wasn’t pressured to finish quickly. The pacing really helped her stick with it.
Meanwhile, Jake wanted something more immersive, with assignments and feedback. He signed up for a beginner Procreate workshop with live sessions and peer critiques—helping him stay accountable and push his skills faster.
Look For Courses That Break It Down Clearly
One trap is picking a class that zooms through features or assumes you already know the basics. If you’re new, these can feel like drinking from a firehose. You want a course that starts with the workspace, brushes, layers, and gestures—slowly building up so you don’t feel lost.
Try to find classes that provide clear, step-by-step videos paired with written instructions or downloadable resources. This way, if you miss something on video, you can quickly reference notes.
Procreate’s own official tutorials are a helpful supplement, but many beginners benefit from community-driven courses where instructors share tips on avoiding common newbie mistakes—like accidentally merging layers you wanted separate.
Check For Active Support and Community
Ever tried watching a tutorial and got stuck, with no one to ask? Painful, right? Having access to an instructor or an active student forum can be a game-changer. Look for classes that include Q&A sections, Facebook groups, or live office hours.
You’ll get feedback, motivation, and a place to share your work without feeling judged. Plus, seeing others’ progress reminds you that everyone struggles at first—it’s not just you.
Don’t Overthink Tools or Fancy Setup — Focus on Fundamentals
I get it: all those brushes and settings can make you feel like you need the latest iPad, fancy stylus, or plugins before you even begin. But guess what? Many beginners feel the same, and it doesn’t matter as much as you think.
A great beginner course helps you master Procreate’s core tools on whatever device you have. You’ll learn how to use native brushes, work with layers, and handle gestures efficiently before diving into customizing your setup. That foundation makes everything else click.
Practical Steps To Choose Your Class Today
- Read reviews carefully. Look for feedback from other beginners about course pace, clarity, and instructor support.
- Preview free lessons. Many platforms let you sample content before buying. See if the teaching style feels comfortable.
- Check course length. Don’t bite off more than you can chew. It’s better to start with shorter courses that you can complete rather than a mega-course that overwhelms.
- Consider your budget. Many affordable or even free options exist that still deliver great beginner value.
To give yourself a booster-shot of confidence, pairing a beginner-specific Procreate course with a general digital art introduction can really speed things up. You might want to explore options like Getting Started with Digital Art: A Beginner’s Guide to Online Courses which offers essential foundational skills that make learning Procreate smoother.
And if you’re the type who thrives on seeing progress, consider courses with project-based lessons. Making real art as you learn—like designing your own sticker pack or a simple character sketch—can turn frustrations into “aha” moments.
So, what’s the bottom line?
Choosing the right Procreate classes for beginners is all about matching the course to your goals, learning pace, and support needs. It’s okay to try a couple before you settle in. The goal is to feel curious, motivated, and never stuck.
Because once you find your groove, Procreate isn’t just an app anymore. It’s your playground, your sketchbook, your creative BFF.
Essential Tools and Setup for Procreate Beginners
Starting with Procreate can feel a bit like showing up to a new hobby with too many choices and not enough guidance. You might have that familiar flutter of excitement mixed with “Uh, where do I even begin?” The good news? The tools and setup you absolutely need are pretty simple—and getting them right early can save you a whole lot of hassle down the road.
First Things First: The Hardware You Really Need
Let’s keep it real: you don’t need the most expensive iPad on the market or a deluxe stylus packed with every imaginable feature. Procreate works best on iPads that support Apple Pencil, which is usually iPad models from 2018 and newer. The iPad Air and Pro line are favorites because of their size and power, but beginner-friendly versions like the iPad 9th generation are also solid options that won’t break the bank.
And about that stylus—Apple Pencil feels almost like magic. It’s pressure-sensitive, tilts to create different strokes, and connects seamlessly. Using your finger might seem fine at first, but trust me, if you’re planning to dive into Procreate classes for beginners, investing in an Apple Pencil (even the first generation) will make a huge difference. It’s like going from crayons to a real set of brushes.
Setting Up Your Workspace in Procreate
Once you’ve got your gear, spending time customizing your Procreate setup feels like setting the table before a big meal. The app starts you off with a clean canvas, but how you arrange brushes, palettes, and layers can shape how naturally your creativity flows.
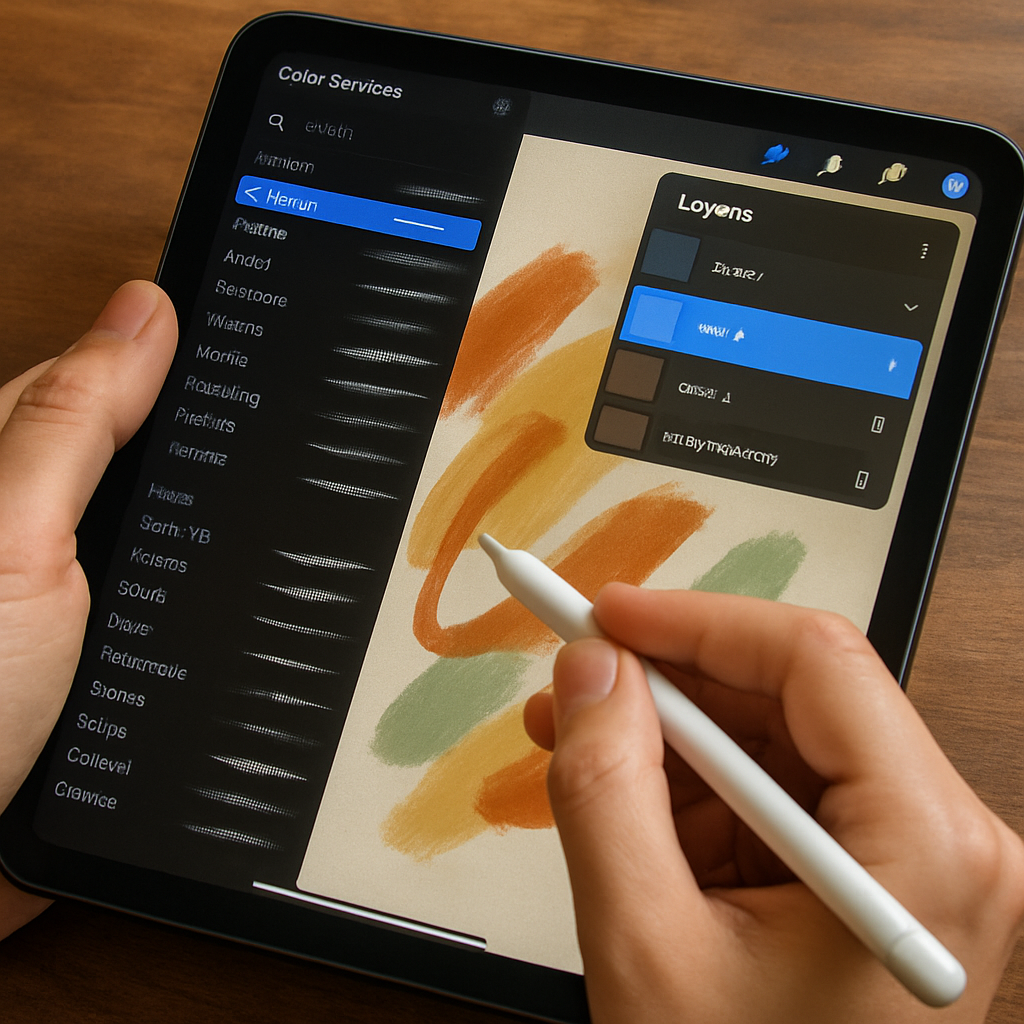
Create a dedicated “starter” brush palette. Procreate has hundreds of brushes, which can be overwhelming, so begin by picking just a handful that suit basics like sketching, inking, and shading. This keeps your tools handy without distracting choices. You can always add more as you go.
Don’t forget layers—a total game changer. Naming layers might feel tedious when you’re excited to paint, but it prevents confusion, especially on complex projects. Think of layers like clear sheets stacked on top of each other, so if you mess up on one, you only need to fix that piece.
Procreate’s Built-In Features That Make Your Life Easier
Ever heard of gesture controls? This is the secret sauce that seasoned digital artists rave about. In Procreate, a simple two-finger tap undoes your last action. Pinch to zoom, swipe with three fingers to redo. It sounds like a neat trick, but these little gestures make creating silky-smooth and frustratingly minimal.
Here’s a quick real-world nugget: I once spent two hours drawing a character’s face and couldn’t get a detail right. Instead of scrapping it, I used the Liquify feature to nudge eyes and lips subtly. It saved the sketch and boosted my confidence about using Procreate tools to fix “mess ups” on the fly.
Also, explore Drawing Assist features like symmetry mode if you’re sketching things like faces or patterns. It makes balanced designs way easier and less intimidating.
Organize Your Files to Keep Calm and Create
You might want to jump straight into art, but setting up folders on your iPad for your projects keeps the chaos at bay. Name files clearly (e.g., “Flower Study 2025-11-01”) and save versions instead of overwriting. Later, you’ll thank yourself when looking back or sharing work for feedback.
Bonus tip: backup your iPad regularly to iCloud or another cloud service. Losing hours of art because of a crash is honestly heartbreaking—and totally avoidable.
Practical Next Steps for Your Setup
So how do you put all this into motion without going in over your head? Here’s a simple checklist:
- Check your iPad model and get an Apple Pencil if possible.
- Open Procreate and create a new canvas sized around 2048×2732 pixels—a nice middle ground for beginners.
- Create a custom brush palette with just 5-7 brushes to avoid overwhelm.
- Learn and practice basic gestures like undo and zoom in your first sketches.
- Practice naming layers and organizing them as you build your artwork.
- Set up folders on your iPad for Procreate projects and start backing up regularly.
And honestly? Don’t sweat having every tool or feature down right away. The work comes through experimentation and steady play, which is exactly why some of the best Procreate Beginners Series lessons focus on gradual exploration—the kind that lets you fall in love with the tools as you learn them.
Ready to get going? Your perfect Procreate setup isn’t about gadgets—it’s about starting simply and growing into your full creative potential. That setup you create today will be your launchpad for years of art-making ahead.
Core Techniques Taught in Procreate Classes for Beginners
If you’re just starting with Procreate, the sheer number of tools and features can feel like staring at a giant toolbox without knowing which wrench to grab first. Trust me, that’s totally normal. But the magic of good Procreate classes for beginners lies in breaking down this overwhelming mess into manageable, core techniques that build your confidence and skill steadily.
Understanding the Canvas and Basic Gestures
You can’t create art without a canvas—this much is obvious. But in Procreate, learning how to navigate your workspace is the very first step that many folks overlook. Beginner classes typically start by showing you how to create a new canvas with custom dimensions—think something like 2048×2732 pixels, which is a sweet spot for most projects.
Then come the gestures—those quick finger dances that undo mistakes, zoom in on details, or switch tools instantly. For example, the quick two-finger tap to undo your last stroke is a lifesaver. And pinching to zoom gives you that close-up view to perfect those tiny details. The beauty of these gestures is that they make the app feel fluent and natural once you get the hang of them.
Here’s a tip: spend a few practice minutes drawing squiggly lines and then zooming, undoing, or redoing. This feels trivial but lays a foundation that makes everything else easier.
Mastering Brushes and Sketching Fundamentals
Next, you’ll dive into brushes—a world as vast as it is varied. Beginner classes wisely focus on a handful of essential brushes instead of drowning you in the hundreds of options Procreate offers. Usually, you’ll start with a pencil brush for sketching, an inker brush for clean lines, and a shading brush to add depth.
Why does this matter? Because starting simple teaches you how different brushes behave. For instance, try sketching a leaf with the pencil brush and then switch to the inker to outline it. Notice how pressure and tilt influence the stroke — this tactile feedback is a game-changer, making your digital drawing feel alive.
Here’s something that stuck with me from a recent beginner course: instructors often highlight the differences between opacity and flow. Opacity controls how transparent your brush strokes are; flow affects how much paint flows onto the canvas with each stroke. Experimenting with these helps you create texture and volume—skills crucial to elevating your work.
Working with Layers Like a Pro
If you’ve ever worked with transparencies or traced on sheets of paper stacked over each other, you get the gist of layers. Procreate classes for beginners put a huge emphasis on layering because it’s a fundamental technique that saves tons of headaches.
Instead of committing to every stroke, you work non-destructively: sketch on one layer, ink on another, and add colors on separate layers. You can fiddle with each without ruining the rest. For example, if your character’s eyes don’t quite pop, you can just tweak that layer without wiping out the whole face.
A common beginner mistake is naming layers “Layer 1,” “Layer 2” until they get lost. Good courses teach you to name and group layers immediately. It’s like labeling your spice jars in the kitchen—it saves time and stress down the line.
Basics of Selection, Transformation, and Adjustment Tools
Procreate introduces selection tools to isolate parts of your drawing so you can tweak or move them without affecting the rest. You’ll learn to use the freehand selection to trace exactly what you want or the automatic selection to click on a color zone.
Once selected, the transform tool lets you scale, rotate, or warp your selection. Imagine drawing a flower but feeling the petals are a bit too small—without layers and selection tools, you’d have to start all over. With these techniques, you adjust just the petals, keeping the rest intact.
Adjustment tools like Gaussian Blur or Hue, Saturation, and Brightness let you polish your art. Many beginners find this fascinating because it’s like adding the final coat of glaze to pottery—suddenly, your piece feels finished.
Using Drawing Assist and Guides for Symmetry & Precision
Procreate has a Drawing Assist feature that beginners rave about. It’s the digital equivalent of those nifty stencils or guides in traditional art. Symmetry helps when you’re drawing something like a face or a mandala, where both sides need to mirror perfectly.
In classes, you often practice by creating symmetrical butterflies or faces, learning to rely on this assist to build muscle memory and precision. This technique quickly boosts quality without getting lost in complicated details.
Real-World Practice: Project-Based Learning That Sticks
The best classes don’t just dump technique on you, they invite you to make actual art. For instance, you might be guided to create a simple digital portrait or a cute mascot character using the brushes, layers, and selection tools you’ve just learned.
This project-based approach means you’re not staring at widgets—you’re solving creative problems, which sticks way better. Plus, you get something cool to show off, boosting motivation.
Here’s a neat detail: some courses recommend comparing your first sketch to your latest at the end of each lesson. Seeing progress visually is incredibly motivating when you’re in that beginner struggle phase.
Want to keep exploring beyond class? Check out resources like the Procreate Beginners Series which break down these techniques into bite-sized, actionable lessons.
So, what’s the takeaway? Mastering Procreate isn’t about racing through features. It’s about getting cozy with a few core techniques: canvas setup, brush control, layering, selection, and precision guides. Treat these as your toolkit, and you’ll build art confidently while having a blast.
Comparing Popular Procreate Classes for Beginners
If you’re anything like me, diving into Procreate feels a bit like opening the hood of a spaceship instead of just a simple paintbrush. So many options for classes are out there, it’s easy to get overwhelmed wondering: which one actually makes a difference when you’re just starting out?
Let’s break down some popular Procreate classes geared specifically for beginners, so you can spot the one that clicks with your learning style and creative goals.
Domestika’s “Procreate for Beginners: Digital Illustration 101”
This course is a fan favorite for a reason. The instructor, Brad Woodward, combines clear explanations with a friendly, down-to-earth vibe that makes Procreate’s myriad tools feel approachable rather than intimidating. Based on dozens of enthusiastic reviews, students love how Brad doesn’t just teach you to push buttons but helps you understand why and when to use each tool.
One reviewer mentioned how they paid ten times the price for a live class yet learned less than in this one session—quite the testimonial! The course focuses on fundamental brush control, layering, and some essential gestures, all layered with practical projects like simple portraits or icons to gently nudge your creativity forward.
But heads up, if you’re brand new not just to Procreate but also to digital art in general, you might find some lessons a bit fast-paced. It helps to have a baseline familiarity with drawing concepts to get the most from it.
CreativeLive’s Procreate Beginner Series
Another solid contender, CreativeLive’s beginner courses often emphasize paced learning with bite-sized lessons. They’re great if you prefer absorbing info in small chunks that you can revisit anytime. These classes tend to cover canvas setup, basic brushes, and layering techniques thoroughly.
A real strength here is the hand-holding approach. Instructors walk you through setting up your workspace and organizing your layers thoughtfully—which is a lifesaver when you’re battling the temptation to just dive in and end up with chaos.
What you don’t get as much of compared to other platforms is community interaction or peer feedback. So if you want more social learning or critiques, you might supplement with an art forum or local group.
Udemy’s Procreate Basics Courses
I know Udemy has a ton of options, but the general pattern with their Procreate beginner courses is that they tend to vary widely in style and depth since anyone can create one. That’s not necessarily bad—if you read reviews carefully and pick one by an instructor with credible art background, you’ll find some excellent gems.
Many courses provide lifetime access to materials, which means you can learn at your own pace, rewind confusing parts, or practice specific techniques when you have time. A common feature includes downloadable project files and customized brushes.
Still, the lack of a standardized curriculum means the training might jump around a bit, so it’s on you to keep track of what you’re mastering and what needs more work.
Skillshare’s Project-Based Procreate Classes
One of the reasons Skillshare classes are popular is because they focus heavily on completed projects rather than just tools. So if you’re the kind of learner who clicks better when there’s a clear, creative goal—say designing a mascot or a floral illustration—you might find these classes inspiring.
They break down lessons into manageable segments, often with short videos on each Procreate feature as it applies directly to your project. The downside? You’ll likely need a subscription, and classes might presume some basic familiarity with digital art or drawing software already.
How To Choose The One That’s Right For You
Here’s what I’d suggest:
- Think about your preferred learning style—do you want step-by-step guidance, community feedback, or hands-on project focus?
- Look for classes with strong reviews specifically mentioning how beginner-friendly the pace and explanations are.
- Check if the class offers downloadable resources or cheat sheets; these little extras save you hours of trial and error.
- Don’t be shy about mixing and matching—taking a course on brush basics from one platform and layering techniques from another can be a winning combo.
Also, keep in mind that investing in a course with clear, practical projects often beats jumping straight into feature-packed tutorials. Projects give your learning real context, which helps everything stick better.
| Course | Focus | Best For | Potential Drawbacks |
|---|---|---|---|
| Domestika: Procreate for Beginners | Comprehensive tool walkthrough + projects | Beginners with some drawing experience | May feel fast-paced for total novices |
| CreativeLive Beginner Series | Step-by-step guided basics with workspace setup | Slow-paced learners valuing structure | Limited community interaction |
| Udemy Procreate Courses | Varied depth, lifetime access, project downloads | Self-driven learners comfortable navigating options | Inconsistent quality, variable teaching styles |
| Skillshare Project-Based Classes | Hands-on creative projects | Visual learners wanting motivation through projects | Requires subscription, may expect existing basic skills |
And if you’re ready for a deep dive into a well-structured, beginner-friendly Procreate course, check out Domestika’s popular Procreate beginners course. It’s packed with clear lessons and practical tips from an engaging instructor—a combo that many learners find transformative.
Alternatively, if you want learning split into bite-sized lessons you can dip into repeatedly, CreativeLive’s Procreate beginner series is well worth exploring.
Choosing your perfect beginner-friendly Procreate class doesn’t have to take forever. Start by thinking about what kind of teaching you connect with most, and then pick a course that fits that vibe. Trust me, once you find that groove, you’ll love showing up to your digital canvas instead of dreading it.
How to Practice and Improve After Completing Procreate Classes
So, you’ve wrapped up your Procreate classes for beginners. First off, congrats! That moment when you’re done feels pretty great, right? But if you’re like most folks, the real question hits soon after: “Now what?” Because finishing a class is just the start, not the finish line.
Here’s the thing—Procreate is a playground, and your skills are the swings and slides you want to get comfortable with. Just watching or following along isn’t enough. You need to play—again and again—to really own what you learned.
Set small, real projects to build daily habits
One of the easiest ways to keep improving is by setting bite-sized challenges. For example, dedicate 10 minutes a day to sketching something simple—maybe a coffee cup, a leaf, or that old sneaker lying around. It doesn’t have to be perfect; it just has to be consistent.
Why daily? Because muscles remember better with frequent practice. Think about it like riding a bike: you wouldn’t wait weeks between rides and expect to stay steady, right? Same with digital brushes and layers. The more you touch them, the more natural they feel.
Experiment beyond your comfort zone
After classes, it’s tempting to stick only with what you know—your favorite brushes, or those basic layers. But stepping outside those walls is where real growth happens. Try new brushes, play with opacity, or switch up color palettes you usually avoid. Maybe even doodle something completely different from your usual style.
A friend of mine tried a Procreate tutorial, then spent weeks just experimenting with watercolor brushes. She told me it was like discovering a new language after learning the alphabet. That playful exploration made her art bloom in ways structured lessons couldn’t.
Seek feedback and connect with others
It might feel scary, but sharing your work and getting feedback is hugely valuable. There are plenty of online communities—from official forums to social media groups—that welcome newbies. Post your progress, ask questions, and watch how your perspective shifts.
This kind of connection motivates you to keep going and also reveals blind spots you can’t see when working solo. Remember, even pros get feedback—it’s part of the process.
Use layered projects to track your growth
Another practical tip: save every step of your important projects as separate layers or versions. Then, when you’re feeling stuck or frustrated, compare your current work to earlier versions. Seeing your progress visually is a powerful reminder of how far you’ve come—and it’s also a confidence booster when you want to tackle a tougher piece.
Plus, having those saved layers lets you revisit and remix old ideas without starting from scratch. You keep building without wasting energy.
Consider online resources to deepen your skills
Even after the beginner courses, lots of free and affordable tutorials can push you further—like those focusing on Procreate’s animation features or texture creation. Sites like CreativiU’s beginner digital art guide break down essential concepts with plenty of practice tips.
Trying new techniques from trusted resources can keep your practice fresh and fun, rather than a dull routine.
Finally, don’t be too hard on yourself. Improvement is a winding road, full of ups and downs. The fact that you keep showing up to your tablet—that’s the biggest win. Before you know it, you won’t just be following instructions; you’ll be inventing your own style.
Frequently Asked Questions About Procreate Classes for Beginners
Starting out with Procreate can feel a little like opening a giant toolbox where you have no idea what half the tools do. So many questions pop up, right? Let’s clear some of those up together.
What exactly do Procreate classes for beginners cover?
Good question! Most beginner classes start with the basics: setting up your canvas, understanding layers, and getting to know brushes. Think of it like learning to ride a bike—you start without training wheels and get a feel for balance before trying tricks. These classes usually guide you through simple projects, helping you build confidence with each stroke.
Do I need any prior drawing experience to join?
Short answer: no. You don’t have to be a seasoned artist. But, if you’ve ever doodled or played around with sketching, it’ll definitely give you a leg up. Procreate classes for beginners often assume you’re new to digital art but might have some traditional drawing basics. If that sounds intimidating, remember, everyone starts somewhere—and these courses are designed to walk you through every step.
How long do these classes typically last?
It varies quite a bit. Some beginner courses are super short, just a few hours total, perfect if you want a quick intro. Others spread over days or weeks with bite-sized lessons so you can practice between sessions. The best plan? Pick what fits your schedule and doesn’t overwhelm you. Remember, art isn’t a race.
Will I learn how to use all Procreate features?
Probably not in beginner classes. Procreate is a beast with tons of features—from animation to advanced brush settings. Beginners usually get the essentials first to avoid overload. Once you feel comfortable with those basics, it’s easier and more fun to explore the advanced stuff on your own or in more specialized classes.
What equipment do I need to start?
You basically need an iPad that supports Procreate and an Apple Pencil. No fancy extras necessary. It’s like having a sketchpad and pen, but everything’s digital. If you’re wondering about models or how to set things up, beginner classes often cover that too, or you can check out local tips for the best setups within your budget.
Can I pause and replay lessons if I’m stuck?
One of the perks of online classes is that you’re in control of the pace. Most platforms let you rewind, pause, and replay as much as you want. So if you hit a tricky part, take a breath, rewind, and try again. This kind of flexibility is a lifesaver when you’re juggling learning with a busy life.
Are there communities or feedback options in these classes?
Some do, some don’t. It depends on the platform. Having a community to share your progress, ask questions, or get feedback can be a huge boost. If your chosen class doesn’t have that, don’t sweat it—there are amazing online art groups and forums where you can connect with fellow beginners and pros alike.
How do I pick the best class for my style and pace?
It comes down to what feels right for you. Do you like project-based learning or step-by-step tutorials? Maybe you want something slow and steady or a quick dive. Reading reviews and checking out sample lessons can help a lot here. And guess what? Sometimes, mixing a couple of courses from different platforms works better than sticking to just one.
So, armed with these answers, do you feel a little less overwhelmed? Remember, every illustrator you admire started where you are now—clicking around, fumbling with layers, and making a big mess before it all clicked. Keep at it. You’ve got this.
Conclusion
So, here we are—at the finish line of your Procreate beginner journey. It might feel like you’ve just scratched the surface, and honestly, that’s exactly where you want to be. This isn’t about perfect art right off the bat; it’s about unlocking a new way to express yourself, one brushstroke at a time.
Think about Sarah, who started with zero digital art experience and, within a few weeks, was confidently creating charming character sketches just by dedicating a few minutes daily. Or Jake, who combined different Procreate classes to fit his chaotic schedule and ended up launching an Etsy shop selling custom digital prints.
What’s the takeaway here? There’s no single perfect path. Experiment with different classes, challenge your comfort zones, and lean into communities that encourage you to share and grow. Use daily micro-projects to build muscle memory and keep your momentum going strong.
And when frustration creeps in—because it will—remember that every pro was once confused by layers and brushes. Persistence is your secret weapon.
Want to take it further? Exploring expert tutorials beyond beginner basics or joining friendly art groups can expand your skills and keep things exciting. Just keep showing up, and your digital art skills will surprise you.
Ready to keep the creative spark alive? Grab your iPad, open Procreate, and let’s see what you’ll create next.
Leave a Reply