Ever stared at a skein of thread and thought, “I’d love to turn this into something beautiful, but I have no idea where to start?”
You’re not alone—most beginners feel that mix of excitement and overwhelm the first time they pick up a needle.
The good news is, mastering a handful of basic embroidery stitches can unlock a world of creative projects, from simple monograms on a tote to playful floral patches on a denim jacket.
In this guide we’ll walk you through the essential stitches that every newcomer should know, explain why each one matters, and give you quick tips to practice without getting tangled in frustration.
We’ll start with the timeless backstitch, the backbone of lettering and outlines, then glide into the satin stitch for smooth, glossy fills, and finish with the cheerful French knot that adds a pop of texture.
Along the way we’ll sprinkle in practical advice—like how to tension your fabric, which hoop size keeps your work flat, and where to find beginner‑friendly video tutorials that walk you step‑by‑step.
Sound familiar? If you’ve ever felt stuck after the first few stitches, you’ll appreciate the simple, no‑fluff approach we take—think of it as a coffee‑break chat with a friend who’s already stitched a few dozen projects.
By the end of this section you’ll know exactly which stitches to practice first, how to set up your workspace for smooth stitching, and you’ll be ready to dive into real projects without second‑guessing every pull of the thread.
Ready to stitch your way from nervous beginner to confident creator? Let’s dive in.
Grab a hoop, a simple cotton floss, and a sharp embroidery needle—those are all you need to get started. As you repeat each stitch, you’ll notice the rhythm, the tiny click of the needle, and the satisfaction of a thread that finally stays where you want it.
TL;DR
If you’re tangled in the excitement of starting a new hobby, mastering three essential embroidery stitches for beginners will give you instant confidence and a satisfying rhythm. In just a few minutes you’ll learn the backstitch, satin stitch, and French knot, set up your hoop and floss, and create a simple project that looks professionally finished.
Step 1: Gather Materials and Tools
Before you even think about the first backstitch, you need a little kit that feels right in your hands.
If you’re staring at a drawer of random craft supplies and wondering what actually belongs on your embroidery table, you’re not alone. The good news? You only need a handful of basics, and once you have them, the rest of the learning curve flattens dramatically.
Pick the Right Hoop
Most beginners start with a wooden or plastic hoop about 6‑8 inches in diameter. It’s big enough to hold a simple motif but small enough to stay snug on a kitchen table or couch armrest. Slip the fabric into the inner ring, tighten the outer ring until the cloth is taut—like a drum skin, not a stretched‑out sheet. If the fabric ripples, tighten a little more; if it puckers, loosen it.
Does the hoop feel heavy? That’s okay. A sturdy hoop prevents the fabric from shifting while you practice the backstitch, satin stitch, or French knot.
Select Needle & Thread
Embroidery needles are thin, with a small eye that lets you pull floss through easily. Size 7‑9 works for most cotton fabrics. Grab a needle that feels comfortable—some have a slightly rounded tip that slides through fabric without snagging.
When it comes to thread, start with a 6‑strand cotton floss. It’s soft, comes in a rainbow of colors, and splits easily if you need finer lines. To split, pull the strands apart until you have the thickness you like—most beginners use 2‑3 strands for clear stitches.
Not sure which colors to choose? Pick a high‑contrast pair, like a deep navy on a light linen, so you can actually see each stitch forming.
Prepare Your Fabric
A cotton or linen weave is perfect for practicing because it’s forgiving and doesn’t fray quickly. Cut a piece about 8×8 inches—big enough to experiment but small enough to fit in your hoop without folding.
Give the fabric a quick press with a warm iron. The heat relaxes the fibers and makes them lie flat, which means fewer surprises when you’re counting tiny stitches.
And here’s a little secret: lightly mist the back of the fabric with water before hooping. The moisture adds just enough grip to keep the cloth from sliding, especially if you’re working on a busy kitchen counter.
Create a Comfortable Workspace
Find a spot with good natural light or a bright lamp that mimics daylight. Your eyes will thank you when you’re counting tiny stitches.
Set up a small tray or mug for your scissors, a cup for water, and a notebook for jotting down stitch lengths or pattern ideas. Keep a pair of tweezers nearby for those stubborn thread ends that love to hide.
Does your chair feel too low? Raise your work surface with a stack of books so your elbows rest comfortably. The goal is to stay relaxed; tension in your shoulders translates to uneven stitches.
Optional Extras (but not mandatory)
A stitch marker or a small piece of tape can help you keep track of where a pattern starts and ends. If you have a magnifying glass or a pair of reading glasses, use them to see the needle tip clearly.
Finally, if you’re craving a structured learning path, check out Mastering Your Craft: A Complete Resource for Online Embroidery Classes for Beginners. The courses walk you through choosing tools, setting up your hoop, and mastering the three core embroidery stitches for beginners.
Now that you’ve gathered everything, you’re ready to move on to step two: learning the backstitch and feeling the rhythm of each pull. Grab your hoop, dip your needle in color, and let the thread tell its story.
Step 2: Master the Running Stitch
Alright, you’ve got your hoop set up and that backstitch feeling a little less intimidating. Now it’s time to meet the running stitch – the smooth, rhythmic stitch that gives embroidery its flow.
Ever notice how a line of tiny stitches can look like a tiny road on a map? That’s the running stitch, and it’s the first “line‑drawing” tool in your embroidery toolbox.
What the running stitch actually does
In plain terms, the running stitch is a simple in‑and‑out motion that creates an even dotted line. It’s perfect for outlining shapes, stitching seams on a quilt, or even adding subtle texture to a flower petal.
Because it’s so easy to see the spacing, you’ll quickly spot tension problems before they ruin a whole piece. That’s why most teachers list it as a must‑know for embroidery stitches for beginners.
Step‑by‑step: how to stitch the running stitch
1. Thread your needle and pull the thread through the back of the fabric, leaving a short tail.
2. Mark your start with a tiny knot or a dab of fabric glue – whatever feels less messy.
3. Push the needle up through the fabric where you want the line to begin. Pull the needle until the tail is snug but not taut.
4. Move forward a few millimeters (about the length of your thumbnail) and push the needle back down.
5. Repeat the up‑and‑down motion, keeping each “dash” the same length. If you’re unsure, count the stitches out loud – “one, two, three…” – it helps lock the rhythm.
6. When you reach the end point, tie a tiny knot on the backside and trim the excess.
That’s it. Simple, right? But the magic is in the consistency.
Do you ever feel your stitches get tighter or looser as you go? That’s a common hiccup. The trick is to keep your wrist relaxed and let the needle do the work. Think of it like tapping a beat on a drum – you want a steady pulse, not a frantic rush.
Tips to keep your running stitch flawless
• Use the right thread thickness. If you’re working on lightweight cotton, split the floss down to two strands. Too many strands will pull the fabric and make the line look uneven.
• Check your tension. After a few stitches, gently tug the line. It should move a hair’s breadth without pulling the fabric.
• Practice on scrap fabric first. A quick 2‑inch line on a spare piece tells you if your spacing feels right before you move to the real project.
• Keep your needle tip sharp. A dull needle catches and creates jagged stitches, breaking the smooth look you’re after.
And here’s a little secret: if you want perfectly even dashes, place a tiny piece of tape on the back of the fabric as a guide. The tape marks each stitch point, and you can peel it off once you’re done.
What about color? Using a contrasting thread makes the running stitch pop, especially when you’re learning. Once you’re comfortable, experiment with tonal shades for a more subtle effect.
Putting the running stitch to work
Now that you’ve got the basics down, think about where you’ll actually use it. A classic example is stitching a simple heart outline on a tote bag – the dotted line gives it a whimsical, hand‑made vibe.
Or try a running stitch border around a printed photo. The line frames the image without covering any detail, and it adds a personal touch you can’t get from a printed border.
Even larger projects benefit: quilt layers often rely on running stitches to hold pieces together temporarily before the final quilting rows.
Does this feel like a new skill you can actually apply tonight? Absolutely.
Grab a scrap, set a timer for ten minutes, and see how many even dashes you can string together.
When you’re done, step back and appreciate the tiny rhythm you just created. That steady beat is the foundation for every other embroidery stitch you’ll learn down the road.
Ready for the next step? Keep that momentum and move on to the satin stitch – the glossy fill that will turn your simple outlines into vibrant, eye‑catching designs.
Step 3: Learn the Backstitch (Video Included)
Alright, you’ve already felt the rhythm of the running stitch, and now it’s time to add a little backbone to your embroidery toolbox.
The backstitch is the go‑to stitch for letters, outlines, and any line that needs to stay solid when you pull on it. Think of it as the “bold” of embroidery – it holds its shape and reads like a handwritten note.
What the backstitch actually does
In plain English, the backstitch creates a continuous line by stepping back into the previous stitch. Each new stitch starts where the last one ended, so there’s no gap – perfect for crisp lettering or a neat border.
Because every stitch overlaps the one before it, the line stays strong even when you stretch the fabric a bit. That’s why it’s the default for monograms, name tags, and the outlines that turn a simple shape into a polished design.
How to backstitch – step‑by‑step
1. Thread your needle and pull the thread through the back of the fabric, leaving a short tail.
2. Bring the needle up at your starting point. This little knot will be the anchor for the whole line.
3. Move the needle forward a short distance (about the length of a pea) and push it back down into the fabric.
4. Now bring the needle up again, but this time start the stitch from the point where the last stitch ended – that’s the “back” part.
5. Push the needle forward the same distance and down again. Keep repeating steps 4 and 5, always starting from the tail of the previous stitch.
6. When you reach the end, tie a neat knot on the backside and trim the excess thread.
It sounds like a lot, but once you get the feel of “up, back, down, forward,” it becomes as natural as tapping a rhythm on a drum.
Common hiccups & quick fixes
Ever notice a wobble in the line? Most of the time it’s tension – either the thread is too tight or the fabric is too loose. Gently tug the line after five stitches; it should move a hair’s breadth without pulling the cloth.
If you keep missing the exact start point, try using a tiny piece of removable tape on the back of the fabric as a guide. The tape marks each stitch entry, and you can peel it off once you’re done.
Another little trap is the needle tip catching on the fabric. A fresh, sharp needle makes a world of difference; a dull one creates jagged edges and throws off your rhythm.
Real‑world uses you can try tonight
Imagine adding a single word – “home”, “love”, or your initials – to a plain pillowcase. The backstitch gives those letters a clean, professional look without any fancy equipment.
Or try a simple leaf outline on a tote bag. The solid line will define the shape, and you can later fill it with a satin stitch for a pop of colour.
Even something as small as a backstitch border around a hand‑stitched bookmark adds a finished feel that makes the piece look intentional.
Does any of that sound doable? Absolutely. All you need is a scrap of fabric, a needle, and a minute or two of focus.
Practice checklist
- Set up a hoop with a smooth cotton fabric.
- Thread a 2‑strand cotton floss in a high‑contrast colour.
- Watch the short video above, then pause after each step.
- Stitch a 2‑inch line, then check for even spacing and tension.
- Repeat on a new piece, aiming for a longer line each time.
When you look back at your line, you’ll notice a steady, unbroken rhythm – the same feeling you got from the running stitch, but now with a line that truly holds its shape.
Take a breath, give yourself a quick high‑five, and move on to the satin stitch when you’re ready. The backstitch is your foundation; the rest of the embroidery world builds on top of it.
Step 4: Practice the Satin Stitch
So you’ve mastered the backstitch and you’re feeling the steady rhythm of those little lines—great, you’re ready for the next step. The satin stitch is the glossy fill that turns a plain outline into a smooth, polished patch of colour.
Ever notice how a satin‑stitched leaf looks like a tiny piece of silk? That subtle shine is what makes the satin stitch such a favorite for beginners who want instant visual payoff without a lot of fancy technique.
Why the satin stitch matters for beginners
First off, it’s forgiving. Because the stitch sits side‑by‑side, any tiny tension wobble gets hidden by the next row. In other words, you get a neat surface even if a couple of stitches are a hair tighter than the rest.
Second, it teaches you control over spacing – the secret sauce behind even colour fills in any embroidery project.
Set‑up before you dive in
Grab the same hoop and fabric you used for the backstitch. A smooth, medium‑weight cotton works best; you’ll see the thread glide without catching.
Thread a 2‑strand cotton floss in a colour that really pops against your fabric. High‑contrast makes it easier to spot mistakes while you’re still learning.
And don’t forget to knot the thread on the backside – a simple double knot keeps the tail from slipping when you start the first row.
Step‑by‑step satin stitch
1. Bring the needle up at the left edge of the area you want to fill. Pull the thread until the knot is snug but not pulling the fabric.
2. Slide the needle straight across to the right edge, keeping the thread taut enough that the stitch lies flat.
3. Push the needle down at that right edge, then bring it back up a fraction of a millimetre to the left – basically you’re creating a tiny “U” shape.
4. Pull the needle up on the left side, right next to where you started. You’ve just completed one satin stitch: a clean, flat bar.
5. For the next bar, start a hair’s breadth to the right of the first one and repeat the same motion. Keep the bars snug but don’t let them overlap; you want a solid wall of colour, not a tangled mess.
6. When you reach the end of the shape, tie off securely on the back and trim the excess.
Tips you’ll wish you’d known earlier
Use a magnifying glass or your reading glasses to watch the needle tip. It’s amazing how much smoother the stitch becomes when you can see the exact entry point.
Try a “tension test” after five bars: gently tug the line. If the fabric lifts, you’re pulling too tight; if the stitch loosens, add a little more pull.
And here’s a little trick – lay a thin strip of masking tape on the backside of the fabric. The tape gives you a visual guide for equal spacing, then you peel it off when you’re done.
Feel free to experiment with two‑tone satin stitches: stitch the first row in a light hue, then go back over it with a darker shade for a subtle shading effect. It’s a simple way to add depth without learning a whole new technique.
Practice checklist (quick recap)
- Hoop a smooth cotton fabric, tensioned like a drum skin.
- Thread 2‑strand floss in a high‑contrast colour, knot the tail.
- Mark the left‑most start point, then stitch parallel bars across the shape.
- Check spacing and tension every few rows; adjust as needed.
- Finish with a neat knot on the back and give yourself a little celebration.
Does it feel a bit messy at first? Absolutely. That’s the beautiful part of learning embroidery stitches for beginners – you get to watch the progress in real time, line by line, bar by bar.
Take a breath, admire the glossy stripe you just created, and know that the satin stitch is now in your toolbox. When you’re ready, you can move on to the French knot, or start filling in a simple flower on a tote bag. Either way, you’ve earned a new skill that instantly upgrades any project.
Step 5: Explore French Knot and Other Decorative Stitches
Now that the satin stitch is tucked away in your toolbox, it’s time to add a little three‑dimensional sparkle. That’s where the French knot steps in, giving you those tiny bumps that look like rose buds or dewdrops on a leaf.
What a French knot actually does
In plain English, a French knot is a little knot that sits on the surface of the fabric. Each knot creates a tiny, raised dot that catches light and adds texture without any extra fill stitches.
Think about the last time you saw a embroidered rose with those glossy centers – those are just rows of French knots, stacked and spaced to suggest a bloom.
Gather your tools (you already have most of them)
Grab a sharp embroidery needle, a hoop, and a cotton floss in a colour that either matches or contrasts the background. If you want the knots to pop, go for a bright hue; if you prefer subtle detail, pick a tone a shade lighter or darker than the fabric.
Thread two or three strands, then tie a small knot on the back. A tight knot prevents the thread from slipping as you work the little twists.
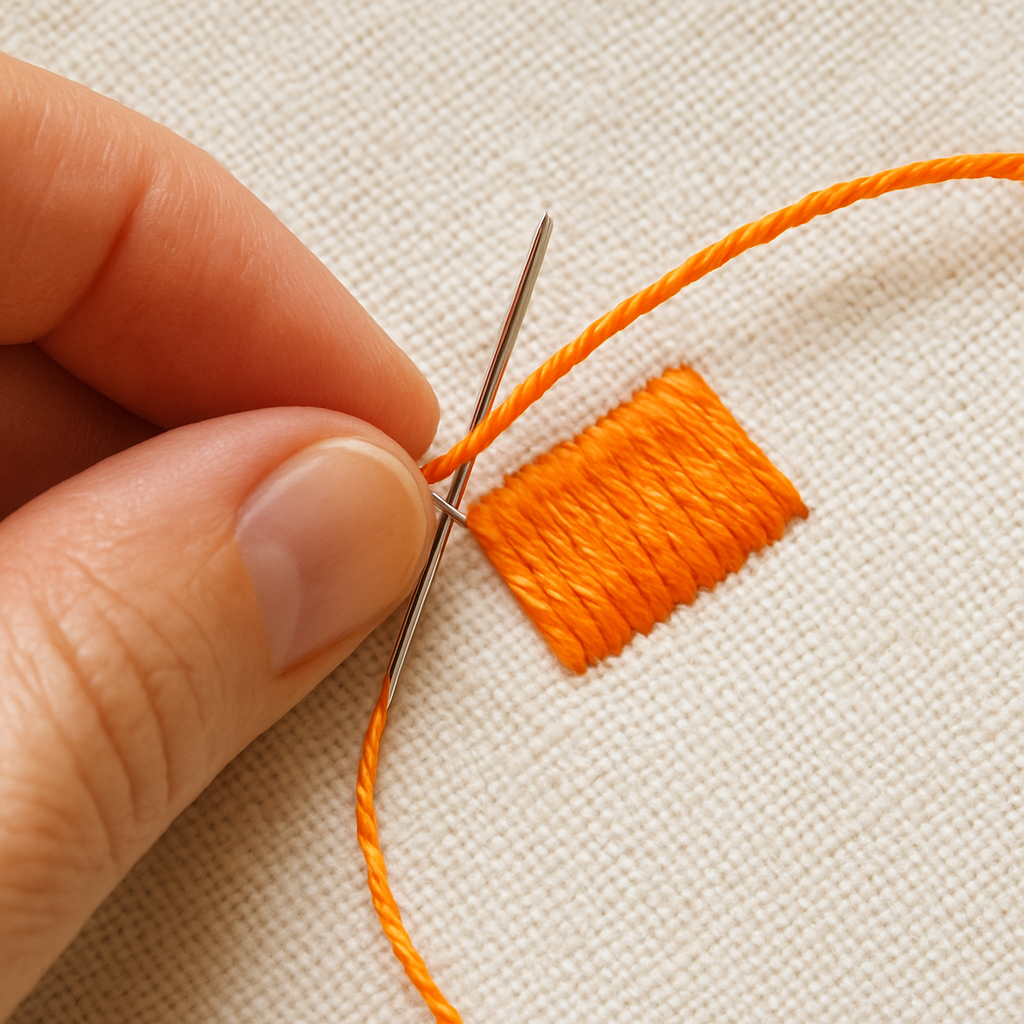
Step‑by‑step French knot
1. Bring the needle up through the fabric where you want the knot to sit.
2. Pull the thread through, leaving a short tail on the front side.
3. Wrap the needle tip around the thread 5‑7 times, keeping the wraps neat and close together. The more wraps, the bigger the knot.
4. While holding the wraps, gently pull the needle back down through the hole you just made, sliding the wraps down onto the fabric surface.
5. Tug the thread just enough to tighten the knot, then trim the excess tail.
Repeat wherever you need a dot – a flower centre, a polka‑dot border, or a whimsical sky of stars.
Tips you’ll wish you’d known earlier
Use a piece of masking tape on the backside of the fabric as a guide. The tape marks the exact spot you want each knot, so you don’t lose your place on a busy design.
If the knot feels too loose, add an extra wrap or pull the thread a tiny bit tighter before you bring the needle down.
When you’re working with a very fine floss, try a needle with a slightly larger eye. It makes the wraps easier to grip and prevents the thread from fraying.
Other decorative stitches to explore
Once you’ve gotten the hang of French knots, you’ll notice a whole family of texture stitches waiting for you. Here are three beginner‑friendly options you can try next.
1. Bullion knot
The bullion knot looks like a tiny rope coil. It’s perfect for stems, vines, or any line that needs a bit of thickness. The technique is similar to a French knot, but you keep wrapping the thread around the needle 8‑10 times before pulling it through.
2. Seed stitch
Seed stitch is basically a series of tiny, evenly spaced French knots. Lay them out in a grid or scatter them across a shape for a speckled effect – great for shading a leaf or creating a textured background.
3. Couching
Couching isn’t a knot at all; it’s a way to lay a thick thread or wire on the surface and stitch it down with tiny stitches. You can use it to outline a bold shape or to add metallic sparkle with a gold‑wrapped thread.
Does trying a new stitch feel intimidating? It’s totally normal. Remember, each tiny knot is just a little experiment – if one comes out crooked, you can always snip it off and try again.
Quick practice checklist
- Hoop your fabric so it’s taut but not stretched.
- Thread 2‑3 strands of cotton floss and knot the tail.
- Mark knot positions with a light pencil or tape.
- Wrap the needle 5‑7 times for a standard French knot.
- Pull the needle through, tighten, and trim.
Give yourself a moment to admire the tiny bumps you’ve created. Those little textures can turn a plain monogram into a piece that feels hand‑crafted and lively.
When you’re ready, mix French knots with satin fills, backstitches, or even a dash of bullion for a truly dimensional design. The next step is just a stitch away, and you’ve already proven you can handle the detail.
Step 6: Compare Beginner Stitches – Pros, Difficulty, and Uses
Now that you’ve practiced the running stitch, backstitch, satin stitch, and French knot, you’re probably asking yourself, “Which one should I reach for first?”
Every stitch brings something different to the table. Some are lightning‑fast for simple outlines, others shine when you need texture or fill.
Below is a handy table that lines up the pros, difficulty level, and typical uses for each of the core embroidery stitches for beginners.
| Stitch | Pros | Difficulty | Typical Uses |
|---|---|---|---|
| Running stitch | Fast, easy to learn, great for outlines and decorative lines | Very easy | Basic borders, simple stitching guides, initial practice lines |
| Backstitch | Strong, continuous line, perfect for lettering and detailed outlines | Easy‑moderate | Monograms, word art, precise shapes |
| Satin stitch | Smooth, glossy fill, hides minor tension issues | Moderate | Leaves, petals, solid colour blocks, decorative fills |
| French knot | Three‑dimensional texture, eye‑catching detail | Moderate‑hard | Flower centers, dotted accents, raised patterns |
Does that table help you see the differences at a glance? Great – now let’s unpack each row a little more.
Running stitch – the “quick doodle”
If you need a line that’s barely there, the running stitch is your go‑to. It’s forgiving, so a few uneven dashes won’t ruin the whole look. Because it’s basically just “in‑and‑out,” you can string a dozen lines in under five minutes.
Use it for simple borders around a pocket, stitching a light‑hearted “hello” on a tote, or as a guide when you’re planning a more complex design.
Backstitch – the backbone of lettering
When you want a crisp, unbroken line that won’t fray, the backstitch steps in. It feels a bit like writing with a pen on paper – each stitch leans on the previous one, giving you that solid feel you need for names, addresses, or any shape that must stay sharp.
Because it’s slightly slower than the running stitch, you’ll notice a rhythm, but the payoff is a line that looks as confident as a handwritten note.
Satin stitch – the glossy filler
Think of the satin stitch as the silk shirt of embroidery – it adds a smooth, polished surface to any shape. Even if a couple of bars are a tad tighter, the next row camouflages it, so the overall finish stays sleek.
It’s perfect for leaves, petals, or any solid‑color area where you want the fabric to look like a painted patch rather than a stitched patch.
French knot – the 3‑D sparkle
If you’re after a little bump that catches light, the French knot delivers. It’s the stitch that turns a flat flower into a blooming one, or a plain border into a dotted, whimsical line.
The trick is patience – each knot needs a few wraps, and tension matters. But once you get the rhythm, those tiny pearls become addictive.
So, how do you choose?
Ask yourself three quick questions: What’s the visual goal? How much time do you have? And how comfortable are you with handling tension?
For a fast‑track project like a monogrammed handkerchief, pair a backstitch outline with a satin‑filled leaf – you get crisp letters and a glossy accent without spending hours on texture.
If you’re making a decorative wall hanging and want extra visual interest, sprinkle French knots along the edges of a satin‑filled shape. The contrast of smooth and raised keeps the eye moving.
And if you’re still unsure, try a “mix‑and‑match” practice sheet: draw four small boxes, dedicate each to one stitch, and see which feels the most natural in your hand.
Remember, there’s no wrong choice. Each stitch adds a different personality, and the more you experiment, the richer your embroidery vocabulary becomes.
Ready to pick a stitch for your next project? Grab your hoop, choose the stitch that matches your vision, and let the fabric tell its story.
FAQ
What are the three must‑know embroidery stitches for beginners?
When you’re just starting out, the running stitch, backstitch, and satin stitch form the core trio of embroidery stitches for beginners. The running stitch gives you a quick dotted line for borders or guides. The backstitch creates a solid, unbroken line perfect for lettering and outlines. The satin stitch fills shapes with a smooth, glossy surface, turning a simple leaf or petal into a polished patch of colour. Mastering these three gives you a versatile toolbox for almost any project.
How do I choose which stitch to use for a specific design?
Think about the visual goal, the time you have, and your comfort with tension. If you need a fast, light outline, grab the running stitch. For crisp text or detailed edges, the backstitch is your best friend. When you want a solid block of colour that hides tiny tension issues, reach for the satin stitch. Mixing them—like a backstitch outline with a satin‑filled interior—creates depth without overwhelming you.
Can I use embroidery floss with more than two strands for these stitches?
Absolutely, but the number of strands changes the look and feel. Two strands work well for fine lines in the running and backstitches, keeping the needle from dragging. For satin stitches, three to four strands give a richer fill, though you’ll need a slightly larger needle to avoid bunching. Experiment on a scrap piece: if the stitch feels too stiff, drop a strand; if it looks flimsy, add one. It’s all about finding that sweet spot for your fabric.
What common mistakes should I watch out for when practicing French knots?
Even though French knots aren’t part of the core trio, they often pop up when you add texture. The biggest slip is inconsistent tension—too loose and the knot flops, too tight and it pulls the fabric. Another pitfall is not wrapping the thread enough; five to seven wraps give a neat bump, while fewer wraps produce a flat spot. Use a piece of masking tape on the back to mark knot positions, and keep your needle tip sharp for smoother wraps.
How often should I replace my embroidery needle?
Needles dull faster than you think, especially when you’re working with tighter fabrics or thicker floss. If you notice snagging, uneven stitches, or the needle bending, it’s time for a fresh one. As a rule of thumb, swap out the needle after about 20‑30 minutes of continuous stitching or whenever you change thread colors. Keeping a small stash of size 7‑9 needles on hand means you won’t have to pause your creative flow.
Is it okay to mix different stitch types in one project?
Definitely! Mixing stitches is how you add visual interest and texture. A classic combo is a backstitch outline around a satin‑filled leaf, then sprinkle a few French knots along the edge for sparkle. Just make sure each stitch has a clear purpose—don’t add a knot just for the sake of it. Planning a quick sketch on paper before you hoop can help you see where each stitch will shine.
Where can I find more guided practice for embroidery stitches for beginners?
Beyond the hands‑on practice sheets you’ve already tried, consider joining an online community or a structured course that walks you through each stitch step‑by‑step. Look for platforms that offer video demos, downloadable patterns, and a space to ask questions. A supportive environment lets you compare progress, get feedback, and stay motivated—especially when you hit those inevitable “my stitches look wonky” moments.
Conclusion
We’ve walked through the running stitch, backstitch, satin stitch, and French knot, so you now have a small toolbox of embroidery stitches for beginners.
Think about the last piece you dreamed of making – maybe a tote bag with a leafy outline, or a pillowcase with your initials. With the basics you just practiced, that vision is within reach.
Remember the golden rule: start simple, keep your tension relaxed, and let the needle guide the rhythm. If a stitch looks off, pause, adjust, and try again – that tiny pause is part of the learning loop.
Next step? Pick one tiny project, set a timer for ten minutes, and stitch a short line or a single knot. Celebrate the result, no matter how perfect it looks. Those little wins build confidence faster than any long‑term plan.
And when you’re ready to level up, CreativiU’s online courses can walk you through more advanced patterns, community feedback, and step‑by‑step video demos.
Pro tip: keep a tiny notebook next to your hoop and jot down the stitch length you liked best – that quick reference saves you time when you jump between projects.
So grab your hoop, choose a stitch, and let the fabric tell its story. Happy stitching!
Enjoy the process and watch your skill grow.
Leave a Reply