Only 25% of the surveyed platforms reveal how many beginner courses they actually offer, while half provide no community at all and the only free option still delivers full video lessons. That’s a stark mismatch between price, transparency, and support. If you’re looking for a beginner’s guide to encaustic painting online, you need a clear path that doesn’t waste your time or money.
Encaustic painting is an ancient art form that uses heated beeswax mixed with colored pigments. It’s forgiving enough to scrape down and start over, but it can be frustrating if you don’t have the right guidance. That’s why an online course can be a lifesaver. In this guide, I’ll walk you through everything you need to start encaustic painting from home: the basics, supplies, workspace setup, techniques, and safety.
The research for this comparison used a search for online encaustic painting courses on April 26, 2026. We scraped four platforms (2 web pages, 2 direct crawls) and extracted name, instructional format, community features, and pricing. Only one platform (Painting with Fire) disclosed its course count (52 courses). CreativiU, Encaustic.com, and Skillshare did not. Community is scarce: only CreativiU and Painting with Fire offer any community, and CreativiU’s private mastermind group is the only one with direct interaction among instructors, members, and industry leaders.
Step 1: Understanding Encaustic Painting Basics
Before you buy any supplies, you need to know what encaustic painting actually is. Encaustic comes from the Greek word enkaustikos, which means “to burn in.” Artists heat beeswax to around 200°F and mix it with dry pigment or pre-colored mediums. Then they paint it onto a rigid surface like wood or clayboard.
Why beeswax? It’s natural, non-toxic, and can be reheated and reshaped for years. That’s the magic of encaustic: you can scrape off a layer you don’t like and start fresh. It’s forgiving. But it’s also demanding. Wax cools fast , in seconds , so you have to work quickly. You can’t blend on the canvas like oil paint. Instead, you build up layers, each one fused with heat.
Encaustic is a journey of discovery. As one encaustic artist put it, “Wax is a beautiful medium for working with photography and collage. It is an ongoing journey of discovery.” You can embed paper, fabric, found objects, even photographs into the wax. The results are luminous and textural. According to allthingsencaustic.com, encaustic can be frustrating and forgiving all rolled into one. When you aren’t happy with a result, scrape down to start over or keep working in layers on top of a piece.
Bottom line: Encaustic painting is a forgiving, layered medium that uses heat to fuse beeswax , and with the right beginner’s guide to encaustic painting online, you can master the basics from home.
Step 2: Essential Supplies for Encaustic Painting
You don’t need a huge setup to start. But there are a few must-haves. Let me break them down.
The Wax
You’ll need encaustic medium , that’s beeswax with a bit of resin (often damar resin) to harden it. Pre-colored encaustic paints are available, but you can also buy clear medium and mix in your own dry pigments. For a beginner, start with a set of 6, 10 basic colors. Brands like R&F are widely used.
The Heat Source
You need a way to melt the wax and fuse layers. A small electric griddle or a temperature-controlled melting pot works well. The wax should stay between 180°F and 200°F. Don’t go above 230°F , wax can smoke or catch fire.
A heat gun is essential for fusing (we’ll cover that in Step 4). A simple hardware store heat gun with two temperature settings is fine. You’ll also need a hot plate or a palette to keep your colors liquid as you work. Some artists use a dedicated encaustic palette with a built-in heater.
Brushes
No natural bristles! They’ll melt in hot wax. Use hog-bristle brushes or synthetic brushes designed for encaustic. Hake brushes (soft, flat Asian brushes) also work well. You’ll want a few sizes: a 1-inch flat for broad strokes, a round for detail, and maybe a fan brush for texture.
Surface
Wax needs a rigid base. Wood panels (birch or plywood) are ideal. You can also use clayboard or heavy-duty canvas stretched over a frame. The surface must be absorbent enough to grip the wax. A layer of gesso is usually recommended to seal the wood.
Other Tools
- Scraping tools: Palette knives, razor blades, or a loop tool for carving into wax.
- Mixing cups: Silicone cups are easy to clean.
- Gloves: Heat-resistant gloves or silicon finger mitts.
- Ventilation: A fan or open window , wax fume irritation is rare but possible.
Here’s a quick comparison of recommended supplies for beginners:
| Item | Why It’s Important | Budget Option | Pro Option |
|---|---|---|---|
| Encaustic medium | Base of all paint | Small set of 6 colors ($30) | R&F medium + pigment ($60) |
| Heat gun | Fusing layers | Dual-temp hardware gun ($20) | Variable temp from art store ($80) |
| Brushes | Applying hot wax | Synthetic hog-bristle set ($15) | Hake brush set ($30) |
| Wood panels | Rigid support | Birch plywood from hardware store ($3 each) | Pre-gessobord panels ($8 each) |
| Scraping tools | Carving and reworking | Old palette knife ($5) | Loop tool set ($25) |
You can find most of these at art supply stores or online. If you’re looking for a structured course that walks you through supplies step by step, check out Getting Started with Online Acrylic Pour Painting Classes for Beginners , it’s a different medium but the supply mindset is similar.
Skimping on supplies is a trap. Cheap brushes shed bristles. Low-quality wax can yellow or crack. Invest a little for good results.
Bottom line: When you follow this beginner’s guide to encaustic painting online, getting the right supplies first saves you frustration and gives your artwork a solid foundation.
Step 3: Setting Up Your Encaustic Workspace
Your workspace matters more than you think. Encaustic painting involves hot wax, flames, and fumes. You need a safe, comfortable area.
Find a Well-Ventilated Room
Beeswax is natural, but heated wax can release small amounts of particles. Open a window or use a fan to keep air moving. If you’re sensitive to smells, wear a mask. Don’t work in a small, closed room.
Protect Your Surfaces
Wax drips are inevitable. Cover your table with newspaper or a silicone mat. Have a fire extinguisher nearby , not because wax is super dangerous, but because you’re working with electricity and heat. Safety first.
Set Up Your Heat Stations
You’ll have a melting pot or griddle for melting medium and a heat gun for fusing. Keep them on separate circuits if possible to avoid tripping breakers. Arrange them so you can reach each without stretching over hot surfaces.
Lighting
Good lighting is crucial. You need to see the surface of the wax clearly. A daylight-balanced lamp or a north-facing window works best.
Organize Your Tools
Keep brushes upright in a jar, scraping tools within arm’s reach, and your wooden panels stacked nearby. A dedicated cart or rolling table can help.
This video shows a workspace setup for encaustic painting. Notice the layout: heat source on the right, fusing station in the middle, cooling area on the left. You can adapt this to your space.
Think of your workspace like a chemistry lab. Hot wax, heat guns, and small flames require calm focus. If you have young children or pets, lock the door or work when they’re asleep. The element of heat means you can’t be careless.
Bottom line: Before you dive into this beginner’s guide to encaustic painting online, set up a safe, ventilated workspace with all your tools at hand.
Step 4: Basic Techniques: Fusing, Layering, and Embedding
Now for the fun part. You have your supplies, your workspace is ready. Let’s paint.
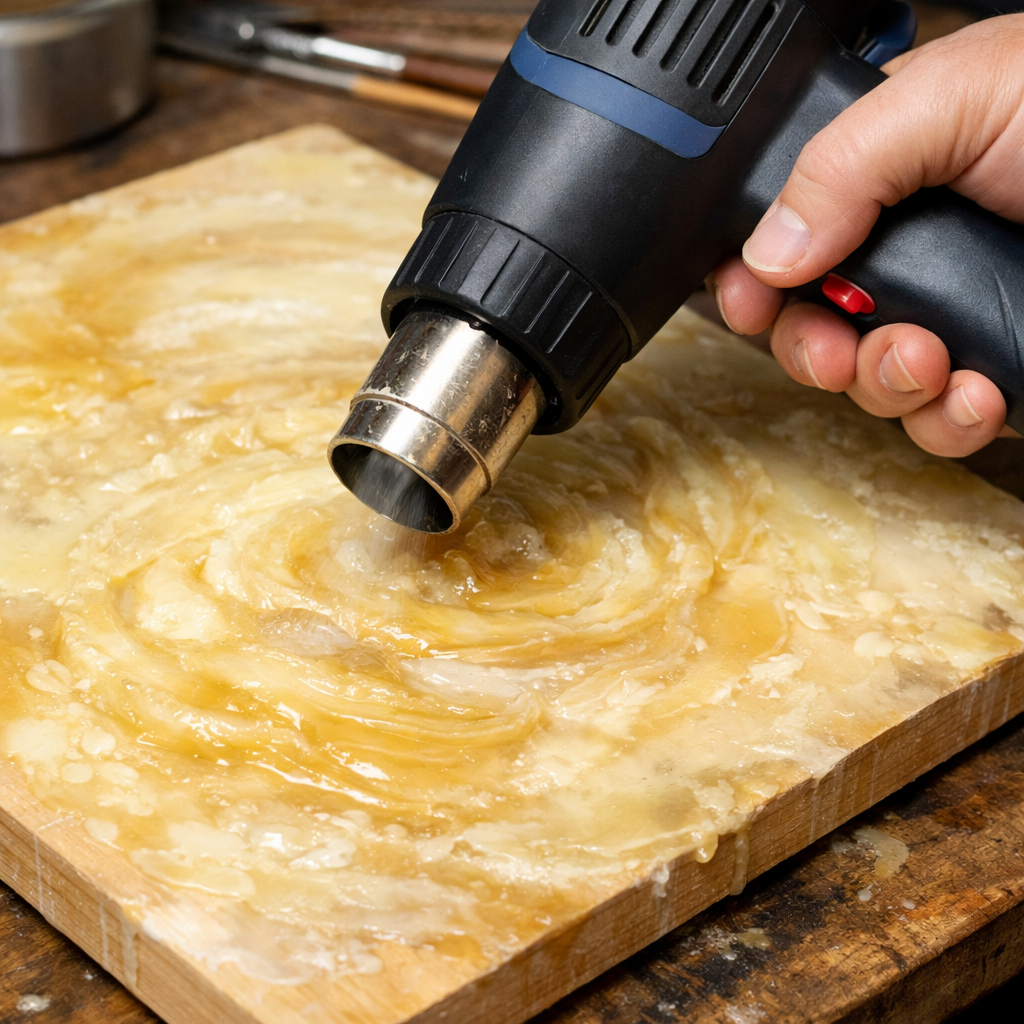
Fusing
Fusing is the most important technique. After you apply a layer of wax, you need to fuse it to the previous layer. You do this with a heat gun, holding it 2, 3 inches away and moving it in a steady back-and-forth motion. The wax will melt just enough to bond. If you overheat it, the colors can blend into mud. Practice on scrap.
Layering
Encaustic is all about layers. You can build up thin translucent layers for a watercolor effect, or thick impasto layers for texture. Each layer must be fused before you add the next. A typical painting might have 5, 20 layers. As Wikipedia notes, “Encaustic painting is a technique where the binder is a mixture of beeswax and damar resin.” The layers give depth and luminosity.
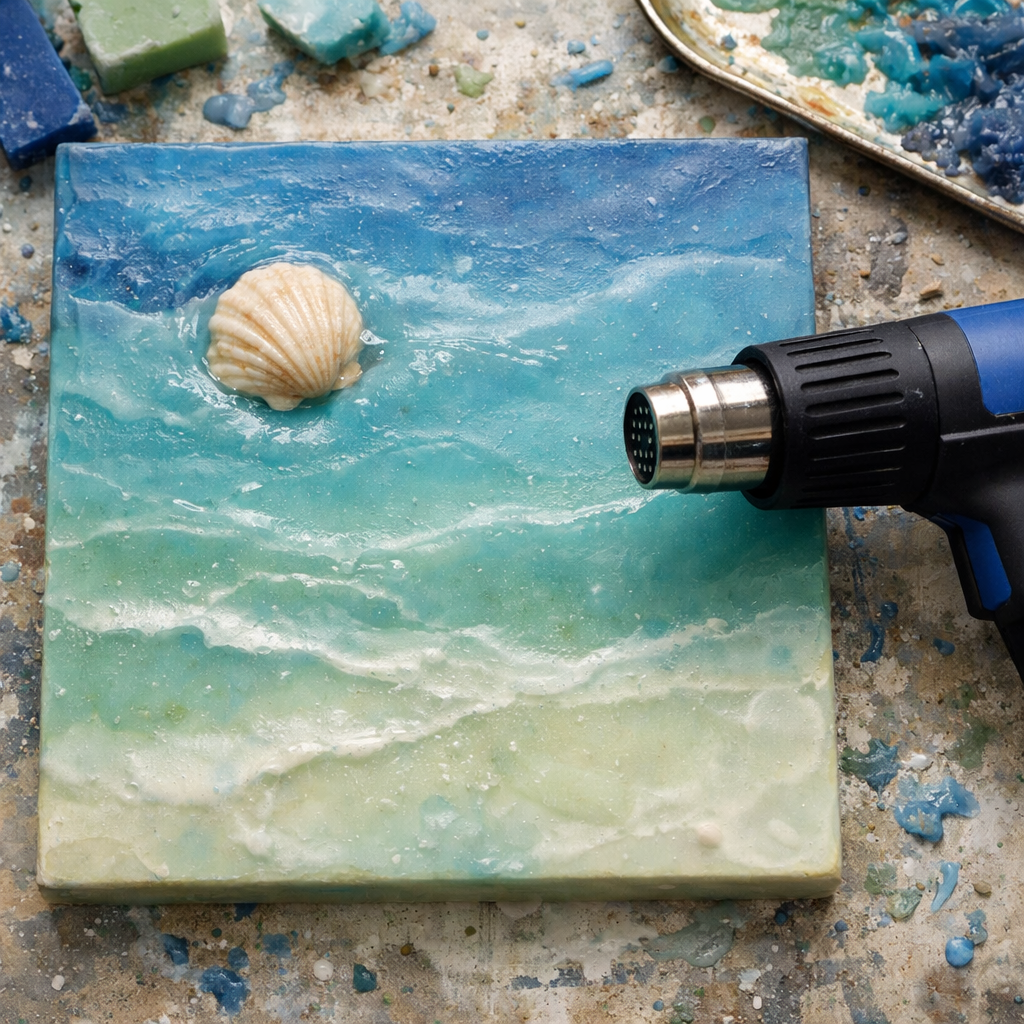
Embedding
One of the coolest things about encaustic is embedding objects. You can press dried leaves, fabric, photographs, or metal into the wax. Embed them between layers so they’re sealed. When you fuse the top layer, the object becomes part of the painting. This technique is forgiving: if you don’t like how something sits, heat it and reposition.
For a step-by-step visual guide, you can watch online tutorials like this encaustic beginner’s demonstration on YouTube. Follow along at your own pace , pause, rewind, try it.
Scraping and Carving
If you mess up, scrape. Use a palette knife or razor blade to remove a layer. You can carve into the wax for fine lines or textures. This is the “forgiving” part I mentioned earlier. It’s almost impossible to ruin an encaustic painting permanently. You can always heat and scrape.
Bottom line: Once you understand fusing, layering, and embedding, you’ll have the core skills any beginner’s guide to encaustic painting online should teach.
Step 5: Safety Considerations for Encaustic Painting
Encaustic painting is safe when you respect the medium. Wax fumes are not highly toxic, but they can irritate your lungs and eyes. Here’s how to stay safe.
Ventilation
I said it before, but it’s worth repeating: open a window or use an exhaust fan. If you work in a garage, crack the door. The Occupational Safety and Health Administration (OSHA) recommends general ventilation for exposure to low levels of fumes. A small fan near your workspace helps.
Fire Safety
Melting wax can catch fire if it reaches its flash point (around 400°F). Your melting pot should have a thermostat. Never leave a hot surface unattended. Keep a fire extinguisher in the room. Also, have a lid nearby to smother any small flames.
Skin Protection
Hot wax sticks to skin and can cause burns. Wear heat-resistant gloves when handling hot pots. If you spill wax on yourself, run cool water over it , don’t try to peel it off. Call a doctor for serious burns.
Tool Safety
Heat guns can reach 1000°F. Always set them down on a heat-proof stand. Unplug when not in use. Scraping tools are sharp , cut away from your body.
Bottom line: This beginner’s guide to encaustic painting online cannot skip safety , always prioritize ventilation, fire safety, and skin protection.
Frequently Asked Questions
What is the best way to learn encaustic painting online as a complete beginner?
The best way is to choose a structured online course that walks you through supplies, safety, and techniques. Our pick, CreativiU, offers a $1 trial with on-demand video lessons and a private community where you can ask questions. You can also start with free resources like Encaustic.com for video lessons, but you won’t get feedback. A beginner’s guide to encaustic painting online should include hands-on demos and the chance to share your work.
Do I need a lot of expensive equipment to start encaustic painting?
No. You can start with a basic heat gun ($20), a small set of encaustic paints ($30, 40), a wood panel ($3), and a palette knife. A dedicated melting pot is nice but not essential , you can melt wax on a small electric griddle. The total for a starter kit can be under $100. As you improve, you can add a proper palette, more colors, and better brushes. The key is to begin with what you have.
Can I use any type of wood or canvas for encaustic painting?
You need a rigid, non-porous surface. Stretched canvas is too flexible , the wax will crack. Plywood or MDF works well if sealed with gesso or encaustic gesso. Clayboard and Ampersand Encausticbord are great options. Avoid pine or cedar because the resin can interact with wax. Always prime the surface to prevent absorption.
How do I clean up after encaustic painting?
Wax clean up is simple. Wipe brushes on a paper towel while hot , never use water. You can also dip brushes in a can of melted clear wax to clean them. Scrape excess wax from your palette and save it for future use. Cover your workspace with newspaper and bundle it for disposal. No solvents needed, which is a nice bonus.
Is encaustic painting safe to do indoors?
Yes, with proper ventilation. Beeswax and damar resin are natural, non-toxic materials. However, heating them releases trace fumes that can irritate some people. Always work in a well-ventilated room, and consider using a respirator if you’re sensitive. Never leave hot wax unattended, and follow fire safety guidelines. The beginner’s guide to encaustic painting online should emphasize that safety is not optional.
How long does an encaustic painting take to finish?
It depends on the number of layers. A simple single-layer painting might take 30 minutes. A complex piece with 15, 20 layers and embedded objects can take several sessions. Because wax dries immediately, you can fuse a layer and start the next within minutes. But you may want to let each layer cool before adding more texture. This medium rewards patience.
What are common beginner mistakes in encaustic painting?
Overheating the wax is the most common mistake , it causes colors to blend and lose clarity. Another is not fusing each layer thoroughly, which leads to peeling. Beginners also use brushes that aren’t heat-resistant. And many pour wax too thick, thinking more is better. Start with thin layers. Scrape and start over if you need to. That’s the beauty of encaustic.
Can I sell encaustic paintings I make at home?
Absolutely. Encaustic art is durable and archival when done right. Many artists sell online or at galleries. To increase your chances, take a high-quality course to build technique. Platforms like CreativiU offer mentorship that can help you refine your style. Also, look into resources like Best Learning Apps for 2026 to find tools that can help market your art digitally.
Conclusion
You’ve made it to the end of this beginner’s guide to encaustic painting online. By now you should understand the basics of what encaustic painting is, what supplies you need, how to set up a safe workspace, the core techniques of fusing, layering, and embedding, and the safety rules that keep you safe.
Encaustic painting is a forgiving, tactile, and deeply satisfying medium. The ability to scrape away mistakes and build up layers of translucent color is unique. No other painting medium lets you rework a piece after it dries without using solvents.
If you’re ready to start learning, I recommend signing up for a structured course. Our pick, CreativiU, provides top-notch instruction, a supportive community, and a low-cost trial. It’s the only platform that pairs guided mentorship with a $1 start. You’ll also have access to a library of video lessons you can watch on your own time.
Remember: every master was once a beginner. The first layer you fuse won’t look like a masterpiece. That’s okay. Keep scraping, keep layering, keep experimenting. Encaustic rewards curiosity and patience.
Now go heat up some wax and create something beautiful.
Leave a Reply