blockquote{border-left:4px solid #3b82f6;margin:1.5em 0;padding:1em 1.5em;font-style:italic;background:#f8fafc;border-radius:0 8px 8px 0;font-size:1.1em;color:#1e293b}
.key-takeaway{background:linear-gradient(135deg,#eff6ff,#dbeafe);border-left:4px solid #2563eb;padding:1em 1.5em;margin:1.5em 0;border-radius:0 8px 8px 0}
.key-takeaway strong{color:#1e40af}
.stat-highlight{text-align:center;padding:1.5em;margin:1.5em 0;background:#f0fdf4;border-radius:12px;border:1px solid #bbf7d0}
.stat-highlight .stat-number{display:block;font-size:2.5em;font-weight:800;color:#16a34a;line-height:1.2}
.stat-highlight .stat-label{display:block;font-size:.95em;color:#374151;margin-top:.3em}
.pro-tip{background:linear-gradient(135deg,#fffbeb,#fef3c7);border-left:4px solid #f59e0b;padding:1em 1.5em;margin:1.5em 0;border-radius:0 8px 8px 0}
.pro-tip strong{color:#92400e}
Want to make a watercolor painting that looks fresh, not messy? You can do it with a few smart steps and the right help. In this guide you’ll learn beginner watercolor painting tips that take the guesswork out of the process. We’ll cover what to buy, how to set up, a core wet‑on‑wet trick, a quick shape practice, and ways to finish and protect your work. Let’s get started.
One analysis of a single beginner watercolor course platform shows that CreativiU packs on‑demand video lessons, scientifically‑designed curriculum, vibrant community collaboration and personalized support, all for just $1 today.
| Name | Teaching Method | Curriculum Design | Community Features | Personalized Support | Starting Price | Best For | Source |
|---|---|---|---|---|---|---|---|
| CreativiU (Our Pick) | on-demand video lessons | scientifically-designed courses | peer and industry leader collaboration, community focus | personalized support | $1 today | Best for complete beginner support | creativiu.com |
A quick look at the method tells us why this matters. Only CreativiU ($1 today) provides personalized support at an introductory price, overturning the idea that one‑on‑one help costs a lot. The platform mixes video lessons with a scientific curriculum, a rare combo that gives a steady learning path. Community features let you chat with peers and pros, while most sites hide that behind a paywall.
The research was done on April 23, 2026. A web search grabbed product pages and logged teaching method, curriculum design, community features, personalized support and price. Only one platform fit the bill, so the table above shows the whole picture.
Step 1: Gather Your Materials
Before you even dip a brush, you need the right tools. The right tools make beginner watercolor painting tips work, not flop.
First, pick a brush. Most beginners do well with round brushes. Susan Chiang writes that round brushes let you hold a sharp point and still hold water. She names two solid choices: the Princeton Series 3750 Select Synthetic and the Winsor & Newton Cotman Watercolor Brushes. Both give a good snap back and a point that holds enough water for washes.
If you want a flat brush later, a size 12 flat can help you paint sky‑to‑ground gradients. You don’t need a fancy waterbrush; those plastic barrels are okay for sketching, but they won’t give you the same control on real paper.
Next, choose paper. Susan Chiang says paper is the most important factor. She recommends a 140 lb (300 gsm) cold‑pressed sheet. That weight stops the paper from buckling when you add a lot of water. Cold‑pressed gives a nice texture that works for both detail and big washes.
If you can, buy a pad of 50 sheets. Pads let you tear off one sheet at a time and keep the rest safe. For a tighter budget, a single sheet of 190 gsm works, but you’ll need to tape it down.
Don’t forget a palette, a jar of clean water, paper towels, and a light pencil for sketching. Keep everything tidy so you can focus on the paint.
Here’s a quick checklist you can print:
- Round synthetic brush (size 6)
- Flat brush (size 12) , optional
- Cold‑pressed 140 lb paper pad
- Tube watercolor set (12 colors)
- Palette, water jar, paper towels
- Light pencil (2H)
And if you want a guide that walks you through each of those items, check out Unlock Your Creativity with the Best Free Online Watercolor Classes. It shows how each tool fits into a beginner watercolor painting workflow.
Bottom line: Get a good round brush, quality paper, and a simple paint set, then you’re ready to start.
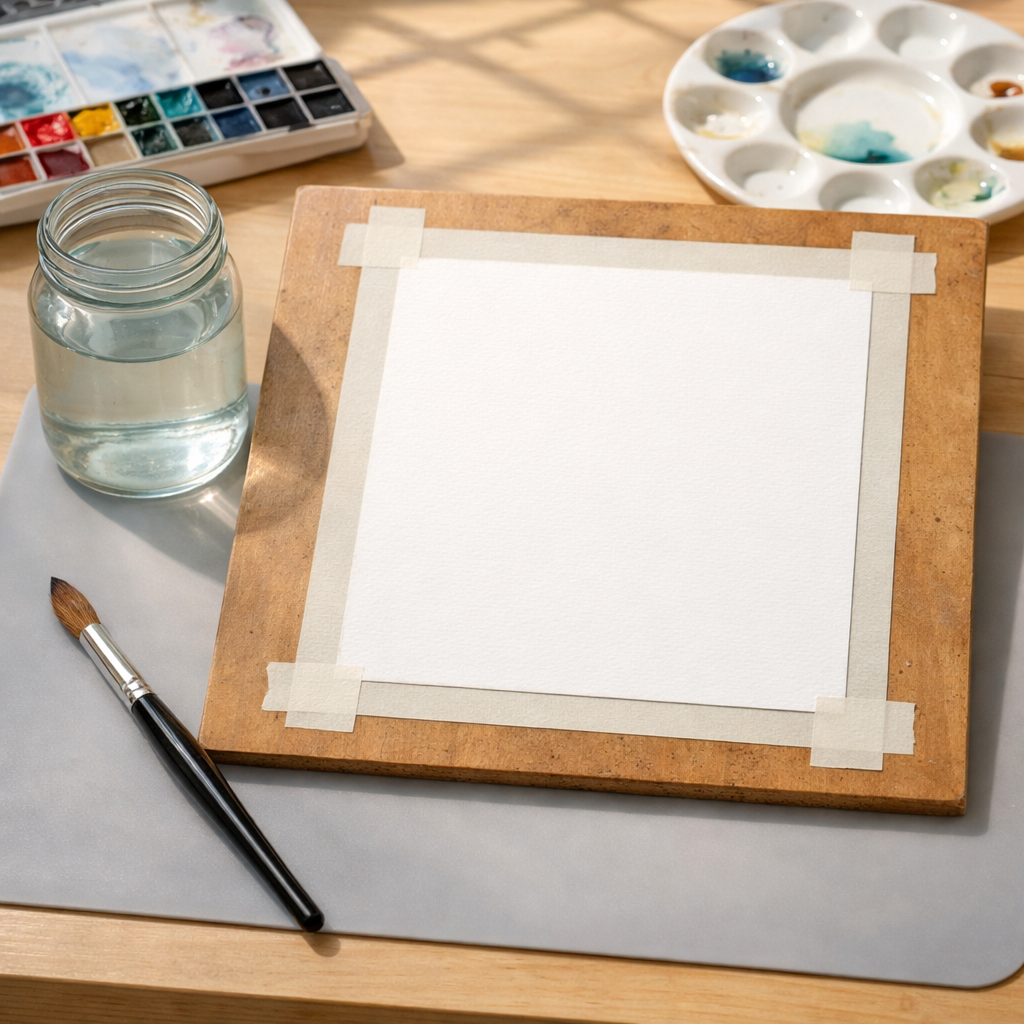
Step 2: Prepare Your Workspace
A tidy space helps you see what you’re doing. It also keeps water from spilling onto electronics.
First, find a flat table near a window with indirect light. Natural light shows true colors, and a flat surface keeps the paper from curling.
Lay down a sheet of wax paper or a silicone mat. That catches any stray drops and protects the table.
Use painter’s tape to secure the edges of your paper. Tape stops the sheet from lifting as it gets wet. You can tape all four sides, or just the bottom if you prefer a looser feel.
Keep a small container of clean water nearby. Change the water when it looks cloudy; fresh water keeps colors bright.
Have a few paper towels within arm’s reach. They’re great for blotting excess water or drying a brush quickly.
When you work in a quiet corner, you’ll notice the water flow better. That lets you practice the wet‑on‑wet technique with less mess.
Bottom line: A well‑lit, tidy table with taped paper and easy‑access water lets you focus on the paint.
Step 3: Master the Wet‑on‑Wet Technique
Wet‑on‑wet is a core skill in beginner watercolor painting tips. It gives you soft blends and dreamy looks.
The idea is simple: wet the paper first, then drop color while the paper is still wet. The pigment spreads and creates smooth gradients.
| What to Do | Why It Works |
|---|---|
| Load a large round brush with clean water. | Creates a wet surface that lets color move. |
| Tap the brush on the paper to leave a damp area. | Even wetness prevents puddles. |
| Load a second brush with a light wash of color. | Color spreads naturally into the wet area. |
| Watch the bloom and pull the edge with a clean brush. | Controls the shape of the wash. |
Start with a sky. Wet a strip across the top third of the paper. While it’s wet, drop a light blue wash. The paint will feather into the water, making a soft sky.
Practice with a simple shape like a circle. Wet a circle, then add a pink wash for a flower petal. The pink will flow outward, giving you a natural petal look.
If the paint looks too dark, remember it will lighten as it dries. That’s a key point in beginner watercolor painting tips , you often need to start a shade a touch stronger than the final look.
When you feel confident, try layering. Let the first wet‑on‑wet wash dry, then add a second, slightly darker wash on top. That builds depth without muddying.
For a deeper dive into brush holds that affect wet‑on‑wet, see A Practical Guide to an Interactive Watercolor Painting Course …. It shows how to load the brush for maximum control.
Bottom line: Wet the paper first, add color while it’s wet, and watch the paint dance.
Step 4: Practice Simple Shapes (Video)
Shapes are the building blocks of every picture. If you can paint a clean circle, you can paint a leaf, a fruit, or a simple landscape.
Watch the video below. It walks you through painting a circle, a square, and a triangle using wet‑on‑wet and wet‑on‑dry methods.
After the video, grab a fresh sheet of your 140 lb paper. Sketch a light pencil circle about 2 inches across. Wet the area with clean water, then drop a soft green wash. Let it spread, then add a darker green edge while still wet.
Next, try a square. Wet the square, add a light yellow, then use a dry brush to pull the edges inward for a subtle texture.
Finally, a triangle. Wet the triangle, use a red wash, and while it’s wet, drag a darker red down one side to suggest a shadow.
“The best time to start building skill was yesterday.”
Do each shape three times. The repetition builds muscle memory, a must‑have part of any beginner watercolor painting tips list.
Bottom line: Simple shapes let you practice control, water flow, and color placement without pressure.
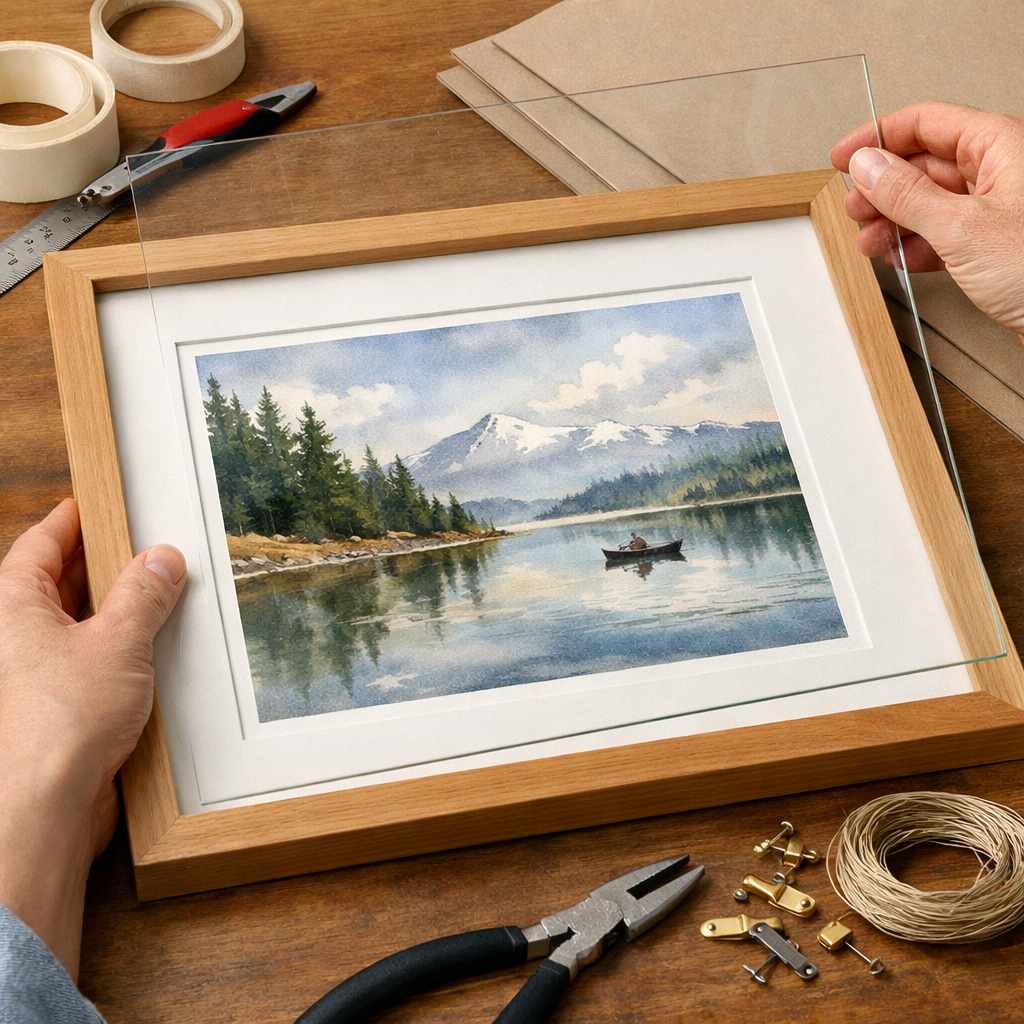
Step 5: Finish & Preserve Your Painting
When the paint is dry, you need to protect it. A finished piece can get dust, light, or water damage.
First, check the surface. If the paper is still a bit cupped, flatten it with a clean board and a light press. Some artists use a warm iron on low heat, but a simple book press works fine.
Next, consider framing. PaintingwithWatercolors.com suggests using a pre‑made frame that includes a mat board, glass, and backing. The mat keeps the paper from touching the glass, which can cause sticking.
If you want a budget option, use a simple poster frame and a piece of acid‑free board behind the painting. Tape the board to the back of the frame with archival tape.
For extra protection, spray a light fixative designed for watercolors. It adds a thin seal that keeps dust off and reduces water spots.
When you share your work online, photograph it with natural light and a neutral background. That keeps colors true and shows off the soft edges you created with wet‑on‑wet.
Our pick, CreativiU, even offers a feedback loop where you can upload a photo of your finished piece and get personalized notes. That extra step can help you spot tiny issues you missed in the studio.
Bottom line: Flatten, frame, and protect your work to keep it looking fresh for years.
FAQ
What basic supplies do I need for beginner watercolor painting tips?
You need a round synthetic brush (size 6 is a solid start), a tube set of at least 12 colors, a 140 lb cold‑pressed paper pad, a palette, a water jar, paper towels, and a light pencil. Adding a flat brush for larger washes and a piece of artist’s tape rounds out the kit. These items cover the core beginner watercolor painting tips without overwhelming your budget.
How do I control water on the paper?
Start with a small amount of water on the brush. Test the wash on a scrap piece first. If it spreads too far, use less water or a drier brush. When you want a soft edge, keep the paper slightly wet and add color slowly. Practicing on scrap paper lets you feel the balance before you paint your final piece.
What is the best way to learn wet‑on‑wet?
Wet the area you want to blend first, then add a light wash of color while the paper is still damp. Watch the pigment bloom and pull the edge with a clean brush if you need a sharper shape. Let the layer dry completely before adding another color to avoid muddy results.
Can I use student‑grade paper for beginner watercolor painting tips?
You can, but student paper often warps when it gets wet. If you choose a lighter weight, be ready to tape it down or stretch it. Professional cotton paper, like the 140 lb cold‑pressed option, stays flat and gives you more consistent results, which is why most beginner guides recommend it.
How often should I practice to see improvement?
Small, daily sessions work best. Aim for 10‑15 minutes a day, focusing on one technique, like a wash, a shape, or a color mix. Consistent practice builds muscle memory faster than long, occasional sessions. Keep a simple sketchbook to track progress.
How do I fix a mistake after the paint has dried?
If the paint is too dark, lift it with a damp brush or a clean paper towel. For small spots, a dab of clean water can re‑wet the area enough to blend. If the error is large, you can add a light glaze over it once the layer is dry, which softens the look without erasing the underlying work.
What should I do with my finished painting?
Flatten any cupping, frame it with a mat and glass, and consider a light fixative spray. Store the framed piece away from direct sunlight to prevent fading. If you plan to sell or share online, photograph it under natural light with a neutral background.
Conclusion
Now you have a clear roadmap of beginner watercolor painting tips. You know what tools to buy, how to set up a tidy space, the wet‑on‑wet trick that gives soft blends, a simple shape practice routine, and the steps to finish and protect your work. The biggest secret is to keep it simple and practice often. With each small session you’ll see your confidence grow and your paintings look more polished.
CreativiU makes this journey even easier. Their $1 starter plan gives you video lessons, a science‑backed curriculum, a supportive community, and one‑on‑one feedback. That combination lines up perfectly with the beginner watercolor painting tips we’ve shared.
Ready to pick up that brush and start? Grab your supplies, set up your space, and dive into the first wet‑on‑wet wash. The only thing standing between you and a beautiful watercolor is the first step. Happy painting!
Leave a Reply