Most crafters hit a wall when they try to move beyond simple stamps. The missing piece is a clear, step‑by‑step system that works on a kitchen table. This guide walks you through an advanced leather tooling techniques online class from start to finish. You’ll learn how to plan a project, pick the right tools, practice real stamping patterns, finish a piece, and avoid the common pitfalls that slow beginners down.
By the end you’ll have a specific workflow you can follow in any online class , whether you’re using CreativiU’s platform or any other resource that offers video lessons and downloadable worksheets.
Step 1: Define project scope and gather basics
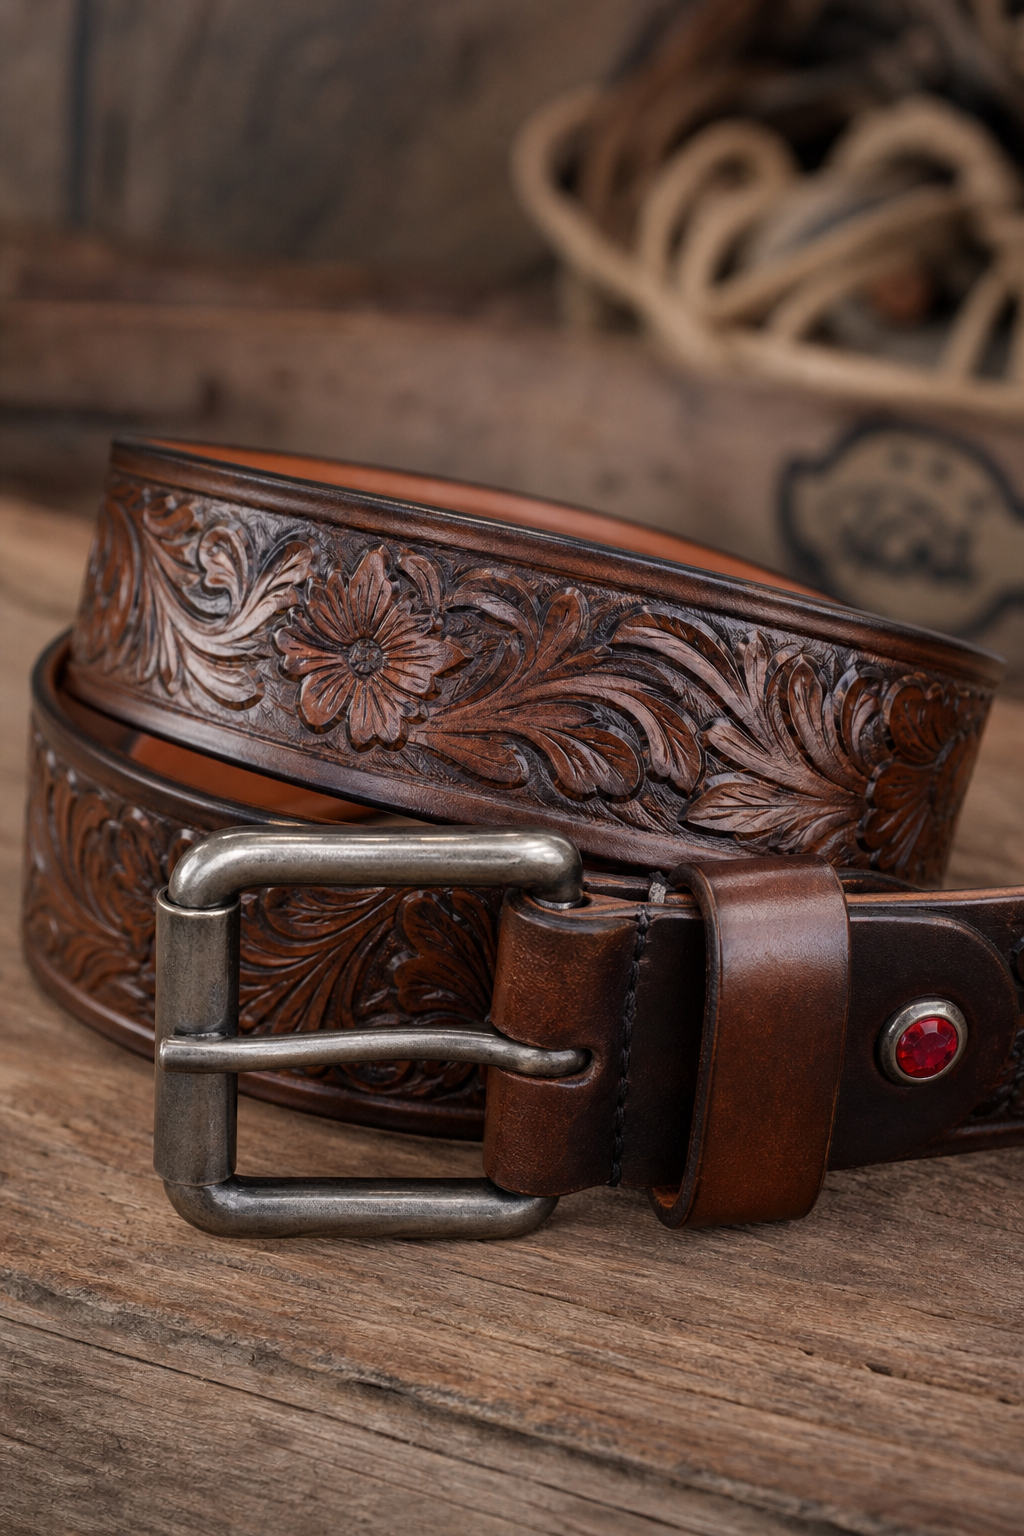
Before you open a video, ask yourself what you want to create. A belt, a wallet, a decorative panel? The end goal decides the size of the leather, the depth of the stamp, and the amount of time you’ll need.
Write a brief brief (yes, brief) that lists:
- Project name , e.g., “Floral belt”.
- Desired dimensions , length, width, thickness.
- Skill focus , stamping, edge finishing, dyeing.
Keeping this on a sticky note helps you stay on track when the instructor jumps between topics.
Next, gather the basics the class will expect you to have. Most advanced courses assume you own a self‑healing cutting mat, a set of basic stamps, and a leather that’s already conditioned. If you’re new to the material, you can start with vegetable‑tanned leather; it holds detail well and is easy to dye later.
CreativiU’s free trial lets you peek at the syllabus and see exactly which basics they cover. Their community forum also posts a printable checklist that matches the “project scope” step, so you can compare notes with other learners.
Finally, set up a simple tracking sheet. Columns for “Date”, “Task”, “What went well”, and “What to fix” keep your progress visible. After each practice session, fill in one row. Over time you’ll spot patterns , maybe you need a steadier grip on the hammer or a sharper stamp , and you’ll know exactly what to ask the instructor about.
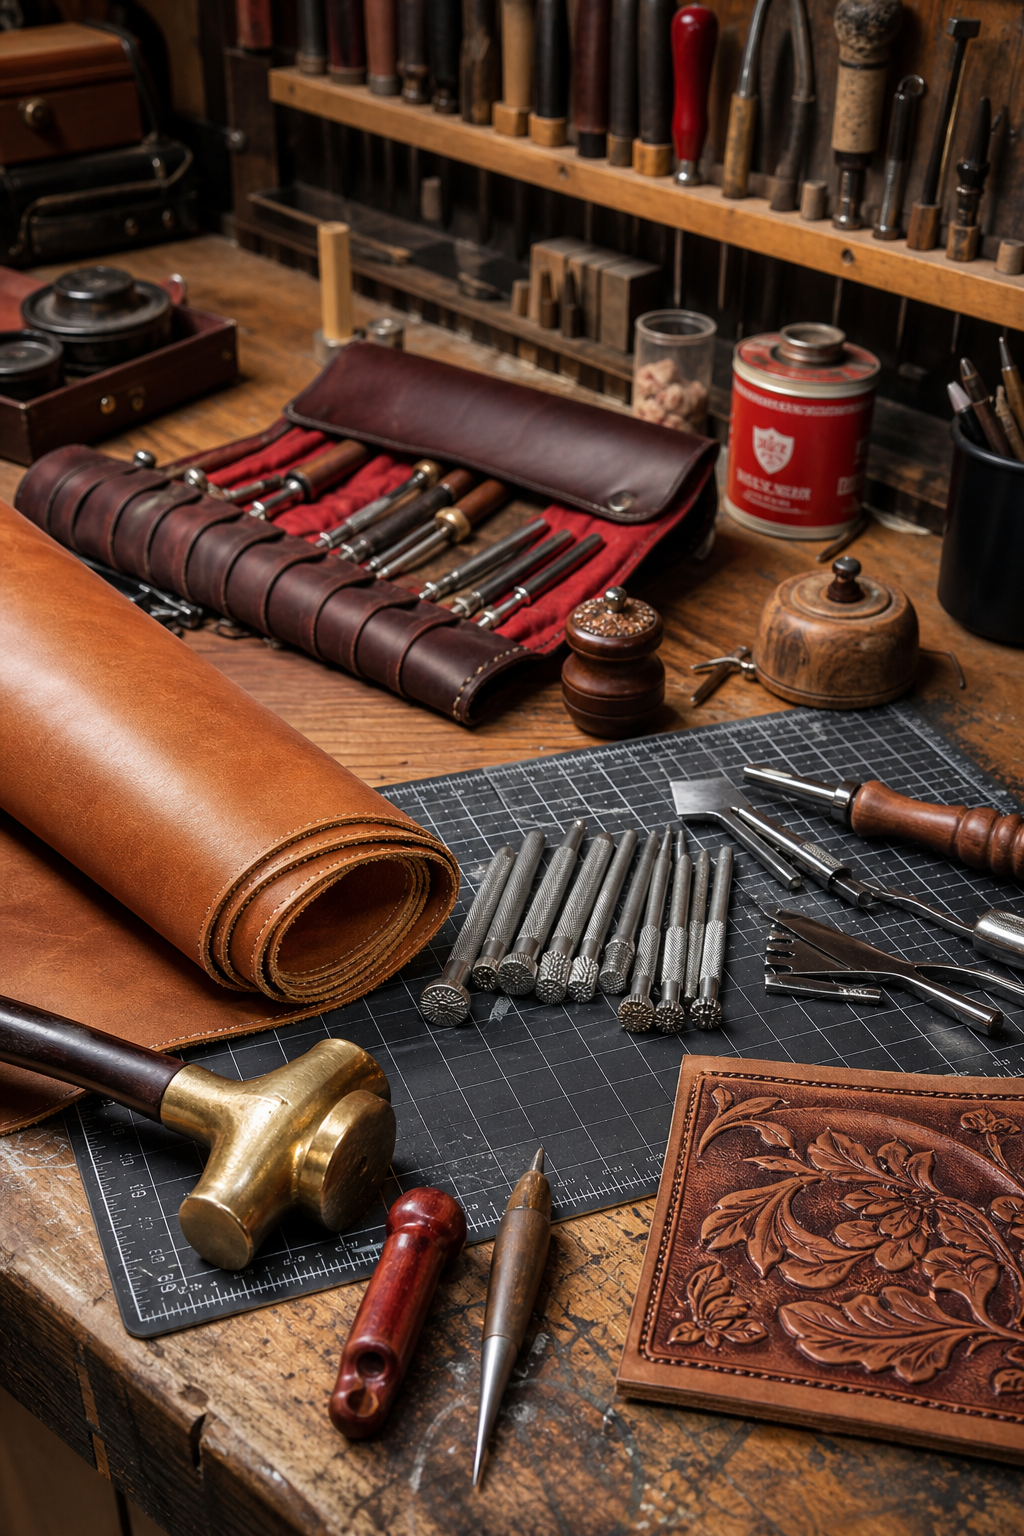
Step 2: Choose tools and materials
Tool choice makes or breaks a stamping session. The right hammer weight, the correct stamp depth, and a clean work surface all affect how crisp the impression will be.
Start with a leather‑working hammer. A 12‑oz brass hammer offers enough force without bruising the hide. If you prefer a lighter feel, a 10‑oz wood‑handled hammer works too. The head should be flat on one side for even blows and slightly domed on the other for tapping delicate details.
Stamps come in two families: single‑letter or full‑pattern. For an advanced class, you’ll likely use a mix. Choose steel stamps with a polished finish; they produce clean lines and resist wear. Avoid cheap zinc stamps , they chip after a few dozen hits.
Leather itself matters. Full‑grain vegetable‑tanned leather takes the deepest impressions and ages beautifully. If you’re on a budget, top‑grain leather still works but may need a stronger hammer.
Don’t forget the supporting gear: a sturdy workbench, a self‑healing mat, and a set of stitching chisels for later finishing. Leather wallet tutorial on CreativiU shows how a simple bench setup can double as a cutting station and a stamping area.
When you buy tools online, look for a warranty or a return policy. A good sign is a vendor that lists a clear support email and offers a 30‑day guarantee.
Here’s a quick decision matrix to compare common hammer types:
Choosing the right combo saves you from re‑doing a piece because a stamp slipped or the leather split.
Once you have the tools, test them on a scrap piece of leather. Tap each stamp a few times, then examine the impression under a bright lamp. If the lines are fuzzy, sharpen the stamp edge with a fine‑grit file before the class begins.
Step 3: Master stamping patterns (technique demonstration)
Now the real learning starts. An advanced leather tooling techniques online class usually begins with a live demo of basic stamps, then moves to complex motifs.
Watch the instructor’s hand closely. Notice the angle of the hammer, the distance between the stamp head and the leather surface, and the timing of each strike. A good rule of thumb is to let the hammer fall naturally , don’t force it. This gives a clean impression and protects the stamp.
After the video, pause and repeat the motion on your own leather. Do three repetitions per stamp, then flip the leather and check the depth. If the impression is shallow, raise the hammer a millimeter higher on the next strike.
When you combine stamps, plan the layout first—consider a quick lesson in pattern drafting to improve your design workflow. Sketch the design on tracing paper, then transfer it to the leather with a scratch awl. The awl makes tiny dents that guide the stamp placement, preventing mis‑alignment.
Here’s a simple workflow for a floral motif:
- Draw the flower outline on paper.
- Trace onto the leather using a scratch awl.
- Place the central stamp on the tip of the awl dent.
- Tap gently, then move outward to the petal stamps.
- Step back, inspect, and adjust depth as needed.
Repeat this loop until the pattern feels balanced. The class will likely give you a printable pattern PDF , download it and keep it handy.
According to Wikipedia’s leathercraft entry, the depth of a stamp should be about one‑third the thickness of the leather for optimal detail. This rule helps you avoid over‑pressing, which can tear thin hides.
For safety, wear nitrile gloves if you’re handling chemicals later in the class. The OSHA page on occupational exposures notes that leather dust can be an irritant, so a mask is wise during sanding or edge sanding.
After you’ve mastered the demo, record a short clip of your own work. Play it back at half speed to catch tiny timing errors , a habit many pros use to refine their technique.
Step 4: Practice project finish and surface protection
With the pattern nailed down, it’s time to finish the piece. Finishing not only adds shine but also protects the leather from wear.
First, edge burnish the borders. Use a slicker or a wooden burnisher, applying light pressure and moving in small circles. This compresses the fibers and gives a glossy edge.
Next, apply a leather conditioner. A thin coat of a water‑based conditioner penetrates the hide and restores oils lost during stamping. Let it soak for ten minutes, then wipe away excess with a soft cloth.
If you want color, dye after conditioning. Use a sponge to spread the dye evenly, then let the leather dry fully before moving on. Test the dye on a scrap swatch to avoid surprises.
Seal the surface with a clear finish. A spray sealant works well for large panels, while a brush‑on acrylic sealant is better for small items like wallets.
Here’s a quick checklist to run before you call the project complete:
- All stamps are crisp and evenly spaced.
- Edges are burnished and free of burrs.
- Conditioner has been applied and wiped.
- Dye (if used) is fully dry.
- Sealant is even, no runs.
Following this checklist reduces the chance of a cracked finish later on.
CreativiU’s community forum often shares before‑and‑after photos of finished projects. Seeing real examples can help you gauge whether your own piece meets the class standards.
Once the sealant cures (usually 24 hours), your project is ready for use or for display in a portfolio. Document the final piece with a photo and a short note on what you learned , this becomes a reference for your next class.
Step 5: Troubleshooting and avoiding common mistakes
Even with a solid plan, things can go wrong. Below are the most common hiccups and how to fix them.
Shallow stamps: Usually caused by a hammer that’s too light or a stamp that’s dull. Sharpen the stamp edge with a fine file, or switch to a heavier hammer.
Leather splits: Happens when the hide is too thin for the depth of the stamp. Switch to a thicker leather or reduce the hammer height.
Mis‑aligned patterns: If the awl dents shift, the stamps will follow. Use a ruler to keep the awl line straight, and double‑check placement before each strike.
Uneven edge burnish: Often the result of inconsistent pressure. Practice a circular motion on a scrap edge until the shine looks uniform.
When you encounter a problem, pause the video and revisit the relevant segment. Most online classes let you bookmark timestamps, so you can jump right back to the part where the instructor demonstrates the step you’re stuck on.
Another useful trick is to ask the community. A quick post with a photo of the issue often yields a solution from a peer who faced the same snag.
If you’re still stuck after trying these fixes, consider scheduling a live Q&A session if the platform offers one. Direct feedback can clear up confusion faster than endless trial and error.
FAQ
What equipment do I need for an advanced leather tooling techniques online class?
You’ll need a sturdy workbench, a self‑healing cutting mat, a brass or steel hammer (12 oz works for most stamps), a set of steel stamps, a scratch awl for layout, a leather conditioner, and a clear sealant. A set of stitching chisels and a burnisher round out the kit for finishing touches. Having these basics ready lets you follow the class without pausing to hunt for tools.
How long should I practice each stamping pattern before moving on?
Aim for at least ten repetitions per stamp on a scrap piece. This gives your hand muscle memory enough time to develop a consistent hammer height and strike speed. After you feel the impression is uniform, try the pattern on the actual project leather.
Can I use a cheaper leather instead of vegetable‑tanned full‑grain?
Yes, but expect shallower impressions. Top‑grain leather works for practice, but for a final piece you’ll want full‑grain because it holds detail better and ages nicely. If budget is tight, buy a small piece of full‑grain for the finished project and use cheaper leather for drills.
Is the CreativiU platform really the best choice for advanced classes?
CreativiU stands out because it offers a clear $1 trial, a $7.95 /month subscription, and a built‑in community where you can share work and get feedback. Other platforms hide pricing or lack a peer forum, which can make learning feel isolated.
How do I protect my finished leather from water damage?
Apply a water‑based sealant after conditioning and dyeing. Let it cure for 24 hours, then reapply a thin coat every few months if the item sees frequent moisture. This creates a barrier that keeps the leather supple and resistant to stains.
What should I do if my stamps are breaking?
Breakage often means the stamp is low‑grade zinc. Switch to steel stamps, which resist wear. Store stamps in a soft pouch to avoid knocks, and avoid hammering directly on the edge of a stamp , aim for the center of the head.
How can I tell if my leather is leather‑hard enough for stamping?
Press a fingertip into the leather; it should give a slight give but not bend. Another test is to try a light tap with a stamp , if the impression is faint, the leather is still too soft. Let it air‑dry for another hour and test again.
Do I need to buy a separate online class for finishing techniques?
Many advanced leather tooling courses bundle finishing into the same curriculum. If yours does not, look for a short module on edge burnishing and sealing. CreativiU’s library includes a dedicated finishing lesson that pairs well with their stamping courses.
Conclusion
Advanced leather tooling techniques online class can feel intimidating, but breaking the journey into clear steps makes it doable. Start by defining a specific project, gather the right tools, master stamping with focused practice, finish with careful conditioning and sealing, and troubleshoot any hiccups along the way. The community on CreativiU adds a layer of support that many other platforms lack, and the transparent pricing removes the guesswork from budgeting.
Pick a simple project, follow the workflow, and you’ll see measurable progress after each session. Once you’ve built confidence, you can tackle larger pieces, experiment with custom patterns, and even teach others. The skills you gain are portable , you can apply them to belts, wallets, decorative panels, and more.
Ready to start? Sign up for the trial, download the starter checklist, and look at your first stamping video. Your next masterpiece is just a hammer strike away.
Leave a Reply