Imagine you just got a small box in the mail. Inside is a tiny wooden handle, a few skeins of bright yarn, and a piece of cloth with a simple flower printed on it. You’ve never tried punch needle embroidery for beginners, but the idea of turning that plain cloth into a soft, fluffy picture feels like a fun project you can finish in an afternoon. The catch? You’re not sure what tools you need, how to stretch the fabric, or which needle size will give you the right loop height. You might feel a little stuck, like you have the puzzle pieces but not the picture on the box.
That’s why this guide exists. It walks you step‑by‑step through everything you need to start punch needle embroidery for beginners. We’ll cover the tools, the fabric prep, how to set up the needle, basic stitches, and a simple design you can finish today. By the end you’ll have a finished piece you can hang, gift, or use as a cozy pillow. You’ll also see how online classes at A Practical Guide to Online Embroidery Classes for can give you extra video help whenever you need it. Let’s jump in and make those loops pop.
Essential Tools and Materials
Getting the right kit makes punch needle embroidery for beginners feel like a smooth ride. A good starter kit gives you a pre‑printed cloth, a wooden punch needle, a threader, and enough yarn to finish the design. The EasyRest guide to the best punch needle kits points out a few kits that work well for new makers. The Punchora Floral Series, for example, comes with a framed canvas and a free thread guarantee, which removes a lot of the worry about running out of yarn.
Here are the core items you’ll need:
- Punch needle tool – wood handle with a slit‑thread design works best for comfort.
- Monk’s cloth or weaver’s cloth – a tight weave that holds loops securely.
- Yarn or embroidery floss – choose a yarn weight that matches the needle size.
- Hoop or frame – a non‑slip hoop keeps the fabric drum‑tight.
- Scissors and threader – sharp snips and a small threader save time.
Why each item matters:
- The wooden handle reduces hand fatigue during long sessions.
- A tight‑woven cloth prevents loops from slipping out.
- Thicker yarn gives a plush look, while fine floss lets you add detail.
- A tight hoop creates even tension, which is the secret to smooth rows.
- Good scissors make clean cuts so the back of your piece stays neat.
When you shop, think about the projects you want to try. If you plan to make a small coaster, a budget starter kit with a 7‑inch hoop is enough. If you want a wall hanging, look for a kit that includes a larger framed canvas. You can also mix and match tools later – many crafters start with a starter kit and then add a professional‑grade Oxford punch needle (source) for bigger projects.
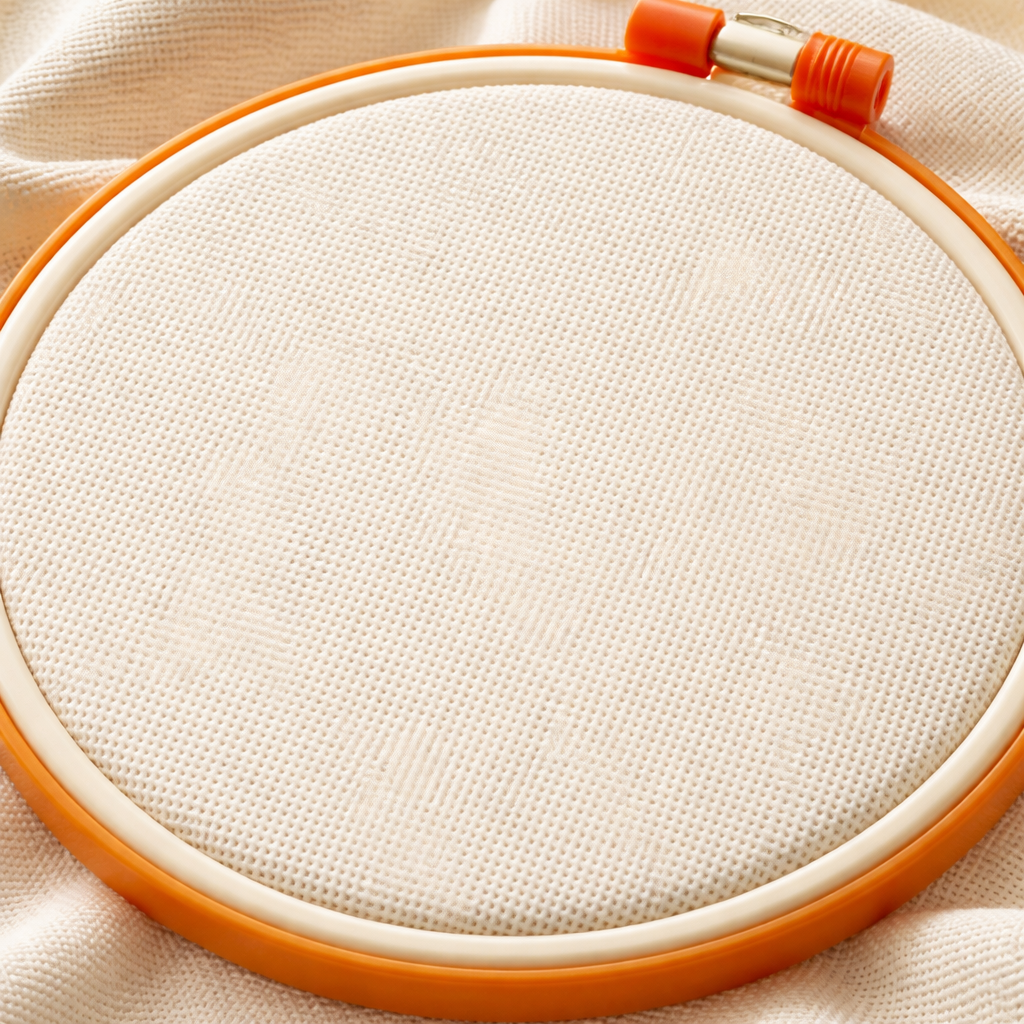
Step 1: Preparing Your Fabric and Hoop
Before you punch, you need the fabric tight and flat. A loose cloth will let loops fall out and make the design look uneven. Jennifer Maker shows a clear way to get the tension right on her tutorial page (how to punch needle for beginners).
Follow these steps:
- Lay your monk’s cloth on a clean surface.
- Place the inner ring of a plastic non‑slip hoop on the cloth.
- Pull the fabric up over the edge and set the outer ring on top.
- Tighten the screw until the cloth feels as tight as a drum.
- Check for wrinkles by running your fingers over the surface; smooth out any folds.
Why a drum‑tight stretch matters: it keeps each loop at the same height, which means the texture looks even on both sides. If the fabric is too loose, you’ll hear a “click” as the needle slides, and loops will drop out.
Here’s a quick tip: after tightening, give the fabric a gentle tap with your fingertip. That settles the weave and helps you feel the tension.
Imagine you’re making a tiny animal coaster. You would cut the cloth just a little bigger than the hoop, stretch it, and you’ll have a perfect base for your design.
Two extra resources that can help you master the stretch:
- Jennifer Maker’s step‑by‑step video guide – see the exact motion of tightening the hoop.
- EasyRest’s list of starter kits – find kits that include pre‑printed cloth that’s ready to hoop.
When you feel the cloth is tight, you’re ready for the needle.
Step 2: Setting Up Your Punch Needle
Choosing the right size needle is the first big decision in punch needle embroidery for beginners. Amy Oxford’s size guide explains how each number changes loop height. The #10 Regular point is the classic first pick because it makes loops about ¼ inch high, which works well with most worsted yarns (Oxford punch needle size guide).
Here’s how to set it up:
- Insert the needle tip into the handle until you hear a click.
- Choose the loop‑height setting. For a beginner project, set it to the medium level (around ¼ inch).
- Thread the needle using the built‑in threader or a small metal threader.
- Pull the yarn through until a short tail sticks out of the eye.
- Give the yarn a gentle pull so there’s just enough slack to start the first stitch.
Why the #10 Regular works best: it balances loop size and ease of use. Bigger needles (#8) make very tall loops that need heavy rug yarn, while finer needles (#14) need very thin floss and can be tricky for a new hand.
Pro tip: after you thread, do a quick test stitch on a scrap of the same cloth. If the loop pops up cleanly and stays even, you’re set.
Below is a short video that shows the whole set‑up in action.
Two more places to learn about needle sizes:
- Oxford’s official size chart – see the loop height table.
- EasyRest’s review of starter kits – many kits include the #10 Regular.
Now that your needle is ready, you can move on to stitching.
Step 3: Stitching Basic Stitches
Basic stitches are the foundation of punch needle embroidery for beginners. Once you get the rhythm of up‑stroke and down‑stroke, you can fill any shape.
Getting the needle direction right
The open side of the needle must face the direction you move. If you push the needle wrong, the loops will sit flat on the back side and look messy. Test this by pressing down and watching the loop pop up on the front side.
Up‑stroke, down‑stroke rhythm
Place the tip on the cloth, press straight down, then pull the needle up just enough that the tip kisses the surface. Slide it over about the width of the needle and repeat. Think of it as a tiny piano beat: down‑press makes a loop, up‑move gets ready for the next.
Making a solid border
Start with the outline of your shape. Keep stitches a little closer together than the fill rows. When you reach a corner, press down, turn the fabric while the needle stays down, and continue. This keeps the edge sharp.
Filling the shape
Work in rows or a spiral. Stagger the rows like bricks to avoid gaps. Every now and then flip the fabric to the back side and check that the loops are all the same height.
Common issues and fixes:
- If loops fall out, lower the tension on the yarn – there should be a tiny slack.
- If the needle jams, the fabric may be too tight; loosen the hoop a notch.
- Uneven rows? Adjust your slide distance so each stitch is the same width.
When you finish, tap the back of the fabric with your fingertip. This settles the loops and gives a smooth surface.
For more detailed stitch examples, you can look at the SeWWhatAlicia pattern guide and the Marching North beginner guide. Both sites show clear photos of the border and fill steps.
Now you have the basics to start any design.
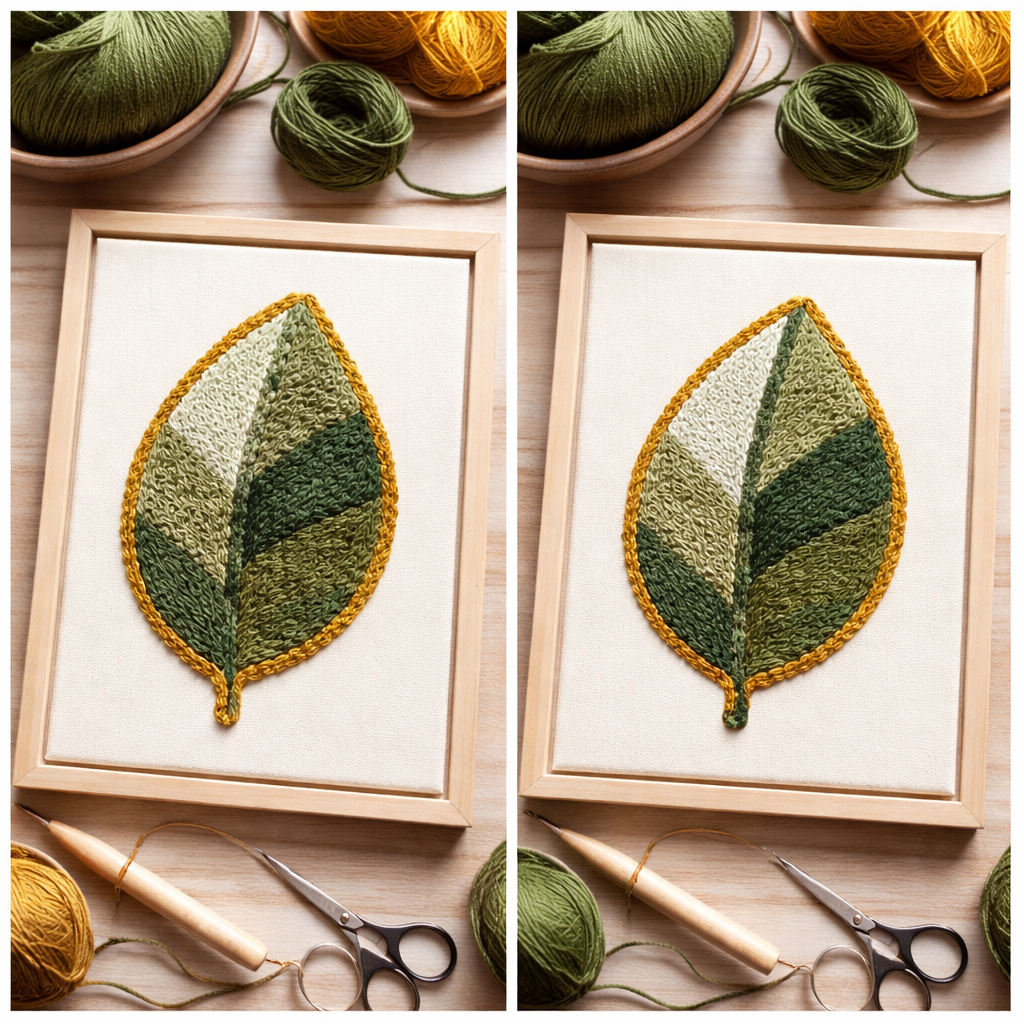
Step 4: Creating a Simple Design – Comparison Table Included
Let’s put the stitches together into a tiny leaf design. This pattern works for a 6‑inch hoop and uses only two colors of yarn.
First, draw the leaf outline on the back of the cloth with a washable marker. Then, follow these steps:
- Stitch the outline using the border technique.
- Fill the leaf with a gentle back‑and‑forth motion, keeping rows close.
- Switch to a second color for the veins and add thin lines with a back stitch.
The result is a soft, textured leaf you can hang on a wall or turn into a pillow patch.
Here’s a quick comparison of three starter projects you might try after the leaf:
| Project | Primary Stitch | Estimated Time | Best Needle Size |
|---|---|---|---|
| Mini‑leaf badge | Border + fill | 15 min | #10 Regular |
| Monogram heart | Back stitch + satin fill | 25 min | #13 Fine |
| Floral coaster set | All three basic stitches | 45 min | #9 Regular |
Why compare? Each project adds a new skill. The badge teaches quick borders, the heart adds lettering, and the coaster set mixes all stitches for a fuller practice.
If you need extra help, you can explore related ideas at How to Master AI Video Editing for Social Media or learn how to add video flair to a craft showcase. For event ideas, check out How to Choose the Best Corporate Event Photo Booth Rental for Your Business. These links give creative inspiration beyond stitching.
Other fun reads that pair well with punch needle projects:
- How to Choose the Perfect Wedding Photo Booth Rental: A Step‑by‑Step Guide
- Everything You Need to Know About 360 Video Booth Rental
- Mirror Photo Booth Rental: 7 Must‑Know Tips for an Unforgettable Event
- Photo Booth Rental Murrieta: A Complete Guide for 2026 Events
- Your Complete Guide to Photo Booth Rental Temecula for Unforgettable Events
- Photo Booth Rental for Graduation Party: A Step‑by‑Step Guide
- How to Choose the Perfect Prom Photo Booth Rental for an Unforgettable Night
- Birthday Party Photo Booth Rental Guide for 2026
- Your Complete Guide to Photo Booth Rental San Diego
- AI Video Editing Tutorial: A Simple Guide for Business Owners
With the leaf pattern done, you’ve practiced the core steps of punch needle embroidery for beginners and have a small piece you can proudly show.
Conclusion
We’ve walked through everything you need to start punch needle embroidery for beginners. You learned how to pick the right kit, how to stretch the fabric in a hoop, how to set up the needle, and how to stitch a basic border and fill. The simple leaf design gave you a quick win, and the comparison table shows where to go next. Remember to keep your fabric tight, choose the #10 Regular needle for most starter projects, and practice the up‑stroke rhythm until it feels natural.
Now you have a finished piece you can frame, turn into a pillow, or give as a gift. If you want more guided practice, the online classes at Punch Needle Embroidery for Beginners: A Step‑by‑Step Guide provide video lessons you can replay anytime. Keep a notebook of what yarn, fabric, and needle combos work best for you – that little habit saves time on every new project.
Happy looping! Grab your hoop, pick a bright yarn, and let the loops grow. Each stitch brings a calm focus that boosts mood, and the finished art adds a personal touch to your home.
FAQ
What basic tools do I need for punch needle embroidery for beginners?
You need a punch needle (the #10 Regular is a solid start), a tight‑woven fabric like monk’s cloth, a non‑slip hoop, yarn or embroidery floss that matches the needle size, a small threader, and sharp scissors. A simple starter kit often bundles these items, so you can begin without hunting for separate pieces.
How do I prepare the fabric so the loops stay in place?
Stretch the fabric in a hoop until it feels as tight as a drum. Make sure the cloth is flat and free of wrinkles. Tap the surface with your fingertip to settle the weave, then check the tension by pulling a corner gently – it should give a tiny resistance without tearing.
What is the best needle size for my first project?
For most beginner projects, the #10 Regular Oxford punch needle works best. It creates loops about ¼ inch high, which show up well with medium‑weight yarn. If you want finer detail, you can move to a #13 Fine, but the #10 gives a forgiving start.
How can I keep my stitches even and avoid gaps?
Practice the up‑stroke, down‑stroke rhythm on a scrap piece first. Keep the slide distance about the width of the needle and maintain a steady hand. Stagger rows like bricks and check the back side often; a quick tap can settle any loose loops.
What should I do if a loop falls out while I’m stitching?
Pause, pull the yarn gently back through the needle, and re‑punch the spot. If the loop keeps slipping, lower the yarn tension a little or loosen the hoop a notch. A tight but not overly tight fabric usually prevents most drops.
How long does it typically take to finish a simple design?
A small leaf or coaster pattern can be finished in 15‑45 minutes, depending on the size and your speed. The key is to work in short bursts, keep the tension consistent, and use the border‑first method to frame the shape.
Can I wash my finished punch needle piece?
Yes. Hand wash in lukewarm water with a mild detergent, then lay flat to dry. If the back side feels rough, a light spray of fabric glue can lock loops in place, but most pieces stay soft after gentle washing.
Where can I find more video tutorials for punch needle embroidery for beginners?
Check out the Punch Needle Embroidery for Beginners: A Simple Step‑by‑Step Guide page. It offers a library of free videos that walk you through each step, from hoop setup to final finishing touches.
Leave a Reply