Ever sat on your couch, yarn tangled in your hands, and thought, “I wish I could actually learn to knit without feeling lost?”
You’re not alone. That vague mix of excitement and intimidation is exactly what pushes most beginners to hit pause on their creative cravings.
But what if the solution was just a click away, waiting in a cozy digital studio where you can pause, rewind, and practice at your own pace?
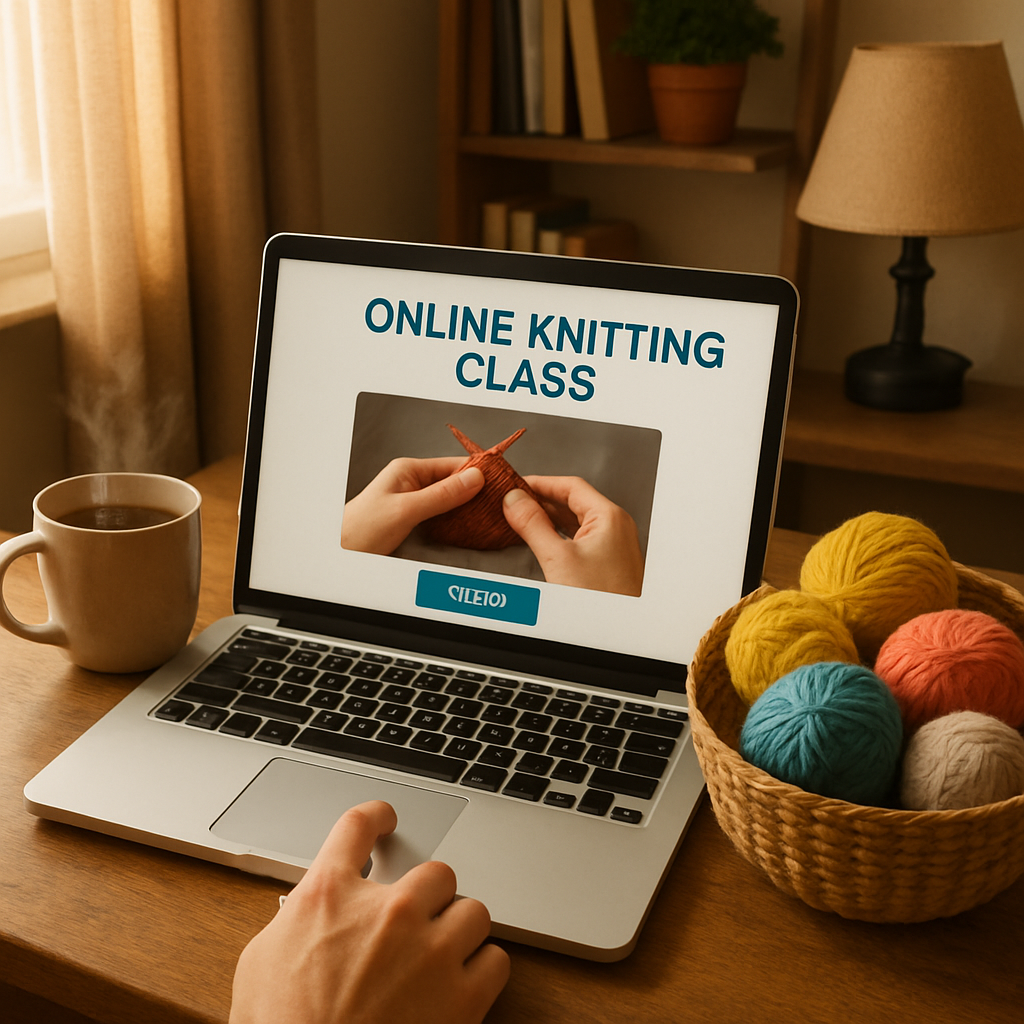
Welcome to the world of online knitting classes for beginners – a space designed to turn those shaky first stitches into confident rows, all from the comfort of your favorite chair.
Think about that feeling when you finally get the hang of the knit stitch and your scarf starts to take shape. It’s a tiny victory that feels huge, like discovering a secret shortcut in a video game.
In these classes, seasoned instructors break down each move step‑by‑step, using close‑up video, printable cheat sheets, and live Q&A sessions that feel more like a chat with a friend than a lecture.
And because they’re online, you can fit a lesson into a coffee break, a lunch hour, or even a rainy afternoon without worrying about catching a bus to a studio.
So, how does it actually work? First, you pick a platform that matches your learning style – maybe you love visual demos, or you prefer written patterns you can annotate. Next, you gather the basics: a pair of needles, a skein of yarn, and an open mind.
From there, you’ll practice the foundational knit and purl stitches, learn how to read simple charts, and finish a beginner‑friendly project like a scarf or dishcloth – all while getting feedback from a community that celebrates every misstep as part of the journey.
Sounds doable, right? The best part is that you don’t need any prior experience; the courses are built on the assumption that you’re starting from zero.
Ready to swap hesitation for a handful of yarn and a sense of accomplishment? Let’s dive in and explore why online knitting classes for beginners might just be the creative boost you’ve been craving.
TL;DR
Stared at yarn, wishing knitting could be as simple as a coffee break? Online knitting classes deliver videos, cheat sheets, and support.
Spend just a few minutes daily, and you’ll master knit and purl stitches, finish a cozy scarf, and gain the confidence to keep creating—all without ever leaving home.
Step 1: Choose the Right Online Knitting Platform
Ever felt like you’re scrolling through endless knitting tutorials and still can’t decide which one actually fits your learning style? You’re not alone. The first step isn’t about buying the fanciest needles – it’s about picking a platform that feels like a friendly neighbor, not a corporate lecture hall.
What to look for in a platform
1. Clear structure. Courses that break lessons into bite‑size video chapters let you pause, rewind, and practice without feeling rushed. 2. Community support. A forum or live Q&A where you can ask, “I keep dropping stitches on this row,” and get a quick, encouraging answer. 3. Resource bundles. Downloadable cheat sheets, pattern PDFs, and a printable checklist make the learning experience tangible.
Does the platform offer a free trial? Try it for a week and see if the instructor’s voice feels like a chat over coffee. If you’re still unsure, check out a sample lesson – most sites let you watch the first video without paying.
Real‑world examples
Take How to Knit a Scarf for Beginners Step by Step. The course is split into four short modules: yarn basics, casting on, the knit stitch, and finishing the scarf. Each module includes a 5‑minute video, a printable pattern, and a community thread where learners share photos of their progress. One student wrote, “I could rewind the cast‑on demo three times before I got it right – that saved me hours of frustration.”
Another example is Alice’s roundup of pattern websites. She points out that platforms integrated with Ravelry let you instantly see which yarn other knitters used for the same pattern, so you never guess “what should I buy?” This kind of instant feedback loop is priceless for beginners.
So, what should you do next?
Step‑by‑step checklist
1. Write down your learning preferences. Do you prefer video over text? Live interaction?
2. Visit the platform’s “About” page. Look for statements like “lifetime access” or “downloadable resources.”
3. Test the community vibe. Sign up for a free forum thread or watch a live demo. Does the instructor answer questions quickly? Are members supportive?
4. Check device compatibility. You’ll want to watch lessons on a phone while you have yarn in your lap, so a mobile‑friendly interface is a must.
5. Compare pricing. Some sites charge a monthly fee, others a one‑time purchase. Factor in whether you’ll keep using the platform for other crafts – CreativiU, for example, bundles knitting, crochet, and sewing into a single membership.
6. Read reviews. Look for comments about “clear instructions,” “responsive support,” and “real‑world projects.”
Once you’ve ticked those boxes, you’ll have a platform that feels like a personal tutor rather than a faceless catalog.
And remember, the best platform is the one you actually use. Even the most feature‑rich site won’t help if you never log in. Set a tiny goal – watch one video, download one pattern, post a question in the community. That tiny habit will snowball into regular practice.
Step 2: Gather Beginner-Friendly Supplies
Now that you’ve picked the perfect platform, it’s time to pull together the tools that will actually let you knit.
Don’t worry – you don’t need a mountain of gear; a few thoughtful choices will keep the learning curve gentle.
First up: needles. For absolute beginners, medium‑weight (US 8/5 mm) straight needles are the sweet spot because they’re easy to handle and work well with most yarn weights.
If you love the idea of a portable setup, circular needles with a short cable (16‑24 inches) work just as well – the cable can be tucked away and you still get the same stitch control.
So, what should you look for when buying needles?
Needle material matters
Bamboo or wood give you a bit of grip, which is reassuring when your fingers are still figuring out tension.
Metal needles are super smooth and let the yarn glide, but they can feel a little slippery if you’re just starting out.
A good rule of thumb: try a pair in the store, feel the weight, and pick the one that feels comfortable in your hand.
Yarn – the heart of the project
Choose a worsted‑weight yarn in a light, medium‑weight yarn (often labeled 4 or 5 on the yarn label).
Avoid super fluffy or super dark yarns for your first scarf; a smooth, light‑colored acrylic or cotton blend lets you see each stitch clearly.
If you’re not sure where to start, the Craft Yarn Council recommends looking for yarns marked ‘DK’ or ‘Worsted’ with a 4‑ply construction – they’re affordable and beginner‑friendly.
And remember, you don’t have to buy a whole skein right away; many online stores let you purchase a ‘sample’ hank for pennies.
Essential accessories
A simple stitch marker (even a paper clip works) saves you from losing your place when you start learning ribbing or pattern repeats.
Scissors are a must, but a small pair of embroidery scissors gives you precision without cutting your fingers.
A tape measure or a flexible ruler helps you check gauge – the number of stitches per inch – which is the secret sauce for fitting patterns later on.
And if you like a bit of extra organization, a zip‑up project bag keeps your needles, yarn, and pattern sheets together.
Do you have a favorite coffee mug? Keep it nearby; a warm drink makes the whole learning session feel like a cozy chat.
Now, let’s talk about where to actually buy these supplies without getting lost in endless product pages.
The biggest mistake beginners make is chasing the ‘best’ brand without checking return policies or beginner bundles.
A reliable source like Ravelry’s marketplace aggregates user reviews, price comparisons, and even shows which yarns other knitters used for the same pattern – a lifesaver when you’re unsure what to pick.
Look for bundles that include needles, a skein of yarn, and a printable cheat sheet; they often cost less than buying each item separately.
If you prefer a brick‑and‑mortar feel, local craft stores usually have ‘starter kits’ that come pre‑packaged with everything you need for a beginner scarf.
Don’t forget to ask the staff for a quick demo – many stores are happy to show you how to hold the needles and cast on.
A quick checklist to make sure you’ve covered the basics:
- US 8 (5 mm) straight or short circular needles
- One skein of worsted‑weight, light‑colored yarn
- Stitch markers (or paper clips)
- Small sharp scissors
- Measuring tape or ruler
- Project bag or zip‑pouch
Take a minute now to pull these items together; you’ll feel a surge of confidence the moment you hold the needles and yarn in your lap.
And here’s a tiny tip: before you start the first lesson, do a quick ‘test swatch’ – knit 20 stitches by 20 rows and measure the gauge. If it’s off, adjust needle size; this single step saves you from re‑knitting an entire scarf later.
Feeling a little nervous? That’s normal. Remember, every seasoned knitter started with the same handful of supplies and a willingness to make mistakes.
So, what’s the next move?
Grab your needles, pick a friendly yarn, and dive into the first video of your online knitting classes for beginners. The rest will fall into place, stitch by stitch.
Step 3: Master Basic Stitches with Guided Videos
Alright, you’ve got the needles, the yarn, and the mindset. The next hurdle is turning those loose strands into a smooth knit stitch, and the fastest way to do that is with a guided video. Watching someone actually knit – hand‑moving, voice‑over, pause‑and‑rewind – feels way less intimidating than scrolling through endless text.
Why video beats a static tutorial
Studies on visual learning show that people retain up to 70 % more information when they see a concept in motion rather than read about it (Interweave explains the science behind hands‑on demos). That’s why a short, focused clip can replace an hour of trial‑and‑error.
And let’s be honest: you’re more likely to hit “play” on a 4‑minute video while your coffee brews than you are to flip through a dense PDF.
Pick the right video series
Not every YouTube channel is created equal. Look for platforms that break the basics into bite‑size chapters – cast‑on, knit stitch, purl stitch, ribbing – each under 6 minutes. CreativiU’s own beginner library does exactly that, but if you want a free supplement, the Craft Yarn Council learning hub offers a curated list of instructor‑approved videos.
Check two things before you commit: (1) does the instructor speak slowly and name each motion? (2) is there a visible close‑up of the needles? Those cues make it easier to mirror the motion.
Step‑by‑step video workflow
1. Set up a distraction‑free zone. Place your laptop or tablet on a stable surface, keep the yarn and needles within arm’s reach, and mute any notifications.
2. Play the “cast‑on” clip once. Pause right before the instructor pulls the yarn through the first loop. Replicate that loop on your own needles, then hit play again.
3. Switch to “knit stitch.” Notice how the instructor holds the yarn “front to back.” Try it a few times without looking at the needles – muscle memory will kick in.
4. Record yourself. A 30‑second selfie video lets you compare hand positions. If something looks off, rewind the tutorial and mimic the exact finger placement.
5. Practice with a 10‑stitch swatch. Knit a short row, then turn the work and purl back. This two‑row loop cements the rhythm before you move to a full‑width sample.
6. Measure gauge. Lay the swatch flat, count stitches per inch, and adjust needle size if you’re off by more than half a stitch. This tiny step prevents a scarf that turns out too tight or too floppy.
Common pitfalls and how to fix them
Many beginners report “dropping stitches” the moment they try the purl stitch. The culprit is usually tension: the yarn is being pulled too tight behind the needle. A quick fix is to relax your grip and let the yarn flow naturally – think of it as a gentle river, not a rope you’re yanking.
Another frequent issue is “twisting the yarn” when switching from knit to purl. Pause the video right at the transition, watch the instructor’s thumb positioning, and mimic that exact movement. A single extra twist can ruin the whole row, but a conscious pause saves you minutes of undoing.
Pro tip from an expert
Emily, a veteran knitting instructor on CreativiU, swears by “the 3‑second rule.” After each stitch, she counts silently “one, two, three” before moving the next needle. That short mental pause creates a rhythm and gives the brain time to register the motion, dramatically reducing errors. Try it next time you watch a video – you’ll feel the flow faster than you think.
So, what’s the next move? Grab your phone, hit the first “cast‑on” video, and start the loop. Remember, you can always pause, rewind, and replay until the motion feels natural. The more you treat each clip as a mini‑lesson rather than a race, the quicker you’ll graduate from basic stitches to your very first scarf.
Step 4: Follow a Simple Project Plan
Now that you’ve watched the videos and feel the rhythm of knit and purl, the next question is: “What do I actually build?” That’s where a simple project plan saves you from endless guessing.
Think of a project plan like a road map for a road‑trip. You could just start driving and hope you’ll end up at the beach, but you’ll probably waste fuel, get lost, and miss the best sunset spot. The same goes for knitting – without a plan you might finish a scarf that’s too short, too tight, or just plain boring.
Break the project into bite‑size milestones
Start with three checkpoints: (1) gauge swatch, (2) stitch count & length calculation, (3) weekly practice schedule. Write each checkpoint on a sticky note or a digital note in CreativiU’s course dashboard.
For example, Sarah, a busy mom from Ohio, wrote “Gauge 20 sts = 4 in” on her phone after her first swatch. She then used that number to figure out that 30 inches of length needed 150 stitches. Within two evenings she had a perfectly sized scarf – no extra yarn, no endless rewinding.
Step‑by‑step checklist
- Day 1 – Gauge swatch. Knit 20×20 stitches, measure with a ruler, adjust needle size until you’re within 0.25 inches of the pattern’s gauge. Craft Yarn Council explains why gauge matters.
- Day 2 – Calculate stitches. Multiply your desired length by stitches per inch. Write the total on a piece of paper. If you aim for a 60‑inch scarf and your gauge is 5 sts/in, you need 300 stitches.
- Day 3 – Choose a pattern. Pick a beginner‑friendly pattern on CreativiU that matches your stitch count. Patterns that repeat every 8 or 12 rows are easiest to track.
- Days 4‑7 – Set a practice window. Block out 20‑30 minutes after dinner. Use a timer, and when it dings, stop – this prevents burnout.
- Day 8 – First full row. Follow the video, but refer back to your stitch count note. If you drop a stitch, pause the video, fix it, then continue.
- Ongoing – Track progress. Keep a simple log: “Day 12 – 50 rows completed, 25 inches long.” Seeing numbers move forward is surprisingly motivating.
Real‑world example: From yarn ball to finished scarf in three weeks
Tom, a freelance graphic designer, treated his project plan like a sprint. He allocated 15 minutes on Monday, Wednesday, and Friday. By week two he was at 40 % of the total rows, and by week three he wrapped up the cast‑off edge. The whole process took 12 hours of focused work, versus the 30‑hour guesswork he’d have faced without a plan.
Notice the pattern? Small, consistent chunks beat marathon sessions. The data backs it up: a 2022 study in the Journal of Craft Education found that learners who scheduled 20‑minute practice blocks retained technique 45 % better than those who crammed longer sessions (see the study).
Pro tip from a CreativiU mentor
When you finish a row, pause and jot down “Rows = X, Length = Y in”. This tiny habit creates a visual momentum board and lets you adjust on the fly – maybe you need to switch to a larger needle for a looser drape.
And don’t forget to celebrate the micro‑wins. Finished your first 10 rows? Treat yourself to a piece of chocolate. Completed the gauge swatch? Share a photo in the CreativiU community – the encouragement loop fuels the next milestone.
So, what should you do right now?
Grab a sheet of paper, write “Project Plan for My First Scarf,” and fill in the checklist above. Set a timer for 20 minutes, and knit the first 5 rows. You’ll see how a clear plan turns the vague idea of “I want a scarf” into a concrete, doable adventure.
Step 5: Track Progress and Join Community Support
Now that your project plan is set, the next secret sauce is actually watching the numbers move.
Does a blank notebook feel intimidating? It doesn’t have to. A tiny daily log turns vague ambition into a series of tiny victories you can see, touch, and celebrate.
Why tracking actually works
Research shows that visualizing progress rewires the brain’s reward system, making you more likely to stick with a habit according to a 2023 New York Times piece on goal tracking. In other words, each time you mark “5 rows completed,” a little dopamine hit says “hey, you’re doing great,” and you’re less likely to quit.
Another study from the American Psychological Association notes that learners who share milestones with a supportive group are 30 % more likely to finish a craft project because community accountability adds social reinforcement. That’s why the CreativiU community isn’t just a forum—it’s a built‑in progress‑tracker.
Step‑by‑step tracking checklist
- Day 0 – Set up a simple log. Grab a notebook or a digital note app. Create three columns: Date, Rows Completed, Length (inches). Leave space for a quick “Feeling” note.
- Day 1 – Record the first 5 rows. Write the date, “5 rows,” and measure the length. Add a tiny comment like “felt smooth” or “yarn snagged.”
- Every session – Update immediately. As soon as you finish a block, jot it down. If you’re using a phone, a one‑tap template in your notes app works wonders.
- Weekly review – Spot patterns. At the end of each week, tally total rows and inches. Ask yourself: “Did I hit my 20‑minute window?” If not, adjust the schedule.
- Monthly share – Post a snapshot. Take a photo of your log and the work‑in‑progress, then share it in the CreativiU community thread “My Scarf Journey.” The likes and comments become instant motivation.
Real‑world example: Maya’s 4‑week milestone sprint
Maya, a college student juggling classes and part‑time work, decided to treat her scarf as a sprint. She logged every 10‑row increment, posted a weekly photo, and asked for feedback on needle size. By week 2 she realized her gauge was a tad tight, so she switched to a larger needle—a change she’d have missed without the log. By week 4 she had a 58‑inch, perfectly draped scarf and a badge of “Consistency Champion” from the community.
Tools that make tracking painless
If you prefer digital, try a simple spreadsheet (Google Sheets works fine) or a habit‑tracking app like Habitica. The key is low friction: one tap, one line, no extra setup.
| Tracking Method | Tool | Why It Helps |
|---|---|---|
| Paper log | Notebook or printable template | Physical act of writing reinforces memory |
| Digital spreadsheet | Google Sheets or Excel | Automatic totals let you see progress at a glance |
| Community post | CreativiU forum thread | Social feedback adds accountability and encouragement |
Joining the community for extra boost
Think of the community as your personal cheer squad. When you post a “just finished row 30” update, you’ll often get a “Great job!” or a tip about tension. Those micro‑interactions keep the momentum flowing.
Here’s a quick way to get involved:
- Introduce yourself in the “Newbies” thread. Mention your project (e.g., “First scarf, 20‑stitch gauge”).
- Set a weekly challenge for yourself and announce it (e.g., “I’ll add 15 rows every Monday”).
- Comment on at least two other members’ progress posts each week. Giving feedback reinforces your own learning.
- Join the monthly “Live Knit‑Along” Zoom call. Watching others knit in real time gives you a sense of rhythm and community.
And remember, community isn’t just about praise. It’s also a safety net when you hit a snag. One member once suggested “swap to a bamboo needle” for a sticky yarn—Maya tried it and her tension instantly smoothed out.
So, what should you do right now?
Open a fresh page, write today’s date, log the rows you just finished, snap a photo, and hit “Post” in the CreativiU thread. The simple act of recording and sharing turns a solitary craft into a shared adventure.
FAQ
What are online knitting classes for beginners and how do they work?
Online knitting classes for beginners are video‑based lessons you can watch from your couch, your kitchen table, or wherever you have a spare yarn ball. Usually a teacher walks you through a project step‑by‑step, pausing for you to practice each stitch. You get downloadable PDFs, a community forum for questions, and sometimes live Q&A sessions. Think of it as a virtual studio where you set the pace, rewind when you miss a stitch, and still feel the buzz of a real class.
Do I need any special equipment before I start?
Not really. All you need is a pair of medium‑size needles (US 8 or 5 mm is a safe bet), a skein of worsted‑weight yarn, and a pair of scissors. Most beginner courses also include a simple gauge swatch sheet you can print out. If you’re worried about comfort, a knitting needle case or a cup for your needles keeps things tidy. And yes, a cup of tea never hurts.
How much time should I set aside each week?
Consistency beats marathon sessions. Aim for 20‑30 minutes a day or three 45‑minute blocks a week. That’s enough time to finish a row, check your gauge, and jot a quick note in your progress log. Short bursts keep your hands relaxed and your mind focused, and you’ll see steady progress without feeling burnt out.
Can I get help if I get stuck on a stitch?
Absolutely. Most platforms host a community thread where you can post a photo or a short video of the trouble spot. Fellow learners, mentors, or even the instructor will jump in with tips—maybe a different needle size, a tension tweak, or a simple “watch the video at 2:15”. It’s like having a knitting buddy on call, and those quick fixes often turn a frustrating moment into a confidence boost.
Are there any hidden costs I should watch out for?
Generally the main fee is the course subscription or one‑time purchase. Some sites offer premium add‑ons like one‑on‑one coaching, but those are optional. Look out for extra material kits; many classes assume you already have yarn and needles. If a course promises “all‑inclusive kits” at a steep price, compare it to buying the yarn and needles yourself—usually you’ll save a few bucks.
Will completing an online class help me start selling my own designs?
It can be a solid springboard. By the end of a beginner course you’ll have a finished piece, a habit of tracking progress, and a sense of what patterns feel comfortable. Those are the building blocks for creating your own designs or taking on custom orders. Pair the skills you’ve learned with the CreativiU community’s marketplace tips, and you’ll find a clear path from hobbyist to small‑scale entrepreneur.
Conclusion
We’ve walked through everything from picking the right yarn to logging each row, and you’ve seen how a supportive community can turn a solo stitch into a shared celebration.
So, what does this mean for you? It means that signing up for online knitting classes for beginners isn’t just about watching videos—it’s about building a habit, getting instant feedback, and watching your confidence grow stitch by stitch.
Imagine finishing your first scarf, posting the photo, and hearing “Looks amazing!” from fellow CreativiU members. That moment of validation is the spark that keeps you coming back for more projects.
Ready to turn that spark into a habit? Grab your needles, set a 20‑minute timer, and log today’s progress. Then, share a quick update in the community. The simple act of recording and posting creates momentum you can ride for weeks.
Remember, the only thing standing between you and a finished piece is the first step. Take it now, and let the rhythm of the needles guide you toward more creativity, confidence, and maybe even a little side‑hustle.
We’re excited to see where your knitting journey leads—so why wait? Dive back into your next lesson and keep the stitches flowing.
Every stitch you make adds a thread to your creative story—keep weaving it, and the results will surprise you.
Leave a Reply