Imagine you just bought a fresh piece of vegetable‑tanned leather, and you want to turn it into a cool belt for your dog. You picture the stitching, the buckle, maybe a little leaf pattern you saw online. But the moment you sit down, the tools look foreign, the leather feels stiff, and you wonder where to start. This is the exact spot where most people get stuck when they first try leather tooling for beginners. The good news? You don’t need a whole workshop full of pricey gear or years of experience. With a few simple steps, a modest kit, and a clear plan, you can go from a raw hide to a polished, professional‑looking piece in a weekend. In this guide we’ll walk through each step, give you real‑world tips, and show you how to avoid the common traps that trip up new crafters. By the end you’ll have a solid roadmap for your first project and the confidence to keep exploring more complex designs.
Step 1: Gather Essential Tools and Materials
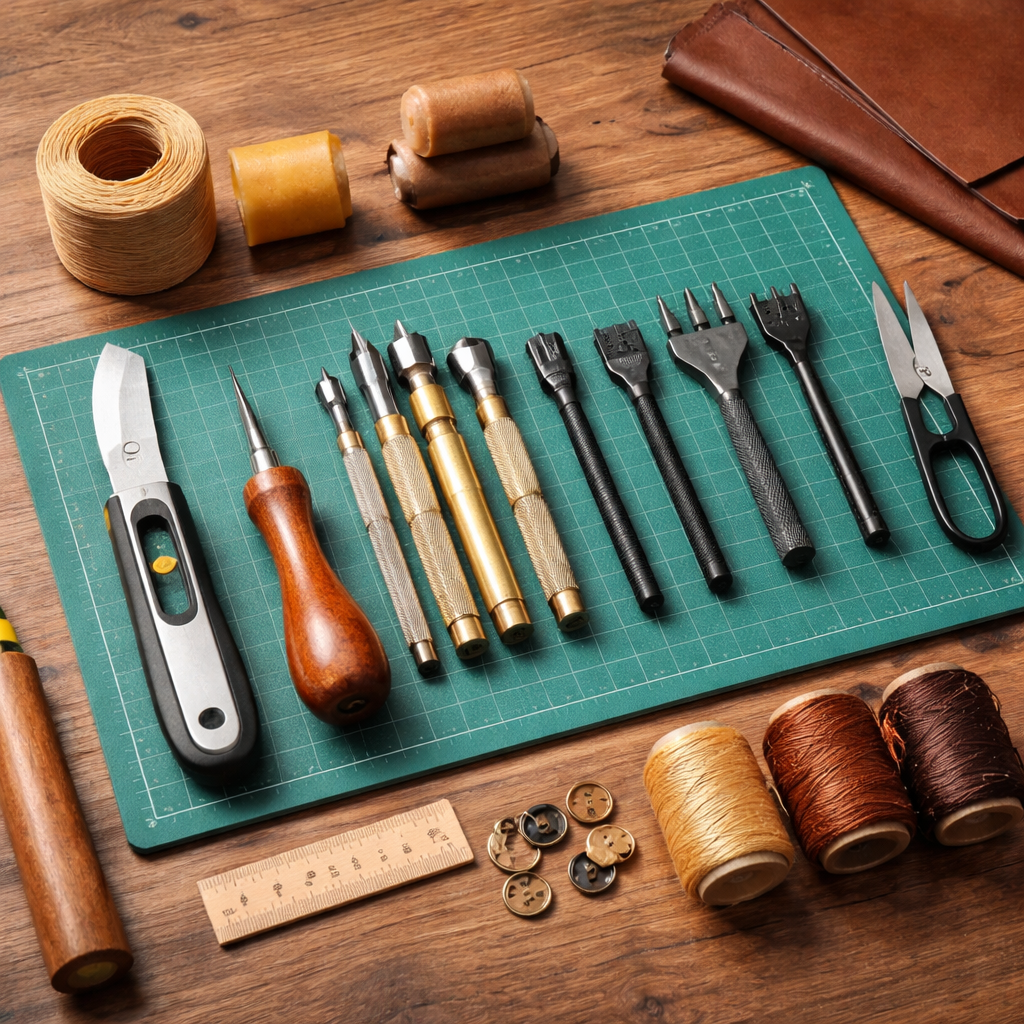
Getting the right tools is the first big win for leather tooling for beginners. You don’t have to break the bank; a small starter kit will cover most projects you’ll try in your first few months.
Cutting tools
Start with a utility knife. It’s cheap, easy to replace, and can slice through thick leather when you keep the blade sharp. Pair it with a ruler or a T‑square for straight cuts. If you need finer work, add a precision X‑Acto knife – it lets you make tight, exact cuts for things like strap holes.
Surface protection
A self‑healing cutting mat gives you a safe work surface. It won’t dull your blades and it often has grid lines that help you line up cuts. Place the mat on a sturdy table so it won’t slide when you tap with a mallet.
Punches and awls
Awls are tiny but mighty. Use a scratch awl to mark stitch lines or to rough up a spot before you glue. For hardware like snaps or rivets, a punch set with multiple sizes will make clean, round holes every time.
Stitching basics
A strong tripoint needle (or a glovers needle) slides through leather without bending. Pair it with waxed nylon thread – the wax helps the thread glide and keeps it from fraying. When you finish a seam, melt the thread ends with a lighter to seal them.
Adhesives and finishing
Leather cement gives a near‑permanent bond when you need to glue layers together. A rubber or wooden mallet is the safest way to set hardware without damaging the metal tools. When you’re ready to smooth edges, an edging tool or a burnishing block will give a professional look.
- Buy a utility knife and replace the blade often.
- Invest in a self‑healing mat; it protects both your work and your tools.
- Start with a basic punch set; you can add more sizes later.
For a deeper dive into which tools give the best bang for your buck, check out the detailed guide on essential tools for beginner leatherworkers. You’ll also find a handy list of recommended brands at Leather Beast’s beginner tool roundup.
Step 2: Preparing Your Leather – Cutting and Stamping
Before you carve or stamp, the leather needs the right amount of moisture. Too dry and the fibers will crack; too wet and the leather will warp. The sweet spot is called “casing” – the leather should feel cool and slightly damp, like a freshly rinsed sponge.
Moistening the leather
Use a clean sponge and work in circles. Apply a thin layer of water and let it sit for a minute. If the leather looks shiny, you’ve added too much; pat it dry with a lint‑free cloth. If it still feels stiff, add a few more drops.
Cutting the shape
Lay the leather on your self‑healing mat. Measure twice with a ruler, then score the outline with a rotary cutter or a utility knife. Press firmly and pull the blade straight to get a clean edge. For curved edges, use a pattern template and trace it with a pencil or a stylus before you cut.
Stamping basics
Stamping works best on a hard surface like a marble slab. Place the leather face down, line up your stamp, and tap with a wooden mallet. Start with light taps; you can always add more pressure. Remember to keep the leather damp while you stamp so the fibers stay flexible.
Practice project
Try a simple “Western floral” pattern that many beginners use. It has basic circles and leaves that let you get a feel for spacing and depth. The pattern is free on the Elktracks beginner guide page. Follow the steps there to practice your stamping technique before you move on to a full project.
Another useful resource for stamping tips is the basic leather stamping and carving guide. It explains how to choose the right moisture level and how to position your tools for crisp impressions.
- Moisture test: press your thumb into the leather; it should leave a shallow dent that springs back.
- Use a marble slab for stamping to avoid bounce.
- Always work from the center of the stamp outward to keep the design even.
Step 3: Mastering Basic Tooling Strokes
Now that your leather is cut and damp, it’s time to learn the core strokes that make up leather tooling for beginners. The most common strokes are the outline, bevel, and shading strokes. Master these and you can create almost any design.
Outline stroke
The outline gives your design its shape. Hold a stamping tool in your dominant hand and tap lightly with a rubber mallet. Keep the angle consistent – about 45 degrees works well for most outlines. Practice on a scrap piece first; you’ll see a clean edge that matches the tool’s shape.
Bevel stroke
Bevels add depth. After you’ve made an outline, turn the tool so the flat side faces the leather and tap again. This pushes the leather fibers back, creating a shadow effect. The deeper you bevel, the more pronounced the shadow.
Shading stroke
Shading fills in areas to give a 3‑D look. Use a rounded stamp and tap repeatedly, moving the tool in small circles. The more taps, the darker the shade. For a smooth gradient, start with light taps and build up.
Practice routine
Take a simple leaf shape. First, outline the leaf, then bevel the veins, and finally shade the base. This three‑step process teaches you how the strokes work together. Repeat the routine until each stroke feels natural.
Watch this quick video for a visual guide to the basic strokes:
For more detailed advice on how to keep your tools sharp, read the Elktracks guide on tool preparation. It covers stropping, sandpaper tricks, and how to check blade angles. You’ll also find a second link to the same page that dives deeper into swivel‑knife handling.
- Start each stroke on a scrap before moving to your main piece.
- Keep the mallet strikes even; irregular hits cause uneven lines.
- Check your work under good light to spot any missed spots.
Step 4: Designing Simple Patterns and Tracing
Even a basic pattern can look impressive when you apply the right strokes. The key is to keep your design simple, trace it cleanly, and transfer it onto the leather without smudging.
Choosing a pattern
Pick a design that uses the strokes you already know. A small flower, a star, or a simple geometric shape works well. You can find free print‑outs on craft forums or sketch your own on paper.
Tracing technique
One easy method is to place a piece of clear food wrap over the damp leather, then tape the printed pattern on top. The wrap stops the ink from soaking into the leather while still letting you see the design. Trace the lines with a stylus or a blunt pencil. This trick is shared by many hobbyists on the LeatherWorker.net tracing thread. It’s quick and works for both small and large pieces.
Transfer tips
After you trace, lift the pattern and use a bone folder to press the traced lines into the leather. The slight indent will guide your stamping and carving. If you need a longer line, use a ruler and a fine‑point awl to score a straight groove.
| Step | What to Do | Why It Helps |
|---|---|---|
| 1 | Moisten leather, then cover with food wrap. | Prevents ink from bleeding. |
| 2 | Tape printed pattern on top. | Keeps design in place. |
| 3 | Trace with stylus. | Creates a faint guide line. |
| 4 | Press lines with bone folder. | Leaves a shallow groove for stamping. |
- Use waxed paper if food wrap isn’t available; it works similarly.
- For intricate designs, trace on tracing paper first, then repeat onto leather.
- Keep the leather slightly damp during tracing to hold the impression.
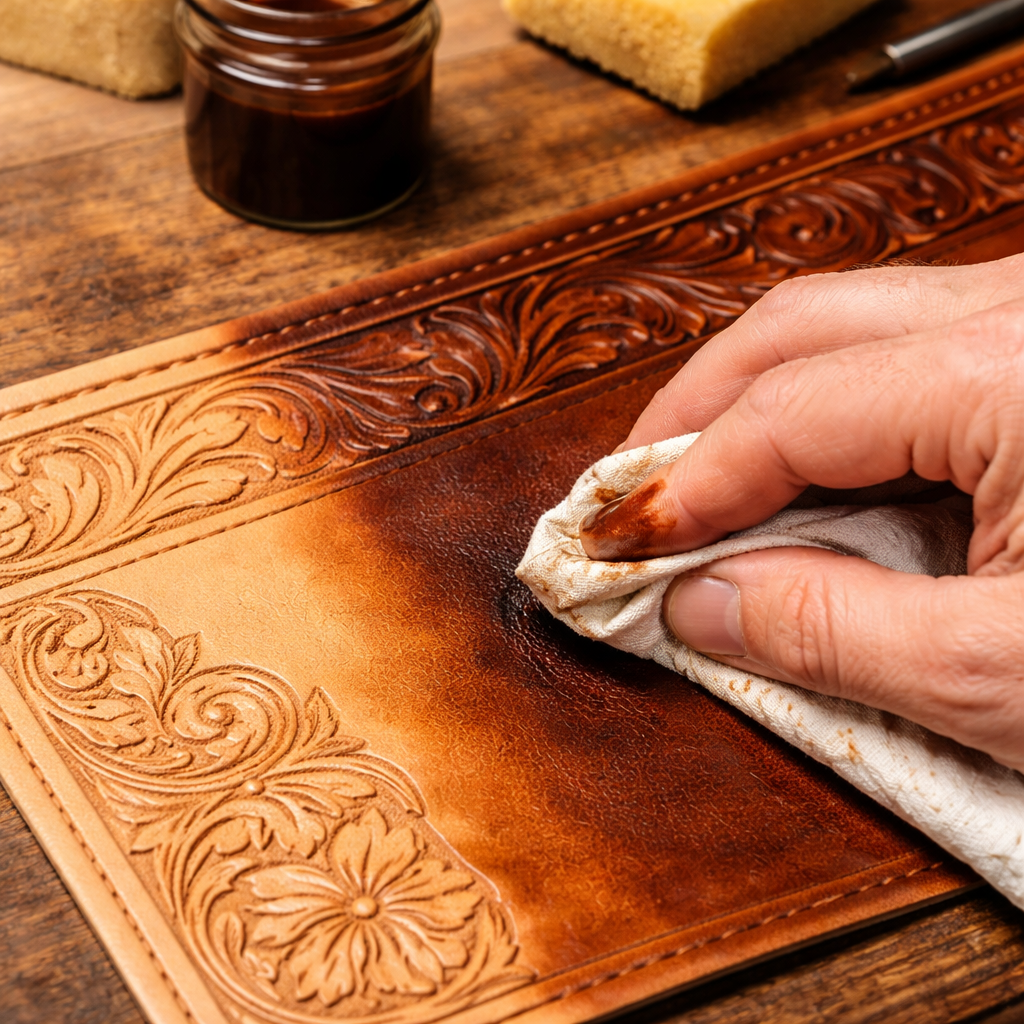
Step 5: Finishing Techniques – Dyeing, Sealing, and Caring
The final look of your piece depends on how you finish it. Dye adds color, sealant protects the surface, and regular care keeps the leather supple.
Dyeing basics
Choose an alcohol‑based leather dye for even color. Apply with a soft cloth in thin layers, letting each coat dry before adding the next. Test the color on a scrap piece first; it’s easier to adjust before you work on the main item.
Sealing the piece
Once the dye is dry, use a clear leather finish or a light coat of gum tragacanth. Apply with a brush, then let it cure for at least 24 hours. The seal locks in color and adds a subtle sheen.
Everyday care
Wipe the leather with a dry cloth after each use. If it gets dirty, use a mild leather cleaner and a soft brush. Condition the leather once a month with a leather conditioner to keep it from drying out.
For more tips on sealing, see the Elktracks finishing guide. It also explains how to choose the right finish for different leather types. Another helpful link is the basic stamping and carving article that covers edge burnishing for a polished look.
Frequently Asked Questions
What tools are absolutely necessary for leather tooling for beginners?
You need a sharp utility knife, a self‑healing cutting mat, a basic punch set, an awl, a tripoint needle with waxed thread, and a rubber mallet. These tools let you cut, mark, punch holes, stitch, and stamp without buying extra gear. Keep a small stash of extra blades and a bottle of leather cement for glue work. For more on choosing tools, see the guide on Photo Booth Rental Murrieta: A Complete Guide for 2026 Events which, while about events, discusses the importance of having the right equipment before you start a project.
How do I know when the leather is at the right moisture level?
The leather should feel cool to the touch and give a slight give when you press it with your thumb. If it looks shiny, it’s too wet; if it feels stiff, it’s too dry. Spray a light mist of water and let it sit for a minute, then test again. This “casing” step is crucial for clear stamps and smooth carving. For a deeper explanation, you can read Mirror Photo Booth Rental: 7 Must‑Know Tips for an Unforgettable Event which also covers preparation steps that are similar across crafts.
Can I use household items as substitutes for leather tools?
Yes, a kitchen fork can act as a makeshift groove tool for stitching lines, and a sturdy wooden block can replace a marble slab for stamping in a pinch. Just be careful not to damage your tools or the leather. Always test on a scrap first. This tip aligns with advice from Everything You Need to Know About 360 Video Booth Rental, where improvisation with common items is encouraged.
How many layers can I safely glue together before stitching?
Most beginners glue up to three layers of leather before stitching. The glue holds the layers in place and prevents shifting while you push the needle through. Use a leather cement that dries clear and apply a thin, even coat. Let it dry for about 10 minutes before you start stitching. For more on layering, check out Your Complete Guide to Photo Booth Rental Temecula for Unforgettable Events which discusses stacking materials for stability.
What is the best way to edge‑finish a leather belt?
First, trim the edge with a sharp knife. Then run an edging tool along the edge to round it off. Finish by burnishing with a slicker or a piece of canvas rubbed with a bit of water. The result is a smooth, professional edge that feels nice to the touch. For a visual walkthrough, see How to Choose the Perfect Wedding Photo Booth Rental: A Step‑by‑Step Guide which includes step‑by‑step edge finishing tips.
How often should I condition my finished leather pieces?
Conditioning once a month is a good rule of thumb for items that get regular use, like belts or wallets. Use a leather conditioner that matches the type of leather you used. Apply a small amount with a soft cloth, let it soak for a few minutes, then buff off any excess. This keeps the leather supple and prevents cracking. For more on regular upkeep, read Photo Booth Rental for Graduation Party: A Step‑by‑Step Guide which offers similar maintenance advice for event props.
Is it okay to use metal hammers on my tools?
No. Metal hammers can dent or warp metal tooling, especially delicate stamps. Always use a rubber or wooden mallet for striking. This protects both your tools and your work surface. For safety tips, you might find the advice in Your Complete Guide to Photo Booth Rental San Diego useful, as it covers handling equipment safely.
Where can I find free pattern templates for leather projects?
Many craft forums share free PDF patterns. A good place to start is the Photo Booth Rental Murrieta page, which links to downloadable resources for various hobbies, including leathercraft. You can also search for “free leather patterns” on community sites and adapt the designs to your skill level.
Conclusion
Learning leather tooling for beginners is all about taking one clear step at a time. Start with the right tools, prep your leather with the proper moisture, master the basic strokes, trace simple patterns, and finish with dye and sealant. Each of these steps builds on the last, turning a raw hide into a polished piece you can be proud of. Remember to practice on scraps, keep your tools sharp, and protect your work surface. When you finish your first project, you’ll see how fast your confidence grows, and you’ll be ready to tackle more detailed designs. If you want more guided lessons, explore the online classes at CreativiU – they have a library of videos and community support to keep you moving forward. Happy tooling!
Leave a Reply