Imagine you’ve just scanned a favorite family snapshot and you want it to live on a pine coffee table instead of a screen. You picture the grain of the wood peeking through the shadows, the photo looking warm and a bit vintage. But you’re not sure how to get the paper image onto wood without a mess or a pricey service. You’ve tried taping the picture on a block, only to see the ink bleed or the paper curl. You need a clear, cheap way that works at home. That’s where learning how to transfer photos to wood with Mod Podge becomes a game‑changer. In this guide, we’ll walk you through every step, from gathering the right supplies to sealing the final piece so it lasts for years. By the end, you’ll feel confident enough to turn any printed picture into a rustic wall art or a heartfelt gift, all while keeping the process simple and fun.
Step 1: Gather Materials and Prepare Your Workspace
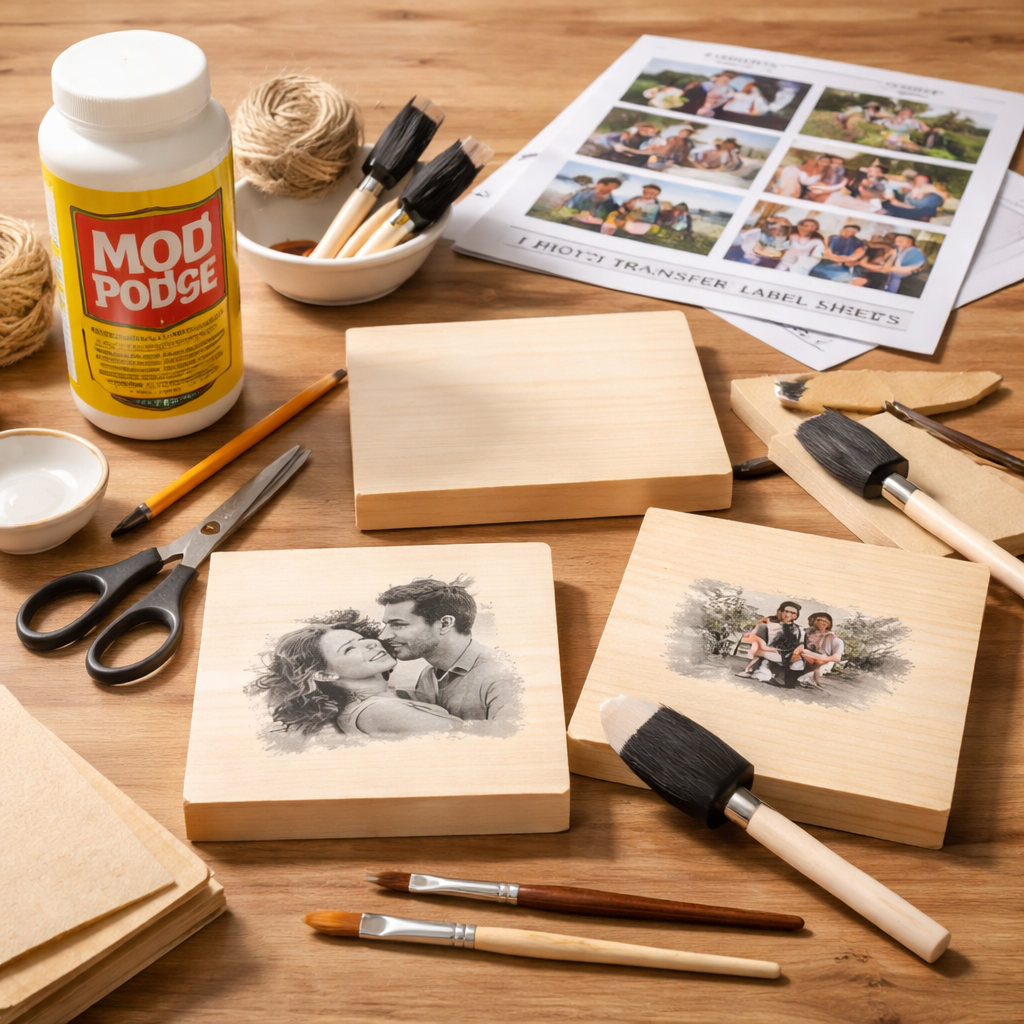
The first thing you need to know about how to transfer photos to wood with Mod Podge is that you don’t need a fancy studio. A clean table, a few basic tools, and a bit of patience are enough. Let’s break down the must‑have items.
Essential supplies
- Wood surface – a smooth slice, pallet board, or reclaimed plank works well.
- Mod Podge (original gloss or matte) – the glue, sealer, and finish all in one.
- Label sheets or glossy printer paper – print on the shiny side for best transfer.
- Brush or foam applicator – a small one lets you spread a thin, even coat.
- Credit‑card or a flat scraper – to smooth out bubbles.
- Masking tape – to keep the wood from moving while you work.
When you set up, lay down a drop cloth or old newspaper to protect the surface. A Piece of Rainbow notes that a well‑ventilated area helps the Mod Podge dry faster, especially if you’re using a gloss formula. The Turquoise Home also suggests a light sanding of the wood first – just enough to remove rough spots, not to strip the grain.
Here’s a quick checklist you can print and stick near your craft area:
- Sand wood lightly (120‑grit).
- Wipe with a lint‑free cloth.
- Set out Mod Podge, brush, and label sheet.
- Secure wood with masking tape.
Why sand? A smooth surface lets the Mod Podge spread evenly, which reduces bubbles that can trap paper fibers later. Think about it this way: a clean canvas gives you a clean finish, just like a smooth board gives the transferred image a clean look.
Once your workspace is ready, you can move on to printing the picture. And if you’re looking for more paper‑craft ideas, check out Creative and Practical DIY Paper Crafts Tutorials for Every Skill Level for inspiration.
Step 2: Choose and Print Your Photo
Now that you know how to transfer photos to wood with Mod Podge, the next piece of the puzzle is the image itself. Choosing the right photo and printing it correctly can make or break the project.
Pick a photo that works
Because wood is usually lighter than paper, darker tones show up best. Mod Podge Rocks Blog advises picking images with strong contrast – think bold shadows and bright highlights. A simple portrait or a black‑and‑white landscape often looks great.
If you need to reverse the image, most free editors have a “flip horizontal” option. This step is crucial because the transfer will flip the picture once you press it onto the wood.
Printing tips
- Use a laser printer if you have one – the dry toner gives clearer detail (source).
- Print on the glossy side of label backing or regular thin printer paper.
- Set the printer to “Glossy Photo Paper” mode for sharper results.
- Do a small test print (2×2 in) before printing the full size.
Why laser? Inkjet inks can smudge when they meet the moisture in the wet Mod Podge layer. Laser toner stays dry, so the image stays crisp.
After printing, cut the paper to match the wood’s dimensions. If your wood piece is 8 × 10 in, trim the print to the same size. Tape the edges together with masking tape so the sheet stays flat while you work.
Need more detail on printer settings? You can explore related ideas at Watch Band Size Guide, which walks through step‑by‑step measurement tips – the same careful approach works for measuring your wood slice.
Step 3: Apply Mod Podge and Transfer the Image
Here’s the heart of how to transfer photos to wood with Mod Podge. You’ll apply a thin coat, place the photo, and let it dry.
Brush on Mod Podge
Using a small brush, spread 1–2 thin coats of Mod Podge over the entire wood surface. A Piece of Rainbow notes that a coat that’s too thick can cause the paper to bubble, while a coat that’s too thin won’t hold the image.
Make sure the layer is even – no puddles, no streaks. Let the first coat dry for about 10 minutes, then apply a second coat if the surface feels dry to the touch.
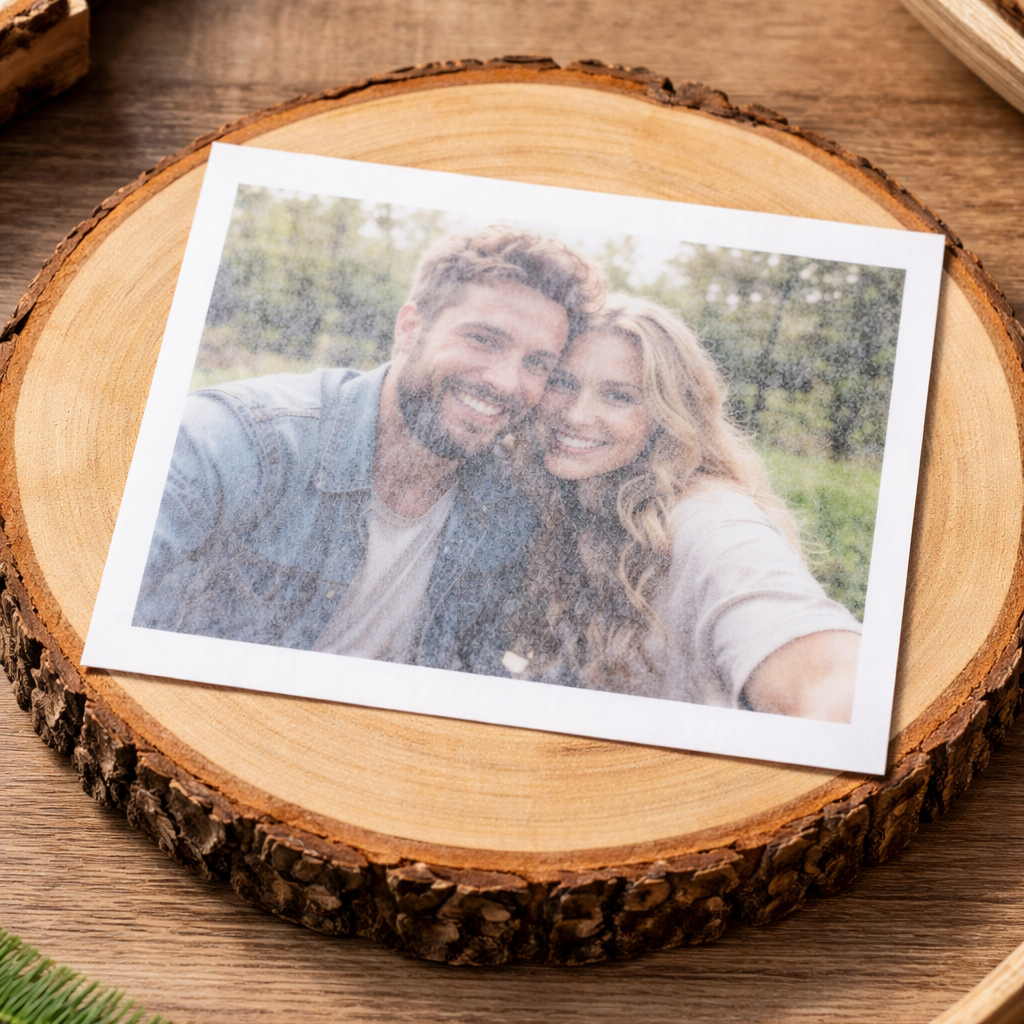
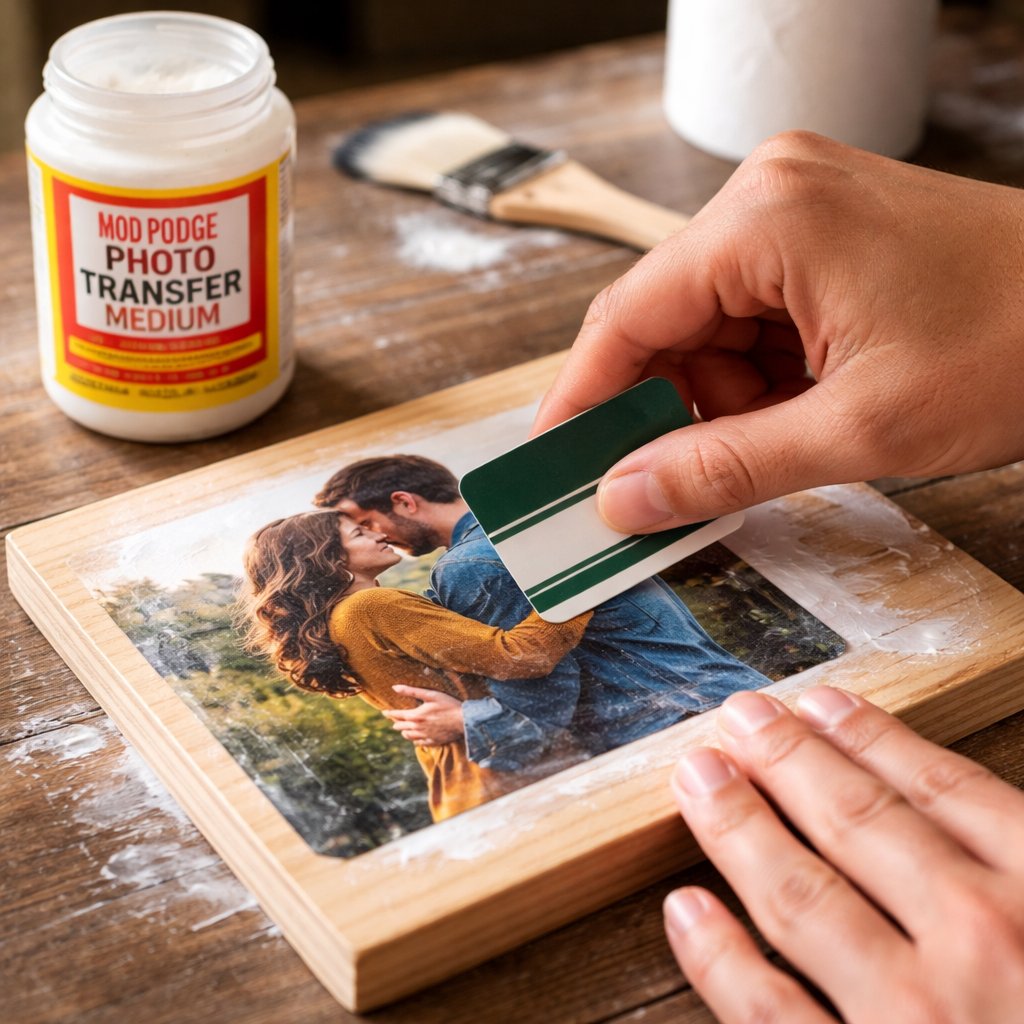
Lay the photo face‑down
Carefully place the printed side down on the Mod Podge‑coated wood. The image will be mirrored, so double‑check that you printed a flipped version earlier.
Use a credit card to smooth the paper from the center outward. This pushes out air bubbles and helps the paper stick flat. The Turquoise Home recommends a gentle pressure – you don’t want to crush the wood fibers.
Once the paper is smooth, wipe away any excess Mod Podge that seeps to the edges with a damp cloth. Too much excess can dry into a film that makes peeling harder later.
Let it dry
Now the real waiting game begins. Leave the piece undisturbed for 3–4 hours, or overnight if you can. Patience is key; pulling the paper too early can pull the ink off the wood.
If you’re short on time, a hair dryer on a low setting can speed up the drying. Keep the dryer moving and don’t hold it too close – you want warm air, not a burn.
When the Mod Podge feels tacky, you’re ready for the next step. For a visual walkthrough, watch the video below that shows the exact motion of smoothing the paper.
After the video, you’ll see why a slow, steady press works best. The next move is to wet the paper and rub it off, revealing the transferred image.
Step 4: Seal, Finish, and Care for Your Wood Photo
Now that you’ve mastered how to transfer photos to wood with Mod Podge, the final step is to protect your work so it stays vibrant for years.
Remove the paper backing
Start by dampening a soft cloth until it’s just moist, not dripping. Gently rub the paper in a circular motion. The paper will lift away, leaving the ink adhered to the wood. GelPress guide warns that rubbing too hard can wear away the image, so keep the pressure light.
Repeat until all fibers are gone. You’ll notice the wood surface looks slightly matte after the paper is removed – that’s normal.
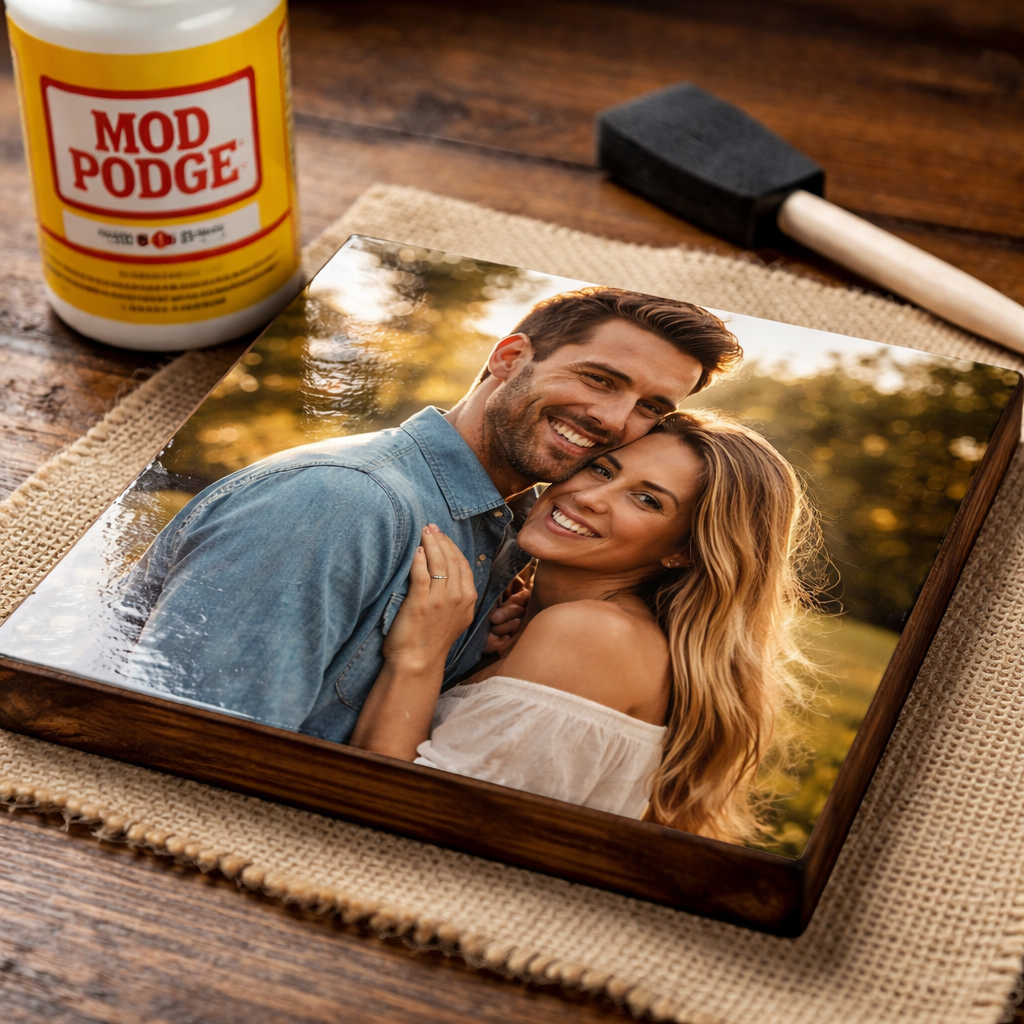
Seal with a top coat
Apply one thin layer of your chosen Mod Podge formula (gloss for shine, matte for a rustic feel). Brush smoothly and let it dry for at least 24 hours. The same product acts as both sealer and finish, so you don’t need a separate clear coat.
If you want extra durability – for example, a piece that will sit on a coffee table – consider a second coat. Two coats give a tougher skin that resists water and UV light.
Care tips
- Wipe with a dry microfiber cloth; avoid abrasive cleaners.
- Keep the piece out of direct sunlight for long periods – UV can fade the ink.
- For a glossy finish, lightly buff with a soft cloth after the final coat cures.
For more ideas on finishing, you might check out How to Make Candles with Wooden Wicks: A Complete Step‑by‑Step Guide – the same principles of sealing apply across crafts.
If you’re curious about related sizing topics, the Watch Case Size Guide explains how to measure and protect items that get daily wear, a useful mindset when you think about protecting your wood art.
FAQ
Can I use inkjet prints for how to transfer photos to wood with Mod Podge?
Inkjet prints can work, but they are more prone to smudging when they meet the moisture in Mod Podge. A laser‑toned print gives sharper detail and stays dry, which leads to a cleaner transfer. If you must use inkjet, let the ink dry completely and handle the paper carefully to avoid fingerprints.
How long should I let the Mod Podge dry before peeling the paper?
Ideally, wait at least 3–4 hours, or overnight for best results. The glue needs time to fully cure so the ink bonds to the wood. Rushing this step can cause the image to lift off when you rub the paper away, leaving gaps or a faint picture.
What type of wood gives the best result for how to transfer photos to wood with Mod Podge?
Light‑colored, smooth woods like pine, basswood, or maple work well because their light tone lets the darker ink stand out. Rough or heavily stained wood can mask details. A quick sand with 120‑grit paper and a wipe with a dry cloth will improve adhesion.
Do I need to seal the wood after the transfer?
Yes. While Mod Podge itself is a sealer, applying a thin top coat after the paper is removed adds protection against moisture and UV light. A second coat can give a tougher finish, especially for pieces that will be handled often.
Can I use a hair dryer to speed up drying when learning how to transfer photos to wood with Mod Podge?
A hair dryer set on low or medium can help, but keep it moving and at least six inches away. Too much heat can cause the Mod Podge to bubble or the ink to fade. Use short bursts and check the surface often to avoid over‑drying.
What if bubbles appear under the paper during the transfer?
Bubbles happen when air gets trapped between the paper and the Mod Podge layer. Use a credit card or a flat scraper to gently push the bubbles outward from the center. Work slowly and keep the pressure even to avoid tearing the paper.
Is a matte or gloss Mod Podge better for a rustic look?
Gloss gives a shiny finish that highlights color depth, while matte softens the look and emphasizes the wood grain. Choose based on the style you want: a farmhouse vibe leans matte, a modern gallery piece often looks better with gloss.
Can I reuse the same Mod Podge bottle for multiple projects?
Absolutely. Mod Podge stays usable as long as the lid is sealed tight. Stir the bottle before each use to blend any settled resin. If the mixture looks clumpy or has dried bits, it’s best to replace it to keep the transfer clean.
Conclusion
Learning how to transfer photos to wood with Mod Podge opens a door to endless personalized décor. You start with a tidy workspace, pick a dark‑toned image, print it on glossy label paper, and coat the wood with a thin layer of Mod Podge. After the image is pressed, you let it dry, gently rub away the paper, and seal the result with a final coat. Each step builds on the last, and the simple tools keep the cost low.
Now you have a clear roadmap: gather supplies, prepare the wood, print the right photo, apply Mod Podge, and protect the finished piece. Whether you’re gifting a grandparent a memory of a family reunion or adding a custom accent to your own wall, the process is satisfying and repeatable. If you want more projects, explore the other guides on CreativiU or check out the watch‑size guides for measuring tips that apply to any craft. Grab your wood slice, fire up the printer, and start turning treasured photos into lasting art.
Leave a Reply