Picture this: you’re scrolling through your feed, seeing a beautiful, perfectly round crochet piece, and you’re like, “How did that come about?”
That little circle is the magic ring – the secret sauce that turns a handful of yarn into a flawless round shape. If you’ve ever stared at a circle and felt stuck, you’re not alone. Even seasoned crocheters get flustered when the magic ring feels slippery.
We’re here to break that myth. We’ll walk you through each step, with real‑world tweaks that make the ring feel solid, not like a trick you’re just pretending to pull off.
First thing’s first: hold your yarn like you’re gripping a favorite mug. That grip gives you the tension you need to keep the loop tight. Think of it as a gentle hug for the yarn, not a squeeze that’ll crack it.
Next, slip stitch into the ring. That tiny slip isn’t just a trick; it’s the foundation for every stitch that follows. If you slip too deep, you’ll get a loose loop; too shallow, and the ring won’t close.
Now, you’re ready to start the first round. Count your stitches, pull the yarn tight, and you’ll see the ring transform into a sturdy circle. The feeling of that first completed stitch? It’s the same thrill you get when you finish a puzzle.
Still nervous? Remember, the magic ring is a skill, not a secret. Practice a few times, and the tension will feel like a second nature. Even if the first try looks a bit uneven, that’s okay – practice makes perfect.
So, what’s the next step? Grab your yarn, your hook, and let’s dive into the first round. We’ll keep it simple, and by the end of this guide, you’ll be crocheting circles like a pro.
And if you’re a creative entrepreneur, imagine turning that magic ring into a base for a product line. Think small scarves, cozy blankets, or even unique gift wraps. The possibilities are as endless as the yarn in your basket.
Let’s get started, because every great piece starts with a single, confident stitch.
TL;DR
The magic ring unlocks round crochet pieces—learn how to crochet a magic ring for beginners and master the base for scarves, blankets, and business‑ready accessories. Start with a relaxed grip, practice the slip stitch, and feel tension settle; a magic ring opens possibilities and boosts confidence for hobbyists and entrepreneurs.
Materials Needed
Before you even think about pulling that magic ring, grab the gear that keeps your fingers happy and your yarn honest.
Yarn: the heart of the circle
Choose a weight that feels comfortable in your hands. Worried about tension? Stick with worsted or bulky weights for beginners; they’re forgiving and show you the shape of the loop clearly.
If you’re planning to make scarves, go lighter; for amigurumi, bulk up. A quick tip: pull a few stitches together—if it feels too tight, switch to a lighter weight; if it’s slack, pick a heavier yarn.
Crochet Hook: your best friend
A hook in the 5 mm to 6 mm range works for most starters. Remember that the size of the hook influences how much yarn sits in the center of the ring. A too‑big hook can make the loop loose; a too‑small one can feel cramped.
Try a few sizes on a scrap and see which feels most natural. Keep the hook in the same hand that holds the yarn; this helps maintain steady tension.
Optional tools that smooth the process
-
Hook holder: keeps your hook from slipping while you wrap yarn over your fingers.
-
Yarn needle: for weaving in tails after you tighten the ring.
-
Scissors: short‑cut the yarn tail to avoid a long mess.
Picture this: a neat, small circle ready to bloom into a hat or a cozy coaster. The right tools make that vision a breeze.

Now, let’s talk about the subtle art of tension. Hold the yarn as if it’s a soft drink you’re about to sip—gentle, not too tight. If the yarn feels like it’s about to snap, slow down and let it flow.
Once you’re set, a quick trick is to wrap the yarn around your first two fingers twice, then cross it over the loop you just made. This creates a “sliding” foundation that slides into the hook easily.
Don’t forget to keep a spare length of yarn on hand. You’ll need a few extra stitches if you’re making a larger circle, and a long tail helps secure the ring when you pull it tight.
Need deeper guidance on the technique itself? Check out this comprehensive resource: Everything You Need to Know About the Magic Circle Crochet Method.
Beyond yarn and hook, consider how your finished piece will shine. If you’re selling handmade scarves, think about pairing them with a custom drink bottle to keep your customers refreshed while they wait for their next order. Custom drink bottles are perfect for branding and add a personal touch to your product line.
And for those who love to add a splash of color to their décor, a beautiful landscape painting can complement the rustic charm of a hand‑crocheted blanket or hat. Check out Gratitude Studios for inspiring landscape art that pairs wonderfully with craft projects.
Step 1: Create the Ring of Yarn
First things first—grab your yarn and hook and take a deep breath. Think of the yarn as a soft cup of tea you’re about to sip; you want a gentle pull, not a hard squeeze, so the tension stays just right.
Now, hold the yarn with your non‑hook hand like you would hold a favorite mug. Your thumb should wrap around the skein, and your fingers should be loose enough that the yarn can slide but tight enough that it won’t slip off.
Slip stitch in the center of the loop you’ve just created. Insert the hook under the yarn, lift, and pull the yarn through. You’re now holding a tiny, adjustable ring that will grow as you crochet.
Pull the yarn tail gently toward you to tighten the ring. Don’t yank it—think of squeezing a rubber band. If it feels too loose, give it another gentle tug. If it’s too tight, let it relax a bit.
Now you’re ready for the first round. Count your stitches, keep the tension steady, and insert the first stitch into the ring. As you finish the round, pull the tail to close the circle completely. That’s the magic ring in action. For a deeper dive into stitch variations, check out How to Crochet a Granny Square for Beginners: Step‑by‑Step Guide which walks you through starting a round in a similar way.
If the ring feels wobbly, it’s usually because the yarn is slipping off the hook. Try wrapping the yarn over your fingers twice before you wrap it over the hook again; this “sliding” trick keeps the loop firm.
Many beginners forget to keep a spare tail. A few extra stitches help you close larger circles, and a long tail gives you a secure finish when you trim the end. Remember, the tail is a safety net for the ring.
If you’re looking to turn those handmade scarves into a shop, you’ll need a clean online presence. A solid website design is the first step. Learn more about affordable options on Website Design Packages Pricing Guide for Australian SMBs.
A good way to practice the ring before you tackle a big hat is to make a tiny “candle” by crocheting 6–8 single crochets around the ring. It’s quick, it shows you whether the ring closed properly, and it gives you a taste of how your yarn will behave in a full project.
Another trick for beginners is to keep a second yarn piece in your other hand. As soon as you finish the first round, slip that spare yarn over the hook and use it to pull the ring tighter. The extra tension helps the ring stay centered, and you’ll notice the stitches stay even instead of drifting outward.
If you’re working with very fine yarn, the ring can feel fragile. In that case, use a smaller hook—about 4.5 mm or 3 mm—and let the yarn slide a bit more before you tighten. It’s like playing with a piece of spaghetti; a little give keeps the loop from cracking.
A final sanity check: before you start the next round, give the ring a gentle tug. If it tightens evenly, you’re good to go. If it pulls to one side, pause, re‑adjust the yarn, and try again. Consistency here saves a lot of frustration later when you’re staring at an uneven circle.
Step 2: Tightening the Ring (Video Tutorial)
Alright, we’ve got our ring set up. Now it’s time to make it tight enough to hold everything together for the next round. Think of the ring like a small rubber band – too loose, and it slips; too tight, and it tears.
First, check the tension on your yarn tail. If it feels slack, pull it gently until the ring looks snug. Don’t yank – a gentle tug will keep the loop from wobbling. If the ring is already tight, let the yarn relax a touch; you want a comfortable, steady center.
When you start the first stitch, push the hook into the center of the ring and yarn over. As you pull the yarn through, let the hook catch the loop and pull the tail slightly. This small movement is what locks the ring into place.
Why the tension matters
Proper tension keeps the stitches from drifting outward. In the real world, a ring that’s too loose can cause a hat to flare at the top or a coaster to look uneven. Tightening the ring gives you a consistent base, so every round after is a mirror image of the first.
Quick tip: use a spare yarn for extra control
Grab a second skein in your free hand and wrap it over the hook right after you finish the first round. This gives the ring a second layer of tension, keeping it centered. Many beginners forget this trick, but it makes a huge difference when the yarn starts to slip.
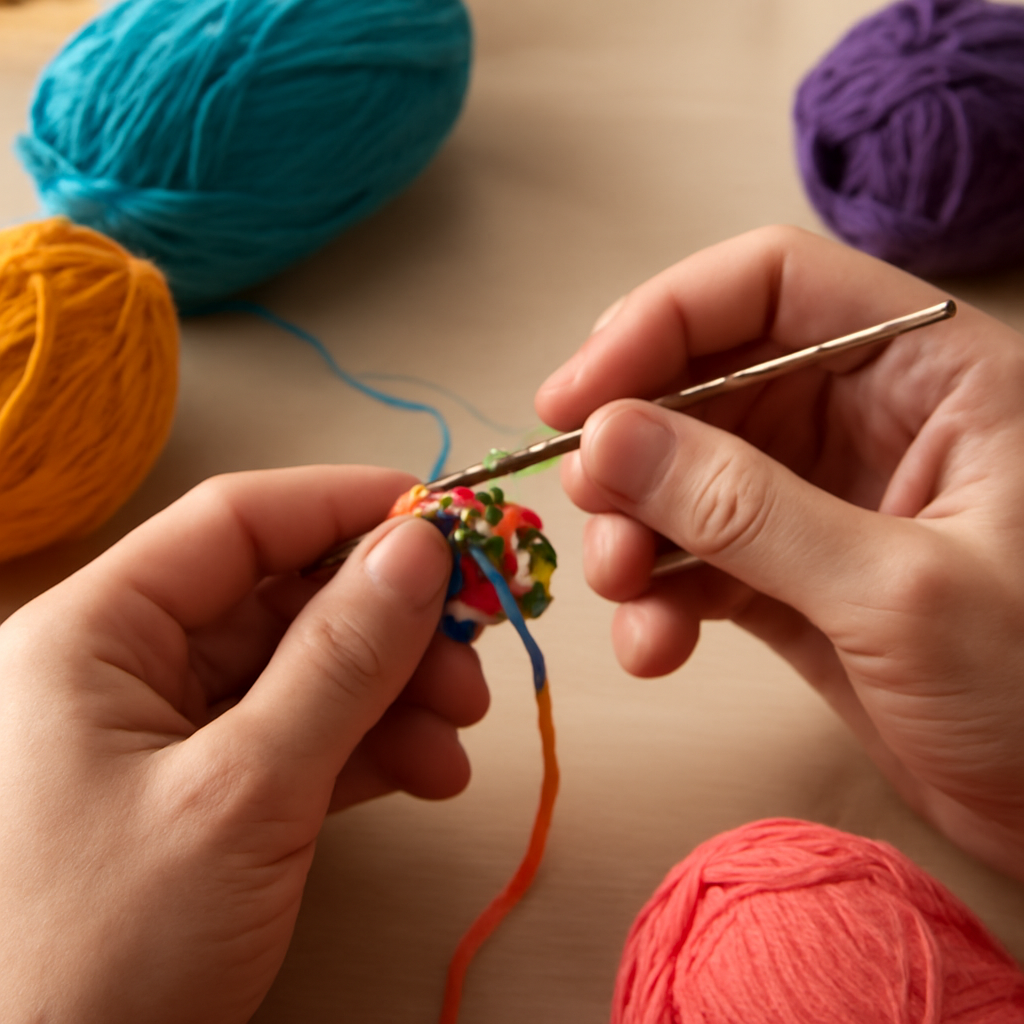
Let’s put this into practice: I’m using a 6 mm hook with a medium weight yarn. After pulling the ring tight, I do a single crochet and then a half‑double. Each time I finish a stitch, I pull the tail a fraction of an inch. By the third stitch the ring feels solid, and the circle looks even.
Do you ever feel the ring wobbly in the middle? That usually means the yarn is sliding off the hook. Try wrapping the yarn over your fingers twice before pulling it over the hook; the “double wrap” trick keeps the loop firm and gives you that snug feel.
Now, here’s a visual check:
After watching the video, you’ll see how the hand moves to lock the ring. Notice the subtle wrist twist that pulls the tail in a straight line. That’s the secret to a tight, clean center.
Once the ring feels firm, give it a quick tug on the tail. If it tightens evenly, you’re good to start the next round. If it pulls to one side, pause, readjust the yarn, and try again. Consistency now means fewer headaches later.
Want to see the ring in action with a full project? Check out this step‑by‑step guide for a complete visual walkthrough.
Ready to tighten that ring like a pro? Keep your hand steady, the yarn relaxed, and your hook positioned right. Once you master this, the rest of the crochet journey will feel like a breeze. Everything You Need to Know About the Magic Circle Crochet Method dives deeper into variations you can try next.
Step 3: Building Your First Row
Now that your magic ring is tight, you’re ready to bring the circle to life. Think of it like planting a seed in a pot—you’ve got the soil, now it’s time to start growing.
First, line up the yarn tail so that the working yarn sits directly above it. That small visual cue keeps you from dropping stitches later. If you’re still feeling shaky, practice a quick “practice round” on a scrap—six single crochets usually do the trick.
Step 3.1: Inserting the Hook
Hold the hook steady with your right hand. Slide the hook under the ring, then under the yarn tail. This double‑under move creates a secure foundation for the first stitch.
When you pull the yarn over the hook, imagine you’re pulling a string through a loop of taffy—smooth, but with a bit of resistance. That tension keeps the stitches from spreading apart as you work.
Step 3.2: Pulling the First Stitch
Wrap the yarn over the hook from back to front, then pull it through the loop. Now you’ve formed a single crochet that sits right in the center. Repeat this until you have the number of stitches called for by your pattern—usually 6 to 12.
Notice how the ring starts to expand outward. Don’t rush to pull it tight yet; let the stitches settle so they’re even. If you feel the yarn slipping, give the tail a gentle tug to readjust.
Step 3.3: Closing the Circle
With the stitches in place, grab the tail and pull it toward the center. You’ll see the loop shrink into a neat circle. If it still feels loose, pull a little more—just enough to make the hole disappear.
Once the ring is closed, you can either join the round with a slip stitch or start the next round directly—your pattern will tell you. We’ve seen many beginners choose the slip stitch for a cleaner edge, especially when making amigurumi.
Now you’ve successfully built your first row. That might feel like a big win, but it’s just the opening act. Think about how this tiny circle can become a scarf, a hat, or even a base for a future product line.
Want to see a visual walk‑through? Sarah Maker’s step‑by‑step guide shows the exact hand movements, and the YouTube video lets you watch the process in real time. These resources help you catch the subtle wrist twist that keeps the ring tight.
What’s next? Grab your yarn, hook, and a scrap of fabric or a small toy you want to create. Start a new magic ring, follow the steps above, and watch your confidence grow. Every time you finish a round, you’re one step closer to mastering the craft.
In our experience, practicing on a few small projects—like a coaster or a simple amigurumi—lets you get comfortable with the rhythm before you tackle larger pieces. And if you’re thinking about turning this into a business, a well‑made ring is the first quality signal your customers will see.
Step 4: Adding Color or Pattern Variations
Now that you’ve nailed the magic ring, it’s time to let your personality shine. Think about the first stitch as a blank canvas, and your yarn colors as the paint you’ll splash onto it.
Choosing Your Palette
Start by picking 2‑3 colors that feel right for the project. If you’re making a scarf, you might go for a gradient—soft pastel at the edges fading into a bold hue in the middle. If you’re after a playful pattern, pick colors that contrast enough to stand out but still harmonize together.
Have you ever wondered why some patterns look flat? The answer is all in the color placement. By alternating colors every stitch or every few stitches, you create visual interest and give depth to a simple circle.
Pattern Types
There are a handful of beginner‑friendly patterns you can weave into a magic ring: striped, reverse‑color, and color‑block. For striped, simply swap yarns after every single crochet. Reverse‑color means you use a darker yarn for every second stitch. Color‑block is where you change color at the end of each round.
Does this feel like a lot? Not really—think of it as flipping a light switch. Once you get the hang of switching yarns, it’s a quick, almost automatic part of the workflow.
Managing Tension with Multiple Colors
When you introduce new colors, tension can shift. If a darker yarn feels tighter, let it rest a beat before you pull the next stitch. This small pause keeps your stitches even and prevents a lopsided ring.
In our experience, using a yarn needle to keep a short tail of each color in your other hand helps you switch without losing your rhythm. It’s a tiny trick that makes the process feel almost effortless.
Adding Pattern to the Ring Itself
Want a ring that already looks finished? Try a magic circle stitch—a single crochet that you wrap in two colors at the start of the first round. The first yarn is used for the first half of the stitch, then you switch to the second color for the second half. Repeat until the ring is closed.
That’s basically a micro‑pattern that adds flair right from the start. Think of it as giving your circle a built‑in border.
Practical Tip: Use a Pattern Guide
For a quick reference, check out this short video that walks through adding color variations to a magic ring: Watch the demonstration. It shows the hand movements and the subtle wrist twist that keeps each color neat and tidy.
After watching, try mimicking the color switch on a scrap of yarn. Don’t worry if it’s not perfect—practice makes the pattern feel natural.
Wrapping It Up
Once your ring is the color or pattern you love, you’re ready to jump into the first round. The same techniques—keeping tension steady, switching colors smoothly—carry over to every round.
So, what should you do next? Take a break, breathe, and then dive back in with your chosen palette. The result will be a ring that’s not just structurally sound but also a piece of art you’re proud to showcase.
Remember, the magic ring is the foundation, but color and pattern give it personality. Every time you experiment, you’re expanding your creative toolkit, one stitch at a time.
Magic Ring vs Slip Stitch: A Quick Comparison
If you’ve ever stared at that tiny loop on your hook, you’re probably wondering, what’s the real difference between a magic ring and a slip stitch? Let’s break it down in a way that feels like a coffee‑chat, no fluff.
Why it matters
The magic ring is the secret sauce that lets you start a round without a hole. A slip stitch, on the other hand, is the little connector you use once the ring is closed or to finish a round. Knowing when to use each saves time and prevents that dreaded uneven edge.
So, who’s got the best tool for the job? Grab a notepad because we’re about to compare the two in bite‑size chunks.
Core differences at a glance
| Feature | Magic Ring | Slip Stitch |
|---|---|---|
| Purpose | Creates a tight, closed circle to start a round. | Connects two stitches; used to finish a round or join two rounds. |
| Learning curve | Can feel tricky until you master the “X” or “slip‑knotted” method. | Very simple—just slide the hook into the loop and yarn over. |
| Common pitfalls | Pulling the tail too tight or too loose; forgetting the double strand. | Leaving the slip stitch too long can leave a visible line; pulling too tight can distort the edge. |
When to use each
When you’re starting a new hat, scarf, or amigurumi, you’ll use a magic ring for the first round. After that, you’ll typically switch to a slip stitch to close the round or to join the next round for a clean edge.
For projects that need a seamless finish—think a seamless blanket or a smooth hat brim—using a slip stitch at the very end keeps the edge invisible. If you skip it, you might notice a small white line where the stitches meet.
Quick checklist for beginners
- Magic Ring: Keep the tail on the side of your hand that holds the hook. Wrap the yarn around your finger, then slide the hook through the loop and yarn over.
- Slip Stitch: Insert the hook into the stitch, yarn over, pull through both loops. Don’t pull too hard—just enough to snug the stitch.
Want a visual reminder of the magic ring technique? This helpful video walks through the steps, showing the subtle wrist twist that keeps the loop snug: Check out this tutorial.
FlamingoCrochet’s guide dives deeper into the “X Method” and slip‑knotted variations, giving you a step‑by‑step breakdown that’s perfect for hands‑on learning: Read their detailed post.
Real‑world impact
When you master the magic ring, your first round feels like a breath of fresh air—no more awkward holes. That confidence translates into smoother projects and fewer frustrations.
Creative entrepreneurs, think about the edge of a product you’re selling: a clean slip stitch finish can elevate the professional look of a scarf or a small blanket. For parents, using the right stitch means the kids’ handmade gifts look polished and ready for gifting.
So next time you’re about to start a new piece, remember: the magic ring is your launchpad, and the slip stitch is your finish line. Keep them in your toolbox, and you’ll crochet like a pro—without the dreaded “hole” drama.
FAQ
What exactly is a magic ring and why does it feel slippery at first?
A magic ring is the tiny loop that becomes the heart of any round crochet piece. You form it by wrapping yarn over your fingers, sliding the hook through, and pulling the tail tight. Newbies often think the loop is loose because the yarn can slip over the hook. The trick is to keep the yarn snug against your fingers while you pull – that small amount of tension holds the loop steady. Once you feel the loop settle, the rest of the stitches follow more confidently.
Do I need a special hook size to start a magic ring?
You don’t need a fancy hook, just one that feels comfortable in your hand. Most beginners use a hook that’s a size or two larger than the yarn’s recommended weight. If the hook is too big, the ring will feel floppy; too small, and it will feel tight and difficult to work into. A 6‑mm or 7‑mm hook works well for worsted weight yarn, giving you enough room to maneuver.
What’s the best way to keep tension consistent while forming the ring?
Hold the yarn in your non‑hook hand like you’re holding a favorite mug – firm but not rigid. Wrap the yarn around your fingers twice before pulling it over the hook. This double wrap keeps the yarn from sliding off the hook. When you pull the tail, do it gently, not yanking. A steady, gentle tug ensures the ring stays even, and the first round won’t wobble.
Can I use a different yarn weight, like super‑fine or chunky, for the ring?
Absolutely. Super‑fine yarn makes the ring feel delicate, so you’ll want a smaller hook to keep the loop tight. Chunky yarn, on the other hand, benefits from a slightly larger hook so the loop isn’t squished. The key is to test a small scrap first: if the ring feels too loose, tighten the grip; if it’s too tight, let a bit of slack in the tail. That tiny adjustment can make the difference between a perfect circle and a wobbling start.
Why do some people still see a hole after closing the ring?
That little white gap is often caused by an uneven pull on the tail. If you pull the tail too hard, you’ll squeeze the stitches together, leaving a visible line. Conversely, if you let the tail slip, the stitches will spread apart and leave a hole. A quick trick is to pull the tail slowly and then give the ring a gentle tug on both sides to balance the tension before you finish the first round.
How do I avoid a visible slip stitch when finishing the first round?
Instead of using a long slip stitch to close the round, try pulling the tail just enough to snug the stitches without adding extra yarn. You can also use the same yarn you used for the first round, keeping the color consistent, which masks the slip stitch line. If you prefer a cleaner edge, finish the round with a small chain instead of a slip stitch, then wrap the tail around the hook to secure it.
Where can I see a visual demonstration of the magic ring technique?
If you want a quick visual, you can watch the tutorial on YouTube. The video shows the subtle wrist twist and how to keep the loop tight as you pull the tail. Watching a real hand in motion helps you spot the tension cues you might miss in a written guide.
Conclusion
We began with a tiny loop and finished with a confident ring, ready to grow into scarves, blankets, or a whole product line.
That first tight circle feels like a secret handshake between you and your yarn—warm, reassuring, and full of promise.
So what’s next? Grab a scrap and run through a quick practice round of six single crochets; notice how the ring settles as you pull the tail gently.
Practice in short bursts, three times a day, and watch your confidence rise like a good cup of tea.
At CreativiU we’ve seen hobbyists turn a simple ring into a thriving side hustle by layering color, texture, and a splash of branding.
If you’re ready to move from stitches to sales, our on‑demand courses let you explore patterns, marketing tips, and community feedback—all in one place.
Remember, the magic ring is just the start; every stitch after that is a new opportunity to create, share, and grow.
When you feel stuck, pause and breathe. The ring will stay centered if you maintain gentle tension. And remember, consistency beats perfection—each time you practice, your technique sharpens, and your pieces look more professional.
Keep going—you’re already a crochet wizard in the making.
Leave a Reply